ignition Citroen C4 AIRCROSS 2017 1.G Repair Manual
[x] Cancel search | Manufacturer: CITROEN, Model Year: 2017, Model line: C4 AIRCROSS, Model: Citroen C4 AIRCROSS 2017 1.GPages: 368, PDF Size: 11.54 MB
Page 192 of 368
190
C4-Aircross_en_Chap08_En-cas-de-panne_ed01-2016
After repairing the tyre, the speed
restriction sticker should be affixed
to the centre of the vehicle's steering
wheel to remind you that this wheel
must only be used temporarily.
Do not exceed a speed of 50 mph
(80 km/h) when driving with a tyre
repaired using this type of kit.
Repair procedure
F Stop the vehicle in as safe a location as possible and on a level and stable sur face.
E
nsure that the tyre valve is not at the
bottom of the wheel, in contact with the
ground.
F
A
pply the parking brake.
F
P
lace the gear lever in position R for
vehicles with a manual gearbox, or in
position P for vehicles with a CVT gearbox.
F
S
witch off the ignition.
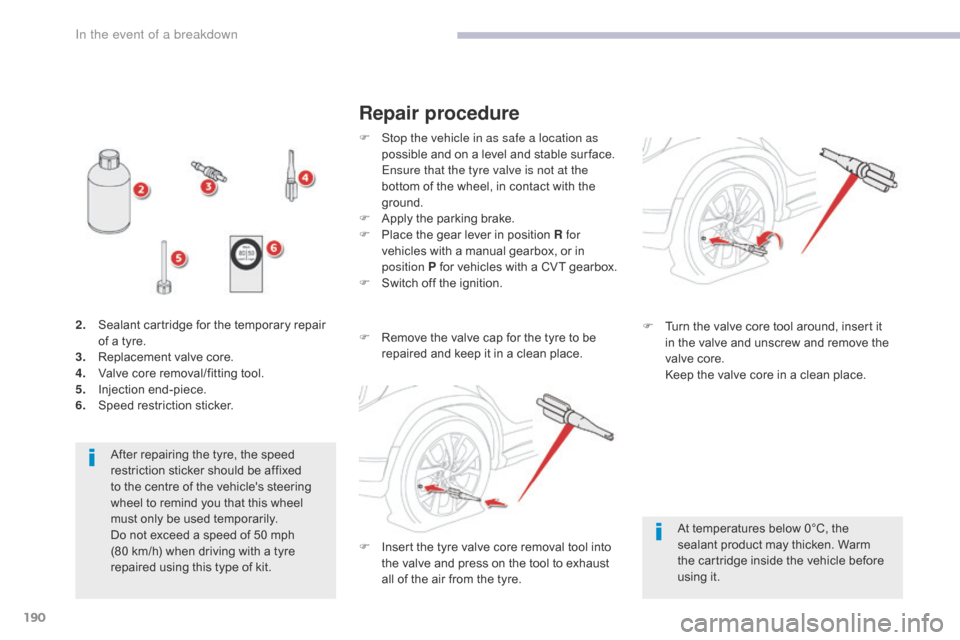
2.
S
ealant cartridge for the temporary repair
of a tyre.
3.
R
eplacement valve core.
4.
V
alve core removal/fitting tool.
5.
I
njection end-piece.
6.
S
peed restriction sticker. F
R
emove the valve cap for the tyre to be
repaired and keep it in a clean place.
At temperatures below 0°C, the
sealant product may thicken. Warm
the cartridge inside the vehicle before
using it.
F
T
urn the valve core tool around, insert it
in the valve and unscrew and remove the
valve core.
K
eep the valve core in a clean place.
F
I
nsert the tyre valve core removal tool into
the valve and press on the tool to exhaust
all of the air from the tyre.
In the event of a breakdown
Page 193 of 368
191
C4-Aircross_en_Chap08_En-cas-de-panne_ed01-2016
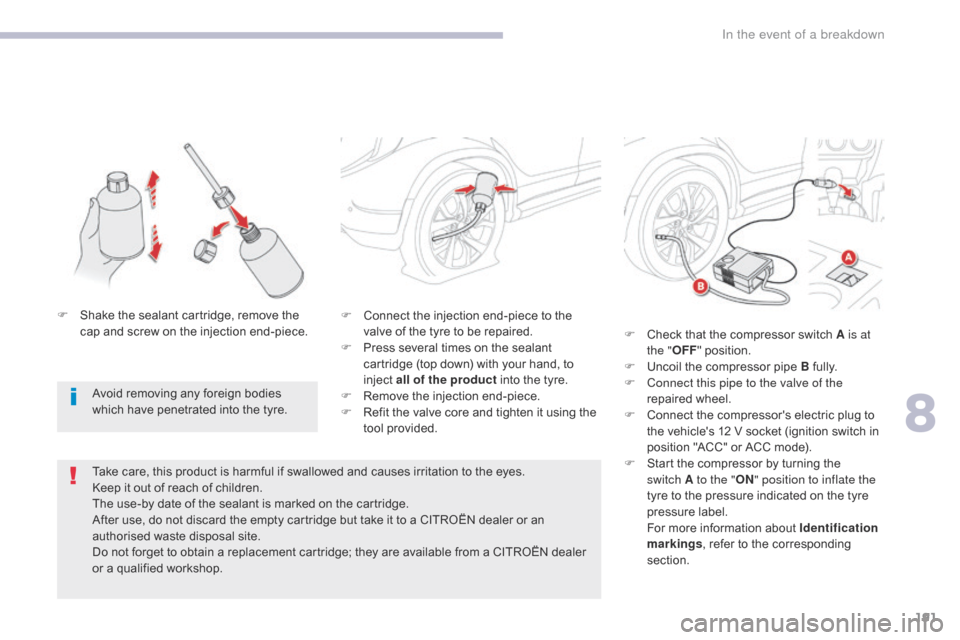
F Connect the injection end-piece to the valve of the tyre to be repaired.
F
P
ress several times on the sealant
cartridge (top down) with your hand, to
inject all of the product into the tyre.
F
R
emove the injection end-piece.
F
R
efit the valve core and tighten it using the
tool provided.
Take care, this product is harmful if swallowed and causes irritation to the eyes.
Keep it out of reach of children.
The use-by date of the sealant is marked on the cartridge.
After use, do not discard the empty cartridge but take it to a CITROËN dealer or an
authorised waste disposal site.
Do not forget to obtain a replacement cartridge; they are available from a CITROËN dealer
or a qualified workshop. F
C
heck that the compressor switch A is at
the " OFF" position.
F
U
ncoil the compressor pipe B fully.
F
C
onnect this pipe to the valve of the
repaired wheel.
F
C
onnect the compressor's electric plug to
the vehicle's 12 V socket (ignition switch in
position "ACC" or ACC mode).
F
S
tart the compressor by turning the
switch
A to the "ON" position to inflate the
tyre to the pressure indicated on the tyre
pressure label.
F
or more information about Identification
markings , refer to the corresponding
section.
Avoid removing any foreign bodies
which have penetrated into the tyre.
F
S
hake the sealant cartridge, remove the
cap and screw on the injection end-piece.
8
In the event of a breakdown
Page 197 of 368
195
C4-Aircross_en_Chap08_En-cas-de-panne_ed01-2016
Removing a wheel
Parking the vehicle
Immobilise the vehicle where it does
not block traffic; if possible, the ground
must be level, stable and not slippery.
Apply the parking brake, switch off the
ignition and engage first gear to block
the wheels.
Never go underneath a vehicle raised
using a jack; use an axle stand.
List of operations
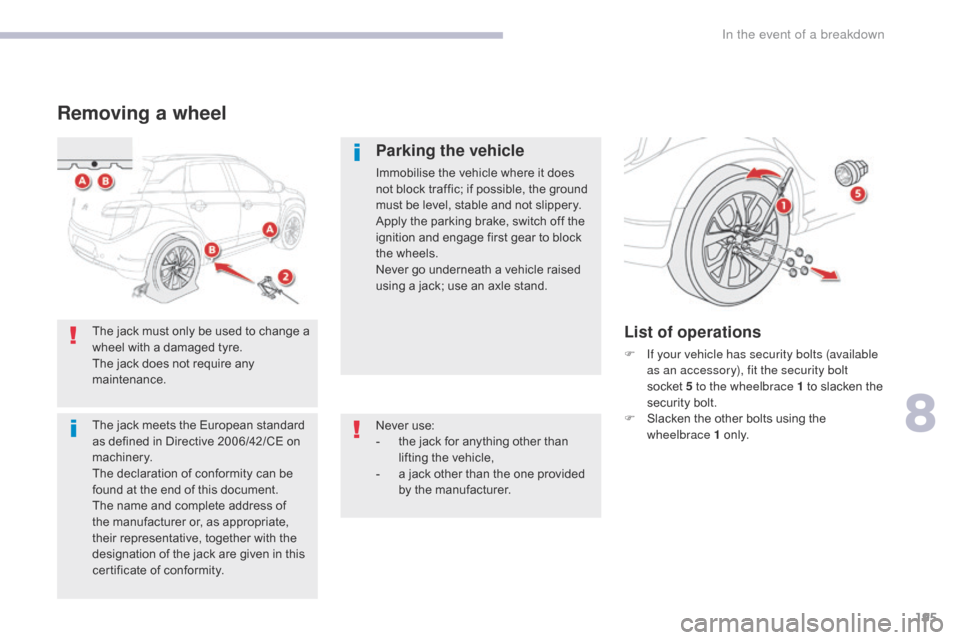
F If your vehicle has security bolts (available as an accessory), fit the security bolt
socket 5 to the wheelbrace 1 to slacken the
security bolt.
F
S
lacken the other bolts using the
wheelbrace 1 o n l y.
Never use:
-
t
he jack for anything other than
lifting the vehicle,
-
a j
ack other than the one provided
by the manufacturer.
The jack must only be used to change a
wheel with a damaged tyre.
The jack does not require any
maintenance.
The jack meets the European standard
as defined in Directive 2006/42/CE on
machinery.
The declaration of conformity can be
found at the end of this document.
The name and complete address of
the manufacturer or, as appropriate,
their representative, together with the
designation of the jack are given in this
certificate of conformity.
8
In the event of a breakdown
Page 216 of 368
214
C4-Aircross_en_Chap08_En-cas-de-panne_ed01-2016
Do not invert the polarities and use only a 12 V charger.
Do not disconnect the terminals while the engine is running.
Do not charge the batteries without disconnecting the terminals first.
Do not push the vehicle to start the engine if it is fitted with a CVT gearbox.
Disconnecting the battery
To maintain a sufficient level of charge
to start the engine, it is advisable to
disconnect the battery if the vehicle is not
going to be used for a very long period.
Before disconnecting the battery:
F
C
lose all the doors and windows,
the
tailgate and the roof.
F
S
witch off all power-consuming
equipment (audio system, wipers,
lamps, etc.).
F
S
witch off the ignition and wait
4
m
inutes.
Once you have gained access to
the
battery, start by disconnecting
the (-) terminal.
Following reconnection of the
battery
Following reconnection of the battery,
switch on the ignition and wait 1 minute
before starting to permit initialisation of the
electronic systems.
However, if problems remain following this
operation, contact a CITROËN dealer or a
qualified workshop.
Referring to the corresponding section, you
must reinitialise certain equipment yourself,
such as:
-
T
he remote control key or the electronic
key (depending on version).
-
T
he electric blind(s).
-
T
he electric windows.
-
T
he date and time.
-
T
he stored radio stations. Some functions, including Stop & Start,
are not available if the battery is not
sufficiently charged.
Never try to charge a frozen battery.
If the battery has been frozen, have
it checked by a CITROËN dealer or a
qualified workshop, who will check that
the internal components have not been
damaged and the casing is not cracked,
which could cause a leak of toxic and
corrosive acid.
The Stop & Start system may not be
operational during the trip following the
first engine start.
In this case, the system will only be
available again after a continuous
period of immobilisation of the vehicle,
a period which depends on the exterior
temperature and the state of charge of
the battery (up to about 8 hours).
In the event of a breakdown
Page 217 of 368
215
C4-Aircross_en_Chap08_En-cas-de-panne_ed01-2016
Towing the vehicle
Towing your vehicle
2 wheel drive (2WD) versions: towing
with the wheels on the ground
General recommendations
Towing with the wheels on the ground
is only possible on 2 wheel drive (2WD)
versions.
F
F
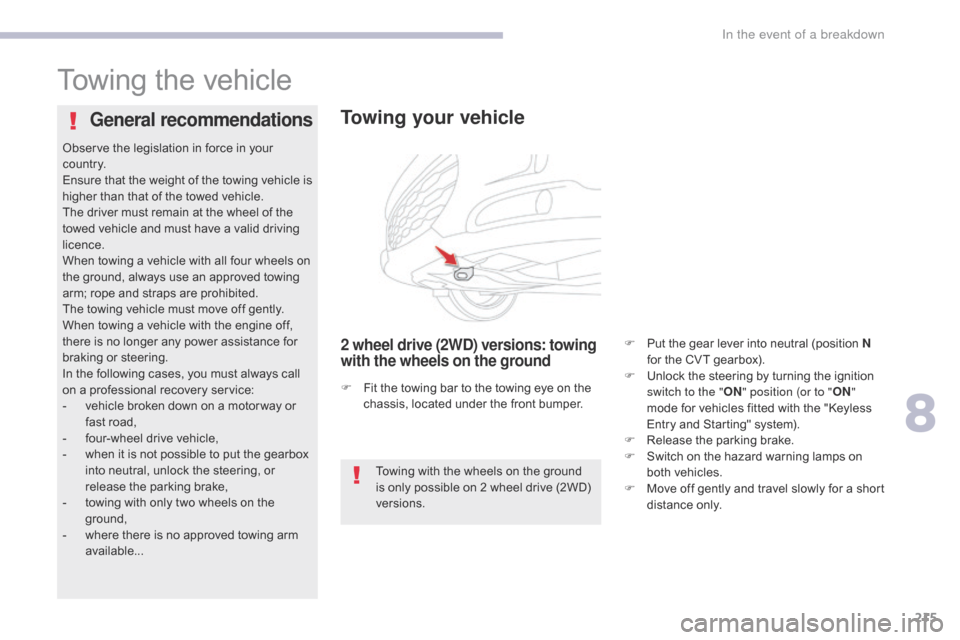
it the towing bar to the towing eye on the
chassis, located under the front bumper.
Observe the legislation in force in your
c o unt r y.
Ensure that the weight of the towing vehicle is
higher than that of the towed vehicle.
The driver must remain at the wheel of the
towed vehicle and must have a valid driving
licence.
When towing a vehicle with all four wheels on
the ground, always use an approved towing
arm; rope and straps are prohibited.
The towing vehicle must move off gently.
When towing a vehicle with the engine off,
there is no longer any power assistance for
braking or steering.
In the following cases, you must always call
on a professional recovery service:
-
v
ehicle broken down on a motor way or
fast road,
-
f
our-wheel drive vehicle,
-
w
hen it is not possible to put the gearbox
into neutral, unlock the steering, or
release the parking brake,
-
t
owing with only two wheels on the
ground,
-
w
here there is no approved towing arm
available... F
P
ut the gear lever into neutral (position N
for the CVT gearbox).
F
U
nlock the steering by turning the ignition
switch to the " ON" position (or to " ON"
mode for vehicles fitted with the "Keyless
Entry and Starting" system).
F
R
elease the parking brake.
F S witch on the hazard warning lamps on
both vehicles.
F
M
ove off gently and travel slowly for a short
distance only.
8
In the event of a breakdown
Page 242 of 368
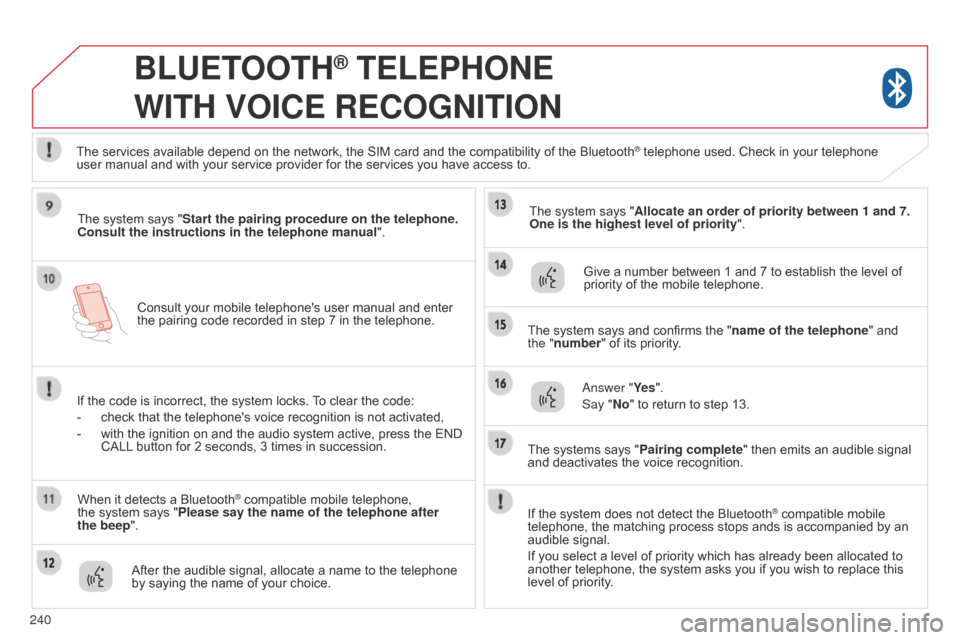
240Consult your mobile telephone's user manual and enter
the pairing code recorded in step 7 in the telephone.
BLUETOOTH® TELEPHONE
WITH
VOICE
RECOGNITION
The system says "Start the pairing procedure on the telephone.
Consult the instructions in the telephone manual ".
If the code is incorrect, the system locks. To clear the code:
-
check that the telephone's voice recognition is not activated,
-
with the ignition on and the audio system active, press the END
CALL
button for 2 seconds, 3 times in succession.
When it detects a Bluetooth
® compatible mobile telephone,
the
system says "Please say the name of the telephone after
the
beep".
After the audible signal, allocate a name to the telephone
by saying the name of your choice. The system says "Allocate an order of priority between 1 and 7.
One is the highest level of priority
".
Give a number between 1 and 7 to establish the level of
priority of the mobile telephone.
The system says and confirms the "name of the telephone " and
the "number" of its priority.
Answer "Ye s ".
Say "No" to return to step 13.
The systems says "Pairing complete" then emits an audible signal
and deactivates the voice recognition.
The services available depend on the network, the SIM card and the compatibility of the Bluetooth
® telephone used. Check in your telephone
user
manual and with your service provider for the services you have access to.
If the system does not detect the Bluetooth
® compatible mobile
telephone, the matching process stops ands is accompanied by an
audible signal.
If you select a level of priority which has already been allocated to
another telephone, the system asks you if you wish to replace this
level of priority.
Page 246 of 368
244
BLUETOOTH® TELEPHONE
WITH
VOICE
RECOGNITION
The telephone ring is sent to the speaker by the front passenger's
seat.
If an audio source (CD, radio, ...) is in operation when the call is
received, it is placed on MUTE and only the incoming call is heard.
When the ignition switch is in the ACC or ON position, the audio
system is activated automatically if an incoming call is received,
even if it was originally off.
At the end of the call, the audio system returns to its previous state.
Redial the last number called
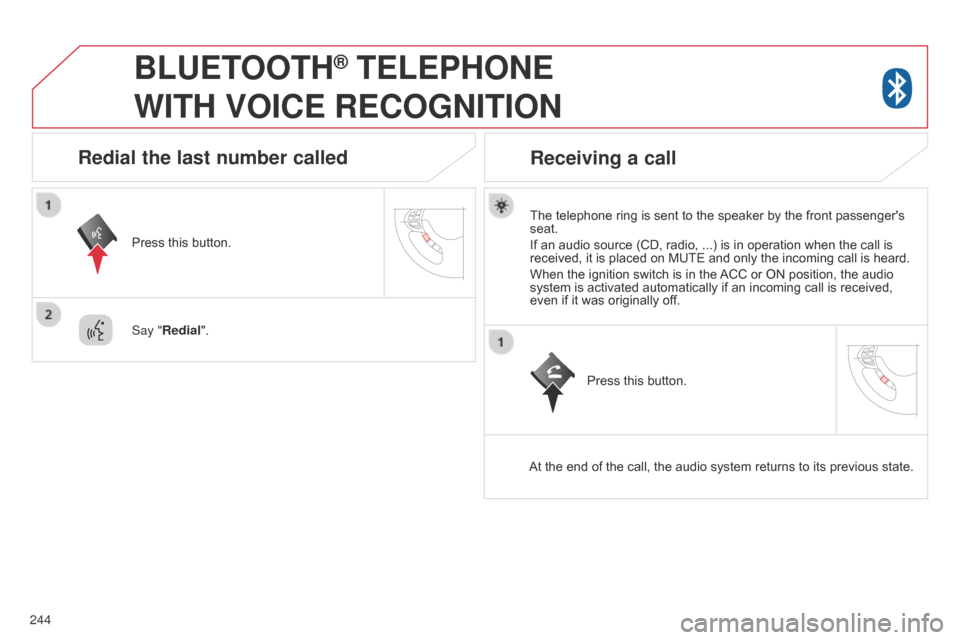
Press this button.
Say "Redial".
Receiving a call
Press this button.
Page 280 of 368
05
278
C4-Aircross_en_Chap10b_Mitsu6_ed01-2016
Using the USB port
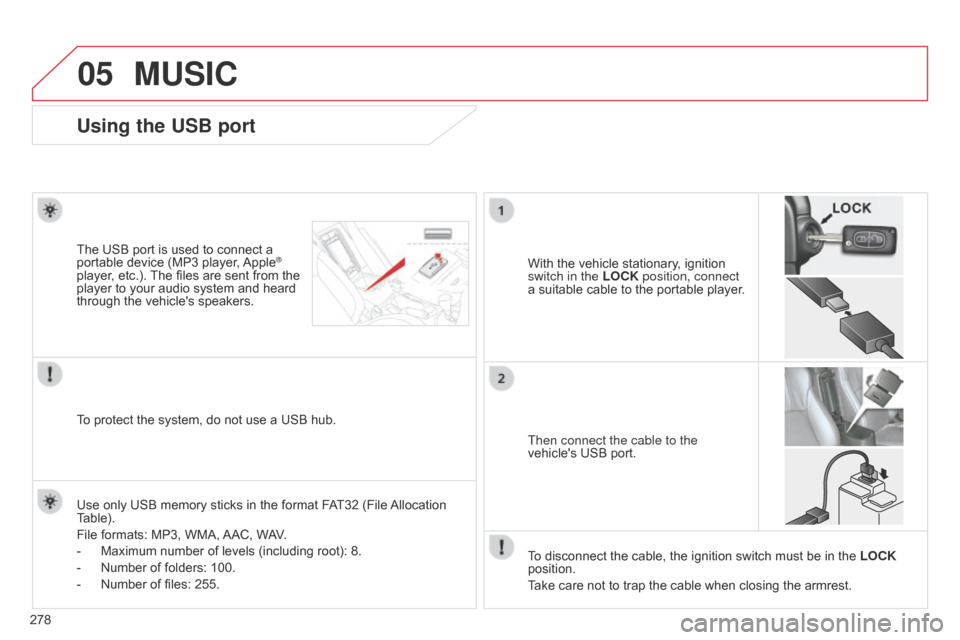
With the vehicle stationary, ignition
switch in the LOCK position, connect
a suitable cable to the portable player.
The USB port is used to connect a
portable device (MP3 player, Apple®
player, etc.). The files are sent from the
player to your audio system and heard
through the vehicle's speakers.
Then connect the cable to the
vehicle's USB port.
Use only USB memory sticks in the format FAT32 (File Allocation
Table).
File formats: MP3, WMA, AAC, WAV.
-
Maximum number of levels (including root): 8.
-
Number of folders: 100.
-
Number of files: 255.
T
o protect the system, do not use a USB hub. To disconnect the cable, the ignition switch must be in the LOCK
position.
Take care not to trap the cable when closing the armrest.
MUSIC
Page 308 of 368
05
306
MUSIC
Using the USB port
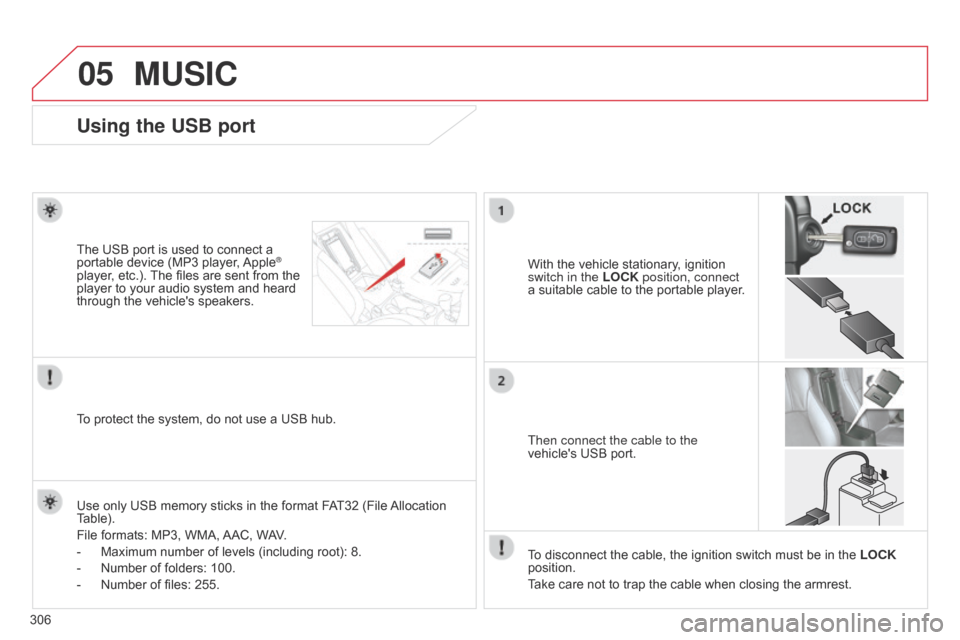
With the vehicle stationary, ignition
switch in the LOCK position, connect
a suitable cable to the portable player.
The USB port is used to connect a
portable device (MP3 player, Apple®
player, etc.). The files are sent from the
player to your audio system and heard
through the vehicle's speakers.
Then connect the cable to the
vehicle's USB port.
Use only USB memory sticks in the format FAT32 (File Allocation
Table).
File formats: MP3, WMA, AAC, WAV.
-
Maximum number of levels (including root): 8.
-
Number of folders: 100.
-
Number of files: 255.
T
o protect the system, do not use a USB hub. To disconnect the cable, the ignition switch must be in the LOCK
position.
Take care not to trap the cable when closing the armrest.
Page 319 of 368
03
317
C4-Aircross_en_Chap10d_Mitsu4_ed01-2016
GENERAL OPERATION
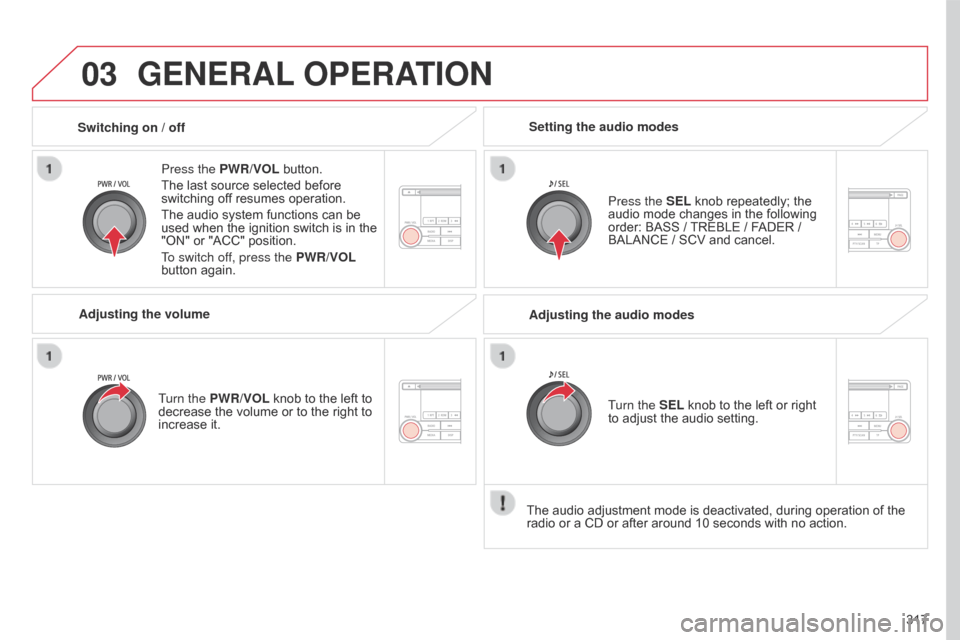
Press the PWR/VOL button.
The last source selected before
switching off resumes operation.
The audio system functions can be
used when the ignition switch is in the
"ON" or "ACC" position.
To switch off, press the PWR/VOL
button again.
Adjusting the volume
Turn the PWR/VOL knob to the left to
decrease the volume or to the right to
increase it. Press the SEL knob repeatedly; the
audio mode changes in the following
order: BASS / TREBLE / FADER /
BALANCE / SCV and cancel.
Setting the audio modes
Switching on
/ off
The audio adjustment mode is deactivated, during operation of the
radio or a CD or after around 10 seconds with no action.Adjusting the audio modes
Turn the SEL knob to the left or right
to adjust the audio setting.