change time Citroen C4 CACTUS 2015 1.G Owner's Manual
[x] Cancel search | Manufacturer: CITROEN, Model Year: 2015, Model line: C4 CACTUS, Model: Citroen C4 CACTUS 2015 1.GPages: 326, PDF Size: 8.56 MB
Page 11 of 326
9
C4-cactus_en_Chap00c_eco-conduite_ed02-2014
Optimise the use of your gearbox
Withô aô manualô gearbox,ô moveô offô gentlyô andô changeô upô withoutô waiting.ô During ô acceleration ô change ô up ô early.
The
ô gear ô shift ô indicator ô invites ô you ô engage ô the ô most ô suitable ô gear: ô as ô
s
oon ô as ô the ô indication ô is ô displayed ô in ô the ô instrument ô panel, ô follow ô it ô
s
traight ô away.
Control the use of your electrical
equipment
Beforeô movingô off,ô ifô theô passengerô compartmentô isô tooô warm,ô ventilateô itô by ô opening ô the ô windows ô and ô air ô vents ô before ô using ô the ô air ô conditioning.
Above
ô 30 ô mph ô (50 ô km/h), ô close ô the ô windows ô and ô leave ô the ô air ô vents
ô ope
n.
Remember
ô to ô make ô use ô of ô equipment ô that ô can ô help ô keep ô the
ô t
emperature ô in ô the ô passenger ô compartment ô down ô (sunroof ô and ô window
ô b
linds...).
To
ô save ô energy, ô do ô not ô set ô the ô air ô conditioning ô at ô too ô low ô a ô temperature.
As
ô soon ô as ô the ô desired ô temperature ô has ô been ô reached, ô limit ô the ô use ô of
ô t
he ô air ô conditioning, ô except ô if ô regulation ô is ô automatic.
Switch
ô off ô the ô demisting ô and ô defrosting ô controls ô as ô soon ô as ô you ô consider
ô p
ossible.
Switch
ô off ô the ô heated ô seat ô as ô soon ô as ô possible.
Switch
ô off ô the ô headlamps ô and ô foglamp ô when ô the ô level ô of ô light ô does ô not ô
r
equire ô their ô use.
Avoid
ô running ô the ô engine ô before ô moving ô off, ô particularly ô in ô winter; ô your ô
v
ehicle ô will ô warm ô up ô much ô faster ô while ô driving.
As
ô a ô passenger, ô if ô you ô avoid ô connecting ô your ô multimedia ô devices ô
(
film, ô music, ô video ô game...), ô you ô will ô contribute ô towards ô limiting ô the ô
c
onsumption ô of ô electrical ô energy, ô and ô so ô of ô fuel.
Disconnect
ô your ô portable ô devices ô before ô leaving ô the ô vehicle.
Eco-driving
Eco-drivingô isô aô rangeô ofô everydayô practicesô thatô allowô theô motoristô toô optimiseô theirô fuelô consumptionô andô CO2ô emissions.
With
ô
an
ô
electronic
ô
gearbox,
ô
do
ô
not
ô
press
ô
the
ô
accelerator
ô
pedal
ô
heavily
ô
o
r
ô s
uddenly.
Drive smoothly
Maintainô aô safeô distanceô betweenô vehicles,ô useô engineô brakingô ratherô t han ô the ô brake ô pedal, ô and ô press ô the ô accelerator ô progressively. ô These ô
p
ractices ô contribute ô towards ô a ô reduction ô in ô fuel ô consumption ô and ô CO
2
emissions
ô
and
ô
also
ô
help
ô
reduce
ô
the
ô
background
ô
traffic
ô
noise.
If
ô
your
ô
vehicle
ô
has
ô
cruise
ô
control,
ô
make
ô
use
ô
of
ô
the
ô
system
ô
at
ô
speeds
ô
a
bove
ô
25
ô
mph
ô
(40
ô
km/h)
ô
when
ô
the
ô
traffic
ô
is
ô
flowing
ô
well.
.
Eco-driving
Page 38 of 326
36
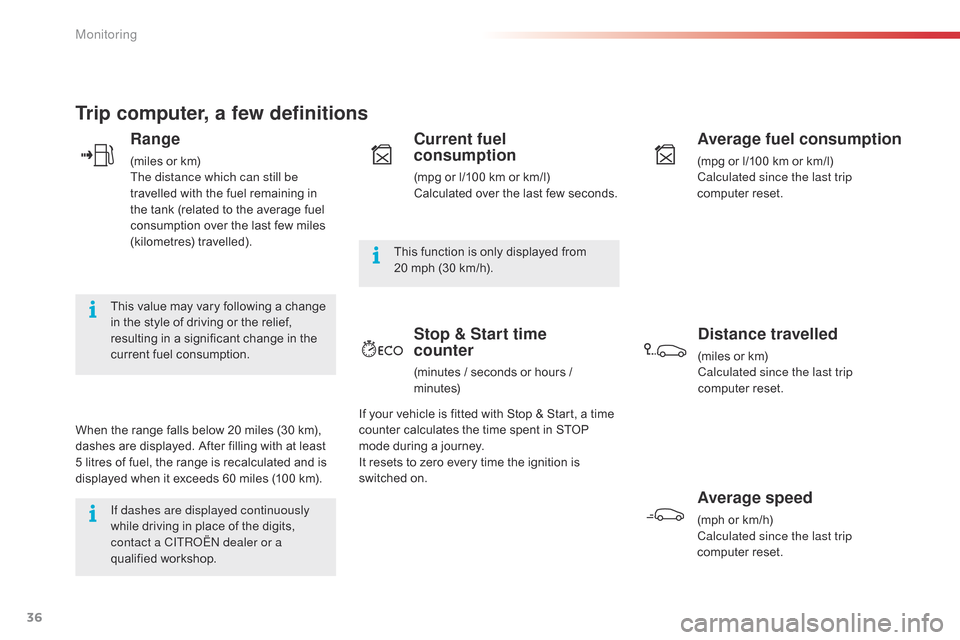
Trip computer, a few definitions
Range
(milesô orô km)
T he distance which can still be
travelled
ô with ô the ô fuel ô remaining ô in ô
t
he ô tank ô (related ô to ô the ô average ô fuel ô
c
onsumption ô over ô the ô last ô few ô miles ô
(
kilometres)
ô t
ravelled).
This
ô value ô may ô vary ô following ô a ô change ô
i
n
ô
the ô style ô of ô driving ô or ô the ô relief, ô
r
esulting ô in ô a ô significant ô change ô in ô the ô
c
urrent ô fuel ô consumption.
When
ô
the
ô range ô falls ô below ô 20 ô miles ô (30 ô km), ô
d
ashes
ô
are ô displayed. ô After ô filling ô with ô at ô least ô
5
ô
litres
ô
of
ô
fuel, ô the ô range ô is ô recalculated ô and ô is ô
d
isplayed
ô when ô it ô exceeds ô 60 ô miles ô (100 ô km).
If dashes are displayed continuously
while
ô driving ô in ô place ô of ô the ô digits, ô
c
ontact a CITR
oûn
dealer or a
qualified
ô w
orkshop. This
ô function ô is ô only ô displayed ô from ô
20
ô mph ô (30 ô km/h).
Current fuel
consumption
(mpgô orô l/100ô kmô orô km/l)
C alculated ô over ô the ô last ô few ô seconds.
Average fuel consumption
(mpgô orô l/100ô kmô orô km/l)
C alculated since the last trip
computer
ô re
set.
Distance travelled
(milesô orô km)
C alculated since the last trip
computer
ô re
set.
Average speed
(mphô orô km/h)
C alculated since the last trip
computer
ô re
set.
Stop & Start time
counter
(minutesô /ô secondsô orô hoursô /ô minutes)
If
ô
your
ô
vehicle ô is ô fitted ô with ô Stop ô & ô Start, ô a ô time ô
c
ounter
ô
calculates ô the ô time ô spent ô in ô STOP ô
m
ode
ô
during ô a ô journey.
It
ô
resets
ô
to ô zero ô every ô time ô the ô ignition ô is ô
s
witched
ô
on.
Monitoring
Page 55 of 326
53
C4-cactus_en_Chap03_confort_ed02-2014
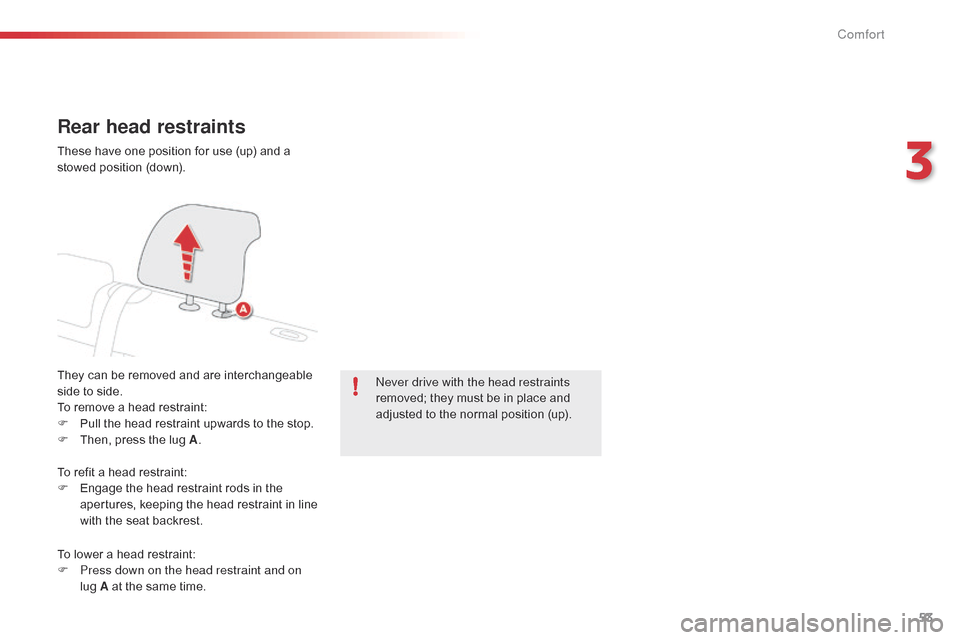
Rear head restraints
Theyô canô beô removedô andô areô interchangeableô side ô to ô side.
To
ô remove ô a ô head ô restraint:
F
ô
P
ull ô the ô head ô restraint ô upwards ô to ô the ô stop.
F
ô
T
hen, ô press ô the ô lug ô A.ne
ver drive with the head restraints
removed;
ô they ô must ô be ô in ô place ô and ô
a
djusted ô to ô the ô normal ô position ô (up).
These
ô have ô one ô position ô for ô use ô (up) ô and ô a ô
s
towed ô position ô (down).
To ô refit ô a ô head ô restraint:
F
ô
E
ngage ô the ô head ô restraint ô rods ô in ô the ô
a
pertures, ô
k
eeping ô
t
he ô
h
ead ô
r
estraint ô
i
n ô
l
ine ô
w
ith ô the ô seat ô backrest.
To
ô lower ô a ô head ô restraint:
F
P
ress down on the head restraint and on
lug
ô A ô at ô the ô same ô time.
3
Comfort
Page 87 of 326
85
C4-cactus_en_Chap05_conduite_ed02-2014
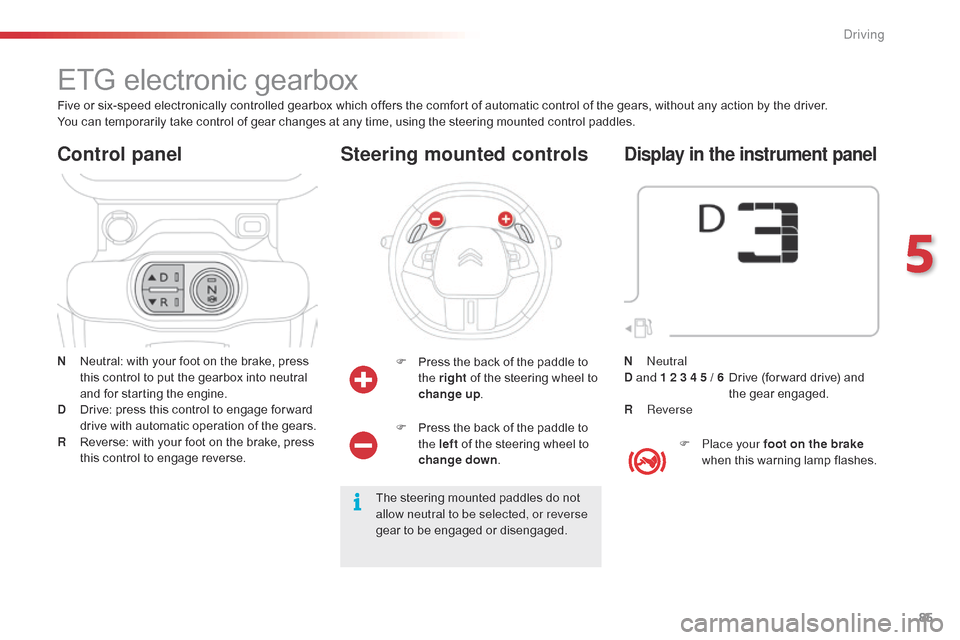
ETGô electronicô gearbox
Nô Neutral:ô with ô your ô foot ô on ô the ô brake, ô press ô t
his ô control ô to ô put ô the ô gearbox ô into ô neutral ô
a
nd ô for ô starting ô the ô engine.
D
ô
D
rive: ô press ô this ô control ô to ô engage ô for ward ô
d
rive ô with ô automatic ô operation ô of ô the ô gears.
R
ô
R
everse: ô with ô your ô foot ô on ô the ô brake, ô press ô
t
his ô control ô to ô engage ô reverse.
Control panel
Fô Pressô the ô back ô of ô the ô paddle ô to ô t
he rightô of ô the ô steering ô wheel ô to ô
ch
ange up .
Steering mounted controls
Theô steeringô mountedô paddlesô doô notô a
llow neutral to be selected, or reverse
gear
ô to ô be ô engaged ô or ô disengaged.
Five
ô
or
ô
six-speed
ô
electronically
ô
controlled
ô
gearbox
ô
which
ô
offers ô the ô comfort ô of ô automatic ô control ô of ô the ô gears, ô without ô any ô action ô by ô the ô driver.
You
ô
can
ô
temporarily
ô
take
ô
control
ô
of
ô
gear
ô
changes
ô
at
ô
any
ô
time, ô using ô the ô steering ô mounted ô control ô paddles.
F ô
P
ress ô the ô back ô of ô the ô paddle ô to ô
t
he left
ô
of ô the ô steering ô wheel ô to ô
ch
ange down
.
Display in the instrument panel
F Place your foot on the brake
when ô this ô warning ô lamp ô flashes.
N
n
e
utral
D and 1 2 3 4 5 / 6 ô ô
D
rive ô (for ward ô drive) ô and ô
t
he
ô g
ear
ô enga
ged.
R
Reverse
5
Driving
Page 89 of 326
87
C4-cactus_en_Chap05_conduite_ed02-2014
Neverô selectô neutralô (positionô N) ô when ô m
oving.
Forward drive
F Press control D .ô T
he ô indicator ô lamp ô in ô the ô control ô comes ô on.
D
ô and ô the ô gear ô engaged ô appear ô in ô
t
he ô instrument ô panel.
The
ô gearbox ô then ô operates ô in ô auto-adaptive ô
m
ode, ô without ô any ô action ô on ô the ô part ô of ô the ô
d
river. ô It ô continuously ô selects ô the ô most ô suitable ô
g
ear ô taking ô account ô of:
-
ô
o
ptimisation ô of ô fuel ô consumption,
-
ô
d
riving ô style,
-
r
oad conditions,
-
ô
v
ehicle ô load.
For
ô optimum ô acceleration, ô when ô
ov
ertaking ô another ô vehicle ô for ô example, ô
p
ress the accelerator pedal fully down,
beyond
ô the ô point ô of ô resistance.
Temporary control of gear
changing
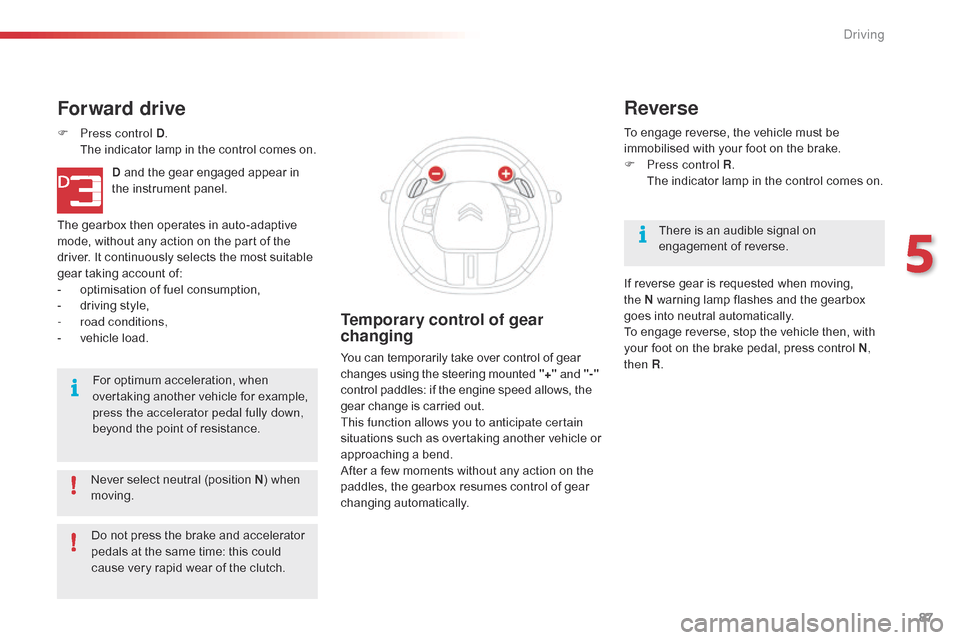
Youô canô temporarilyô takeô overô controlô ofô gearô changes ô using ô the ô steering ô mounted ô "+" and
"-"
control
ô paddles: ô if ô the ô engine ô speed ô allows, ô the
ô g
ear ô change ô is ô carried ô out.
This function allows you to anticipate certain
situations
ô
s
uch ô
a
s ô
ov
ertaking ô
a
nother ô
v
ehicle ô
o
r ô
a
pproaching ô a ô bend.
After
ô a ô few ô moments ô without ô any ô action ô on ô the ô
p
addles, ô the ô gearbox ô resumes ô control ô of ô gear ô
c
hanging
ô a
utomatically. To
ô engage ô reverse, ô the ô vehicle ô must ô be ô
i
mmobilised ô with ô your ô foot ô on ô the ô brake.
F
P
ress control R
.
ô T
he ô indicator ô lamp ô in ô the ô control ô comes ô on.
Reverse
Thereô isô anô audibleô signalô onô enga
gementô o fô r everse.
If
ô
reverse ô gear ô is ô requested ô when ô moving, ô
t
he
N
ô
warning ô lamp ô flashes ô and ô the ô gearbox ô
g
oes
ô
into ô neutral ô automatically.
To
ô
engage ô reverse, ô stop ô the ô vehicle ô then, ô with ô
y
our
ô
foot ô on ô the ô brake ô pedal, ô press ô control ô N,
then R .
Do
ô
not
ô
press
ô
the
ô
brake
ô
and
ô
accelerator
ô
p
edals
ô
at
ô
the
ô
same
ô
time:
ô
this
ô
could
ô
c
ause
ô
very
ô
rapid
ô
wear
ô
of
ô
the
ô
clutch.
5
Driving
Page 94 of 326
92
C4-cactus_en_Chap05_conduite_ed02-2014
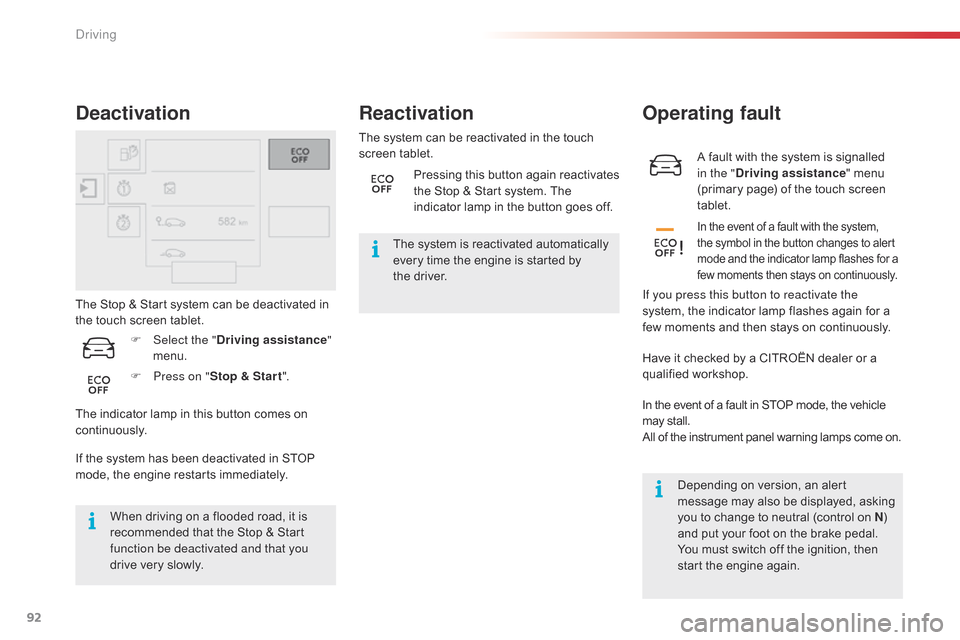
Aô faultô withô theô systemô isô signalledô in the " Driving assistance "
ô menu ô
(
primary ô page) ô of ô the ô touch ô screen ô
t
ablet.
Operating fault
Inô theô eventô ofô aô faultô withô theô system,ô the ô symbol ô in ô theô button ô changes ô to ô alertô m
ode ô and ô the ô indicator ô lamp ô flashes ô for ô a
ô f
ew ô moments ô then ô stays ô on ô continuously.
If you press this button to reactivate the
system,ô the ô indicator ô lamp ô flashes ô again ô for ô a ô
f
ew ô moments ô and ô then ô stays ô on ô continuously.
The
ô
Stop
ô
&
ô
Start
ô
system
ô
can
ô
be
ô
deactivated
ô
in
ô
t
he
ô
touch
ô
screen
ô
tablet.
Deactivation
Ifô theô systemô hasô beenô deactivatedô inô STOPô m ode, ô the ô engine ô restarts ô immediately.
When
ô driving ô on ô a ô flooded ô road, ô it ô is ô
r
ecommended ô that ô the ô Stop ô & ô Start ô
f
unction be deactivated and that you
drive
ô very ô slowly. The
ô system ô can ô be ô reactivated ô in ô the ô touch ô
s
creen
ô t
ablet.
Reactivation
Theô systemô isô reactivatedô automaticallyô e
very ô time ô the ô engine ô is ô started ô by ô
t
heô driver.
F
P
ress on " Stop & Star t ".
F
Sel
ect the " Driving assistance "
menu.
The
ô
indicator
ô
lamp
ô
in
ô
this
ô
button
ô
comes
ô
on
ô
c
ontinuously. Pressing
ô this ô
b
utton ô again ô reactivates ô
t
he ô Stop ô & ô Start ô system. ô The ô
i
ndicator ô lamp ô in ô the ô button ô goes ô off.
Have ô it ô checked ô by ô a ô CITROûN ô dealer ô or ô a ô
q
ualified
ô w
orkshop.
In
ô the ô event ô of ô a ô fault ô in ô STOP ô mode, ô the ô vehicle
ô m
ay ô stall.
All
ô of ô the ô instrument ô panel ô warning ô lamps ô come ô on.
Depending
ô on ô version, ô an ô alert ô
m
essage ô may ô also ô be ô displayed, ô asking ô
y
ou ô to ô change ô to ô neutral ô (control ô on ô N)
ô
a
nd ô put ô your ô foot ô on ô the ô brake ô pedal.
You
ô must ô switch ô off ô the ô ignition, ô then ô
s
tart ô the ô engine ô again.
driving
Page 100 of 326
98
C4-cactus_en_Chap05_conduite_ed02-2014
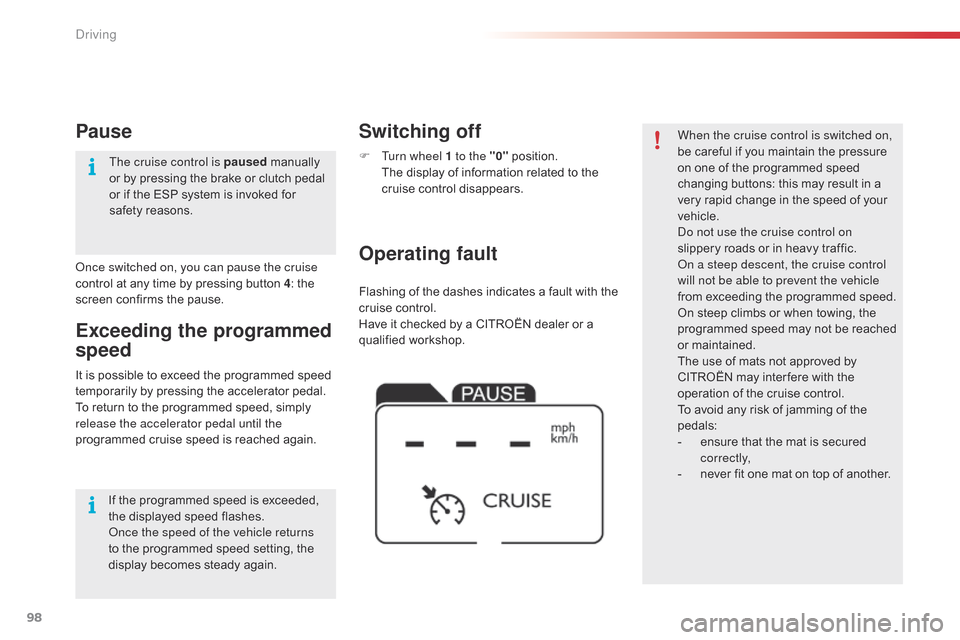
Flashingô ofô theô dashesô indicatesô aô faultô withô theô cruise ô control.
Have
ô it ô checked ô by ô a ô CITROûN ô dealer ô or ô a ô
q
ualified
ô w
orkshop.
Operating fault Switching off
F Turn wheel 1 to the "0"ô p osition.ô T
he ô display ô of ô information ô related ô to ô the ô
c
ruise ô control ô disappears. When the cruise control is switched on,
be
ô careful ô if ô you ô maintain ô the ô pressure ô o
n ô one ô of ô the ô programmed ô speed ô
c
hanging ô buttons: ô this ô may ô result ô in ô a ô
v
ery ô rapid ô change ô in ô the ô speed ô of ô your ô
v
ehicle.
do n
ot use the cruise control on
slippery
ô roads ô or ô in ô heavy ô traffic.
on a s
teep descent, the cruise control
will not be able to prevent the vehicle
from
ô exceeding ô the ô programmed ô speed.
On
ô steep ô climbs ô or ô when ô towing, ô the ô
p
rogrammed ô speed ô may ô not ô be ô reached ô
o
r ô maintained.
The
ô use ô of ô mats ô not ô approved ô by ô
C
ITROûN ô may ô inter fere ô with ô the ô
o
peration ô of ô the ô cruise ô control.
To
ô avoid ô any ô risk ô of ô jamming ô of ô the ô
ped
als:
-
ô
e
nsure ô that ô the ô mat ô is ô secured ô
c
o r r e c t l y,
-
ô
n
ever ô fit ô one ô mat ô on ô top ô of ô another.
It
ô
is
ô
possible
ô
to
ô
exceed
ô
the
ô
programmed
ô
speed
ô
t
emporarily
ô
by
ô
pressing
ô
the
ô
accelerator
ô
pedal.
To
ô
return
ô
to
ô
the
ô
programmed
ô
speed,
ô
simply
ô
r
elease the accelerator pedal until the
programmed
ô
cruise
ô
speed
ô
is
ô
reached
ô
again.
Exceeding the programmed
speed
once switched on, you can pause the cruise
control ô at ô any ô time ô by ô pressing ô button ô 4: ô the ô
s
creen ô confirms ô the ô pause.
Pause
Ifô theô programmedô speedô isô exceeded,ô the ô displayed ô speed ô flashes.
on
ce the speed of the vehicle returns
to
ô the ô programmed ô speed ô setting, ô the ô
d
isplay ô becomes ô steady ô again.
The cruise control is paused
ô m
anually
ô o
r ô by ô pressing ô the ô brake ô or ô clutch ô pedal ô
o
r ô if ô the ô ESP ô system ô is ô invoked ô for ô
s
afety ô reasons.
Driving
Page 105 of 326
103
C4-cactus_en_Chap05_conduite_ed02-2014
Parkô Assist
Thisô systemô providesô activeô assistanceô withô parking,ô detectingô aô parkingô spaceô thenô controllingô theô steeringô toô parkô inô theô space.
I t ô controls ô the ô steering ô while ô the ô driver ô manages ô the ô accelerator, ô brakes, ô gears ô and ô clutch ô (manual ô gearbox). ô During ô phases ô of ô entry ô into ô and ô exit ô from ô
a
ô parking ô space, ô the ô system ô provides ô visual ô and ô audible ô information ô to ô the ô driver ô in ô order ô to ô make ô the ô manoeuvre ô safe. ô It ô may ô be ô necessary ô to ô move ô
f
or wards ô and ô backwards ô more ô than ô once.
The
ô Park ô Assist ô system ô cannot ô in ô any ô
c
ircumstances ô replace ô the ô need ô for ô
v
igilance ô on ô the ô part ô of ô the ô driver.
The
ô driver ô must ô remain ô in ô control ô of ô
t
heir ô vehicle ô ensuring ô that ô the ô space ô
r
emains ô clear ô during ô the ô manoeuvre.
In
ô some ô circumstances, ô the ô sensors ô
m
ay ô not ô detect ô small ô obstacles ô located ô
i
n ô their ô blind ô spots. Changing
ô tyre ô sizes ô (out-size ô tyres, ô
w
inter ô tyres, ô ...) ô can ô inter fere ô with ô
t
he ô correct ô operation ô of ô the ô parking ô
a
ssistance ô system.
During
ô a ô manoeuvre ô the ô steering ô wheel ô
t
urns ô quickly: ô do ô not ô hold ô the ô steering ô
w
heel, do not place your hand between
the
ô spokes ô of ô the ô steering ô wheel ô and ô
t
ake ô care ô with ô loose ô and ô bulky ô clothing, ô
s
carves, ô handbags... ô There ô is ô a ô risk ô of ô
in
jury. For
ô entry ô into ô a ô parking ô space ô (parallel ô
p
arking) ô the ô system ô does ô not ô detect ô
s
paces ô which ô are ô clearly ô much ô smaller ô
o
r ô larger ô than ô the ô size ô of ô the ô vehicle.
This
ô "parking ô assistance" ô system ô
i
s ô activated ô automatically ô during ô
m
anoeuvres; ô it ô is ô therefore ô possible ô
t
hat ô a ô symbol ô comes ô on ô in ô the ô screen, ô
a
ccompanied ô by ô an ô audible ô signal, ô
w
ithout ô affecting ô the ô manoeuvre.The
ô selection ô of ô the ô type ô of ô manoeuvre ô
(
entering ô or ô exiting ô a ô parallel ô parking ô
s
pace) ô prevents ô a ô change ô to ô STOP ô
m
ode ô of ô Stop ô & ô Start.
In
ô STOP ô mode, ô this ô selection ô restarts ô
t
he
ô eng
ine.
The
ô driver ô can ô take ô control ô at ô any ô time ô by ô gripping ô the ô steering ô wheel.
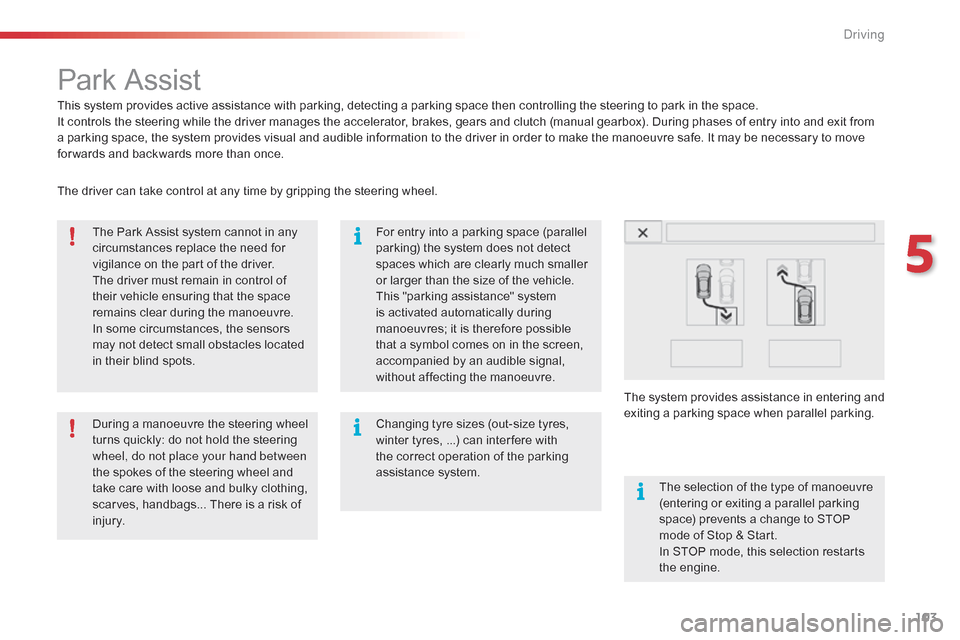
The
ô
s
ystem ô
p
rovides ô
a
ssistance ô
i
n ô
e
ntering ô
a
nd ô
e
xiting
ô aô par
king
ô spa
ce
ô w
hen
ô par
allel
ô par
king.
5
driving
Page 128 of 326
126
C4-cactus_en_Chap07_securite_ed02-2014
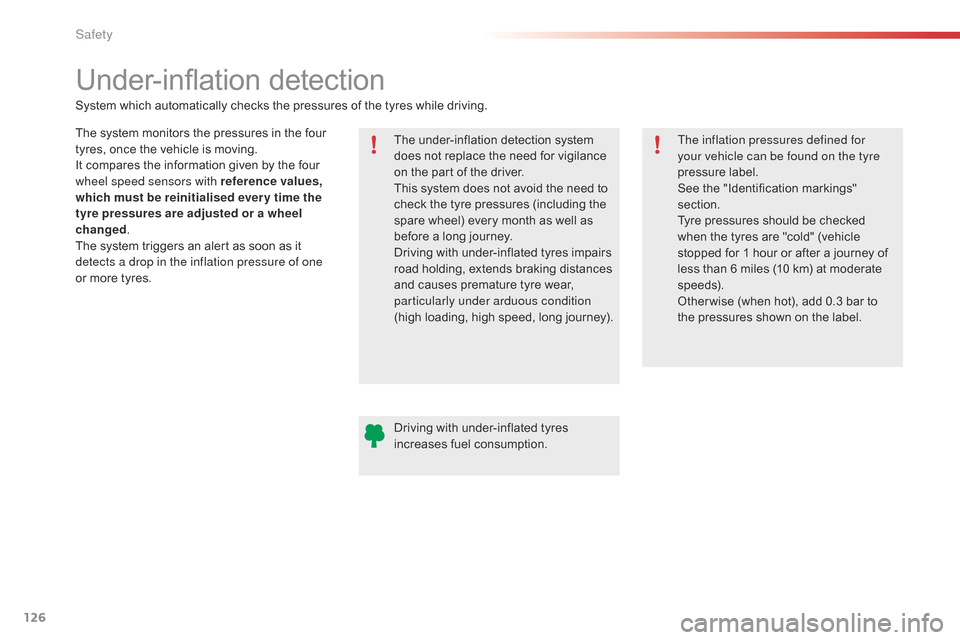
Under-inflationô detection
Theô systemô monitorsô theô pressuresô inô theô fourô t
yres, ô once ô the ô vehicle ô is ô moving.
It
ô compares ô the ô information ô given ô by ô the ô four ô
w
heel speed sensors with reference values,
which must be reinitialised ever y time the
tyre pressures are adjusted or a wheel
changed .
The
ô system ô triggers ô an ô alert ô as ô soon ô as ô it ô
d
etects a drop in the inflation pressure of one
or
ô more ô tyres. The
ô under-inflation ô detection ô system ô
d
oes ô not ô replace ô the ô need ô for ô vigilance ô
o
n ô the ô part ô of ô the ô driver.
This
ô system ô does ô not ô avoid ô the ô need ô to ô
c
heck ô the ô tyre ô pressures ô (including ô the ô
s
pare ô wheel) ô every ô month ô as ô well ô as ô
b
efore ô a ô long ô journey.
Driving
ô with ô under-inflated ô tyres ô impairs ô
r
oad ô holding, ô extends ô braking ô distances ô
a
nd ô causes ô premature ô tyre ô wear, ô
par
ticularly under arduous condition
(high
ô loading, ô high ô speed, ô long ô journey).
System
ô which ô automatically ô checks ô the ô pressures ô of ô the ô tyres ô while ô driving.
The inflation pressures defined for
your vehicle can be found on the tyre
pressure
ô label.
See
ô the ô "Identification ô markings" ô
s
ection.
Tyre
ô pressures ô should ô be ô checked ô
w
hen ô the ô tyres ô are ô "cold" ô (vehicle ô
s
topped ô for ô 1 ô hour ô or ô after ô a ô journey ô of ô
l
ess ô than ô 6 ô miles ô (10 ô km) ô at ô moderate ô
s
peeds).
Other wise
ô (when ô hot), ô add ô 0.3 ô bar ô to ô
t
he ô pressures ô shown ô on ô the ô label.
Driving
ô with ô under-inflated ô tyres ô
i
ncreases ô fuel ô consumption.
Safety
Page 186 of 326

184
C4-cactus_en_Chap09_info-pratiques_ed02-2014
Daytime running lamps /
S idelamps (LEDs)
Forô theô replacementô ofô theô light-emittingô d
iodes ô (LEDs), ô contact ô a ô CITROûN ô dealer ô or ô a ô
q
ualified
ô w
orkshop. F
ô D isconnect ô the ô bulb ô connector.
F
ô
R
emove ô the ô bulb ô and ô change ô it.
Dipped beam headlamps
Fô Removeô the ô protective ô cover ô by ô pulling ô the ô t
ab.
F
ô
T
ake ô the ô connector ô and ô bulb ô holder, ô then ô
l
ift ô the ô assembly ô upwards ô to ô unclip ô it.
F
ô
R
emove ô the ô assembly ô of ô connector ô and ô
b
ulb ô holder. To
ô reassemble, ô carry ô out ô these ô operations ô in ô
r
everse order, positioning the alignment lug
at the top .
Practical information