headlamp Citroen C4 CACTUS 2016 1.G User Guide
[x] Cancel search | Manufacturer: CITROEN, Model Year: 2016, Model line: C4 CACTUS, Model: Citroen C4 CACTUS 2016 1.GPages: 308, PDF Size: 7.96 MB
Page 86 of 308

84
Parking lamps
Side markers for the vehicle by illumination of the sidelamps on the traffic side only.
F
D
epending on version, within one minute
o
f switching off the ignition, operate the
l
ighting control stalk up or down depending
o
n the traffic side (for example: when
p
arking on the left; lighting control stalk
u
pwards; the right hand sidelamps are on).
This
is confirmed by an audible signal and
i
llumination of the corresponding direction
i
ndicator warning lamp in the instrument panel.
To
switch off the parking lamps, return the
l
ighting control stalk to the central position.
Daytime running lamps / Sidelamps
(LEDs)
The light-emitting diodes (LEDs) come on automatically when the engine is started.
In
some weather conditions (e.g. low
t
emperature or humidity), the presence
o
f misting on the internal sur face of the
g
lass of the headlamps and rear lamps
i
s normal; it disappears after the lamps
h
ave been on for a few minutes.They
provide the following functions:
- D aytime running lamps (lighting control
s
talk in position "0 " or " AUTO " with
adequate
light level).
-
S
idelamps (lighting control stalk in
p
osition "AUTO"
with low light level or
"
Sidelamps only" or "Main or dipped beam
h
eadlamps").The
LEDs are brighter when operating
a
s daytime running lamps.
Lighting and visibility
Page 87 of 308

85
Switching on
F W ith the ignition off, "flash" the headlamps
u
sing the lighting stalk.
F
A
further "headlamp flash" switches the
f
unction off.
Switching off
The
manual guide-me-home lighting switches
o
ff automatically after a set time.
The
temporary illumination of the dipped beam
h
eadlamps after the vehicle's ignition has been
s
witched off makes the driver's exit easier
w
hen the light is poor.
Guide-me-home
lighting
Automatic
When the automatic illumination of headlamps i
s activated, if the ambient light level is
l
ow, the dipped beam headlamps come on
a
utomatically when switching off the ignition.
Activation
or deactivation of the system, as well
a
s the period for the guide-me-home lighting is
s
et in the touch screen tablet.
F
Sel
ect the "Driving assistance "
menu,
then "Vehicle settings ".
Manual
Headlamp beam
h
eight
ad
justment
To avoid causing a nuisance to other road users, t
he height of the headlamp beams should be a
djusted according to the load in the vehicle.
The
initial setting is position "0".
0.
D
river only
o
r driver + front passenger.
-.
D
river + front passenger + rear
p
assengers.
1.
D
river + front passenger + rear passengers +
l
oad in the boot.
-.
D
river + front passenger + rear passengers +
l
oad in the boot.
2.
D
river only + maximum authorised load in
t
he boot.
This
position is sufficient to avoid causing dazzle.
Higher
settings may limit the spread of light from
t
he
hea
dlamps.
4
Lighting and visibility
Page 126 of 308

124
Key left in the "Ignition on"
position
If the key has been left in the ignition switch at position 2 (Ignition on) ,
the
ignition will be switched off
a
utomatically after one hour.
To
switch the ignition back on, turn the
k
ey to position 1 (Stop),
then back to
p
osition 2 (Ignition on) .
Never
switch
off
the
ignition
before
the
v
ehicle
is
at
a
complete
stop.
With
the
engine
off,
the
braking
and
s
teering
assistance
systems
are
also
c
ut
off:
risk
of
loss
of
control
of
the
v
ehicle.
When
you
leave
the
vehicle,
keep
the
k
ey
with
you
and
lock
the
vehicle.
To facilitate unlocking of the steering c olumn, it is recommended that the
w
heels be returned to the straight ahead
p
osition before switching off the engine.
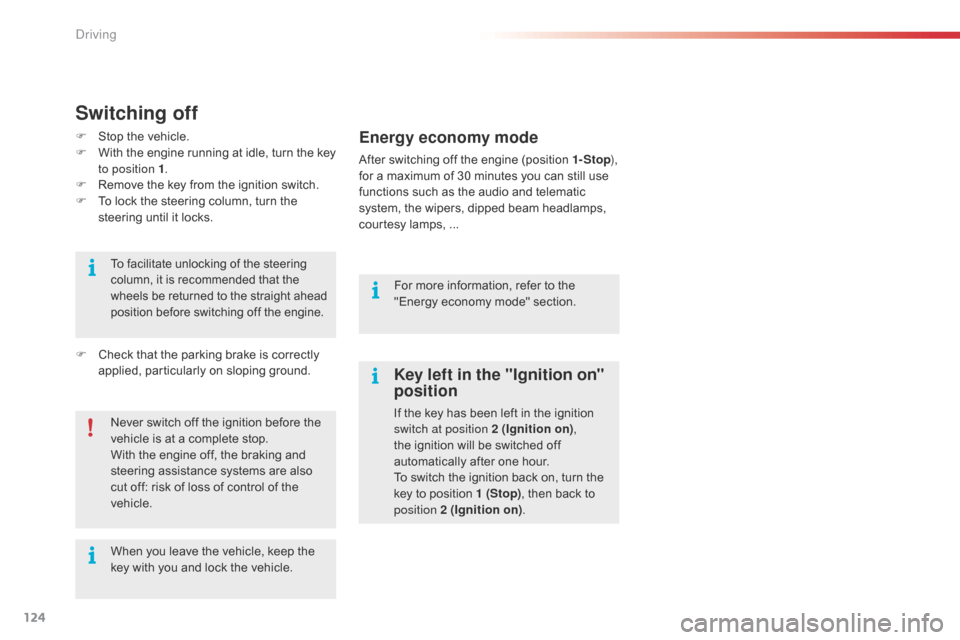
Switching off
F Stop the vehicle.
F W ith the engine running at idle, turn the key
t
o position 1 .
F
R
emove the key from the ignition switch.
F
T
o lock the steering column, turn the
s
teering until it locks.
F
C
heck that the parking brake is correctly
a
pplied, particularly on sloping ground.For
more information, refer to the
"
Energy economy mode" section.Energy economy mode
After switching off the engine (position 1- Stop),
for a maximum of 30 minutes you can still use
f
unctions such as the audio and telematic
s
ystem, the wipers, dipped beam headlamps,
c
ourtesy lamps, ...
Driving
Page 163 of 308

161
Load reduction mode
System which manages the use of certain functions according to the level of charge
r
emaining in the battery.
When
the vehicle is being driven, the load
r
eduction function temporarily deactivates
c
ertain functions, such as the air conditioning,
t
he heated rear screen...
The
deactivated functions are reactivated
a
utomatically as soon as conditions permit.System
which manages the duration of use of c
ertain functions to conserve a sufficient level
of
charge in the battery.
After
the engine has stopped, you can
s
till use functions such as the audio and
t
elematics system, windscreen wipers, dipped
b
eam headlamps, courtesy lamps, etc. for
a
maximum combined duration of about
f
orty minutes.
Energy economy mode
Switching to economy mode
A message then appears in the instrument p
anel screen indicating that the vehicle has
s
witched to economy mode and the active
f
unctions are put on standby.
If
a telephone call is being made at this time, it
w
ill be maintained for around 10 minutes with
t
he Bluetooth hands-free system of your audio
s
ystem.
Exiting economy mode
These functions are reactivated automatically n ext time the vehicle is driven.
In
order to restore the use of these functions
i
mmediately, start the engine and let it run:
-
f
or less than ten minutes, to use the
e
quipment for approximately five minutes,
-
f
or more than ten minutes, to use the
e
quipment for up to approximately
t
hirty minutes.
Let
the engine run for the duration specified to
e
nsure that the battery charge is sufficient.
Do
not repeatedly and continuously restart the
e
ngine in order to charge the battery.
A
flat battery prevents the engine from
s
tarting.
For
more information on the battery,
r
efer to the corresponding section.
7
Practical information
Page 186 of 308

184
Advice on care and maintenance
Recommendations on the care and maintenance your vehicle are given in the maintenance and warranty guide.
T he headlamps have polycarbonate
l
enses, finished with a protective
l
a c q u e r.
Do
not clean them with a dry or
a
brasive cloth, nor with detergent or
so
lvent
pro
ducts.
Use
a sponge and soapy water.
The
use of a high pressure jet wash
f
or cleaning the headlamps, lamps
a
nd their surrounds may damage the
l
acquer and seals.
Observe
the recommendations on
p
ressure and distance for jet washing.
First clean persistent stains with a
sponge
and warm soapy water.For
the care of the stickers in the rear
d
oor glasses, we recommend the
fo
llowing:
-
U
se a wide jet at a temperature of
b
etween 25°C and 40°C.
-
W
here possible, direct the jet at
r
ight angles to the stickers.
Leather
Care of the expressive stickers
These styling stickers are treated to give good resistance to ageing and tearing.
They
have been designed to allow you to
c
ustomise your vehicle's bodywork.
When
using a high pressure jet wash, keep the
e
nd of the lance at least 30 centimetres from
t
he stickers
Leather
is
a
natural
product.
Appropriate
r
egular
care
and
cleaning
is
essential
for
its
du
rability.
Refer
to
your
vehicle's
maintenance
and
w
arranty
guide
for
information
on
the
special
p
recautions
to
observe.
Headlamps and lamps Care of the AIRBUMP® panels
The AIRBUMP® panels require no particular c
are o
r m
aintenance.
They
are
cleaned simply using water or one of
t
he
products
available from CITROËN dealers.
To
avoid
problems of premature ageing of the
A
IRBUMP
® panels, do not use polish on them.
Practical information
Page 200 of 308

198
Changing a bulb
Front lamps
1. Daytime running lamps / Sidelamps (LE
Ds).
2.
D
ipped beam headlamps (H7).
3.
M
ain beam headlamps (H1).
4.
D
irection indicators (PY21W).
5.
F
ront foglamps (PS24W). In
some weather conditions (e.g. low
t
emperature or humidity), the presence
o
f misting on the internal sur face of the
g
lass of the headlamps and rear lamps
i
s normal; it disappears after the lamps
h
ave been on for a few minutes.
The headlamps have polycarbonate
l
enses with a protective coating:
F
d
o not clean them using a dr y
or abrasive cloth, nor with a
detergent or solvent product,
F
u
se a sponge and soapy water or a
p
H neutral product,
F
w
hen using a high pressure washer
o
n persistent marks, do not keep
t
he lance directed towards the
l
amps or their edges for too long,
s
o as not to damage their protective c
oating a nd sea ls.
Changing a bulb should only be done
a
fter the headlamp has been switched
o
ff for several minutes (risk of serious
b
urns).
F
D
o not touch the bulb directly with
y
our fingers, use a lint-free cloth.
It
is imperative to use only anti-
ultraviolet
(UV) type bulbs to avoid
d
amaging
t
he
h
eadlamp.
Always
replace a failed bulb with a
n
ew bulb with the same type and
s
pecification.
In the event of a breakdown
Page 201 of 308

199
Daytime running lamps /
S idelamps (LEDs)
For the replacement of the light-emitting d
iodes (LEDs), contact a CITROËN dealer or a
q
ualified
w
orkshop. F
D isconnect the bulb connector.
F
R
emove the bulb and change it.
Dipped beam headlamps
F Remove the protective cover by pulling t
he tab.
F
T
ake the connector and bulb holder, then
l
ift the assembly upwards to unclip it.
F
R
emove the assembly of connector and
b
ulb holder. To
reassemble, carry out these operations in
r
everse order, positioning the alignment lug
at the top .
8
In the event of a breakdown
Page 202 of 308

200
Main beam headlamps
F Remove the protective cover by pulling t
he tab.
F
D
isconnect the bulb connector (do not
r
emove
t
he
e
arth
c
onnector
lo
cated
belo
w).
F
P
ush on the spring, then move it towards
t
he middle of the vehicle to release
t
he bulb.
F
R
emove the bulb and change it.
Direction indicators
Amber coloured bulbs, such as the direction indicators, must be replaced
w
ith bulbs of identical specifications
a
nd colour.
Rapid
flashing
of
the
direction
indicator
w
arning
lamp
(right
or
left)
indicates
the
f
ailure
of
a
bulb
on
that
side.
F
T
urn
the
bulb
holder
an
eighth
of
a
turn
a
nti-clockwise
and
extract
it.
F
R
emove
the
bulb
and
change
it.
To
reassemble,
carry
out
these
operations
in
r
everse
o
rder. To
reassemble,
carry
out
these
operations
in
r
everse
o
rder.
In the event of a breakdown
Page 210 of 308

208
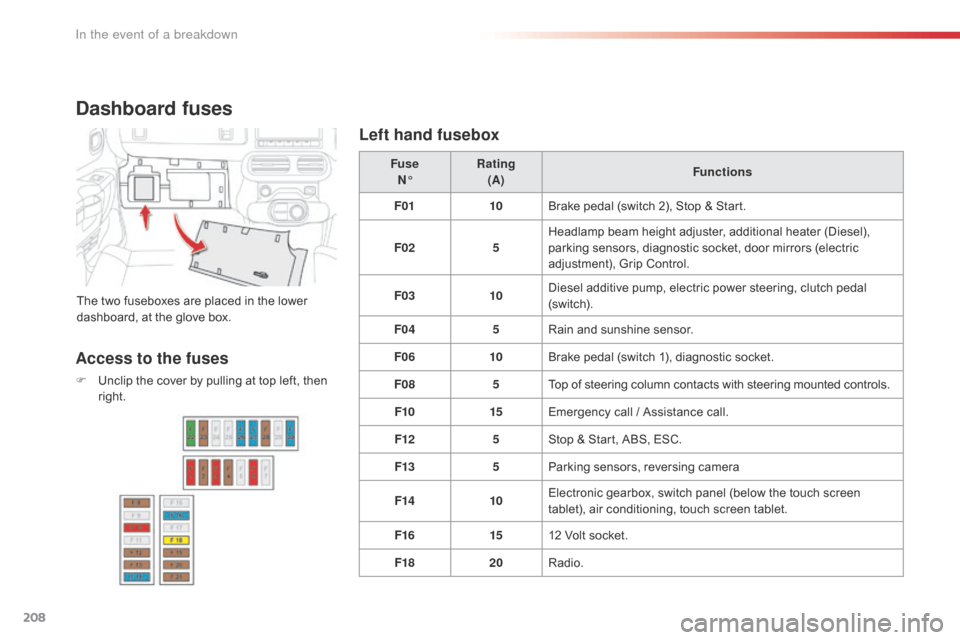
Dashboard fuses
The two fuseboxes are placed in the lower dashboard, at the glove box. Fuse
N° Rating
(A) Functions
F01 10Brake pedal (switch 2), Stop & Start.
F02 5Headlamp beam height adjuster, additional heater (Diesel),
p
arking sensors, diagnostic socket, door mirrors (electric
a
djustment), Grip Control.
F03 10Diesel additive pump, electric power steering, clutch pedal (
sw i tc h).
F04 5Rain
and sunshine sensor.
F06 10Brake
pedal (switch 1), diagnostic socket.
F08 5Top
of steering column contacts with steering mounted controls.
F10 15Emergency
call / Assistance call.
F12 5Stop
& Start, ABS, ESC.
F13 5Parking
sensors, reversing camera
F14 10Electronic
gearbox, switch panel (below the touch screen
t
ablet), air conditioning, touch screen tablet.
F16 1512
Volt socket.
F18 20Radio.
Access to the fuses
F Unclip the cover by pulling at top left, then r
ight.
Left hand fusebox
In the event of a breakdown
Page 213 of 308

211
Engine compartment fuses
Access to the fuses
F Unclip the cover.
F C hange the fuse (see corresponding
par
agraph).
F
W
hen you have finished, close the cover
c
arefully to ensure correct sealing of the
f
usebox. Fuse
N° Rating
(A) Functions
F1 40Air
c
onditioning.
F2 30 / 40Stop & Start.
F3 30Passenger
c
ompartment
f
usebox.
F4 70Passenger
c
ompartment
f
usebox.
F5 70Built-in Systems Inter face (BSI).
F6 60Cooling fan assembly.
F7 80Built-in Systems Inter face (BSI).
F8 15Engine
management, petrol pump.
F9 15Engine
m
anagement.
F10 15Engine
m
anagement.
F11 20Engine
m
anagement.
F12 5Cooling
fan assembly.
F13 5Built-in
Systems Inter face (BSI).
F14 5Battery
charge unit (non Stop & Start engine).
F15 5Stop
& Start.
F17 5Built-in
Systems Inter face (BSI).
F18 10Right
hand main beam headlamp.
The
fusebox is placed in the engine
c
ompartment near the battery.
8
In the event of a breakdown