light CITROEN C4 CACTUS 2017 Owners Manual
[x] Cancel search | Manufacturer: CITROEN, Model Year: 2017, Model line: C4 CACTUS, Model: CITROEN C4 CACTUS 2017Pages: 256, PDF Size: 7.62 MB
Page 4 of 256
2
.
.
Instrument panel 8
W arning and indicator lamps 9
I
ndicators 20
Touch screen
2
4
Trip computer
2
7
Distance recorders
2
8
Setting the date and time
2
9
Lighting dimmer
3
0Remote control and key
3
1
K
eyless Entry and Starting
3
3
Central locking
3
5
Recommendations
35
Emergency procedures
3
6
Doors
39
Boot
39
Alarm
4
0
Front electric window controls
4
1
Rear door windows
4
2
Front seats
4
3
Rear seats
4
5
Steering wheel adjustment
4
6
Mirrors
46
Ventilation
48
Recommendations for ventilation and air
conditioning
49
Heating/Manual air conditioning
5
0
Automatic air conditioning
5
1
Recirculation of interior air
5
3
Front demisting – defrosting
5
4
Rear screen demisting – defrosting
5
4
Courtesy lamps
5
4
Boot lamp
5
5
Panoramic glazed sunroof
5
5
Interior fittings
5
6
Boot fittings
5
9
Rear parcel shelf (commercial version)
6
0Lighting control stalk
6
1
Direction indicators
6
2
Automatic illumination of headlamps
6
3
Daytime running lamps/Sidelamps (LEDs)
6
3
Parking lamps
6
4
Guide-me-home lighting
6
4
Headlamp beam height adjustment
6
4
Cornering lighting
6
5
Wiper control stalk
6
5
General safety recommendations 6 9
Hazard warning lamps
7
0
Horn
70
Emergency or assistance call
7
0
Electronic stability control (ESC)
7
2
Grip control
7
4
Seat belts
7
5
Airbags
78
Child seats
8
1
Deactivating the front passenger airbag
8
2
ISOFIX mountings and child seats
8
8
i-Size child seats
9
1
Child lock
9
3
Over view
Dashboard instruments Access
Ease of use and comfort Safety
Lighting and visibility
Eco-driving
Eco-driving
6
Instruments and controls
4
Contents
Page 6 of 256
4
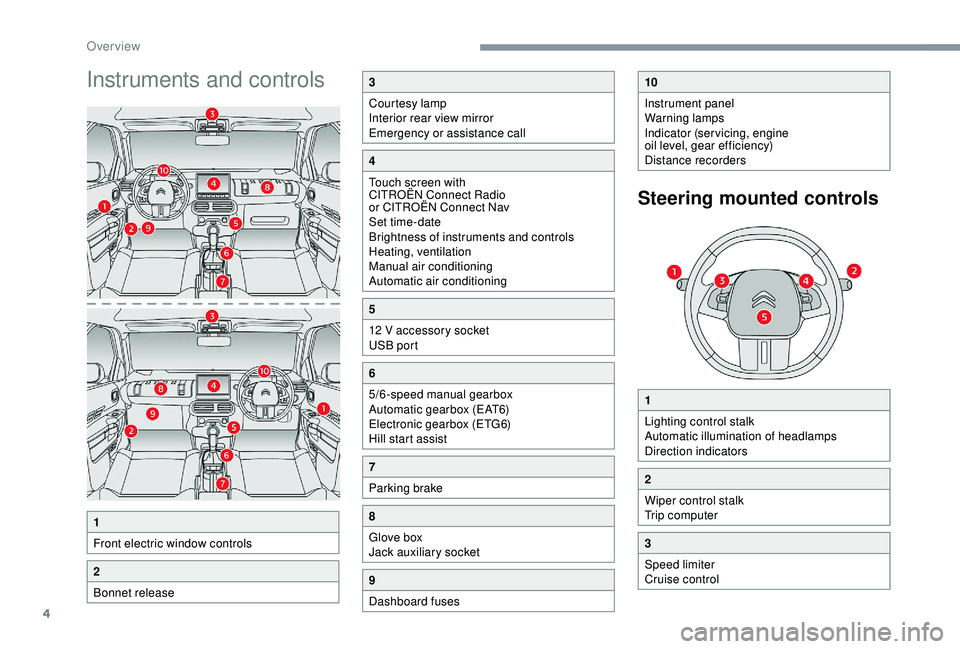
Instruments and controls
1
Front electric window controls
2
Bonnet release
3
Courtesy lamp
Interior rear view mirror
Emergency or assistance call
4
Touch screen with
CITROËN Connect Radio
or CITROËN Connect Nav
Set time-date
Brightness of instruments and controls
Heating, ventilation
Manual air conditioning
Automatic air conditioning
5
12 V accessory socket
USB port
6
5/6-speed manual gearbox
Automatic gearbox (EAT6)
Electronic gearbox (ETG6)
Hill start assist
7
Parking brake
8
Glove box
Jack auxiliary socket
9
Dashboard fuses
10
Instrument panel
Warning lamps
Indicator (servicing, engine
oil level, gear efficiency)
Distance recorders
1
Lighting control stalk
Automatic illumination of headlamps
Direction indicators
2
Wiper control stalk
Trip computer
3
Speed limiter
Cruise control
Steering mounted controls
Over view
Page 8 of 256
6
Eco- driving
Optimise the use of your
gearbox
With a manual gearbox, move off gently
and change up without waiting. During
acceleration, change up early.
With an automatic or electronic gearbox,
give preference to automatic mode and avoid
pressing the accelerator pedal heavily or
suddenly.
Adopt a smooth driving style
Maintain a safe distance between vehicles,
use engine braking rather than the
brake pedal, and press the accelerator
progressively. These practices contribute
towards a reduction in fuel consumption and
CO
2 emissions and also help to reduce the
background traffic noise.
If your vehicle has cruise control, make use of
the system at speeds above 25 mph (40 km/h)
when the traffic is flowing well.
Control the use of your electrical
equipment
Before moving off, if the passenger
compartment is too warm, ventilate it by
opening the windows and air vents before
using the air conditioning.
Above 31 mph (50 km/h), close the windows
and leave the air vents open.
Remember to make use of equipment that can
help keep the temperature in the passenger
compartment down (sunroof and window
blinds, etc.).
Switch off the air conditioning, unless it has
automatic regulation, as soon as the desired
temperature is attained. Switch off the lamps and foglamps when the
ambient light level does not require their use.
Avoid running the engine before moving off,
particularly in winter; your vehicle will warm up
much faster while driving. Switch off the demisting and defrosting
controls when not required, if they are not
automatically controlled.
Switch off the heated seat as soon as
possible.
As a passenger, if you avoid connecting your
multimedia devices (film, music, video game,
etc.), you will contribute towards limiting the
consumption of electrical energy, and so of
fuel.
Disconnect your portable devices before
leaving the vehicle.
The gear efficiency indicator invites you to
engage the most suitable gear: as soon as the
indication is displayed in the instrument panel,
follow it straight away.
For vehicles fitted with an electronic or
automatic gearbox, this indicator appears only
in manual mode. Eco-driving is a range of everyday practices
that allow the motorist to optimise their fuel
consumption and CO
2 emissions.
Eco-driving
Page 10 of 256
8
Instrument panel
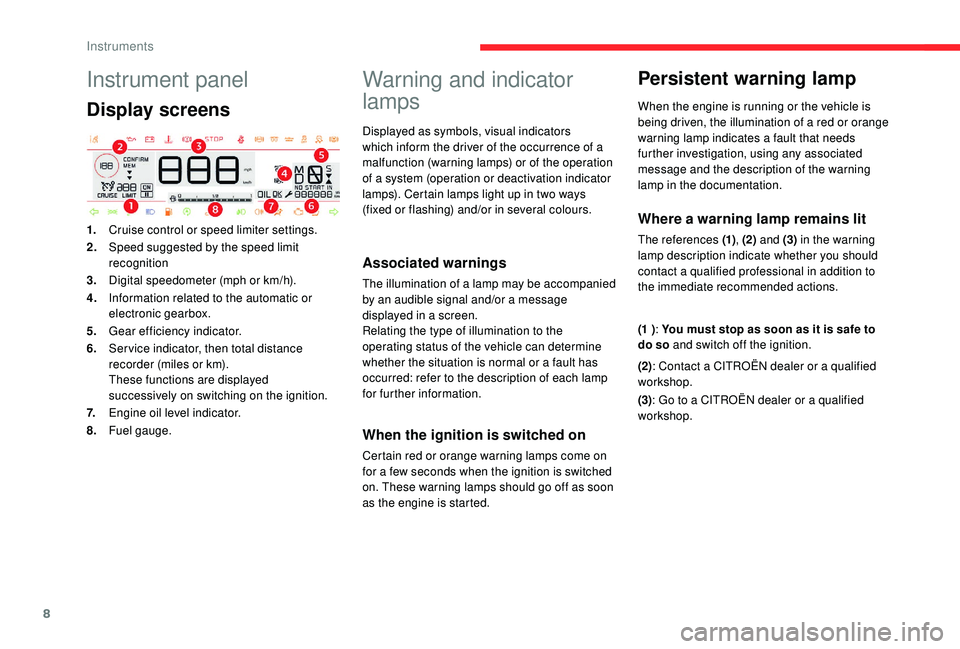
Display screens
1.Cruise control or speed limiter settings.
2. Speed suggested by the speed limit
recognition
3. Digital speedometer (mph or km/h).
4. Information related to the automatic or
electronic gearbox.
5. Gear efficiency indicator.
6. Ser vice indicator, then total distance
recorder (miles or km).
These functions are displayed
successively on switching on the ignition.
7. Engine oil level indicator.
8. Fuel gauge.
Warning and indicator
lamps
Displayed as symbols, visual indicators
which inform the driver of the occurrence of a
malfunction (warning lamps) or of the operation
of a system (operation or deactivation indicator
lamps). Certain lamps light up in two ways
(fixed or flashing) and/or in several colours.
Associated warnings
The illumination of a lamp may be accompanied
by an audible signal and/or a message
displayed in a screen.
Relating the type of illumination to the
operating status of the vehicle can determine
whether the situation is normal or a fault has
occurred: refer to the description of each lamp
for further information.
When the ignition is switched on
Certain red or orange warning lamps come on
for a few seconds when the ignition is switched
on. These warning lamps should go off as soon
as the engine is started.
Persistent warning lamp
When the engine is running or the vehicle is
being driven, the illumination of a red or orange
warning lamp indicates a fault that needs
further investigation, using any associated
message and the description of the warning
lamp in the documentation.
Where a warning lamp remains lit
The references (1) , (2) and (3) in the warning
lamp description indicate whether you should
contact a qualified professional in addition to
the immediate recommended actions.
(1 ) : You must stop as soon as it is safe to
do so and switch off the ignition.
(2): Contact a CITROËN dealer or a qualified
workshop.
(3) : Go to a CITROËN dealer or a qualified
workshop.
Instruments
Page 22 of 256
20
Indicators
Service indicator
The ser vice indicator is displayed on the
instrument panel. Depending on the vehicle
version:
-
t
he distance recorder display line indicates
the distance remaining before the next
ser vice is due, or the distance travelled
since it was due preceded by the sign "-".
-
a
n alert message indicates the distance
remaining as well as the period before the
next ser vice is due or since it was overdue.
Warning/indicator
lamp State
CauseAction/
Observations
Ser vice
spanner Lights up temporarily
when the ignition is
switched on. Between 1,900 miles
(3,000 km) and 620
miles (1,000 km)
remain before the
next ser vice is due.
Fixed, when the
ignition is switched
on. The ser vice is due in
less than 620 miles
(1,000 km).Have your vehicle
serviced very soon.
+ Ser vice
spanner
flashing
Flashing then fixed,
when the ignition is
switched on.
(For BlueHDi Diesel
versions, associated
with the Ser vice
warning lamp). The ser vice is
overdue.
Have your vehicle
ser viced as soon as
possible.
The distance indicated (in kilometres
or miles) is calculated according to the
mileage covered and the time elapsed
since the last ser vice.
The alert may be triggered close to a due
date.
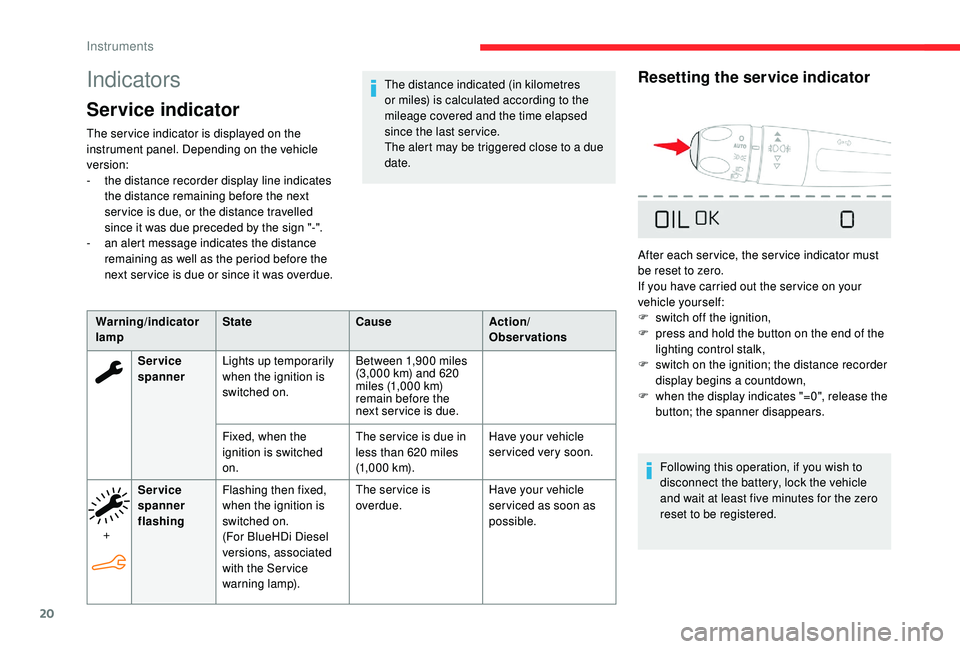
Resetting the service indicator
After each service, the service indicator must
be reset to zero.
If you have carried out the ser vice on your
vehicle yourself:
F
s
witch off the ignition,
F
p
ress and hold the button on the end of the
lighting control stalk,
F
s
witch on the ignition; the distance recorder
display begins a countdown,
F
w
hen the display indicates "=0", release the
button; the spanner disappears.
Following this operation, if you wish to
disconnect the battery, lock the vehicle
and wait at least five minutes for the zero
reset to be registered.
Instruments
Page 25 of 256

23
Remaining range less than 375 miles
(600 km) (1.6 BlueHDi Euro 6.1)
Remaining range less than 60 miles
(100
km) (1.5 BlueHDi Euro 6.2)
When switching on the ignition, this warning
lamp flashes, accompanied by the permanent
lighting of the Ser vice warning lamp, an audible
signal and the display of a message ("NO
START IN and a distance" or "Top up AdBlue:
Starting impossible in x miles/km") indicating
the remaining range expressed in miles or
kilometres.
When driving, this message is displayed every
thirty seconds until the AdBlue level has been
topped up.
It is essential to top up as soon as possible and
before the tank is completely empty, other wise
it will not be possible to restart the engine.
When switching on the ignition, this warning
lamp flashes, accompanied by an audible
signal (1 beep) and the display of a message
("NO START IN and a distance" or "Top up
AdBlue: Starting impossible in x miles/km")
indicating the remaining range expressed in
miles or kilometres. When driving, the audible signal and the
message display are triggered every 6 miles
(10 km) until the AdBlue tank is topped up.
It is essential to top up as soon as possible and
before the tank is completely empty, other wise
it will not be possible to restart the engine.
Breakdown due to a lack of AdBlue
®
When switching on the ignition, this warning
lamp flashes and the Service warning lamp
comes on, accompanied by an audible signal
and the temporary display of "NO START IN
0 km or miles" or "Top up AdBlue: Starting
impossible".
The AdBlue
® tank is empty: the starting
prevention system required by legislation
prevents starting of the engine.
To be able to restart the engine, it is
essential to add at least 5 litres of AdBlue
®
to its tank.
For more information on AdBlue
®
(BlueHDi engines) , and, in particular,
on topping up, refer to the corresponding
section.
In the event of a fault with the
SCR emissions control system
A system that prevents engine starting is
activated automatically from 685 miles
(1,100 km) after confirmation of a fault with
the SCR emissions control system.
Have the system checked by a CITROËN
dealer or a qualified workshop as soon as
possible.
In the event of the detection of a fault
If it is a temporary fault, the alert
disappears during the next journey,
after self-diagnostic checks of the SCR
emissions control system.
These warning lamps come on, accompanied
by an audible signal and the display of the
"Emissions fault" message.
The alert is triggered while driving as soon
as the fault is detected for the first time, then
when switching on the ignition for subsequent
journeys, while the fault persists.
1
Instruments
Page 26 of 256
24
While driving, the message is displayed every
thirty seconds while the fault with the SCR
emissions control system persists.
The alert is repeated when switching on the
ignition.
You should go to a CITROËN dealer or a
qualified workshop as soon as possible.
Other wise you will not be able to restart the
vehicle.
Starting preventedYou have exceeded the authorised driving
limit: the starting prevention system
inhibits engine starting.
To be able to restart the engine, you must call a
CITROËN dealer or a qualified workshop.
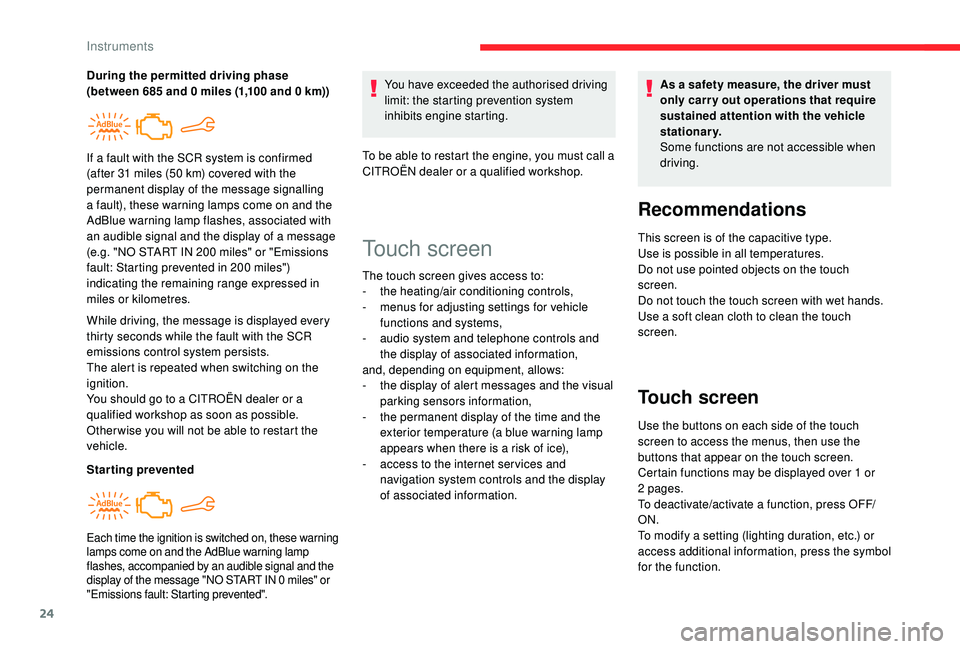
During the permitted driving phase
(between 685 and 0 miles (1,100 and 0 km))
If a fault with the SCR system is confirmed
(after 31 miles (50 km) covered with the
permanent display of the message signalling
a fault), these warning lamps come on and the
AdBlue warning lamp flashes, associated with
an audible signal and the display of a message
(e.g. "NO START IN 200 miles" or "Emissions
fault: Starting prevented in 200 miles")
indicating the remaining range expressed in
miles or kilometres.
Each time the ignition is switched on, these warning
lamps come on and the AdBlue warning lamp
flashes, accompanied by an audible signal and the
display of the message "NO START IN 0 miles" or
"Emissions fault: Starting prevented".
Touch screen
The touch screen gives access to:
- t
he heating/air conditioning controls,
-
m
enus for adjusting settings for vehicle
functions and systems,
-
a
udio system and telephone controls and
the display of associated information,
and, depending on equipment, allows:
-
t
he display of alert messages and the visual
parking sensors information,
-
t
he permanent display of the time and the
exterior temperature (a blue warning lamp
appears when there is a risk of ice),
-
a
ccess to the internet ser vices and
navigation system controls and the display
of associated information. As a safety measure, the driver must
only carry out operations that require
sustained attention with the vehicle
stationary.
Some functions are not accessible when
driving.
Recommendations
This screen is of the capacitive type.
Use is possible in all temperatures.
Do not use pointed objects on the touch
screen.
Do not touch the touch screen with wet hands.
Use a soft clean cloth to clean the touch
screen.
Touch screen
Use the buttons on each side of the touch
screen to access the menus, then use the
buttons that appear on the touch screen.
Certain functions may be displayed over 1 or
2 pages.
To deactivate/activate a function, press OFF/
ON.
To modify a setting (lighting duration, etc.) or
access additional information, press the symbol
for the function.
Instruments
Page 28 of 256

26
The functions are grouped into 4 families.Families Functions
"Parking" -
"Rear wiper in reverse ": activation/deactivation of the rear wiper with
reverse gear.
-
"Automatic folding of mirrors ": activation/deactivation of the
automatic door mirror folding/unfolding when locking/unlocking.
"Headlamps" -
"Guide-me-home lighting ": activation/deactivation of automatic guide-
me-home lighting.
-
"Welcome lighting ": activation/deactivation of exterior welcome
lighting.
-
"Daytime running lamps " (depending on country of sale).
-
"Directional headlamps " activation/deactivation of the cornering
lighting.
"Comfort" -
"Unlock: Boot only ": activation/deactivation of selective unlocking of
the tailgate.
"Safety" -
"Fatigue Detection System ": activation/deactivation of the driver
fatigue detection system.
-
"Recommended speed display " activation/deactivation of speed limit
display.
-
"Collision risk alert and automatic braking ": activation/deactivation
of the collision risk alert and automatic emergency braking.
-
"Blind spot sensors ": activation/deactivation of blind spot sensors.
"Driving functions" tab
Function Comments
Park Assist Activation of the
function.
Stop & Star t Activation/deactivation
of the function.
Parking sensors Activation/deactivation
of the function.
Traction control Activation/deactivation
of the function.
Blind spot
sensors Activation/deactivation
of the function.
Under-inflation
initialisation Reinitialisation of
the under-inflation
detection system.
Diagnostics List of current alerts.
"Vehicle" menu/"Driving"
menu
"Vehicle settings" tab
For more information on one of these
functions, refer to the corresponding
section.
Instruments
Page 32 of 256
30
Lighting dimmer
Permits manual adjustment of the brightness of
the instruments and controls to suit the ambient
light level.Only works when the vehicle lamps are
on (except daytime running lamps) and in
night mode.
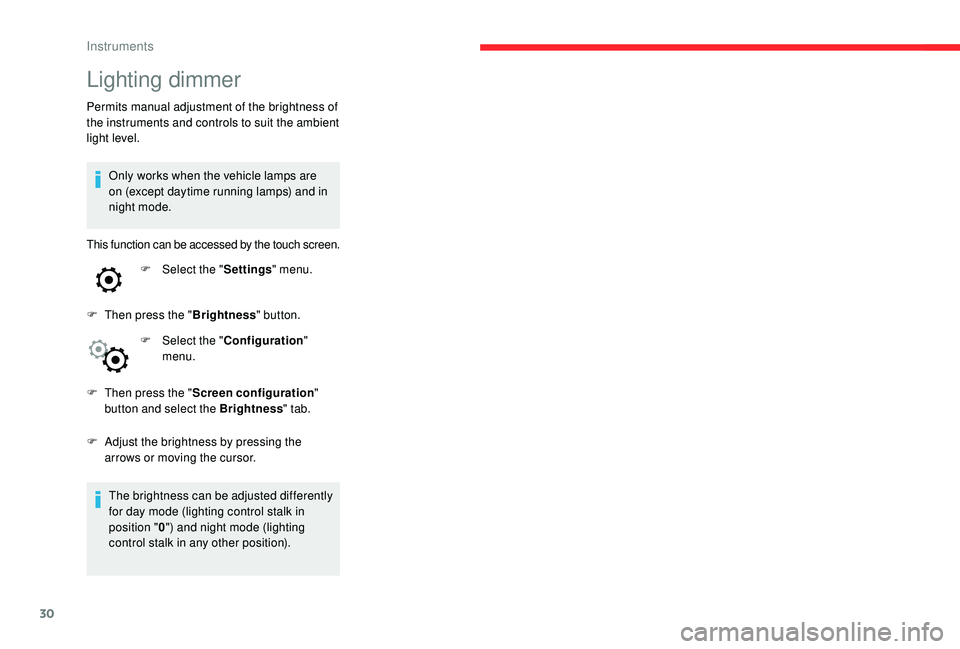
This function can be accessed by the touch screen.
F Select the " Settings" menu.
F
T
hen press the " Brightness" button.
F
Sel
ect the " Configuration "
menu.
F
T
hen press the " Screen configuration "
button and select the Brightness " tab.
F
A
djust the brightness by pressing the
arrows or moving the cursor.
The brightness can be adjusted differently
for day mode (lighting control stalk in
position " 0") and night mode (lighting
control stalk in any other position).
Instruments
Page 34 of 256

32
Locking the vehicle
With the remote control
F Press this button to lock the vehicle.
The continuous illumination of the direction
indicators for a few seconds signals:
-
t
he locking of the vehicle for versions
without an alarm,
-
t
he activation of the alarm for other
versions. When the vehicle is locked, if it is
unlocked without opening a door or the
boot, it will automatically lock itself again
after thirty seconds.
The folding and automatic unfolding of the
door mirrors can be deactivated by the
vehicle's configuration menu.
With the key
F Turn the key in the driver's door lock
towards the rear of the vehicle to lock it.
Check that the doors and boot are fully
closed.
Locating your vehicle
This function allows you to identify your vehicle
from a distance, particularly in poor light. Your
vehicle must be locked.
Depending on version, the door mirrors fold. If one of the doors or the boot is still open,
the central locking does not work; the vehicle
locks, then immediately unlocks, identifiable by
the locks making a rebounding sound.
Unlocking the vehicle
With the key
F Turn the key in the driver's door lock
towards the front of the vehicle to unlock
it.
Selective unlocking of the boot
F Press this button to unlock and release the boot. The doors
remain locked. If selective unlocking of the boot is
deactivated
, pressing this button also unlocks
the doors. Activate or deactivate selective
unlocking of the boot via the touch screen:
Remember to close and lock the boot
again by pressing the closed padlock. F
I
n the Driving/Vehicle
menu,
select the " Vehicle settings "
tab, then " Comfort" and activate/
deactivate " Unlock boot only ".
With the remote control
F Press this button to unlock the
vehicle.
Rapid flashing of the direction indicators for a
few seconds signals:
-
t
he unlocking of the vehicle for versions
without an alarm,
-
t
he deactivation of the alarm for other
versions.
Depending on version, the door mirrors unfold,
and the welcome lighting comes on.
By default, selective unlocking of the boot is
activated.
Access