cooling Citroen C4 DAG 2014.5 2.G Owner's Manual
[x] Cancel search | Manufacturer: CITROEN, Model Year: 2014.5, Model line: C4 DAG, Model: Citroen C4 DAG 2014.5 2.GPages: 340, PDF Size: 12.89 MB
Page 18 of 340
16
C4-2_en_Chap01_controle-de-marche_ed01-2014
Warning and indicator lamps
Visual indicators which inform the driver of the occurrence of a malfunction (warn -
ing lamp) or of the operation of a system (operation or deactivation indicator lamp).
When the ignition is switched on
Certain
warning
lamps
come
on
for
a
few
seconds
when
the
ignition
is
switched
on.
When
the engine is started, these warning lamps should go off.
If
they
remain
on,
before
moving
of
f,
refer
to
the
information
on
the
warning
lamp
in
question.
Associated warnings
The
illu
mination,
fixed
or
flashing,
of
certain
warning
lamps
may
be
accompanied
by
an audible signal and the display of a message.
Warning lamps
When the engine is running or the vehicle is being driven, the illumination of one of the fol -
lowing warning lamps indicates a malfunction which requires action on the part of the driver .
The
warning comes on in the instrument panel.
If your vehicle has a screen, a
warning lamp coming on is al -
ways
accompanied
by
the
dis
-
play
of
an
additional
message,
to
assist
you
in
identifying
the
problem.
If
you
encounter
any
problems,
do
not
hesitate
to
contact
a
CITROËN
dealer
or
a
qualified
workshop.
W
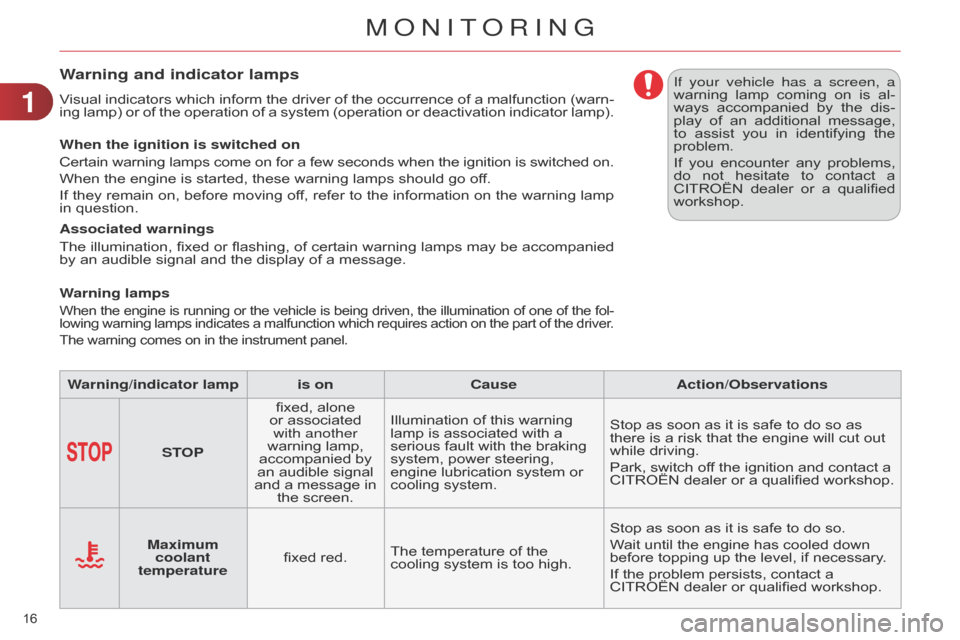
arning/indicator lamp is onCause Action/Observations
STOP fixed,
alone
or
associated
with another
warning
lamp,
accompanied
by
an
audible
signal
and
a
message
in
the
screen. Illumination
of
this
warning
lamp
is
associated
with
a
serious
fault
with
the
braking
system,
power
steering,
engine
lubrication
system
or
cooling
system. Stop
as
soon as it is safe to do so as
there
is
a
risk that the engine will cut out
while
driving.
Park,
switch off the ignition and contact a
CITROËN
dealer
or
a
qualified
workshop.
Maximum
coolant
temperature fixed
red. The
temperature
of
the
cooling
system
is
too
high. Stop
as
soon as it is safe to do so.
Wait
until
the engine has cooled down
before
topping up the level, if necessary.
If
the
problem persists, contact a
CITROËN
dealer or qualified workshop.
1
MONITORING
Page 49 of 340
33
47
C4-2_en_Chap03_confort_ed01-2014
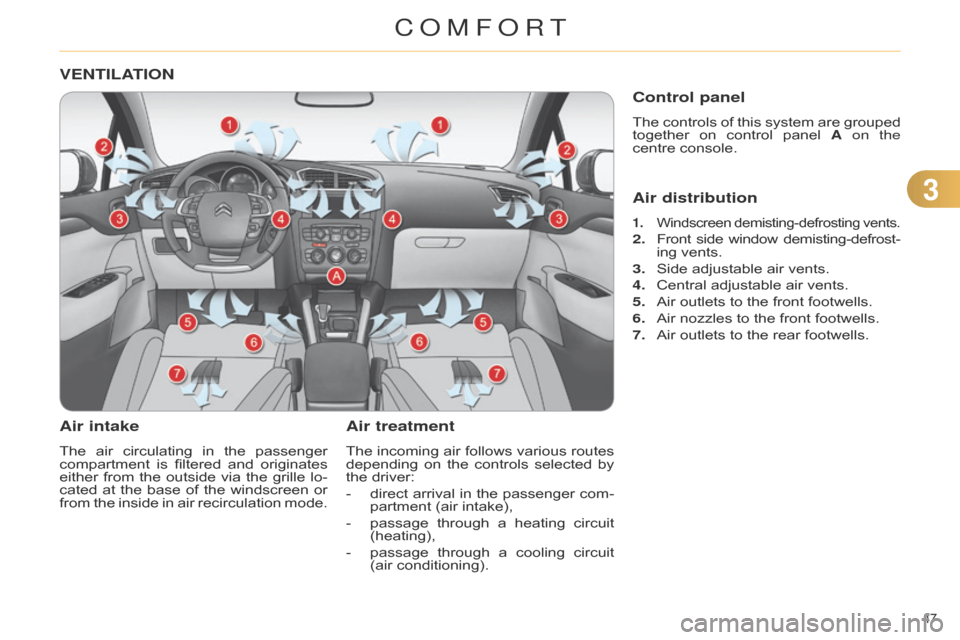
VENTILATION
Air intake
The air circulating in the passenger compartment
is filtered and originates
either
from
the
outside
via
the
grille lo
-
cated
at
the
base
of
the
windscreen
or
from
the
inside
in
air
recirculation
mode.
Air treatment
The incoming air follows various routes depending
on the controls selected by
the
driver:
-
direct
arrival
in
the
passenger
com
-
partment
(air intake),
-
passage
through
a
heating
circuit
(heating),
-
passage
through
a
cooling
circuit
(air
conditioning).
Control panel
The controls of this system are grouped together
on control panel A on the
centre
console.
Air distribution
1. Windscreen demisting-defrosting vents.
2. Front side window demisting-defrost -
ing vents.
3.
Side
adjustable air vents.
4.
Central
adjustable air vents.
5.
Air
outlets to the front footwells.
6.
Air
nozzles to the front footwells.
7.
Air
outlets to the rear footwells.
COMFORT
Page 55 of 340
33
53
C4-2_en_Chap03_confort_ed01-2014
For maximum cooling or heating of
the passenger compartment,
it
is
possible
to
exceed
the
mini
-
mum
value
14
or
the
maximum
value
28.
F
T
urn control 2 or 3 to the left
until "LO"
is
displayed
or
to
the
right
until
"HI"
is
dis
-
played.
See "Front demisting - defrosting".
4. Automatic visibility programmeManual operation
If you wish, you can make a dif ferent choice
from that of fered by the system
by
changing
a
setting.
The
the
"AUT
O"
indicator
lamps
go
of
f;
the
other
func
-
tions
will
still
be
controlled
automati
-
cally.
F
Pressing
the
"AUT
O" button returns
the
system
to
completely
automatic
operation.
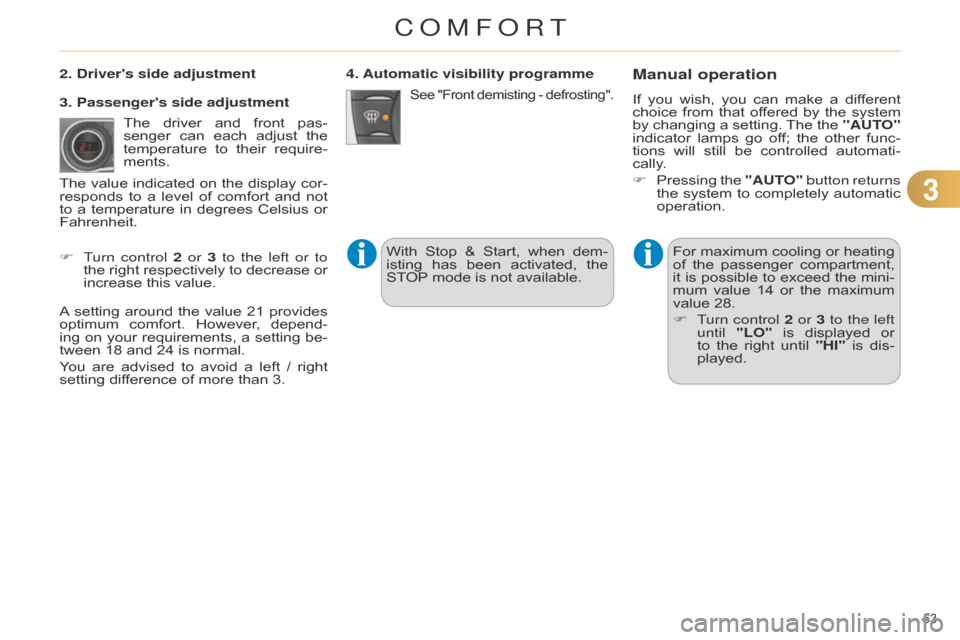
2. Driver's side adjustment
The
driver
and
front
pas
-
senger
can
each
adjust
the
temperature
to
their
require
-
ments.
F
T
urn control 2 or 3 to the left or to
the
right
respectively
to
decrease
or
increase
this
value.
A
setting
around
the
value
21
provides
optimum
comfort.
However
,
depend
-
ing
on
your
requirements,
a
setting
be
-
tween
18
and
24
is
normal.
You
are
advised
to
avoid
a
left
/
right
setting
difference
of
more
than
3.
3. Passenger's side adjustment
The
value
indicated
on
the
display
cor
-
responds
to
a
level
of
comfort
and
not
to
a
temperature
in
degrees
Celsius
or
Fahrenheit. With
Stop
&
Start,
when
dem
-
isting
has
been
activated,
the
ST
OP
mode
is
not
available.
COMFORT
Page 177 of 340
1010
175
C4-2_en_Chap10_verification_ed01-2014
BONNET
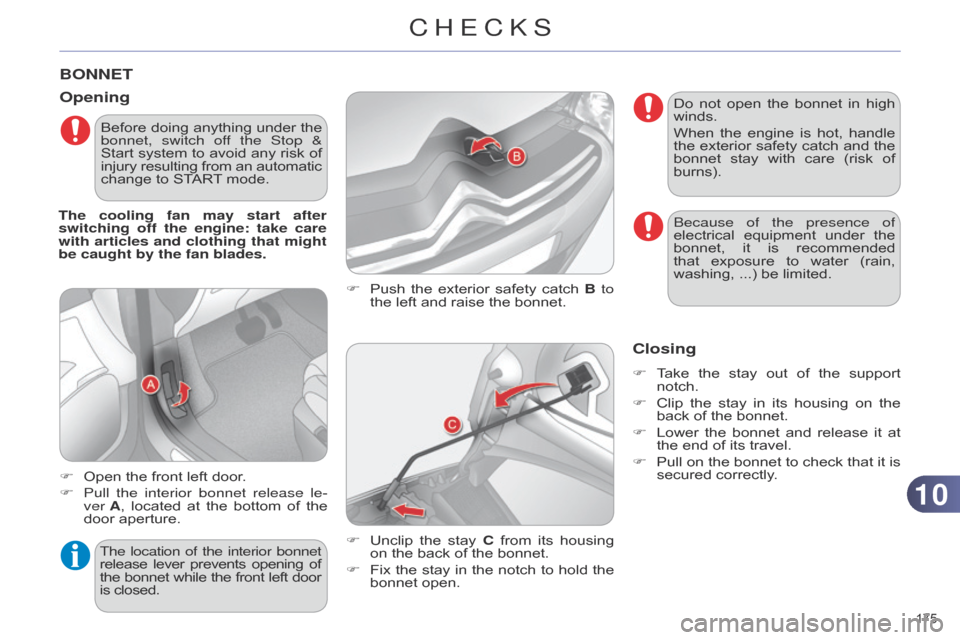
F Push the exterior safety catch B to
the left and raise the bonnet.
Opening
F Open the front left door.
F
Pull
the interior bonnet release le-
ver
A,
located
at
the
bottom
of
the
door
aperture. F
Unclip
the
stay
C
from
its
housing
on
the back of the bonnet.
F
Fix
the
stay
in
the
notch
to
hold
the
bonnet
open.
The location of the interior bonnet
release
lever
prevents
opening
of the
bonnet
while
the
front
left
door is
closed.
Closing
F Take the stay out of the support notch.
F
Clip
the
stay
in
its
housing
on
the
back
of the bonnet.
F
Lower
the
bonnet
and
release
it
at
the
end of its travel.
F
Pull
on
the
bonnet
to
check
that
it
is
secured
correctly.
Do
not
open
the
bonnet
in
high
winds.
When
the
engine
is
hot,
handle
the
exterior
safety
catch
and
the
bonnet
stay
with
care
(risk
of
burns).
Before
doing
anything
under
the
bonnet, switch of
f the Stop &
Start
system
to
avoid
any
risk
of
injury
resulting
from
an
automatic change
to
START
mode.
The cooling fan may start after
switching off the engine: take care
with articles and clothing that might
be caught by the fan blades.
b
ecause of the presence of
electrical
equipment
under
the
bonnet,
it
is
recommended
that
exposure
to
water
(rain,
washing,
...) be limited.
CHECKS
Page 180 of 340
1010
178
C4-2_en_Chap10_verification_ed01-2014
CHECKING LEVELS
Take care when working under the bonnet, as certain areas of
the
engine
may
be
extremely
hot
(risk
of
burns)
and
the
cooling
fan
could
start
at
any
time
(even
with
the ignition off).
The
check
is
carried
out
either
when
the
ignition
is
switched
on
using
the
oil
level
indicator
in
the
instrument
panel
for
ve
-
hicles with an electric oil level
gauge,
or using the dipstick.
Engine oil level
Checking using the dipstick
Refer
to
the
"Petrol
engine"
or
"Diesel
engine"
section
for
the
location
of
the
dipstick
in
the
engine
compartment
of
your
vehicle.
F
T
ake
the
dipstick
by
its
coloured
grip
and
remove it completely.
F
Wipe
the
end
of
the
dipstick
using
a
clean
non-fluffy cloth.
F
Refit
the
dipstick
and
push
fully
down,
then
pull
it
out
again
to
make
the
visual
check:
the
correct
level
is
between
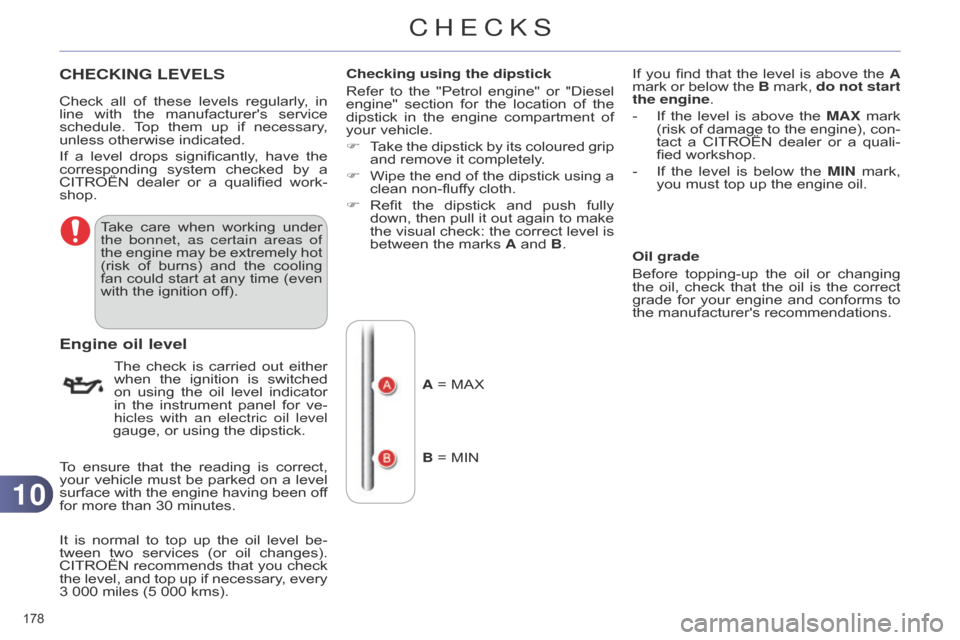
the marks A and B.
Check
all
of
these
levels
regularly
,
in
line
with
the
manufacturer's
service
schedule.
T
op
them
up
if
necessary
,
unless
otherwise
indicated.
If
a
level
drops
significantly
,
have
the
corresponding
system
checked
by
a
CITROËN
dealer
or
a
qualified
work
-
shop.
To
ensure
that
the
reading
is
correct,
your
vehicle
must
be
parked
on
a
level
surface
with
the
engine
having
been
of
f
for
more
than
30
minutes.
It
is
normal
to
top
up
the
oil
level
be
-
tween
two
services
(or
oil
changes).
CITROËN
recommends
that
you
check
the
level,
and
top
up
if
necessary
,
every
3
000
miles
(5
000
kms). A
= MAX
B
= MIN If
you find that the level is above the A
mark or below the B mark, do not start
the engine.
-
If
the
level
is
above
the
MAX
mark
(risk
of
damage
to
the
engine),
con
-
tact
a
CITROËN
dealer
or
a
quali
-
fied
workshop.
-
If
the
level
is
below
the
MIN
mark,
you
must top up the engine oil.
Oil grade
Before
topping-up
the
oil
or
changing
the
oil,
check
that
the
oil
is
the
correct
grade
for
your
engine
and
conforms
to
the
manufacturer's recommendations.
CHECKS
Page 181 of 340
1010
179
C4-2_en_Chap10_verification_ed01-2014
Brake fluid level
Changing the fluid
Refer
to
the
manufacturer's
service
schedule
for
details
of
the
interval
for
this
operation.
Fluid specification
The
brake
fluid
must
conform
to
the
manufacturer's
recommendations.
Power steering fluid level
The power steering fluid level should
be close to the "MAX" mark.
With
the
engine
cold,
un
-
screw
the
cap
to
check
the
level.
Coolant level
The coolant level should be close
to the "MAX" mark but
should
never exceed it.
When
the
engine
is
warm,
the
temperature
of
the
coolant
is
regulated
by
the
fan.
In
addition,
as
the
cooling
system
is
pressurised,
wait
at
least
one
hour
after
switching
of
f
the
engine
before
carrying
out
any
work.
To
avoid
any
risk
of
scalding,
unscrew
the cap by two turns to allow the pres
-
sure
to
drop.
When
the
pressure
has
dropped,
remove
the
cap
and
top
up
the
level.
Fluid specification
The
coolant
must
conform
to
the
manu
-
facturer's
recommendations.
The cooling fan may start after
switching off the engine: take
care with articles and clothing
that might be caught by the
fan blades.
The
brake
fluid
level
should
be
close
to
the
"MAX"
mark.
If
it
is
not,
check
the
brake
pad
wear.
Topping up the engine oil level
Refer
to
the
"Petrol
engine"
or
"Diesel
engine"
section
for
the
location
of
the
oil
filler
cap
in
the
engine
compartment
of
your
vehicle.
F
Unscrew
the
oil
filler
cap
to
reveal
the
filler
aperture.
F
Add
oil
in
small
quantities,
avoiding
any
spills
on
engine
components
(risk
of
fire).
F
W
ait
a
few
minutes
before
checking
the
level
again
using
the
dipstick.
F
Add
more
oil
if
necessary.
F
After
checking
the
level,
carefully
refit
the
oil
filler
cap
and
the
dipstick
in
its
tube.
After
topping
up
the
oil,
the
check
when
switching
on
the
ignition
with
the
oil
level
indicator
in
the
instrument
panel
is
not
valid
during
the
30
minutes
after
topping
up.
Engine oil change
Refer
to
the
manufacturer's
service
schedule
for
details
of
the
interval
for
this
operation.
In
order
to
maintain
the
reliability
of
the
engine
and
emission
control
system,
never
use
additives
in
the
engine
oil.
CHECKS
Page 218 of 340
1111
216
C4-2_en_Chap11_info-pratique_ed01-2014
VERY COLD CLIMATE SCREEN *
* According to country.
Fitting
F Offer up the very cold climate screen to the front of the lower sec
-
tion
of the front bumper.
F
Press
around
its
edge
to
engage
its
fixing
clips one by one.
Removal
F Use a screwdriver as a lever to re -
lease each fixing clip in turn.
Do
not
forget
to
remove
the
very
cold
climate screen when:
-
the
ambient
temperature
ex
-
ceeds
10 °C,
-
towing,
-
driving at speeds above 75 mph
(120
km/h).
Removable
protective
screen
which
prevents
the
accumulation
of
snow
at
the
radiator
cooling
fan.
FITTING ROOF BARS
For safety
reasons and to avoid dam -
aging the roof, it is essential to use the
transverse
bars
approved
for
your
ve
-
hicle.
When
fitting
roof
bars,
use
only
the
four
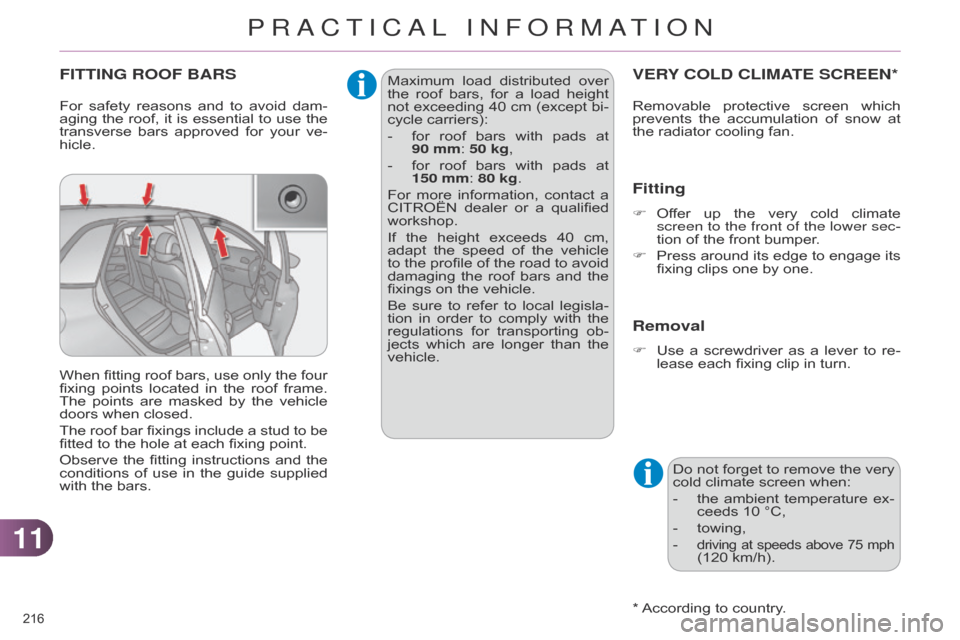
fixing
points
located
in
the
roof
frame.
The
points
are
masked
by
the
vehicle
doors
when closed.
The
roof
bar
fixings
include
a
stud
to
be
fitted
to the hole at each fixing point.
Observe
the
fitting
instructions
and
the
conditions
of
use
in
the
guide
supplied
with
the bars. Maximum
load
distributed
over
the
roof bars, for a load height not
exceeding 40 cm (except bi -
cycle
carriers):
-
for
roof
bars
with
pads
at
90
mm: 50 kg,
-
for
roof
bars
with
pads
at
150
mm: 80 kg.
For
more
information,
contact
a
CITROËN
dealer
or
a
qualified
workshop.
If
the
height
exceeds
40
cm,
adapt
the
speed
of
the
vehicle
to
the
profile
of
the
road
to
avoid
damaging
the
roof
bars
and
the
fixings
on the vehicle.
Be
sure
to
refer
to
local
legisla
-
tion
in
order
to
comply
with
the
regulations
for
transporting
ob
-
jects
which
are
longer
than
the
vehicle.
PRACTICAL INFORMATION
Page 221 of 340
1111
219
C4-2_en_Chap11_info-pratique_ed01-2014
TOWING A TRAILER
We recommend the use of genu -
ine CITROËN towbars and their
harnesses
that
have
been
tested
and
approved
from
the
design
stage
of
your
vehicle,
and
that
the
fitting
of
the
towbar
is
en
-
trusted
to
a
CITROËN
dealer
or
a
qualified workshop.
If
the
towbar
is
not
fitted
by
a
CITROËN
dealer
,
it
must
still
be
fitted
in
accordance
with
the
vehicle
manufacturer's
instruc
-
tions.
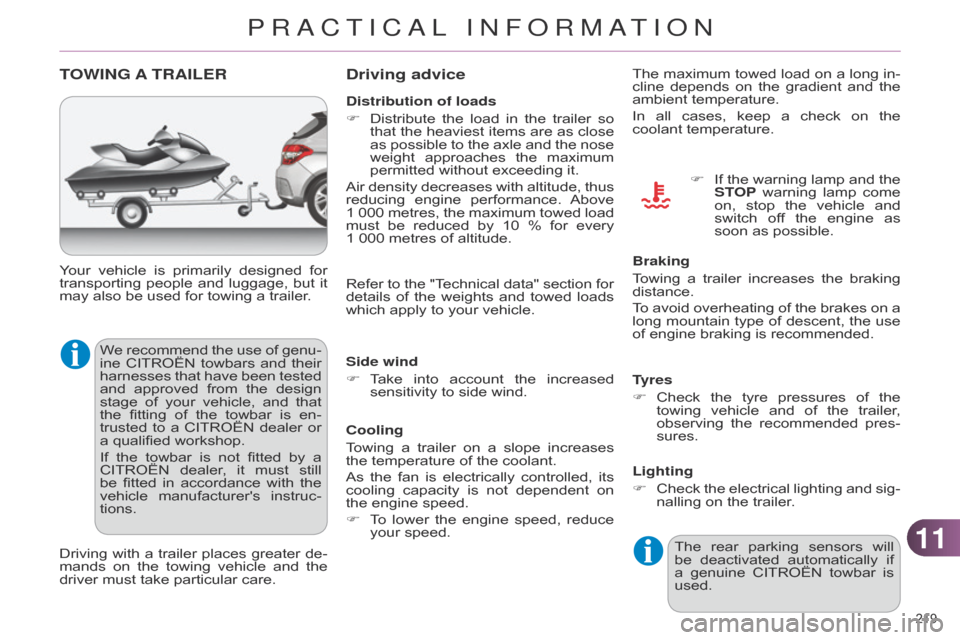
Your
vehicle
is
primarily
designed
for
transporting
people
and
luggage,
but
it
may
also be used for towing a trailer.
Driving
with
a
trailer
places
greater
de
-
mands
on
the
towing
vehicle
and
the
driver
must take particular care.
Driving advice
Distribution of loads
F
Distribute
the
load
in
the
trailer
so
that
the
heaviest
items
are
as
close
as
possible
to
the
axle
and
the
nose
weight
approaches
the
maximum
permitted
without exceeding it.
Air
density
decreases
with
altitude,
thus
reducing
engine
performance.
Above
1
000
metres,
the
maximum
towed
load
must
be
reduced
by
10
%
for
every
1 000
metres of altitude.
Side wind
F
T
ake
into
account
the
increased
sensitivity
to side wind.
Cooling
Towing
a
trailer
on
a
slope
increases
the
temperature of the coolant.
As
the
fan
is
electrically
controlled,
its
cooling
capacity
is
not
dependent
on
the
engine speed.
F
T
o
lower
the
engine
speed,
reduce
your
speed. The
maximum
towed
load
on
a
long
in
-
cline depends on the gradient and the ambient
temperature.
In all cases, keep a check on the
coolant
temperature.
F
If
the
warning
lamp
and
the
ST
OP
warning
lamp
come
on,
stop
the
vehicle
and
switch
of
f
the
engine
as
soon
as possible.
Braking
Towing
a
trailer
increases
the
braking
distance.
T
o
avoid
overheating
of
the
brakes
on
a
long
mountain
type
of
descent,
the
use
of
engine braking is recommended.
Tyres
F
Check
the
tyre
pressures
of
the
towing
vehicle
and
of
the
trailer
,
observing
the
recommended
pres
-
sures.
Lighting
F
Check
the
electrical
lighting
and
sig
-
nalling
on the trailer.
Refer
to
the
"T
echnical
data"
section
for
details
of
the
weights
and
towed
loads
which
apply to your vehicle.
The
rear
parking
sensors
will
be
deactivated
automatically
if
a
genuine
CITROËN
towbar
is
used.
PRACTICAL INFORMATION