cooling Citroen C4 PICASSO 2016 2.G Owner's Manual
[x] Cancel search | Manufacturer: CITROEN, Model Year: 2016, Model line: C4 PICASSO, Model: Citroen C4 PICASSO 2016 2.GPages: 527, PDF Size: 13.72 MB
Page 35 of 527
33
C4-Picasso-II_en_Chap01_instruments-bord_ed01-2016
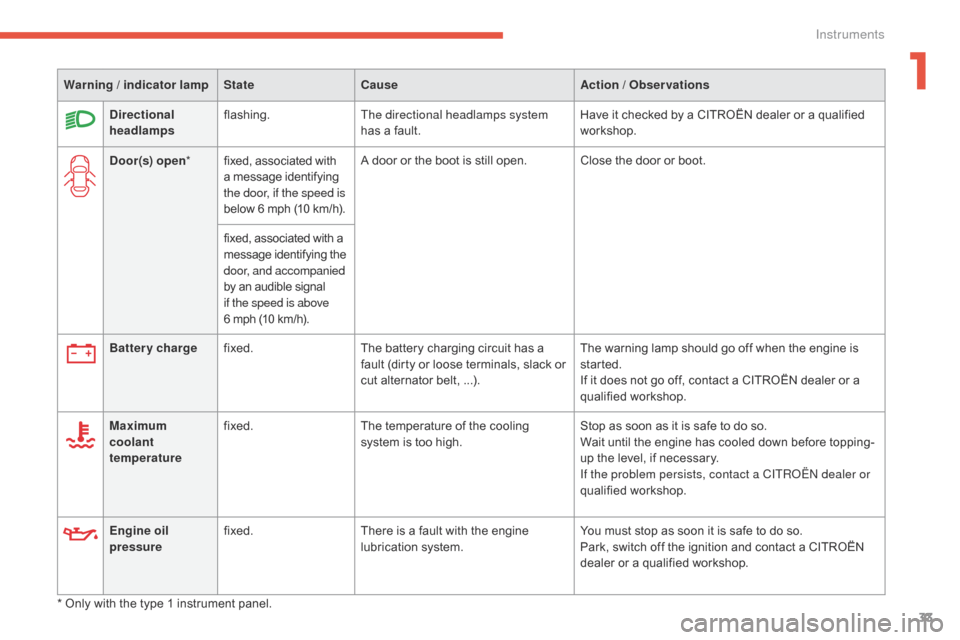
Warning / indicator lampStateCause Action / Observations
Battery charge fixed. The
battery charging circuit has a
f
ault (dirty or loose terminals, slack or
c
ut alternator belt, ...).The
warning lamp should go off when the engine is
s
tarted.
If
it does not go off, contact a CITROËN dealer or a
q
ualified
w
orkshop.
Maximum
coolant
temperature fixed.
The
temperature of the cooling
s
ystem is too high.Stop
as soon as it is safe to do so.
Wait
until the engine has cooled down before topping-
up
the level, if necessary.
If the problem persists, contact a CITROËN dealer or
qualified
w
orkshop.
Directional
headlamps
flashing.
The directional headlamps system
has
a fault.Have
it checked by a CITROËN dealer or a qualified
w
orkshop.
Door(s) open *fixed,
associated with
a m
essage
id
entifying
t
he door, if the speed is
below
6 mph (10 km/h).A
door or the boot is still open. Close the door or boot.
fixed,
associated with a
m
essage
id
entifying
th
e
d
oor, and accompanied
by
an audible signal
i
f the speed is above
6
mph (10 km/h).
*
Only with the type 1 instrument panel.
Engine oil
pressure
fixed.
There
is a fault with the engine
l
ubrication system.You
must stop as soon it is safe to do so.
Park,
switch off the ignition and contact a CITROËN
d
ealer or a qualified workshop.
1
Instruments
Page 42 of 527
40
C4-Picasso-II_en_Chap01_instruments-bord_ed01-2016
* Only with the type 2 instrument panel.
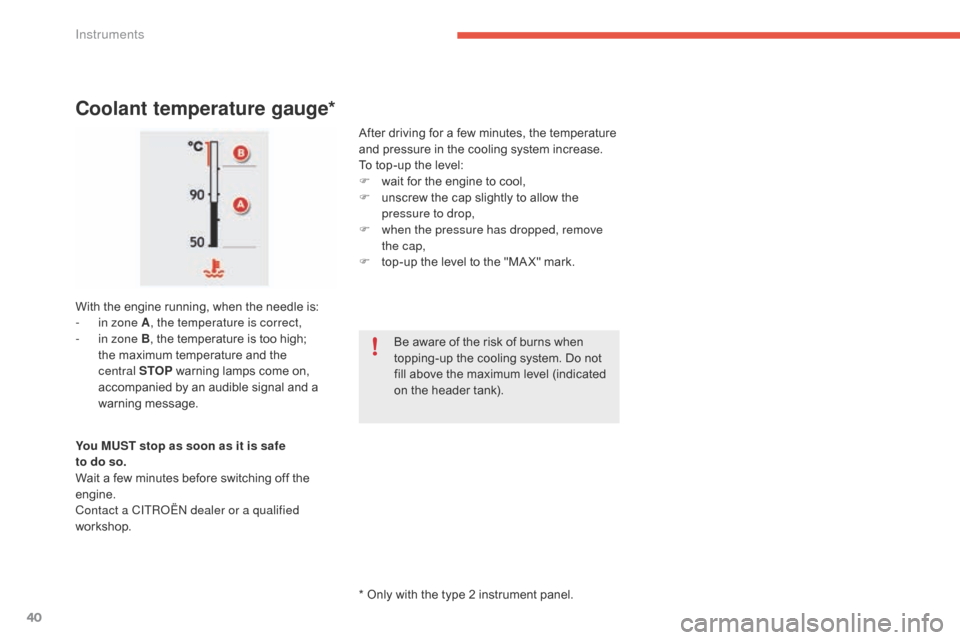
Coolant temperature gauge*
After driving for a few minutes, the temperature and pressure in the cooling system increase.
To
top-up the level:
F
w
ait for the engine to cool,
F
u
nscrew the cap slightly to allow the
p
ressure to drop,
F
w
hen the pressure has dropped, remove
the cap,
F
t
op-up the level to the "MA X" mark.
With
the
engine
running,
when
the
needle
is:
-
i
n zone A , the temperature is correct,
-
i
n zone B,
the
temperature
is
too
high;
t
he
maximum
temperature
and
the
c
entral STOP
warning
lamps
come
on,
a
ccompanied
by
an
audible
signal
and
a
w
arning
m
essage. Be
aware of the risk of burns when
t
opping-up the cooling system. Do not
f
ill above the maximum level (indicated
o
n the header tank).
You MUST stop as soon as it is safe
to do so.
Wait
a
few
minutes
before
switching
off
the
e
ngine.
Contact a CITROËN dealer or a qualified
workshop.
Instruments
Page 94 of 527
92
C4-Picasso-II_en_Chap03_ergonomie-confort_ed01-2016
Ventilation
Air intake
The air circulating in the passenger compartment is filtered and originates either
f
rom the outside via the grille located at the
b
ase of the windscreen or from the inside in air
recirculation
m
ode.
Air treatment
The incoming air follows various routes depending on the controls selected by the
d
river:
-
d
irect arrival in the passenger
c
ompartment (air intake),
-
p
assage through a heating circuit (heating),
-
p
assage through a cooling circuit (air
c
onditioning).
Control panel
The controls of this system are accessible in
the Air conditioning menu of the touch screen
tablet A .
The
demisting/defrosting controls for the
w
indscreen and rear screen are located on the
left
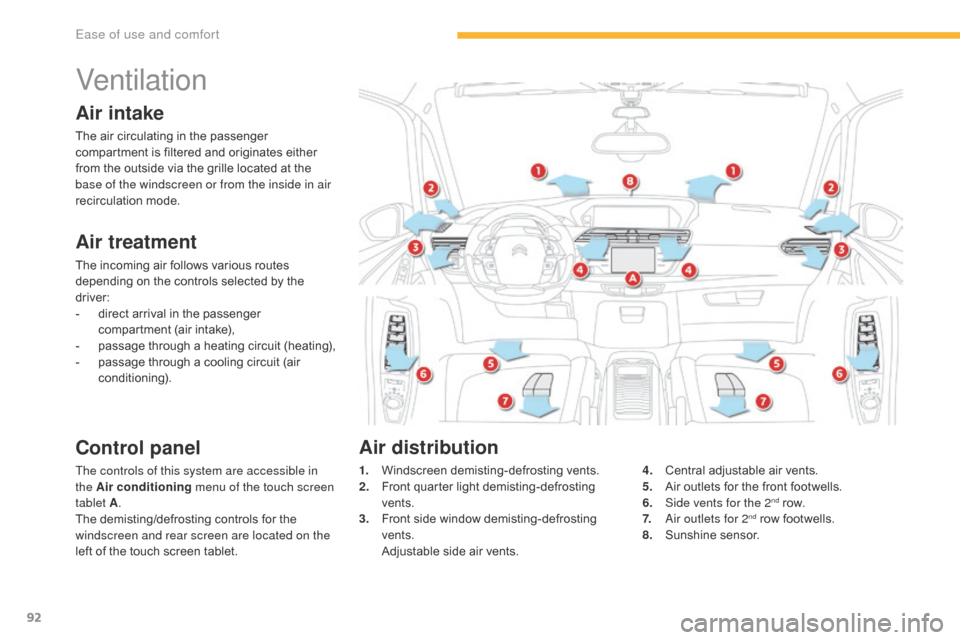
of the touch screen tablet. 1. W
indscreen d emisting-defrosting v ents.
2. F ront quarter light demisting-defrosting
ve
nts.
3.
F
ront side window demisting-defrosting
ve
nts.
A
djustable side air vents.4. C
entral adjustable air vents.
5. A ir outlets for the front footwells.
6.
S
ide vents for the 2
nd row.
7. A
ir outlets for 2nd row footwells.
8. S
unshine s
ensor.
Air distribution
Ease of use and comfort
Page 100 of 527
98
C4-Picasso-II_en_Chap03_ergonomie-confort_ed01-2016
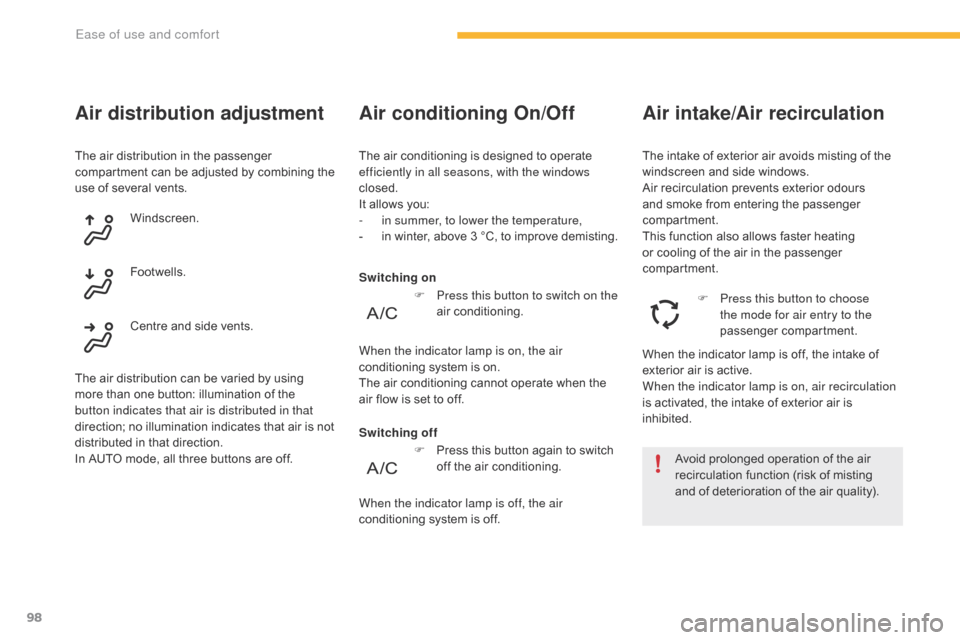
The air distribution in the passenger compartment can be adjusted by combining the
u
se of several vents.
Air distribution adjustment
Windscreen.
Footwells.
Centre
and side vents.
The
air
distribution can be varied by using
m
ore
than one button: illumination of the
b
utton indicates that air is distributed in that
direction;
no illumination indicates that air is not
d
istributed in that direction.
In
AUTO
mode, all three buttons are off.Switching off Switching on
Air conditioning On/Off
The air conditioning is designed to operate e
fficiently in all seasons, with the windows
closed.
It
allows you:
-
i
n summer, to lower the temperature,
-
i
n winter, above 3 °C, to improve demisting.
Avoid
prolonged operation of the air
r
ecirculation function (risk of misting
a
nd of deterioration of the air quality).
When
the indicator lamp is off, the intake of
e
xterior air is active.
When the indicator lamp is on, air recirculation
is
activated, the intake of exterior air is
in
hibited.F
P
ress this button to choose
the mode for air entry to the
passenger
c
ompartment.
The
intake of exterior air avoids misting of the w
indscreen and side windows.
Air
recirculation prevents exterior odours
a
nd smoke from entering the passenger
c
ompartment.
This
function also allows faster heating
o
r cooling of the air in the passenger
c
ompartment.
Air intake/Air recirculation
F Press this button again to switch o
ff the air conditioning.
When the indicator lamp is off, the air
conditioning
system is off.
F
P
ress this button to switch on the
air
c
onditioning.
When the indicator lamp is on, the air
conditioning system is on.
The
air
conditioning cannot operate when the
a
ir
flow
is
set to off.
Ease of use and comfort
Page 126 of 527
124
C4-Picasso-II_en_Chap04_conduite_ed01-2016
When towing
Distribution of loads
F Distribute the load in the trailer so that the heaviest items are as close as possible to
the
axle and the nose weight approaches the
m
aximum permitted without exceeding it.
Air density decreases with altitude, thus
reducing
engine per formance. Above
1 0
00 metres, the maximum towed load must
b
e reduced by 10 % for every 1 000 metres of
altitude.
Side wind
F Take into account the increased sensitivity t
o side wind.
For more information on Weights
, refer
to the corresponding section.
The rear parking sensors will be
d
eactivated automatically to avoid the
audible
signal if a genuine CITROËN
t
owbar is used.
Cooling
Towing a trailer on a slope increases the temperature of the coolant.
As
the fan is electrically controlled, its cooling
c
apacity is not dependent on the engine speed.
F
T
o lower the engine speed, reduce your
s
peed.
The
maximum towed load on a long incline
d
epends on the gradient and the ambient
t
emperature.
In
all cases, keep a check on the coolant
t
emperature. F
I
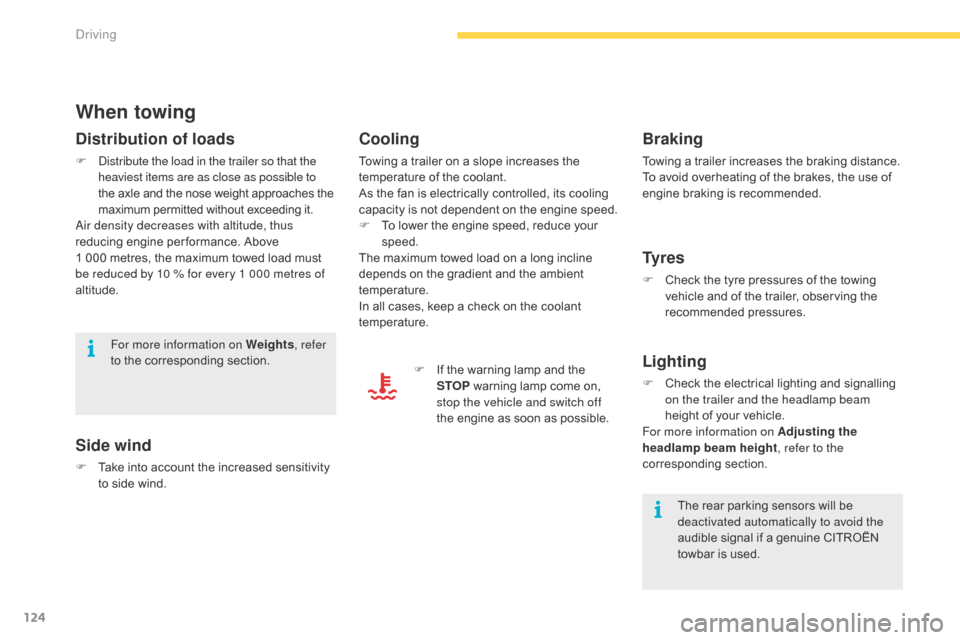
f the warning lamp and the
S
TOP
warning lamp come on,
s
top the vehicle and switch off
the
engine as soon as possible.
Braking
Towing a trailer increases the braking distance.
T o avoid overheating of the brakes, the use of
e
ngine braking is recommended.
Ty r e s
F Check the tyre pressures of the towing v
ehicle and of the trailer, observing the
re
commended
p
ressures.
Lighting
F Check the electrical lighting and signalling o
n the trailer and the headlamp beam
height
of your vehicle.
For more information on Adjusting the
headlamp beam height , refer to the
corresponding
s
ection.
Driving
Page 263 of 527
261
C4-Picasso-II_en_Chap07_info-pratiques_ed01-2016
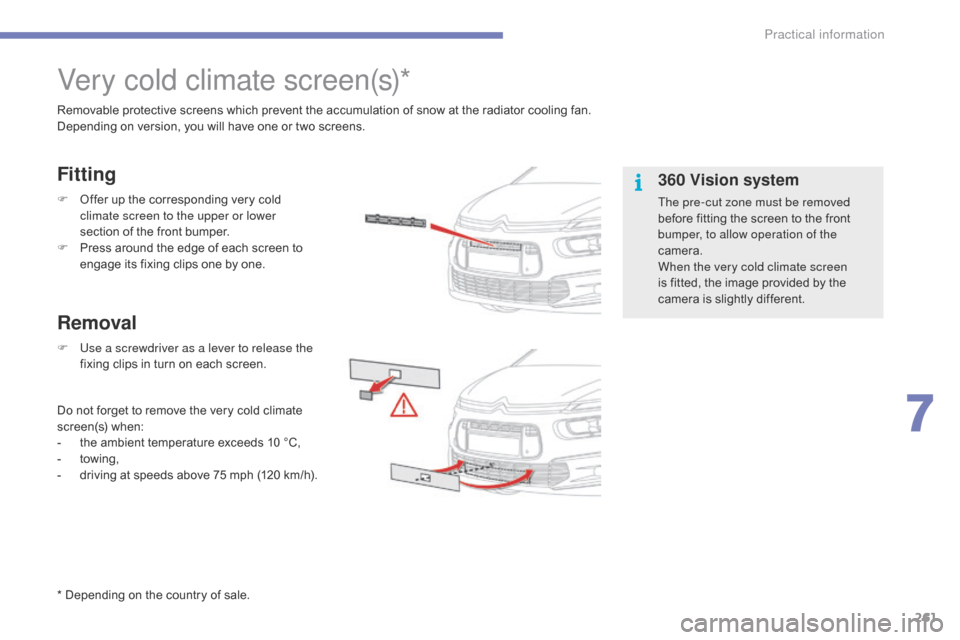
Very cold climate screen(s)*
Removable protective screens which prevent the accumulation of snow at the radiator cooling fan.
D epending on version, you will have one or two screens.
F
O
ffer up the corresponding very cold
c
limate screen to the upper or lower
section
of the front bumper.
F
P
ress around the edge of each screen to
e
ngage its fixing clips one by one.
F
U
se a screwdriver as a lever to release the
fixing
clips in turn on each screen.
Do
not forget to remove the very cold climate
s
creen(s)
w
hen:
-
t
he ambient temperature exceeds 10 °C,
-
tow
ing,
-
d
riving
a
t
s
peeds
a
bove
7
5
m
ph
(
120 km/h).
Removal Fitting
360 Vision system
The pre-cut zone must be removed
before fitting the screen to the front
b
umper, to allow operation of the
camera.
When the very cold climate screen
is
fitted, the image provided by the
c
amera is slightly different.
* Depending
on
the
country
of
sale.
7
Practical information
Page 273 of 527
271
C4-Picasso-II_en_Chap07_info-pratiques_ed01-2016
Bonnet
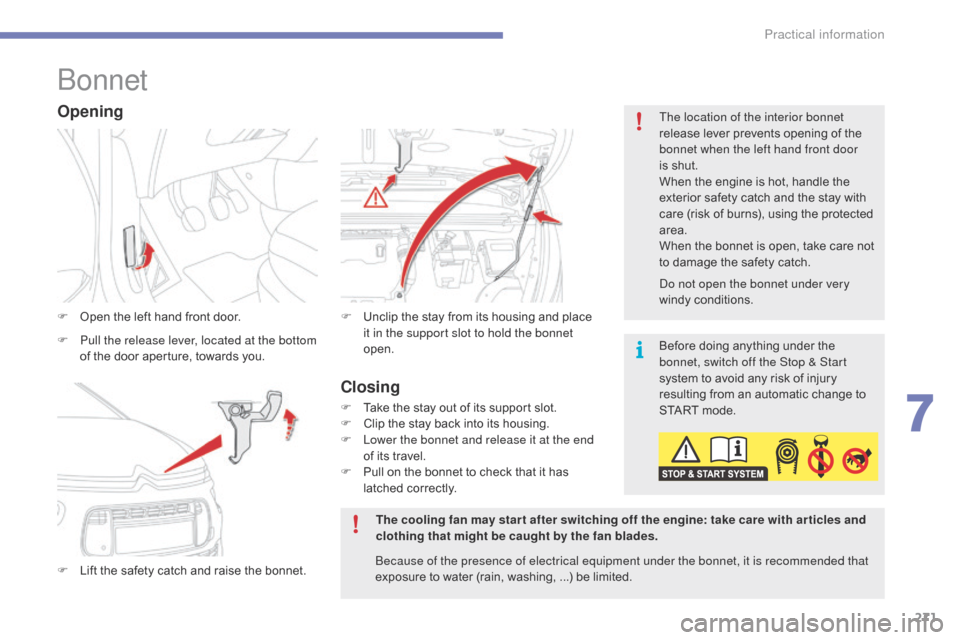
F Open the left hand front door.
F
L
ift the safety catch and raise the bonnet.F
U nclip the stay from its housing and place i
t in the support slot to hold the bonnet
open.
Opening
F Pull the release lever, located at the bottom of the door aperture, towards you. Before
doing anything under the
b
onnet, switch off the Stop & Start
system
to avoid any risk of injury
r
esulting from an automatic change to
S
TART mode.
The cooling fan may star t after switching off the engine: take care with ar ticles and
clothing that might be caught by the fan blades. Do not open the bonnet under very
windy
c
onditions.
The location of the interior bonnet
release lever prevents opening of the
b
onnet when the left hand front door
is shut.
When the engine is hot, handle the
e
xterior safety catch and the stay with
c
are (risk of burns), using the protected
a
rea.
When the bonnet is open, take care not
t
o damage the safety catch.
Because of the presence of electrical equipment under the bonnet, it is recommended that
exposure to water (rain, washing, ...) be limited.
Closing
F Take the stay out of its support slot.
F C lip the stay back into its housing.
F
L
ower the bonnet and release it at the end
of
its travel.
F
P
ull on the bonnet to check that it has
l
atched correctly.
7
Practical information
Page 276 of 527
274
C4-Picasso-II_en_Chap07_info-pratiques_ed01-2016
Checking levels
Take care when working under the bonnet, as certain areas of the engine may be extremely hot (risk of burns) and the cooling fan could start at any time (even with the ignition off).
Engine oil level
The check is carried out either when the ignition is switched on using the
o
il level indicator in the instrument
panel for vehicles so equipped, or
using
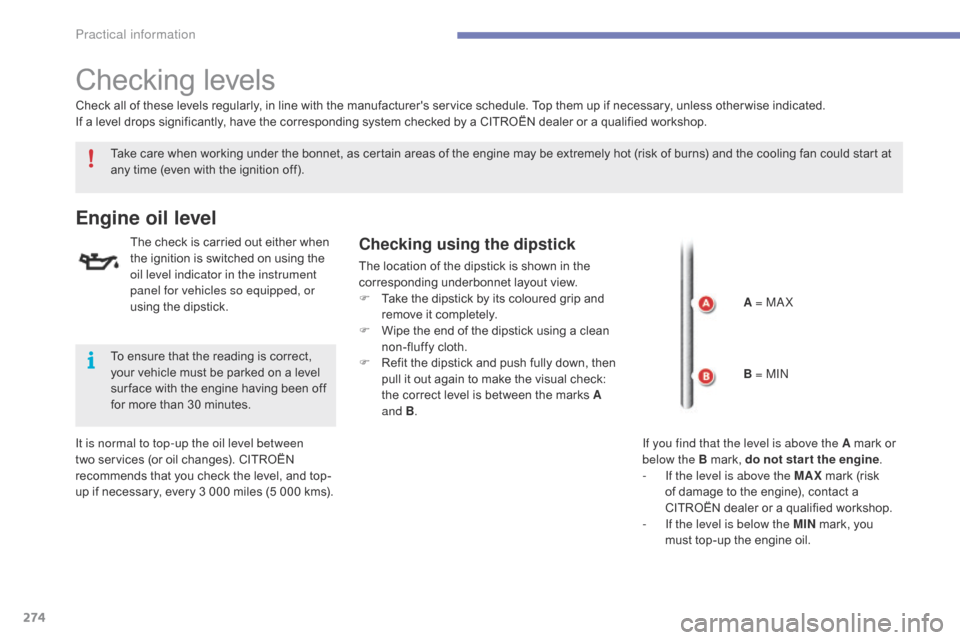
the dipstick.Checking using the dipstick
The location of the dipstick is shown in the corresponding underbonnet layout view.
F
T
ake the dipstick by its coloured grip and
r
emove it completely.
F
W
ipe the end of the dipstick using a clean
n
on-fluffy cloth.
F
R
efit the dipstick and push fully down, then
p
ull it out again to make the visual check:
t
he correct level is between the marks A
and B .
It is normal to top-up the oil level between
two
services
(or
oil
changes).
CITROËN
r
ecommends
that
you
check
the
level,
and
top-
up
if
necessary,
every
3
000
miles
(5
000
kms).
Check
all
of
these
levels
regularly,
in
line
with
the
manufacturer's service schedule. Top them up if necessary, unless other wise indicated.
If
a
level
drops
significantly,
have
the
corresponding system checked by a CITROËN dealer or a qualified workshop.
To
ensure
that
the
reading
is
correct,
y
our
vehicle
must
be
parked
on
a
level
s
ur face
with
the
engine
having
been
off
f
or
more
than
30
minutes. A = MA X
B = MIN
If you find that the level is above the A
mark or
belo
w the B mark, do not star t the engine.
-
I
f the level is above the MAX
mark (risk
o
f damage to the engine), contact a
C
ITROËN dealer or a qualified workshop.
-
I
f the level is below the MIN
mark, you
m
ust top-up the engine oil.
Practical information
Page 278 of 527
276
C4-Picasso-II_en_Chap07_info-pratiques_ed01-2016
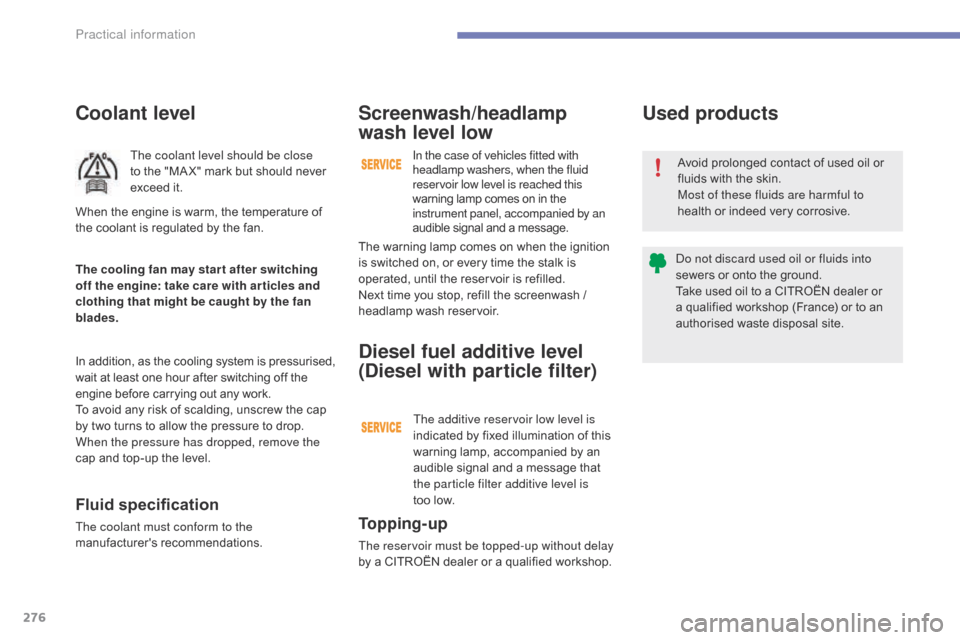
Coolant level
The coolant level should be close
to the "MA X" mark but should never
e
xceed it.
In
addition, as the cooling system is pressurised,
w
ait
at
least one hour after switching off the
e
ngine
before carrying out any work.
To
avoid
any risk of scalding, unscrew the cap
b
y
two
turns to allow the pressure to drop.
W
hen the pressure has dropped, remove the
cap
and
top-up the level.
Fluid specification
The coolant must conform to the
manufacturer's r ecommendations.
The cooling fan may star t after switching
off the engine: take care with ar ticles and
clothing that might be caught by the fan
blades. When the engine is warm, the temperature of
t
he coolant is regulated by the fan.To p p i n g - u p
The reservoir must be topped-up without delay
by
a CITROËN dealer or a qualified workshop.
Diesel fuel additive level
(Diesel with particle filter)
The additive reservoir low level is
indicated by fixed illumination of this
w
arning lamp, accompanied by an
a
udible signal and a message that
t
he particle filter additive level is
too low.
The
warning lamp comes on when the ignition
i
s
switched on, or every time the stalk is
o
perated,
until the reservoir is refilled.
Next
time
you stop, refill the screenwash /
h
eadlamp
wash reservoir.
Screenwash/headlamp
wash level low
In the case of vehicles fitted with
headlamp washers, when the fluid
reservoir low level is reached this
warning
lamp comes on in the
in
strument panel, accompanied by an
audible
signal and a message. Avoid
prolonged contact of used oil or
f
luids with the skin.
Most of these fluids are harmful to
health
or indeed very corrosive.
Do not discard used oil or fluids into
sewers
or onto the ground.
Take
used oil to a CITROËN dealer or
a
qualified workshop (France) or to an
a
uthorised waste disposal site.
Used products
Practical information
Page 318 of 527
316
C4-Picasso-II_en_Chap08_en-cas-panne_ed01-2016
F Start the engine of the vehicle with the g
ood battery and leave it running for a few
m
inutes.
F
O
perate the starter on the broken down
v
ehicle and let the engine run.
I
f the engine does not start straight away,
s
witch off the ignition and wait a few
m
oments before trying again.
F
W
ait until the engine returns to idle then
d
isconnect the jump lead cables in the
r
everse
o
rder.
F
R
efit the plastic cover to the (+) terminal, if
your
vehicle has one.
F
A
llow the engine to run for at least
3
0 minutes, by driving or with the vehicle
s
tationary, so that the battery reaches an
adequate
state of charge.
Starting using another battery
Some functions, including Stop & Start, are not available if the battery is not
sufficiently
c
harged.
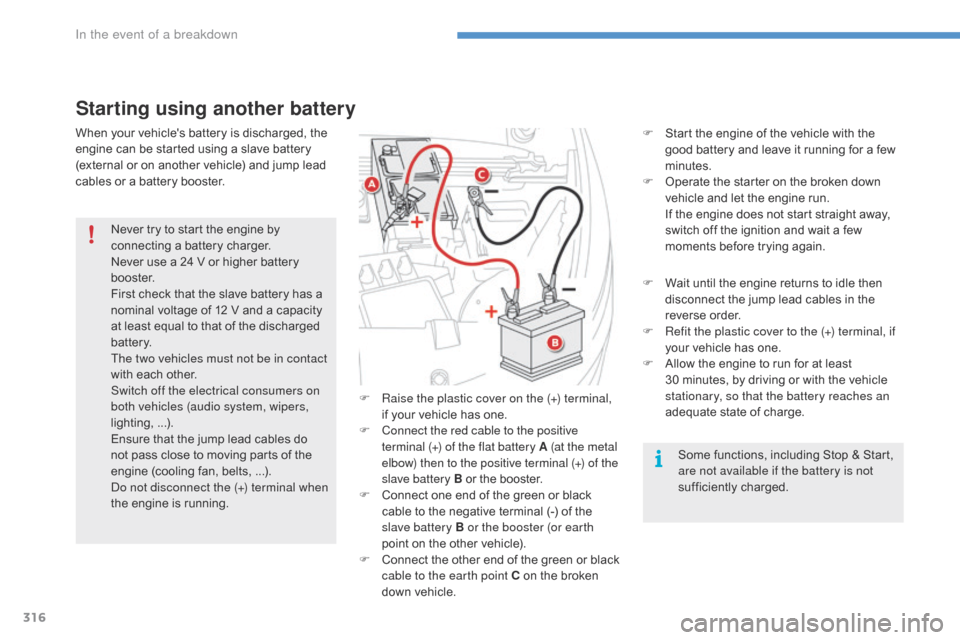
F
R
aise the plastic cover on the (+) terminal,
if
your
vehicle
has
one.
F
C
onnect the red cable to the positive
terminal (+) of the flat battery A (at the metal
elbow) then to the positive terminal
(+) of the
slave battery B
or
the
booster.
F
C
onnect
one
end
of
the
green
or
black
c
able
to
the
negative
terminal
(-)
of
the
s
lave battery B or the booster (or earth
point
on
the
other
vehicle).
F
C
onnect
t
he
o
ther
e
nd
o
f
t
he
g
reen
o
r
b
lack
c
able to the earth point C
on
the
broken
d
own
vehicle.
Never
try
to
start
the
engine
by
c
onnecting
a
battery
charger.
Never
use
a
24
V
or
higher
battery
b
o o s t e r.
First
check
that
the
slave
battery
has
a
n
ominal
voltage
of
12
V
and
a
capacity
a
t
least
equal
to
that
of
the
discharged
b
attery.
The two vehicles must not be in contact
with
each
other.
Switch off the electrical consumers on
both vehicles (audio system, wipers,
lighting, ...).
Ensure
that
the
jump
lead
cables
do
n
ot
pass
close
to
moving
parts
of
the
e
ngine
(cooling
fan,
belts, ...).
Do not disconnect the (+) terminal when
the
engine
is
running.
When
your
vehicle's
battery
is
discharged,
the
e
ngine
can
be
started
using
a
slave
battery
(
external
or
on
another
vehicle)
and
jump
lead
c
ables
or
a
battery
booster.
In the event of a breakdown