fuse CITROEN C4 PICASSO 2019 Owners Manual
[x] Cancel search | Manufacturer: CITROEN, Model Year: 2019, Model line: C4 PICASSO, Model: CITROEN C4 PICASSO 2019Pages: 316, PDF Size: 10.36 MB
Page 4 of 316

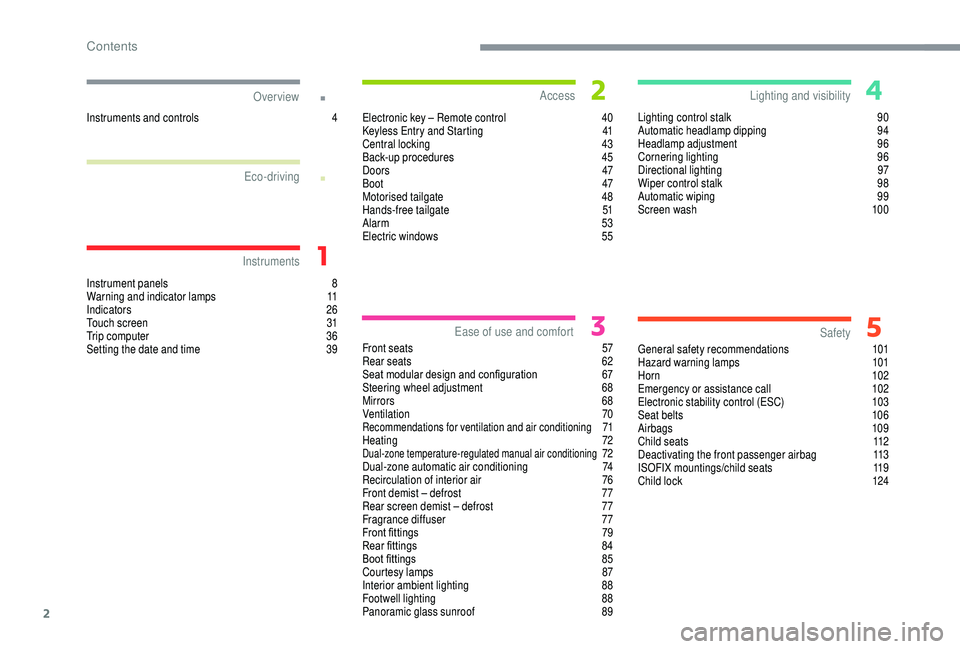
2
.
.
Instrument panels 8
W arning and indicator lamps 1 1
Indicators
26
Touch screen
3
1
Trip computer
3
6
Setting the date and time
3
9
Instruments and controls
4 E
lectronic key – Remote control
4
0
Keyless Entry and Starting
4
1
Central locking
43
Ba
ck-up procedures
4
5
Doors
47
Boot
47
Motorised tailgate
4
8
Hands-free tailgate
5
1
Alarm
53
Electric windows
5
5
Front seats
5
7
Rear seats
62
S
eat modular design and configuration
6
7
Steering wheel adjustment
6
8
Mirrors
68
Ventilation
70
Recommendations for ventilation and air conditioning 71
H
eating 72
Dual-zone temperature-regulated manual air conditioning 72
D
ual-zone automatic air conditioning 7 4
Recirculation of interior air
7
6
Front demist – defrost
7
7
Rear screen demist – defrost
7
7
Fragrance diffuser
7
7
Front fittings
7
9
Rear fittings
8
4
Boot fittings
8
5
Courtesy lamps
87
In
terior ambient lighting
8
8
Footwell lighting
8
8
Panoramic glass sunroof
8
9 Lighting control stalk
9
0
Automatic headlamp dipping
9
4
Headlamp adjustment
9
6
Cornering lighting
9
6
Directional lighting
9
7
Wiper control stalk
9
8
Automatic wiping
9
9
Screen wash
1
00
General safety recommendations
1
01
Hazard warning lamps
1
01
Horn
102
Emergency or assistance call
1
02
Electronic stability control (ESC)
1
03
Seat belts
1
06
Airbags
109
Child seats 1 12
Deactivating the front passenger airbag 1 13
ISOFIX mountings/child seats 1
19
Child lock
1
24
Over view
Instruments Access
Ease of use and comfort Safety
Lighting and visibility
Eco-driving
Contents
Page 5 of 316

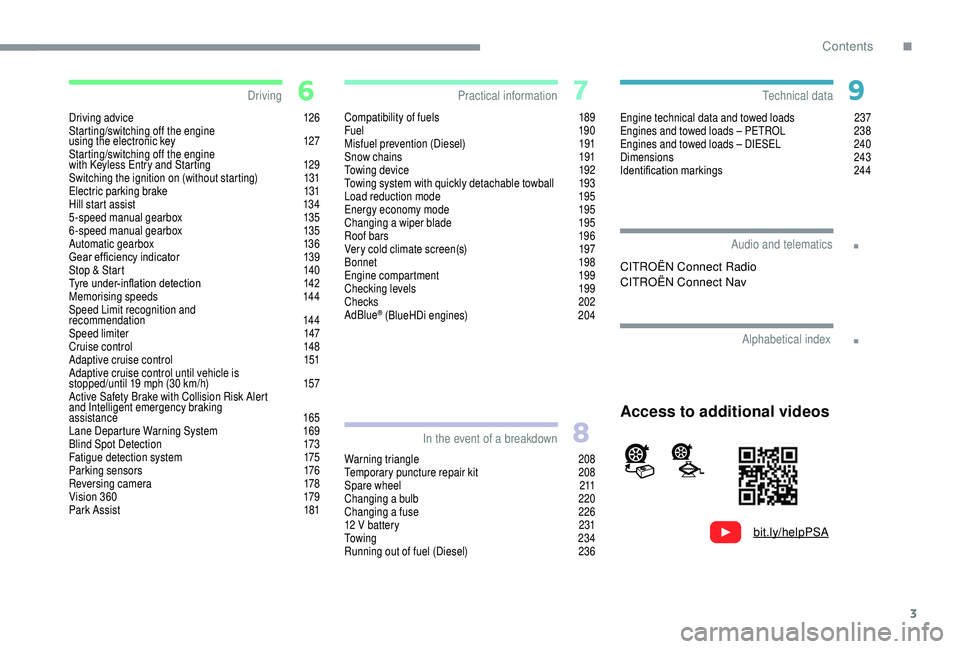
3
.
.
bit.ly/helpPSA
Driving advice 126
Starting/switching off the engine
using the electronic key
1
27
Starting/switching off the engine
with
K
eyless Entry and Starting
1
29
Switching the ignition on (without starting)
1
31
Electric parking brake
1
31
Hill start assist
1
34
5-speed manual gearbox
1
35
6-speed manual gearbox
1
35
Automatic gearbox
1
36
Gear ef ficiency indicator
1
39
Stop & Start
1
40
Tyre under-inflation detection
1
42
Memorising speeds
1
44
Speed Limit recognition and
recommendation
144
Speed limiter
1
47
Cruise control
1
48
Adaptive cruise control
1
51
Adaptive cruise control until vehicle is
stopped/until 19
mph (30 km/h)
1
57
Active Safety Brake with Collision Risk Alert
and Intelligent emergency braking
assistance
165
Lane Departure Warning System
1
69
Blind Spot Detection
1
73
Fatigue detection system
1
75
Parking sensors
1
76
Reversing camera
1
78
Vision 360
1
79
Park Assist
1
81Compatibility of fuels 1
89
Fuel 19 0
Misfuel prevention (Diesel)
1
91
Snow chains
1
91
Towing device
1
92
Towing system with quickly detachable towball
1
93
Load reduction mode
1
95
Energy economy mode
1
95
Changing a
wiper blade
1
95
Roof bars
1
96
Very cold climate screen(s)
1
97
Bonnet
19
8
Engine compartment
1
99
Checking levels
1
99
Checks
202
AdBlue
® (BlueHDi engines) 2 04
Warning triangle
2
08
Temporary puncture repair kit
2
08
Spare wheel
2
11
Changing a
bulb
2
20
Changing a
fuse
2
26
12
V battery
2
31
To w i n g
2 3 4
Running out of fuel (Diesel)
2
36Engine technical data and towed loads
2
37
Engines and towed loads – PETROL
2
38
Engines and towed loads – DIESEL
2
40
Dimensions
2
43
Identification markings
2
44
Driving
Practical information
In the event of a breakdown Technical data
Alphabetical index
Audio and telematics
Access to additional videos
CITROËN Connect Radio
CITROËN Connect Nav
.
Contents
Page 6 of 316

4
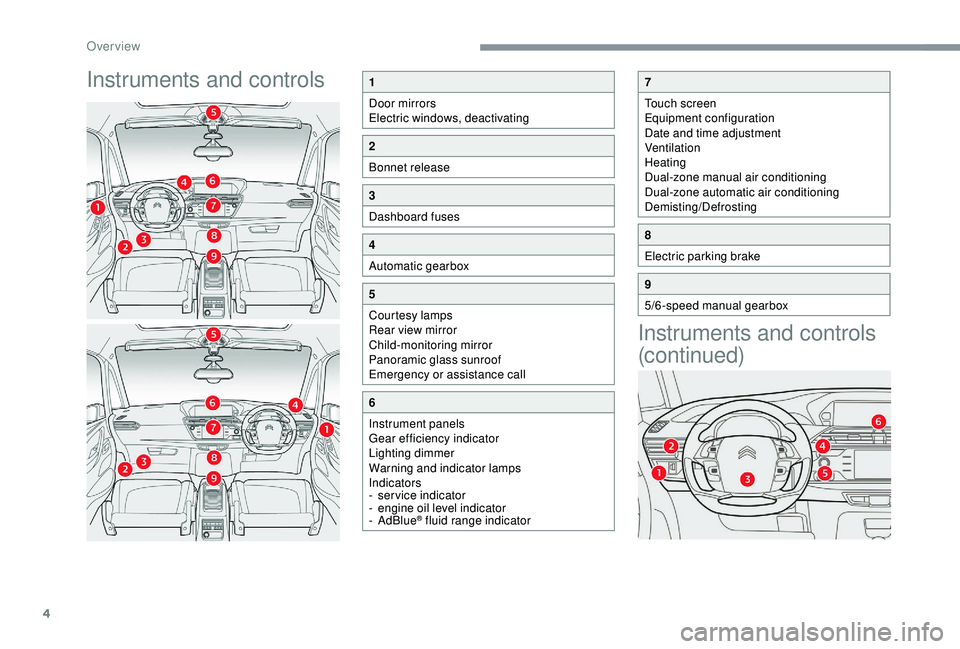
Instruments and controlsInstruments and controls
(continued)1
Door mirrors
Electric windows, deactivating
2
Bonnet release
3
Dashboard fuses
4
Automatic gearbox
5
Courtesy lamps
Rear view mirror
Child-monitoring mirror
Panoramic glass sunroof
Emergency or assistance call
6
Instrument panels
Gear efficiency indicator
Lighting dimmer
Warning and indicator lamps
Indicators
-
ser
vice indicator
-
e
ngine oil level indicator
-
AdBlue
® fluid range indicator
7
Touch screen
Equipment configuration
Date and time adjustment
Ventilation
Heating
Dual-zone manual air conditioning
Dual-zone automatic air conditioning
Demisting/Defrosting
8
Electric parking brake
9
5/6-speed manual gearbox
Over view
Page 79 of 316

77
Front demist – defrost
On/Off
F Press this button to demist or defrost the windscreen and side windows as quickly as
possible. The indicator lamp in the button
comes on.
The system automatically manages the air
conditioning (depending on version), air
flow and air intake, and provides optimum
distribution towards the windscreen and side
windows.
F
T
o switch off demisting/defrosting, press
this button again. The indicator lamp in the
button goes off.
With Stop & Start, when demisting/
defrosting has been activated, STOP
mode is not available.
Rear screen demist –
defrost
On/Off
F Press this button to demist /defrost the rear screen and, depending on version, the door
mirrors. The indicator lamp in the button
comes on.
Demisting/defrosting switches off automatically
to prevent excessive electrical consumption.
F
I
t is possible to stop the demisting/
defrosting operation before it is switched off
automatically by pressing this button again.
The indicator lamp in the button goes off.
Switch off the demisting/defrosting of
the rear screen and door mirrors as
soon as appropriate, as lower current
consumption results in reduced fuel
consumption. Rear screen demisting/defrosting can only
be operated when the engine is running.
Fragrance diffuser
Diffuses a fragrance in the passenger
c ompartment from the central air vents.
Your diffuser is fitted with an empty
cartridge when your vehicle is delivered.
You therefore need to install a
cartridge
before use.
Flow adjustment
F Turn button A to adjust (left to decrease, right to increase) or stop (completely to the
left) the fragranced air flow.
The central vents must be open.
3
Ease of use and comfort
Page 80 of 316

78
The average use per cartridge is 3 months
a t the rate of one hour per day.
Removing the diffuser
Inserting the diffuser
F Push button A by turning it a quarter turn
completely to the end.
F
R
emove the diffuser from the dashboard
F
R
eplace your cartridge (see "Replacing
a
cartridge"). After installing or replacing the cartridge:
F
p
ut the diffuser back in its housing,
F
t
urn it a quarter of a turn to the right.
Replacing a cartridge
The diffuser refill includes a cartridge B and its
s ealed cover C .
F
R
emove the protective film D .
F
P
lace the head of cartridge B on the diffuser
button A .
F
T
urn it a quarter turn to lock it on the button
and remove the cover.
F
I
nsert the diffuser in its housing.
You can replace cartridges at any time and
keep the cartridges already started in their
original cover.
Diffuser button
The diffuser button A is independent of the
cartridge. The cartridges are delivered without
the button A .
The diffuser button A can only be fixed into the
central control panel with a
cartridge.
Therefore always keep the button A and
a
cartridge.
Depending on the country, replacement
cartridges are available online or from
CITROËN dealers, as well as any qualified
workshop.
Storage is provided for the cartridges and
covers in the glove box.
Ease of use and comfort
Page 103 of 316

101
General safety
recommendations
Labels are affixed in different locations on
your vehicle. They include safety warnings
and vehicle identification information. Do
not remove them: they are an integral part
of your vehicle.
For any work on your vehicle, use
a qualified workshop that has the technical
information, skills and equipment required,
all of which a
CITROËN dealer is able to
provide.
Depending on country regulations, some
safety equipment may be compulsory:
high visibility safety vests, warning
triangles, breathalysers, spare bulbs,
spare fuses, fire extinguisher, first aid kit,
mud flaps at the rear of the vehicle, etc. We draw your attention to the following
points:
-
T
he fitting of electrical equipment
or accessories not approved by
CITROËN may cause excessive
current consumption and faults and
failures with the electrical system of
your vehicle. Contact a
CITROËN
dealer for information on the range of
recommended accessories.
-
A
s a safety measure, access to
the diagnostic socket, used for the
vehicle's electronic systems, is
reser ved strictly for CITROËN dealers
or qualified workshops, equipped
with the special tools required (risk
of malfunctions of the vehicle's
electronic systems that could cause
breakdowns or serious accidents).
The manufacturer cannot be held
responsible if this advice is not
followed.
-
A
ny modification or adaptation not
intended or authorised by CITROËN
or carried out without meeting the
technical requirements defined by
the manufacturer will result in the
suspension of the legal and contractual
warranties. Installation of accessory radio
communication transmitters
Before installing a
radio communication
transmitter, you must contact a CITROËN
dealer for the specifications of compatible
transmitters (frequency, maximum power,
aerial position, specific installation
requirements), in line with the Vehicle
Electromagnetic Compatibility Directive
(2004/104/EC).
Hazard warning lamps
F When you press this red button, all four direction indicators flash.
They can operate with the ignition off.
5
Safety
Page 164 of 316

162
70
70
Indicator lampDisplay Associated message Comments
(green) +
(orange) "Take back control of the
vehicle"
The driver must take
back control of the
vehicle by accelerating
or braking, depending on
the circumstances.
(green) +
(red) "Take back control of the
vehicle"
The system cannot
manage the critical
situation alone
(emergency braking of
the target vehicle, rapid
insertion of another
vehicle between the two
vehicles).
The driver must
immediately take back
control of the vehicle.
or
(grey) (orange)
"Activation not possible,
conditions unsuitable"
The system refuses
to activate the cruise
control (speed outside
the operating range,
winding road).
Driving
Page 176 of 316

174
Operating fault
In the event of a fault with the
s ystem, this warning lamp flashes
for a
few moments in the instrument
panel, accompanied by the Ser vice
warning lamp coming on and the
display of a
message.
Contact a
CITROËN dealer or a qualified
workshop to have the system checked. The system may suffer temporary
interference in certain weather conditions
(rain, hail, etc.).
In particular, driving on a
wet sur face or
the transition from a dry area to a wet area
can cause false alerts (e.g. the presence
of water droplets in the blind spot is
interpreted as a vehicle).
In bad or wintry weather, ensure that the
sensors are not covered with mud, ice or
snow.
Take care not to cover the warning zone in
the door mirrors or the detection zones on
the front and rear bumpers with adhesive
labels or other objects; they may hamper
the correct operation of the system.
High pressure jet wash
When washing your vehicle, keep the
nozzle at a
minimum distance of 12 inches
(30
cm) from the sensors.
No alert will be given in the following situations:
-
i
n the presence of non-moving objects
(parked vehicles, barriers, street lamps,
road signs, etc.), -
w
ith vehicles moving in the opposite
direction,
-
d
riving on a winding road or a sharp corner,
-
w
hen overtaking or being overtaken by
a
very long vehicle (lorry, bus, etc.) which
is both detected in the rear blind spot and
present in the driver's front field of vision,
-
w
hen overtaking quickly,
-
i
n very heavy traffic: vehicles detected in
front and behind are confused with a lorry or
a
stationary object,
-
i
f the Park Assist function is activated.
Driving
Page 201 of 316

199
Engine compartment
This engine is shown as an example.
The positions of the following elements may
change:
-
A
ir filter.
-
E
ngine oil dipstick.
-
E
ngine oil filler cap.
-
P
riming pump.
Petrol
Diesel
5.Fusebox.
6. A i r f i l t e r.
7. Engine oil dipstick.
8. Engine oil filler cap.
9. Remote earth point.
10. Priming pump*
The Diesel fuel system operates under
very high pressure.
All work on this circuit must be carried out
only by a
CITROËN dealer or a qualified
workshop.
Checking levels
Check all of these levels regularly, in line with
the manufacturer's service schedule. Top them
up if necessary, unless other wise indicated.
If a
level drops significantly, have the
corresponding system checked by a
CITROËN
dealer or a
qualified workshop.
The liquid must comply with the
manufacturer's recommendations and with
the vehicle's engine. Take care when working under the bonnet,
as certain areas of the engine may be
extremely hot (risk of burns) and the
cooling fan could start at any time (even
with the ignition off).
Used products
Avoid prolonged contact of used oil or
fluids with the skin.
Most of these fluids are harmful to health
or indeed very corrosive.
Do not discard used oil or fluids into
sewers or onto the ground.
Take used oil to a
CITROËN dealer or
a
qualified workshop and dispose of
it in the containers reser ved for this
purpose.
Engine oil level
The check is carried out either when
the ignition is switched in using the
oil level indicator in the instrument
panel for vehicles equipped with an
electric gauge, or using the dipstick.
*
D
epending on engine.
1. Screenwash and headlamp wash
reservoir.
2. Engine coolant reservoir.
3. Brake fluid reser voir.
4. Battery/Fuses.
7
Practical information
Page 228 of 316

226
Third brake lamp (light- emitting
diodes – LEDs)
Number plate lamps (W5W)
F Insert a thin screwdriver into one of the cut-
outs in the lens.
F
P
ush it outwards to unclip it.
F
R
emove the lens.
F
C
hange the faulty bulb.
To refit, press on the lens to clip it in place.
You can also contact a
CITROËN dealer or
a
qualified workshop for the replacement of
these bulbs.
For the replacement of this type of lamp,
contact a
CITROËN dealer or a
qualified
workshop.
Changing a fuse
Access to tooling
The extraction tweezers are fitted in the
dashboard fuses compartment.
F
U
nclip the cover by pulling at the top right,
then left,
F
C
ompletely remove the cover by carefully
pulling it in the axis indicated by the arrow,
F
R
emove the tweezers. F
O
pen the glove box
F U nclip the cover by pulling at the top left,
then right.
F
C
ompletely remove the cover by carefully
pulling it in the axis indicated by the arrow.
F
R
emove the tweezers.
Changing a fuse
Before changing a fuse, it is necessary to:
F i dentify the cause of the failure and correct
it,
F
s
witch off all electrical loads,
F
i
mmobilise the vehicle and switch off the
ignition,
F
i
dentify the defective fuse using the existing
allocation tables and diagrams.
In the event of a breakdown