belt CITROEN C4 PICASSO 2022 User Guide
[x] Cancel search | Manufacturer: CITROEN, Model Year: 2022, Model line: C4 PICASSO, Model: CITROEN C4 PICASSO 2022Pages: 316, PDF Size: 10.36 MB
Page 113 of 316

111
The airbags may no longer be deployed in the
event of a serious impact.
In the event of a
minor impact or bump on
the side of the vehicle or if the vehicle rolls
over, the airbags may not be deployed.
In the event of a
rear or front collision,
none of the lateral airbags are deployed.Advice
For the airbags to be fully effective,
observe the safety recommendations
below.
Adopt a
normal and upright sitting
position.
Fasten your seat belt, ensuring it is
positioned correctly.
Do not leave anything between the
occupants and the airbags (a child, pet,
object, etc.), nor fix or attach anything
close to or in the way of the airbag release
trajectory; this could cause injuries during
their deployment.
Never modify the original definition of your
vehicle, particularly in the area directly
around the airbags.
After an accident or if the vehicle has
been stolen or broken into, have the
airbag systems checked.
All work on the airbag systems must
be carried out by a
CITROËN dealer or
a
qualified workshop.
Even if all of the precautions mentioned
are obser ved, a risk of injury or of minor
burns to the head, chest or arms when an
airbag is deployed cannot be ruled out.
The airbag inflates almost instantly (within
a
few milliseconds) then deflates within
the same time discharging the hot gas via
openings provided for this purpose. Front airbags
Do not drive holding the steering wheel
by its spokes or resting your hands on the
centre part of the wheel.
Passengers must not place their feet on
the dashboard.
Do not smoke as deployment of the
airbags can cause burns or the risk of
injury from a
cigarette or pipe.
Never remove or pierce the steering
wheel or hit it violently.
Do not fix or attach anything to the
steering wheel or dashboard, this could
cause injuries with deployment of the
airbags.
Curtain airbags
Do not fix or attach anything to the roof,
as this could cause head injuries when
the curtain airbag is deployed.
If fitted to your vehicle, do not remove the
grab handles installed on the roof, they
play a
part in securing the curtain airbags.
5
Safety
Page 114 of 316
112
Lateral airbags
Use only approved covers on the seats,
compatible with the deployment of the
lateral airbags. For information on the
product range of seat covers suitable for
your vehicle, contact a CITROËN dealer.
Do not fix or attach anything to the seat
backrests (clothes, etc.) as this could
cause injuries to the thorax or arm when
the lateral airbag is deployed.
Do not sit with the upper part of the body
any nearer to the door than necessary.
The vehicle's front door panels include
side impact sensors.
A damaged door or any unauthorised or
incorrectly executed work (modification or
repair) on the front doors or their interior
trim could compromise the operation of
these sensors – risk of malfunction of the
lateral airbags!
Such work must only be done by
a
CITROËN dealer or a qualified
workshop.General points relating to
child seats
The regulations on carrying children are
specific to each country. Refer to the
legislation in force in your country.
For maximum safety, please obser ve the
following recommendations:
-
I
n accordance with European regulations,
all children under the age of 12
or less
than one and a
half metres tall must
travel in approved child seats suited to
their weight , on seats fitted with a
seat belt
or ISOFIX mountings.
-
S
tatistically, the safest seats in your
vehicle for carr ying children are the rear
seats.
-
A c
hild weighing less than 9 kg must
travel in the rear ward facing position
both in the front and in the rear.
It is recommended that children travel on
the rear seats of your vehicle:
-
"rearward facing " up to the age of 3,
-
"forward facing " over the age of 3. Ensure that the seat belt is positioned and
tightened correctly.
For child seats with a
support leg, ensure
that the support leg is in firm and steady
contact with the floor.
At the front: if necessary, adjust the
passenger seat.
At the rear: if necessary, adjust the
relevant front seat.
Remove and stow the head restraint
before installing a
child seat with backrest
on a
passenger seat.
Refit the head restraint once the child seat
has been removed.
Child seat at the rear
" Rearward facing"
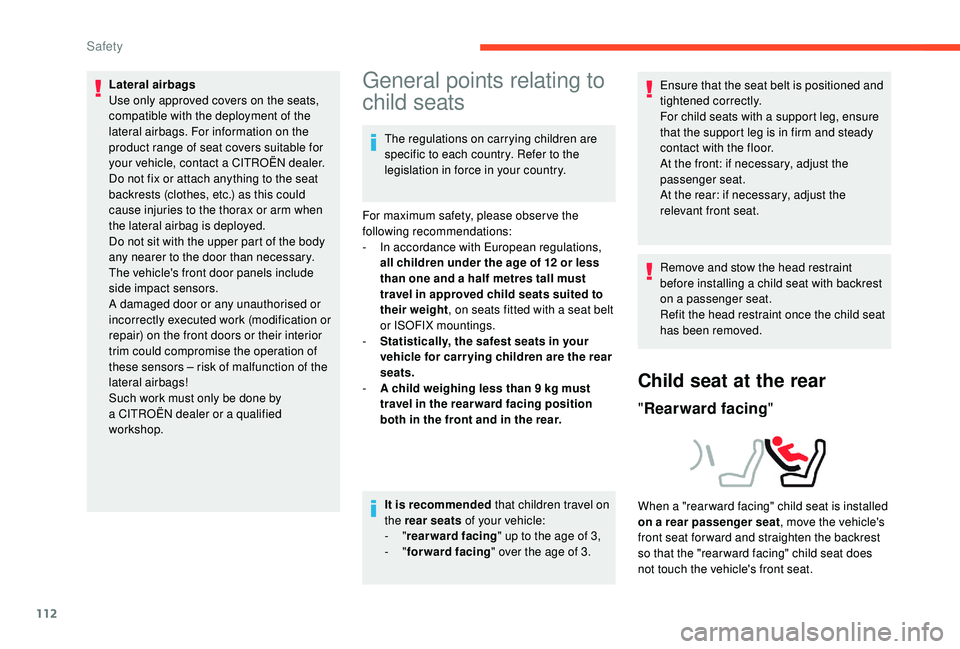
When a "rear ward facing" child seat is installed
on a
rear passenger seat , move the vehicle's
front seat for ward and straighten the backrest
so that the "rear ward facing" child seat does
not touch the vehicle's front seat.
Safety
Page 119 of 316
117
Recommended child seats
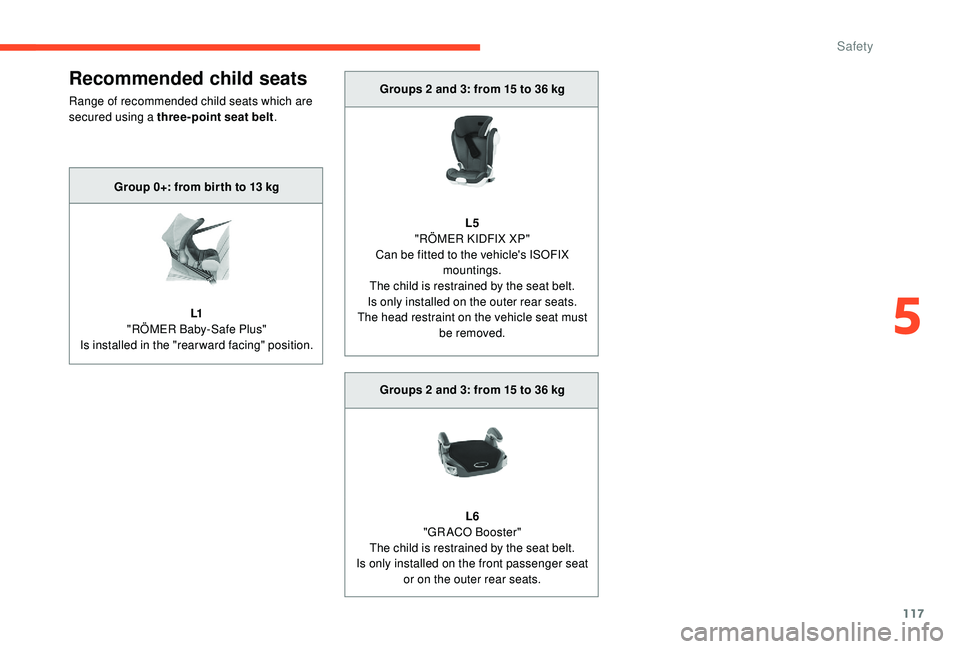
Range of recommended child seats which are
secured using a three-point seat belt .Groups 2
and 3: from 15 to 36 kg
L5
"RÖMER KIDFIX XP"
Can be fitted to the vehicle's ISOFIX mountings.
The child is restrained by the seat belt.
Is only installed on the outer rear seats.
The head restraint on the vehicle seat must be removed.
Group 0+: from bir th to 13
kg
L1
"RÖMER Baby-Safe Plus"
Is installed in the "rearward facing" position.
Groups 2
and 3: from 15 to 36 kg
L6
"GRACO Booster"
The child is restrained by the seat belt.
Is only installed on the front passenger seat or on the outer rear seats.
5
Safety
Page 120 of 316

118
Installing a child seat attached with the seat belt
In accordance with European regulations, this table indicates the options for installing child seats secured using the seat belt and universally approved
(a ) in relation to the weight of the child and the seat in the vehicle.
Weight of the child/indicative age
Seat position Groups 0 (b) and 0+)
Bir th to 13
kgGroup 1
9 -18
kgGroup 2
15 -25
kgGroup 3
22-36
kg
1
st row Front passenger seat (
c)
- fixed UUUU
-
h
eight adjustable U(R)U(R)U(R)U(R)
2
nd row Fixed outer rear seats and
centre rear seat ( d)
Longitudinally-adjustable outer rear seats ( d) ( e) U
UUU
3
rd row Outer rear seats UUUU
(a) Universal child seat: child seat that can
be installed in all vehicles using the
seat belt. (b)
Group 0: from birth to 10
kg. Infant
car seats and "car cots" cannot be
installed on the front passenger seat or
in the 3
rd row. When installed in the 2nd
row, they may prevent the use of the
other seats. (c)
Refer to the current legislation in your
country before installing your child on
this seat.
Safety
Page 121 of 316
119
This ISOFIX mounting system provides fast,
reliable and safe fitting of the child seat in your
vehicle.
The ISOFIX child seats are fitted with two
latches which are easily secured on the two
rings A.
Some also have an upper strap which is
attached to ring B .
"ISOFIX " mountings
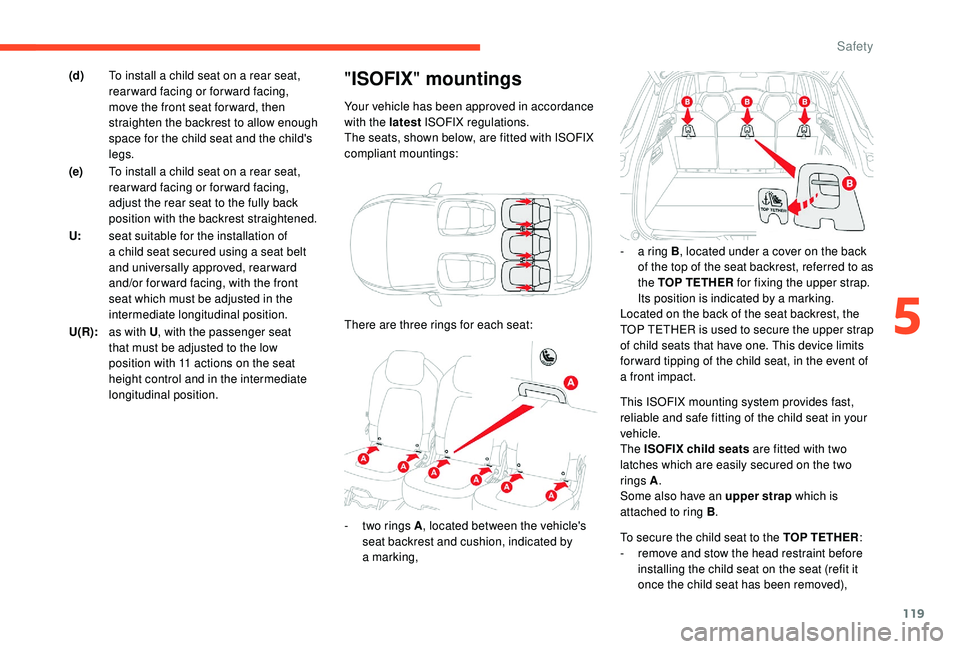
Your vehicle has been approved in accordance
with the latest ISOFIX regulations.
The seats, shown below, are fitted with ISOFIX
compliant mountings:
(d)
To install a
child seat on a
rear seat,
rearward facing or forward facing,
move the front seat for ward, then
straighten the backrest to allow enough
space for the child seat and the child's
legs.
(e) To install a
child seat on a
rear seat,
rearward facing or forward facing,
adjust the rear seat to the fully back
position with the backrest straightened.
U: seat suitable for the installation of
a
child seat secured using a
seat belt
and universally approved, rearward
and/or for ward facing, with the front
seat which must be adjusted in the
intermediate longitudinal position.
U(R): as with U , with the passenger seat
that must be adjusted to the low
position with 11
actions on the seat
height control and in the intermediate
longitudinal position. There are three rings for each seat:
-
t
wo rings A , located between the vehicle's
seat backrest and cushion, indicated by
a
marking, -
a r
ing B, located under a
cover on the back
of the top of the seat backrest, referred to as
the TOP TETHER for fixing the upper strap.
Its position is indicated by a
marking.
Located on the back of the seat backrest, the
TOP TETHER is used to secure the upper strap
of child seats that have one. This device limits
for ward tipping of the child seat, in the event of
a
front impact.
To secure the child seat to the TOP TETHER :
-
r
emove and stow the head restraint before
installing the child seat on the seat (refit it
once the child seat has been removed),
5
Safety
Page 122 of 316
120
- detach the TOP TETHER cover by pulling its cut-out,
-
p
ass the upper strap of the child seat over
the seat backrest, centring it between the
openings for the head restraint rods,
-
f
ix the hook of the upper strap to ring B ,
-
t
ighten the upper strap.The incorrect installation of a
child seat in
a
vehicle compromises the protection of
the child in the event of an accident.
Strictly obser ve the fitting instructions
provided with the child seat.
For information on the possibilities for
installing ISOFIX child seats in your
vehicle, refer to the summary table.
Recommended ISOFIX child
seats
Also consult the user guide from the child
seat's manufacturer to find out how to
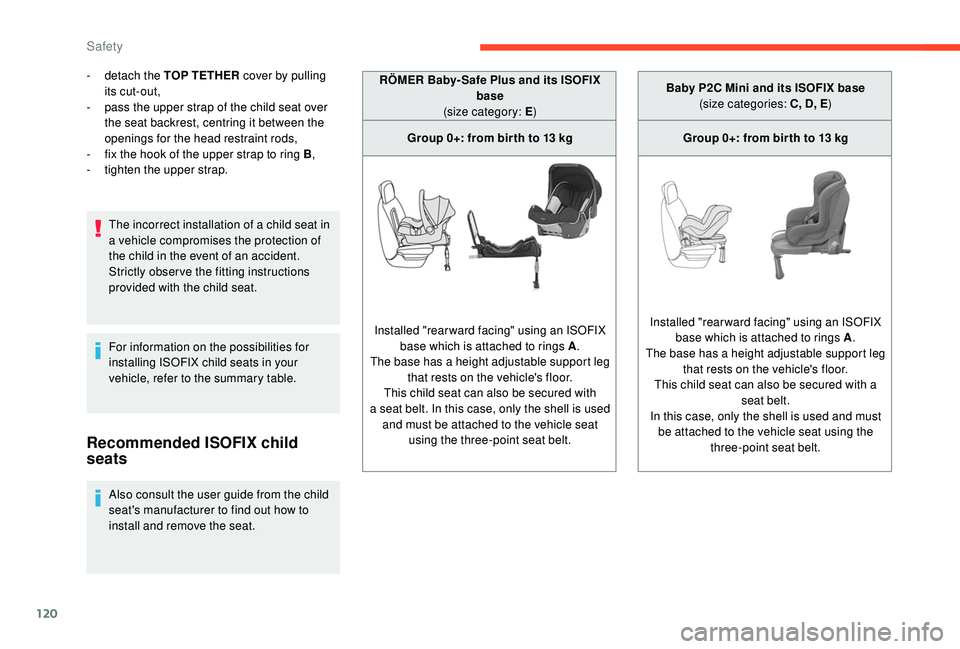
install and remove the seat. RÖMER Baby- Safe Plus and its ISOFIX
base
(size category: E )
Group 0+: from bir th to 13 kg
Installed "rearward facing" using an ISOFIX base which is attached to rings A .
The base has a height adjustable support leg
that rests on the vehicle's floor.
This child seat can also be secured with
a seat belt. In this case, only the shell is used
and must be attached to the vehicle seat using the three-point seat belt. Baby P2C Mini and its ISOFIX base
(size categories: C, D, E )
Group 0+: from bir th to 13 kg
Installed "rearward facing" using an ISOFIX base which is attached to rings A .
The base has a height adjustable support leg that rests on the vehicle's floor.
This child seat can also be secured with a seat belt.
In this case, only the shell is used and must be attached to the vehicle seat using the three-point seat belt.
Safety
Page 123 of 316
121
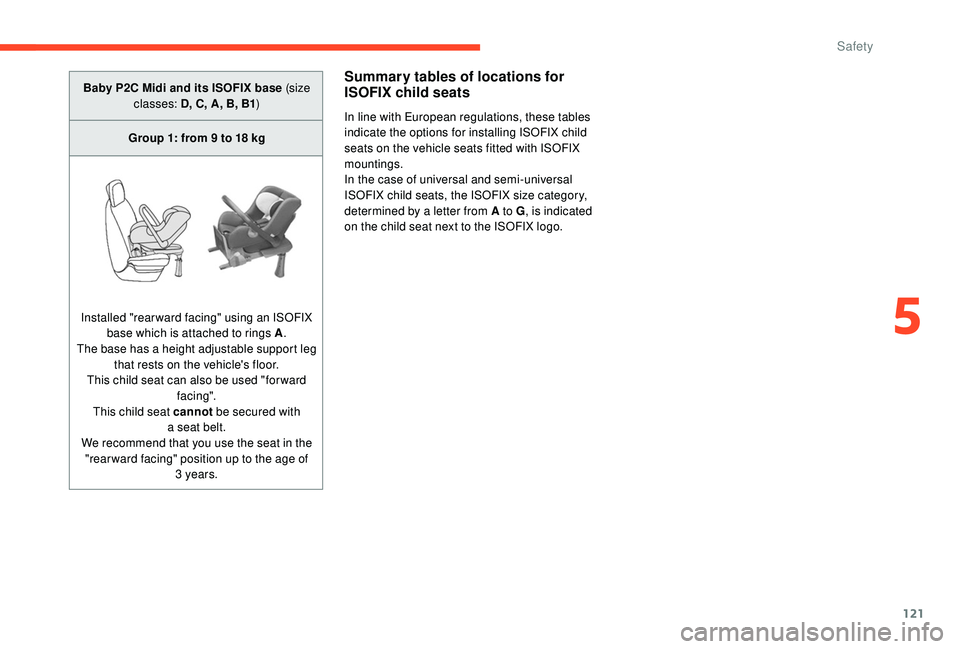
Baby P2C Midi and its ISOFIX base (size classes: D, C, A, B, B1 )
Group 1: from 9
to 18 kg
Installed "rearward facing" using an ISOFIX base which is attached to rings A .
The base has a height adjustable support leg that rests on the vehicle's floor.
This child seat can also be used "for ward fac ing".
This child seat cannot be secured with
a
seat belt.
We recommend that you use the seat in the "rear ward facing" position up to the age of 3
years.Summary tables of locations for
ISOFIX child seats
In line with European regulations, these tables
indicate the options for installing ISOFIX child
seats on the vehicle seats fitted with ISOFIX
mountings.
In the case of universal and semi-universal
ISOFIX child seats, the ISOFIX size category,
determined by a letter from A to G , is indicated
on the child seat next to the ISOFIX logo.
5
Safety
Page 126 of 316
124
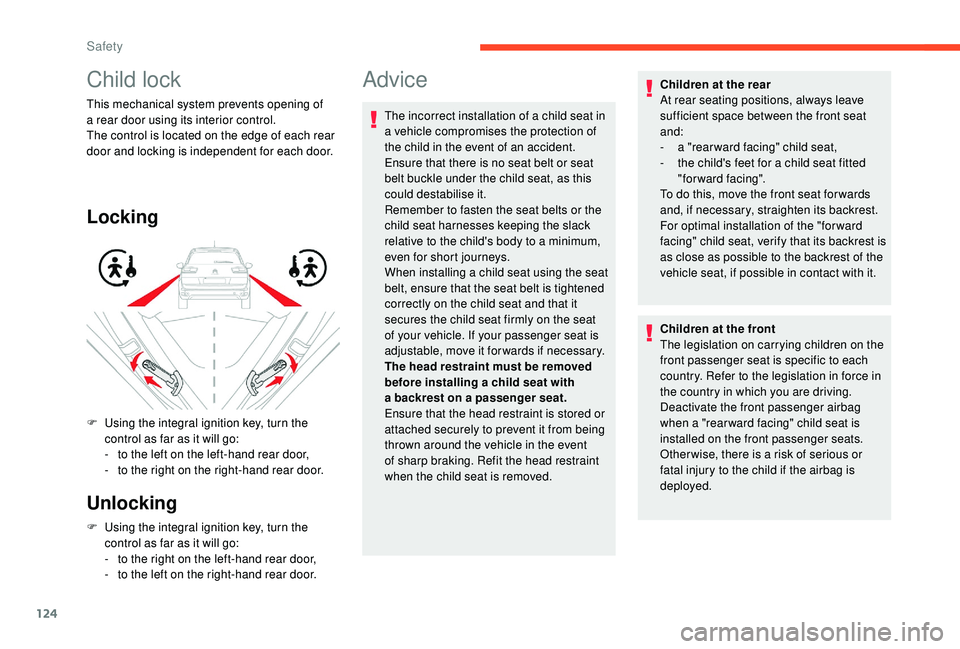
Child lock
This mechanical system prevents opening of
a rear door using its interior control.
The control is located on the edge of each rear
door and locking is independent for each door.
Locking
Unlocking
F Using the integral ignition key, turn the control as far as it will go:
-
t
o the right on the left-hand rear door,
-
t
o the left on the right-hand rear door.
F
U
sing the integral ignition key, turn the
control as far as it will go:
-
t
o the left on the left-hand rear door,
-
t
o the right on the right-hand rear door.
Advice
The incorrect installation of a child seat in
a vehicle compromises the protection of
the child in the event of an accident.
Ensure that there is no seat belt or seat
belt buckle under the child seat, as this
could destabilise it.
Remember to fasten the seat belts or the
child seat harnesses keeping the slack
relative to the child's body to a
minimum,
even for short journeys.
When installing a
child seat using the seat
belt, ensure that the seat belt is tightened
correctly on the child seat and that it
secures the child seat firmly on the seat
of your vehicle. If your passenger seat is
adjustable, move it forwards if necessary.
The head restraint must be removed
before installing a
child seat with
a
backrest on a passenger seat.
Ensure that the head restraint is stored or
attached securely to prevent it from being
thrown around the vehicle in the event
of sharp braking. Refit the head restraint
when the child seat is removed. Children at the rear
At rear seating positions, always leave
sufficient space between the front seat
and:
-
a "
rear ward facing" child seat,
-
t
he child's feet for a child seat fitted
"forward facing".
To do this, move the front seat for wards
and, if necessary, straighten its backrest.
For optimal installation of the "forward
facing" child seat, verify that its backrest is
as close as possible to the backrest of the
vehicle seat, if possible in contact with it.
Children at the front
The legislation on carrying children on the
front passenger seat is specific to each
country. Refer to the legislation in force in
the country in which you are driving.
Deactivate the front passenger airbag
when a "rear ward facing" child seat is
installed on the front passenger seats.
Other wise, there is a
risk of serious or
fatal injury to the child if the airbag is
deployed.
Safety
Page 127 of 316
125
Installing a booster seat
The chest part of the seat belt must be
positioned on the child's shoulder without
touching the neck.
Ensure that the lap part of the seat belt
passes correctly over the child's thighs.
We recommend using a
booster seat with
a
backrest, equipped with a belt guide at
shoulder level.
Additional protections
To prevent accidental opening of the doors
and rear windows, use the child lock.
Take care not to open the rear windows by
more than one third.
To protect young children from the rays
of the sun, fit side blinds on the rear
windows.
As a
safety precaution, do not leave:
-
a c
hild or children alone and
unattended in a
vehicle,
-
a c
hild or an animal in a vehicle
which is exposed to the sun, with the
windows closed,
-
t
he keys within reach of children inside
the vehicle.
5
Safety
Page 142 of 316

140
The information appears in the
instrument panel in the form of an
ar row.
With a
manual gearbox, the arrow may be
accompanied by the gear recommended.
This arrow may be pointing up or down,
depending on the context.
The system adapts its gear efficiency
recommendation according to the driving
conditions (slope, load, etc.) and the
driver's requirements (power, acceleration,
b r a k i n g , e t c .) .
The system never suggests:
-
e
ngaging first gear,
-
enga
ging reverse gear.
Stop & Start
Per fect for urban use, the Stop & Start system
reduces fuel consumption and exhaust
emissions as well as the noise level when
stationary.
The Stop & Start system puts the engine
temporarily into standby – STOP mode – during
stops in the traffic (red lights, traffic jams, or
other, etc.). The engine restarts automatically –
START mode – as soon as you wish to move off
again.
Restarting occurs instantaneously, quickly and
silently.
Operation
Going into engine STOP mode
This indicator lamp comes on in the
instrument panel and the engine
goes into standby automatically.
-
W
ith a manual gearbox , at speeds below
12
mph (20 km/h), or with the vehicle
stationary (with the PureTech 110, 130
and
BlueHDi 100, 130
versions), when you place
the gear lever in neutral and you release the
clutch pedal,
-
W
ith an automatic gearbox , at speeds
below 2
mph (3 km/h), or when the vehicle
is stationary (depending on version), when
you press the brake pedal or place the gear
selector into position N .
If your vehicle is fitted with this system, a time
counter calculates the sum of the periods in
STOP mode during a
journey. It resets to zero
every time the ignition is switched on with the
"START/STOP" button. For your convenience, during parking
manoeuvres, STOP mode is not available
for a
few seconds after coming out of
reverse gear.
The Stop & Start system does not modify
the vehicle's functions, such as, for
example, braking, power steering, etc.
Never refuel with the engine in STOP
mode; you must switch off the ignition with
the "START/STOP" button.
Special cases: STOP mode not
available
STOP mode is not invoked when:
- t he driver's door is open,
-
t
he driver's seat belt is not fastened,
-
t
he vehicle has not exceeded 6 mph
(10
km/h) since the last engine start using
the "START/STOP" button,
-
t
he electric parking brake is applied or being
applied,
-
t
he engine is needed to maintain
a
comfortable temperature in the passenger
compartment,
-
d
emisting is active,
Driving