window Citroen C4 PICASSO RHD 2015 1.G User Guide
[x] Cancel search | Manufacturer: CITROEN, Model Year: 2015, Model line: C4 PICASSO RHD, Model: Citroen C4 PICASSO RHD 2015 1.GPages: 428, PDF Size: 10.09 MB
Page 74 of 428
72
Electric windows
Manual operation
To open or close the window, press or pull the switch gently. The window stops as soon as the
s
witch is released.
Safety anti-pinch
When the window rises and meets an obstacle, it stops and immediately partially lowers again.
In
the event of unwanted opening of the
w
indow on closing, press the switch until the
w
indow opens completely, then pull the switch
i
mmediately until the window closes. Continue
t
o
h
old
t
he
s
witch
f
or
a
pproximately
o
ne
s
econd
a
fter the window has closed.
The
safety anti-pinch function is not active
d
uring this operation.
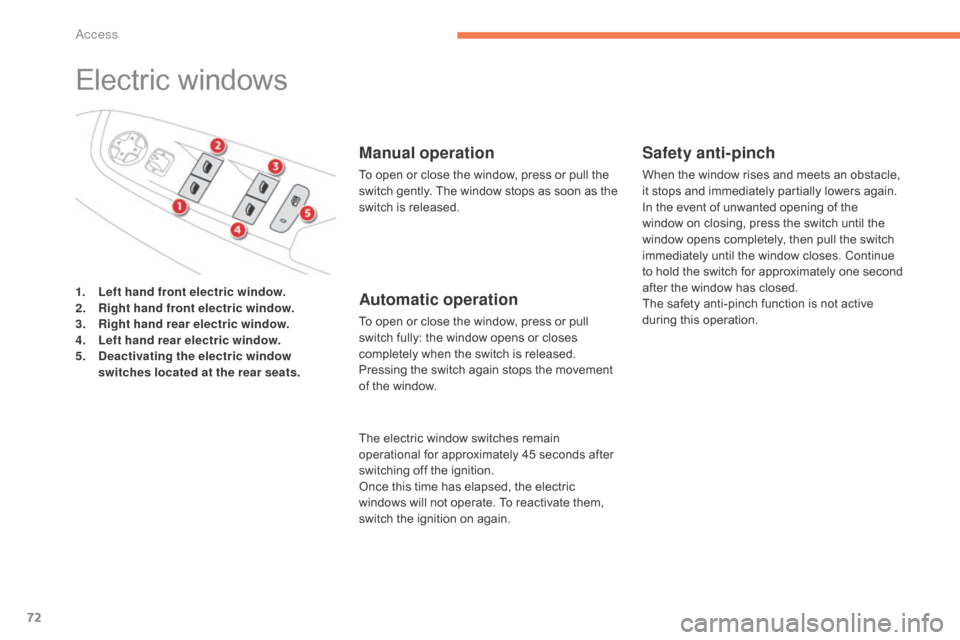
1.
Le
ft hand front electric window.
2.
R
ight hand front electric window.
3.
R
ight hand rear electric window.
4.
Le
ft hand rear electric window.
5.
D
eactivating the electric window
switches located at the rear seats.
Automatic operation
To open or close the window, press or pull s witch fully: the window opens or closes
c
ompletely when the switch is released.
P
ressing the switch again stops the movement
o
f the window.
The
electric window switches remain
o
perational for approximately 45 seconds after
s
witching off the ignition.
Once
this time has elapsed, the electric
w
indows will not operate. To reactivate them,
s
witch the ignition on again.
Access
Page 75 of 428
73
Reinitialisation of
the electric windows
Deactivating the rear controls
for the rear windowsIn the event of contact during operation o
f the windows, you must reverse the
m
ovement of the window. To do this,
p
ress the switch concerned.
When
operating the passenger electric
w
indow switches, the driver must
e
nsure that nothing is preventing
c
orrect closing of the windows.
The
driver must ensure that the
p
assengers use the electric windows
c
o r r e c t l y.
Be
particularly aware of children when
o
perating
t
he
w
indows.
Be
aware of passengers or other
p
ersons present when closing the
w
indows using the the electronic key
o
r the "Keyless Entry and Starting"
s
ystem.
Following
reconnection
of
the
battery,
the
s
afety
anti-pinch
function
must
be
reinitialised.
The
safety
anti-pinch
function
is
not
active
d
uring
these
operations.
For
the
safety
of
your
children,
press
s
witch 5 to prevent operation of the
rear
windows
irrespective
of
their
p
ositions.
The
warning
lamp
in
the
button
comes
on,
a
ccompanied
by
a
message
confirming
a
ctivation.
It
remains
on,
as
long
as
the
child
l
ock
is
deactivated.
Use
of
the
rear
electric
windows
from
the
d
river's
controls
remains
possible. For
each
window:
-
l
ower
the
window
completely,
then
raise
it,
i
t
will
rise
in
steps
of
a
few
centimetres
with
e
ach
action.
Repeat
the
operation
until
the
w
indow
closes
completely,
-
c
ontinue
to
pull
the
switch
for
at
least
o
ne second
after
reaching
this
position,
w
indow
c
losed.
2
Access
Page 96 of 428
94
Ventilation
Air intake
The air circulating in the passenger compartment is filtered and originates either from the outside via t
he grille located at the base of the windscreen or
f
rom the inside in air recirculation mode.
Air treatment
The incoming air follows various routes depending on the controls selected by the
d
river:
-
d
irect arrival in the passenger
c
ompartment (air intake),
-
p
assage through a heating circuit (heating),
-
p
assage through a cooling circuit (air
c
onditioning).
Control panel
The controls of this system are accessible in the " Air conditioning "
menu of the touch
s
creen tablet A .
The
demisting/defrosting controls for the
w
indscreen and rear screen are located on the
l
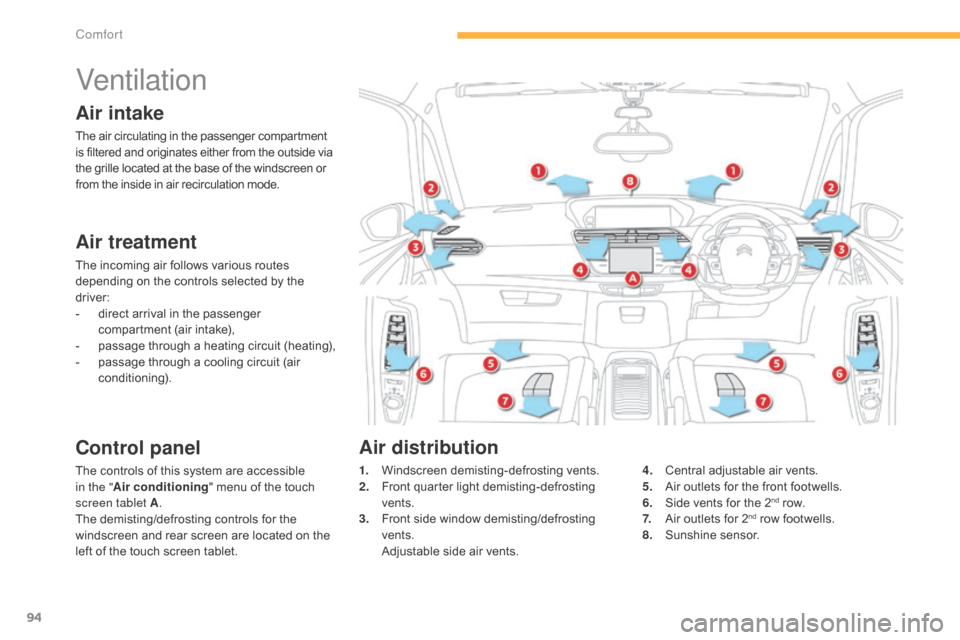
eft of the touch screen tablet. 1. W
indscreen d emisting-defrosting v ents.
2. F ront quarter light demisting-defrosting
ve
nts.
3.
F
ront side window demisting/defrosting
ve
nts.
A
djustable side air vents.4. C
entral adjustable air vents.
5. A ir outlets for the front footwells.
6.
S
ide vents for the 2
nd row.
7. A
ir
outlets
for
2nd row footwells.
8. S
unshine s
ensor.
Air distribution
Comfort
Page 100 of 428
98
Air intake / Air recirculation
The intake of exterior air prevents the formation of mist on the windscreen and side windows.
The recirculation of interior air isolates the
passenger
compartment from exterior odours
a
nd smoke.
F
P
ress the button to recirculate
the
interior air. The indicator
l
amp comes on.
F
P
ress the button again to permit
t
he intake of exterior air. The
i
ndicator lamp goes off to confirm
t
his. The
air conditioning is designed to ope
rate effectively in all seasons,
with
the windows closed.
Air conditioning On / Off
Switching on
Switching off
The air conditioning does not operate when the air flow adjustment is set to
o
f f. F
P
ress this button, the associated
i
ndicator lamp comes on.
Avoid
driving
too
long
without
r
ecirculation
of
interior
air
(risk
of
m
isting
and
deterioration
of
air
quality).
This
function
allows
hot
or
cold
air
to
be
d
elivered
selectively
and
more
quickly.
It
enables you to:
-
l
ower the temperature, in summer,
-
i
ncrease the effectiveness of the demisting
i
n winter, above 3°C.
F
Press the button again, the associated indicator lamp switches off.
Air distribution adjustment
These buttons are used to arrange the distribution of air in the passenger
c
ompartment by combining several air outlets.
Windscreen.
The
air distribution can be adapted by using
s
everal buttons: illumination of the indicator
l
amp confirms the presence of fan boosted air
i
n the direction indicated, the indicator lamp off
i
ndicates the absence of fan boosted air in the
d
irection
i
ndicated.
For
a uniform distribution of air in the
p
assenger compartment, the three buttons can
b
e activated simultaneously.
Footwells.
Central
and side vents.
Comfort
Page 104 of 428
102
Avoid prolonged operation of the air recirculation function (risk of misting
a
nd of deterioration of the air quality).
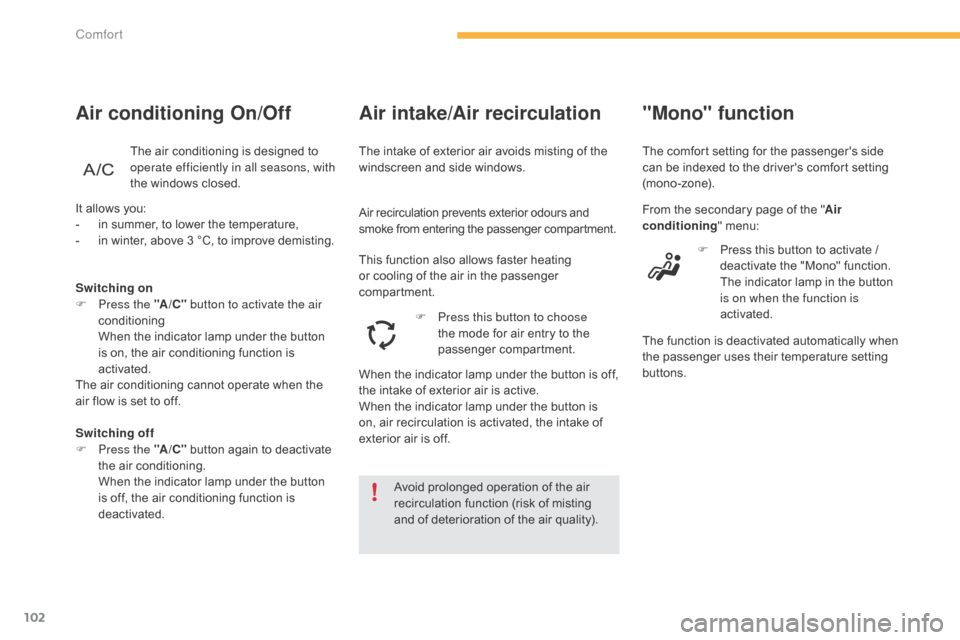
"Mono" function
The comfort setting for the passenger's side can be indexed to the driver's comfort setting
(
mono-zone).
From
the secondary page of the "Air
conditioning "
menu:
F
P
ress this button to activate /
d
eactivate the "Mono" function.
T
he indicator lamp in the button
i
s on when the function is
activated.
The
function is deactivated automatically when
t
he
p
assenger
u
ses
t
heir
t
emperature
se
tting
b
uttons.
It
allows
you:
-
i
n
summer,
to
lower
the
temperature,
-
i
n
winter,
above
3
°C,
to
improve
demisting.
Switching off
F
P
ress the "A /C "
button
again
to
deactivate
t
he
air
conditioning.
W
hen
the
indicator
lamp
under
the
button
i
s
off,
the
air
conditioning
function
is
d
eactivated.
Switching on
F
P
ress the " A/C" button to activate the air
conditioning
W
hen
the
indicator
lamp
under
the
button
i
s
on,
the
air
conditioning
function
is
a
ctivated.
The
air
conditioning
cannot
operate
when
the
a
ir
flow
is
set
to
off.
Air conditioning On/Off
The air conditioning is designed to o perate efficiently in all seasons, with
the
windows closed. The
intake of exterior air avoids misting of the w
indscreen and side windows.
Air intake/Air recirculation
Air recirculation prevents exterior odours and s
moke from entering the passenger compartment.
This
function also allows faster heating
o
r cooling of the air in the passenger
c
ompartment. F
P
ress this button to choose
the
mode for air entry to the
p
assenger
c
ompartment.
When
the indicator lamp under the button is off,
t
he intake of exterior air is active.
When
the indicator lamp under the button is
o
n, air recirculation is activated, the intake of
e
xterior air is off.
Comfort
Page 111 of 428
109
Sliding sun visor
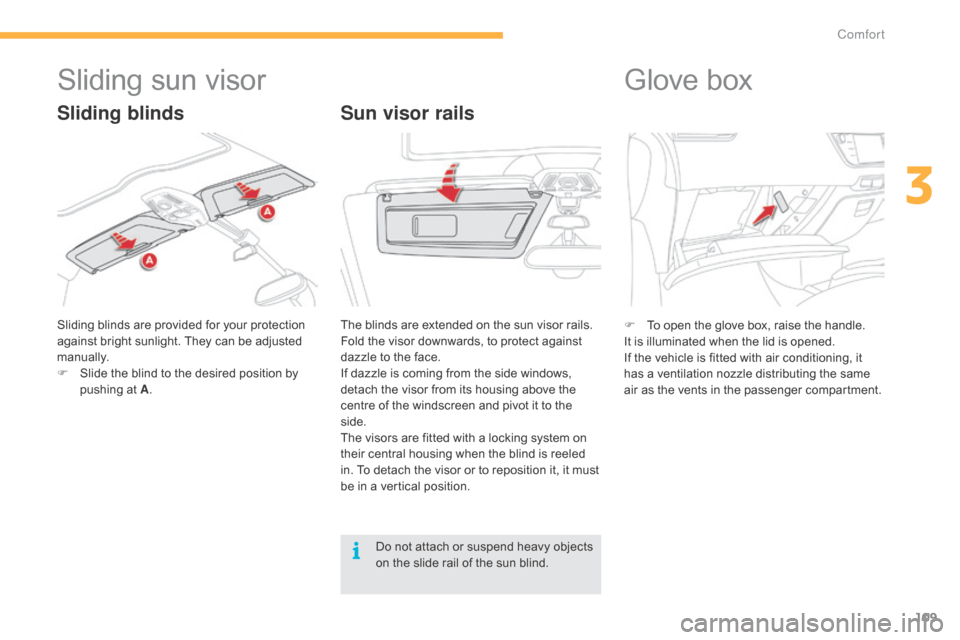
Sliding blinds are provided for your protection against bright sunlight. They can be adjusted
m
anually.
F
S
lide the blind to the desired position by
p
ushing at A.
Sun visor rails
Glove box
F To open the glove box, raise the handle.
It is illuminated when the lid is opened.
If
the vehicle is fitted with air conditioning, it
h
as a ventilation nozzle distributing the same
a
ir as the vents in the passenger compartment.
The
blinds
are
extended
on
the
sun
visor
rails.
Fold
the
visor
downwards,
to
protect
against
d
azzle
to
the
face.
If
dazzle
is
coming
from
the
side
windows,
d
etach
the
visor
from
its
housing
above
the
c
entre
of
the
windscreen
and
pivot
it
to
the
si
de.
The
visors
are
fitted
with
a
locking
system
on
t
heir
central
housing
when
the
blind
is
reeled
i
n.
To
detach
the
visor
or
to
reposition
it,
it
must
b
e
in
a
vertical
position.
Sliding blinds
Do not attach or suspend heavy objects o n the slide rail of the sun blind.
3
Comfort
Page 118 of 428
116
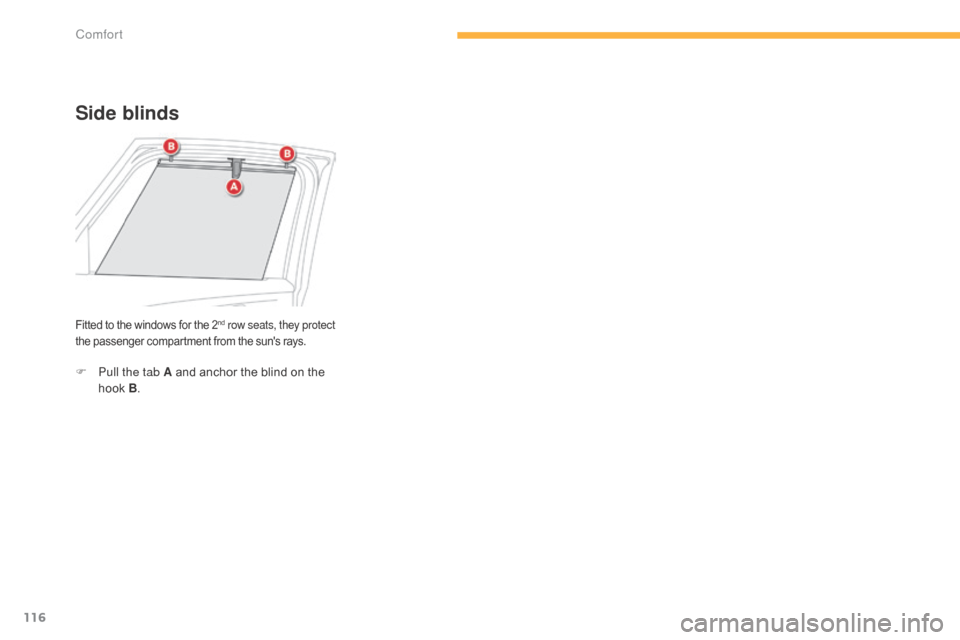
Side blinds
Fitted to the windows for the 2nd row seats, they protect
the
passenger
compartment
from the sun's rays.
F Pull the tab A and anchor the blind on the h
ook B.
Comfort
Page 233 of 428
231
In the event of a minor impact or bump on the side of the vehicle or if the
v
ehicle rolls over, the airbags may not
b
e deployed.
In the event of a rear or front collision,
none
of the lateral airbags is deployed.
System
contributing
towards
greater
protection
f
or
the
the
driver
and
passengers
(with
the
e
xception
of
the
rear
centre
passenger)
in
the
e
vent
of
a
serious
side
impact
in
order
to
limit
t
he
risk
of
injury
to
the
side
of
the
head.
Each
curtain
airbag
is
built
into
the
pillars
and
t
he
upper
passenger
compartment
area.
Curtain airbags
Deployment
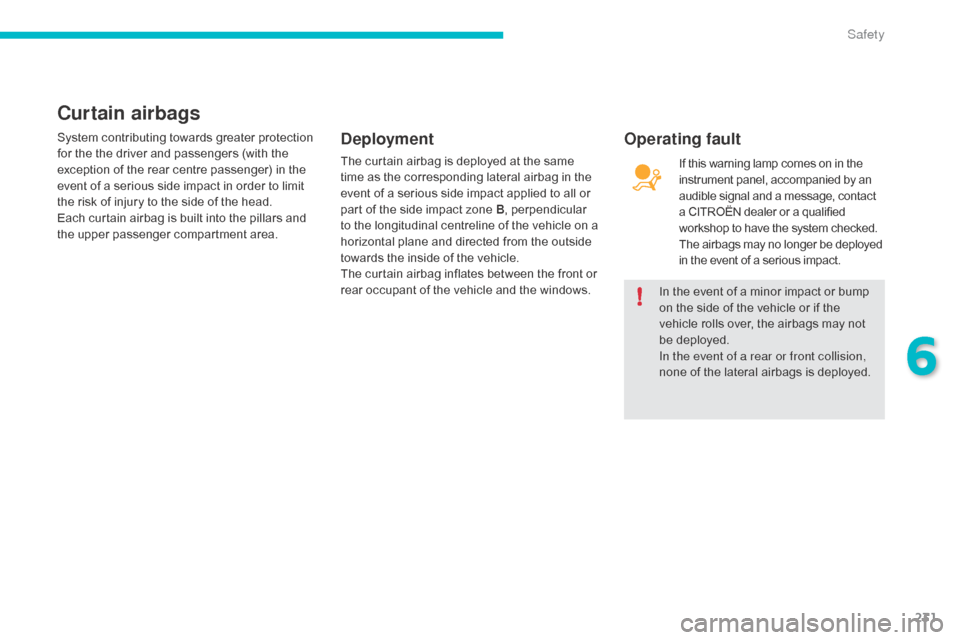
The curtain airbag is deployed at the same t
ime as the corresponding lateral airbag in the
e
vent of a serious side impact applied to all or
p
art of the side impact zone B, perpendicular
t
o the longitudinal centreline of the vehicle on a
h
orizontal plane and directed from the outside
t
owards the inside of the vehicle.
The
curtain airbag inflates between the front or
r
ear occupant of the vehicle and the windows.If
this warning lamp comes on in the i
nstrument panel, accompanied by an
a
udible signal and a message, contact
a
CITROËN dealer or a qualified
w
orkshop to have the system checked.
T
he airbags may no longer be deployed
i
n the event of a serious impact.
Operating fault
6
Safety
Page 253 of 428
251
Child seats
The incorrect installation of a child seat in a vehicle compromises the child's protection in
t
he event of an accident.
Check
that there is no seat belt or seat belt
b
uckle under the child seat as this could
de
stabilise
i
t.
Remember
to fasten the seat belts or the
c
hild seat harnesses keeping the slack in
relation
to the child's body to a minimum,
even
for short journeys.
For
the installation of a child seat using a
s
eat belt, ensure that this is well tensioned
o
n the child seat and that it is holding the
c
hild seat firmly against the seat of your
v
ehicle. If your front passenger seat is
a
djustable, move it for ward if necessary.
at t
he rear seats, always leave sufficient
space
between the front seat and:
-
a
rear ward facing child seat,
-
t
he feet of a child seated in a for ward
f
acing child seat.
Recommendations
For this, move the front seat for ward and if necessary straighten its backrest.
For
o
ptimum
in
stallation
o
f
t
he
fo
rward
f
acing
c
hild seat, ensure that the back of the child
s
eat is as close as possible to the backrest
o
f the vehicle's seat, or in contact if possible.
The
head restraint must be removed before
i
nstalling a child seat with a backrest on the
p
assenger
sea
t.
Ensure
that the head restraint is stowed or
a
ttached securely so that it is not thrown
a
round the vehicle in the event of sharp
b
raking.
Refit
the head restraint as soon as the child
s
eat is removed.Installing a booster
cushion
As a safety precaution, do not leave:
- o ne or more children alone and
u
nsupervised in a vehicle,
-
a
child or an animal in a vehicle which
i
s exposed to the sun, with the windows
c
losed,
-
t
he keys within reach of children inside
t
he vehicle.
To
prevent accidental opening of the doors,
u
se the child lock.
Take
care not to open the rear windows by
m
ore than one third.
To
protect young children from the rays of
t
he sun, fit side blinds on the rear windows.
The
chest part of the seat belt must be
p
ositioned on the child's shoulder without
t
ouching the neck.
Ensure that the lap part of the seat belt
passes correctly over the child's thighs.
CITROËN recommends the use of a booster
s
eat which has a back, fitted with a seat belt
g
uide at shoulder level.
The
legislation
on
carrying
a
child
on
the
f
ront
passenger
seat
is
specific
to
each
c
ountry.
Refer
to
the
legislation
in
force
in
t
he
country
in
which
you
are
driving.
Deactivate
the
passenger's
front
airbag
w
hen
a
rear ward
facing
child
seat
is
installed
o
n
the
front
passenger
seat.
Other wise,
the
c
hild
would
risk
being
seriously
injured
or
k
illed
if
the
airbag
were
deployed.
Children at the front
6
Safety
Page 291 of 428
289
Before disconnecting the battery
Wait 2 minutes after switching off the ignition before disconnecting the battery.
Close
the windows and the doors before
d
isconnecting the battery.
Following reconnection
of the battery
Following reconnection of the battery, switch on t
he ignition and wait 1 minute before starting to
p
ermit initialisation of the electronic systems.
H
owever, if problems remain following this
o
peration, contact a CITROËN dealer or a
q
ualified
w
orkshop.
Referring
to the corresponding section, you
m
ust
y
ourself
r
einitialise
(
depending
o
n
ve
rsion):
-
t
he remote control key,
-
t
he electric blind(s),
-
...
F
R
emove
the
plastic
cover
from
the
(+)
terminal,
if
your
vehicle
has
one.
F
C
onnect
the
red
cable
to
the
positive
t
erminal
(+)
of
the
flat
battery
A
, then to the
positive
terminal
(+)
of
the
slave
battery
B.
F
C
onnect
one
end
of
the
green
or
black
c
able
to
the
negative
terminal
(-)
of
the
s
lave battery B (or earth point on the other
vehicle).
F
C
onnect
t
he
o
ther
e
nd
o
f
t
he
g
reen
o
r
b
lack
c
able to the earth point C
on
the
broken
d
own
vehicle
(or
on
the
engine
mounting).
F
S
tart
the
engine
of
the
vehicle
with
the
g
ood
battery
and
leave
it
running
for
a
few
m
inutes.
F
O
perate
the
starter
on
the
broken
down
v
ehicle
and
let
the
engine
run
I
f
the
engine
does
not
start
straight
away,
s
witch
off
the
ignition
and
wait
a
few
m
oments
before
trying
again.
F
W
ait
until
the
engine
returns
to
idle
then
d
isconnect
the
jump
lead
cables
in
the
r
everse
o
rder.
F
R
efit
the
plastic
cover
to
the
(+)
terminal,
if
y
our
vehicle
has
one.
Some
functions
are
not
available
if
the
b
attery
is
not
sufficiently
charged.
7
Practical information