lock Citroen C4 RHD 2013.5 2.G Owner's Manual
[x] Cancel search | Manufacturer: CITROEN, Model Year: 2013.5, Model line: C4 RHD, Model: Citroen C4 RHD 2013.5 2.GPages: 328, PDF Size: 28.6 MB
Page 4 of 328
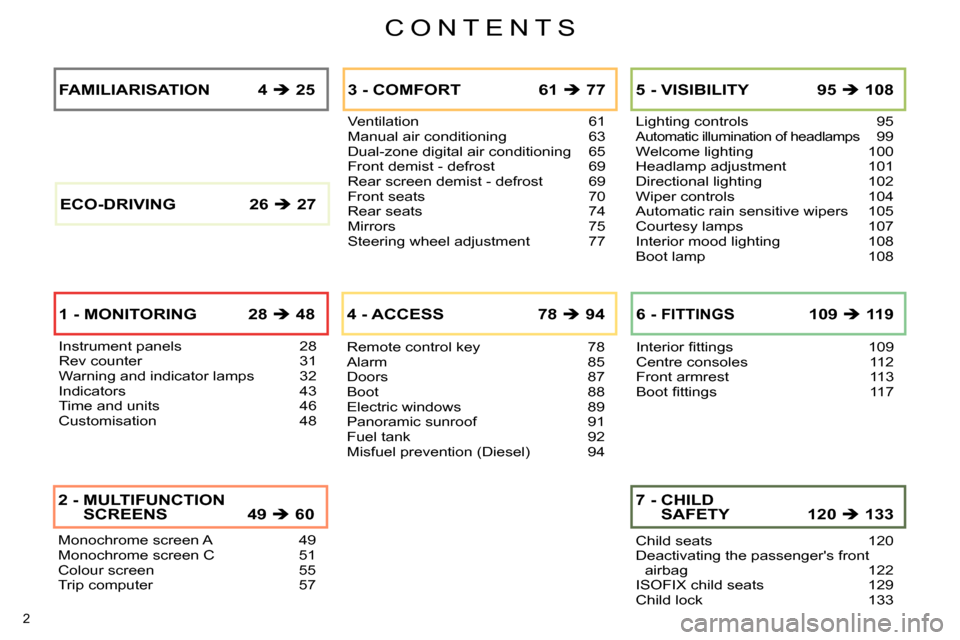
CONTENTS
2
Monochrome screen A 49
Monochrome screen C 51
Colour screen 55
Trip computer 57
2 - MULTIFUNCTION
SCREENS 49 60
Ventilation 61
Manual air conditioning 63
Dual-zone digital air conditioning 65
Front demist - defrost 69
Rear screen demist - defrost 69
Front seats 70
Rear seats 74
Mirrors 75
Steering wheel adjustment 77
3 - COMFORT 61 77
Remote control key 78
Alarm 85
Doors 87
Boot 88
Electric windows 89
Panoramic sunroof 91
Fuel tank 92
Misfuel prevention (Diesel) 94
4 - ACCESS 78 94
Lighting controls 95Automatic illumination of headlamps 99
Welcome lighting 100
Headlamp adjustment 101
Directional lighting 102
Wiper controls 104
Automatic rain sensitive wipers 105
Courtesy lamps 107
Interior mood lighting 108
Boot lamp 108
5 - VISIBILITY 95 108
Interior fi ttings 109
Centre consoles 112
Front armrest 113
Boot fi ttings 117
6 - FITTINGS 109 11 9
Instrument panels 28
Rev counter 31
Warning and indicator lamps 32
Indicators 43
Time and units 46
Customisation 48
FAMILIARISATION 4 25
1 - MONITORING 28 48
Child seats 120
Deactivating the passenger's front
airbag 122
ISOFIX child seats 129
Child lock 133
7 - CHILD
SAFETY 120 133 ECO-DRIVING 26 27
Page 8 of 328
6
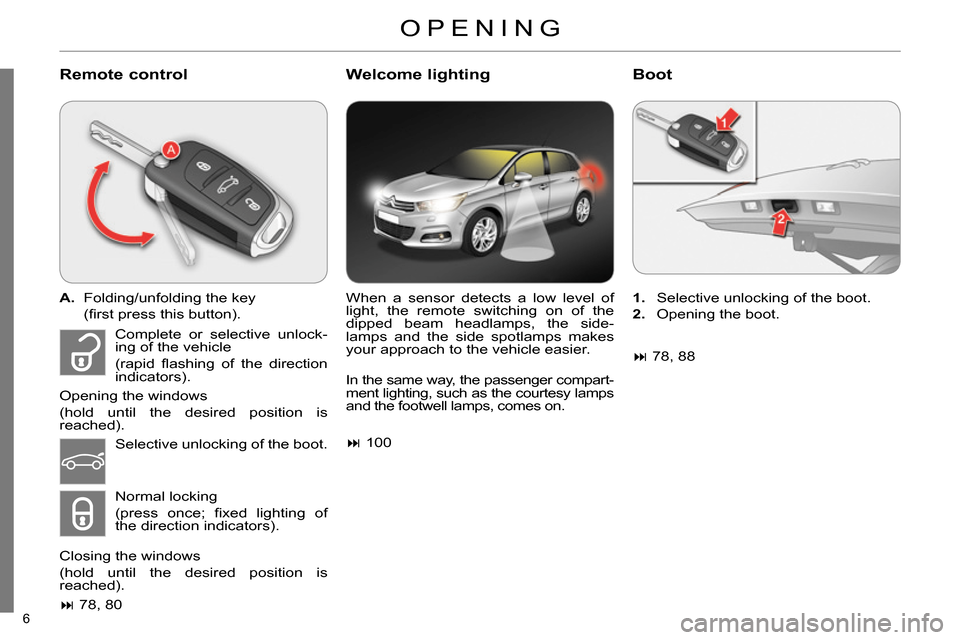
Remote control
Welcome lighting
Boot
A.
Folding/unfolding the key
(fi rst press this button).
78, 80
When a sensor detects a low level of
light, the remote switching on of the
dipped beam headlamps, the side-
lamps and the side spotlamps makes
your approach to the vehicle easier.
1.
Selective unlocking of the boot.
2.
Opening the boot.
Complete or selective unlock-
ing of the vehicle
(rapid fl ashing of the direction
indicators).
Opening the windows
(hold until the desired position is
reached). In the same way, the passenger compart-
ment lighting, such as the courtesy lamps
and the footwell lamps, comes on.
100
78, 88
Selective unlocking of the boot.
Normal locking
(press once; fi xed lighting of
the direction indicators).
Closing the windows
(hold until the desired position is
reached).
OPENING
Page 11 of 328
9
FAMILIARISATION
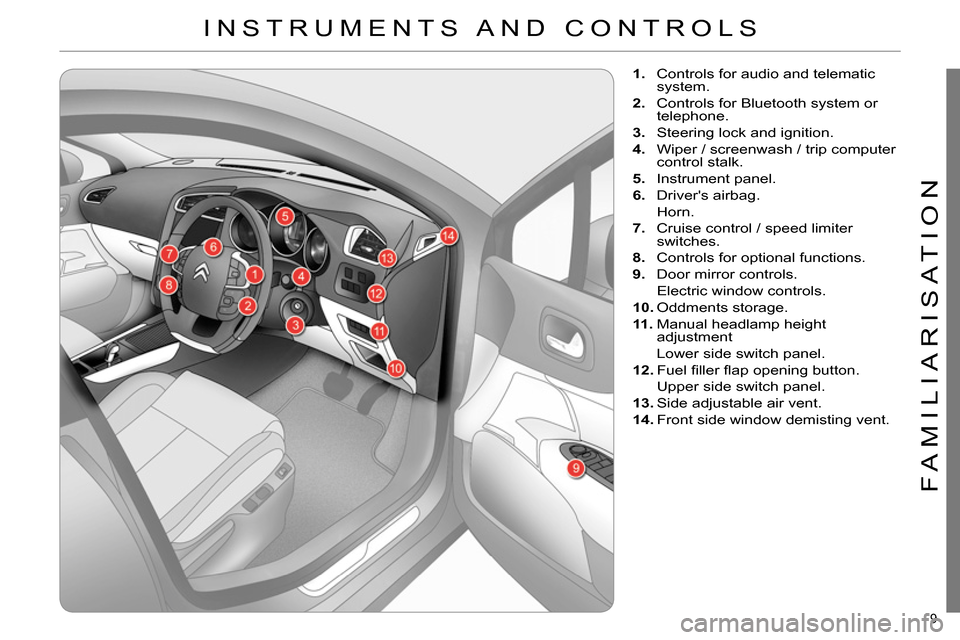
1.
Controls for audio and telematic
system.
2.
Controls for Bluetooth system or
telephone.
3.
Steering lock and ignition.
4.
Wiper / screenwash / trip computer
control stalk.
5.
Instrument panel.
6.
Driver's airbag.
Horn.
7.
Cruise control / speed limiter
switches.
8.
Controls for optional functions.
9.
Door mirror controls.
Electric window controls.
10.
Oddments storage.
11 .
Manual headlamp height
adjustment
Lower side switch panel.
12.
Fuel fi ller fl ap opening button.
Upper side switch panel.
13.
Side adjustable air vent.
14.
Front side window demisting vent.
INSTRUMENTS AND CONTROLS
Page 15 of 328
13
FAMILIARISATION
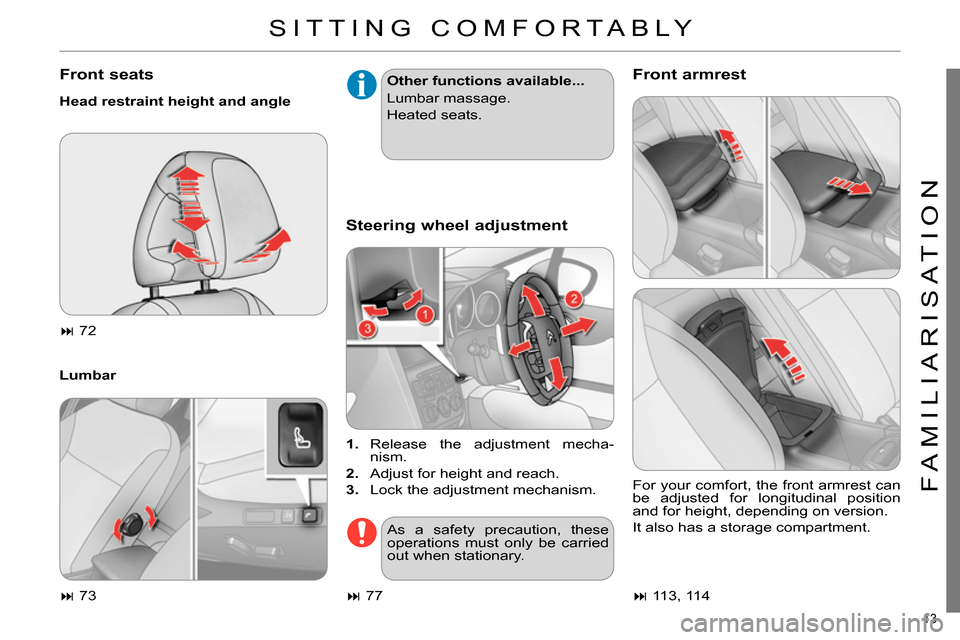
Front seats
Head restraint height and angle
Lumbar
Other functions available...
Lumbar massage.
Heated seats.
Steering wheel adjustment
Front armrest
73
1.
Release the adjustment mecha-
nism.
2.
Adjust for height and reach.
3.
Lock the adjustment mechanism.
77
For your comfort, the front armrest can
be adjusted for longitudinal position
and for height, depending on version.
It also has a storage compartment.
113, 114
72
As a safety precaution, these
operations must only be carried
out when stationary.
SITTING COMFORTABLY
Page 19 of 328
17
FAMILIARISATION
Instrument panels
Warning lamps
Central switch panels
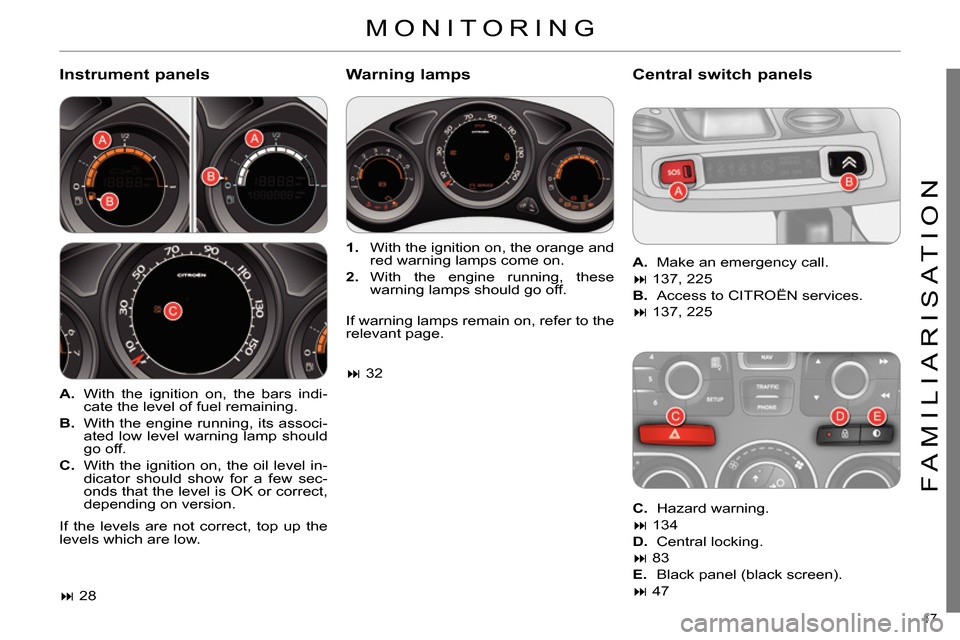
A.
With the ignition on, the bars indi-
cate the level of fuel remaining.
B.
With the engine running, its associ-
ated low level warning lamp should
go off.
C.
With the ignition on, the oil level in-
dicator should show for a few sec-
onds that the level is OK or correct,
depending on version.
28
1.
With the ignition on, the orange and
red warning lamps come on.
2.
With the engine running, these
warning lamps should go off.
32
A.
Make an emergency call.
137, 225
B.
Access to CITROËN services.
137, 225
C.
Hazard warning.
134
D.
Central locking.
83
E.
Black panel (black screen).
47
If the levels are not correct, top up the
levels which are low. If warning lamps remain on, refer to the
relevant page.
MONITORING
Page 20 of 328
18
Side switch panel
Multifunction steering wheel
Cruise control / speed limiter
controls
172, 170
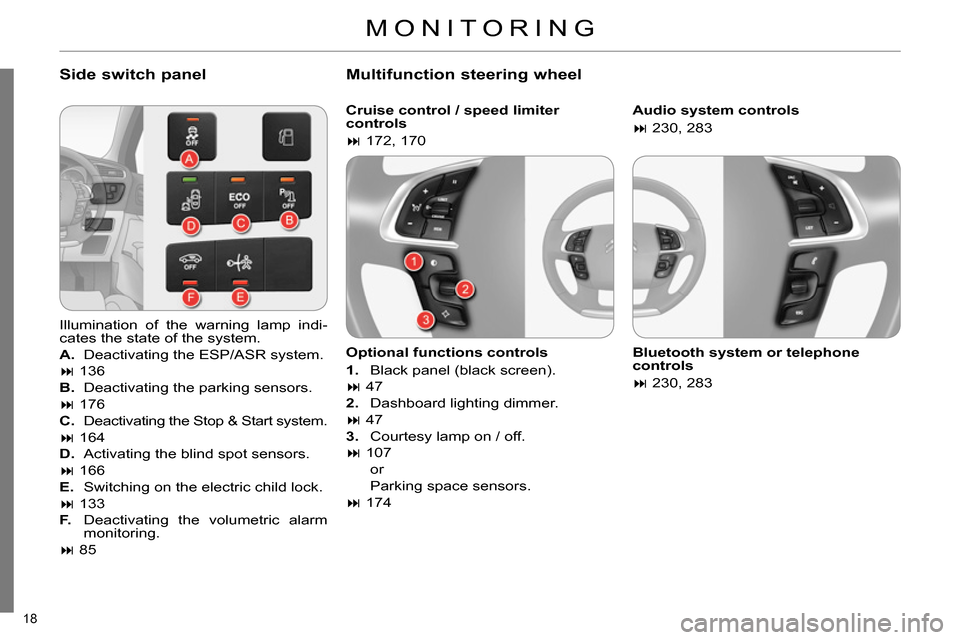
Optional functions controls
1.
Black panel (black screen).
47
2.
Dashboard lighting dimmer.
47
3.
Courtesy lamp on / off.
107
or
Parking space sensors.
174
Audio system controls
230, 283
Bluetooth system or telephone
controls
230, 283
Illumination of the warning lamp indi-
cates the state of the system.
A.
Deactivating the ESP/ASR system.
136
B.
Deactivating the parking sensors.
176
C.
Deactivating the Stop & Start system.
164
D.
Activating the blind spot sensors.
166
E.
Switching on the electric child lock.
133
F.
Deactivating the volumetric alarm
monitoring.
85
MONITORING
Page 38 of 328
1
MONITORING
36
Warning lamp
is on
Cause
Action/Observations
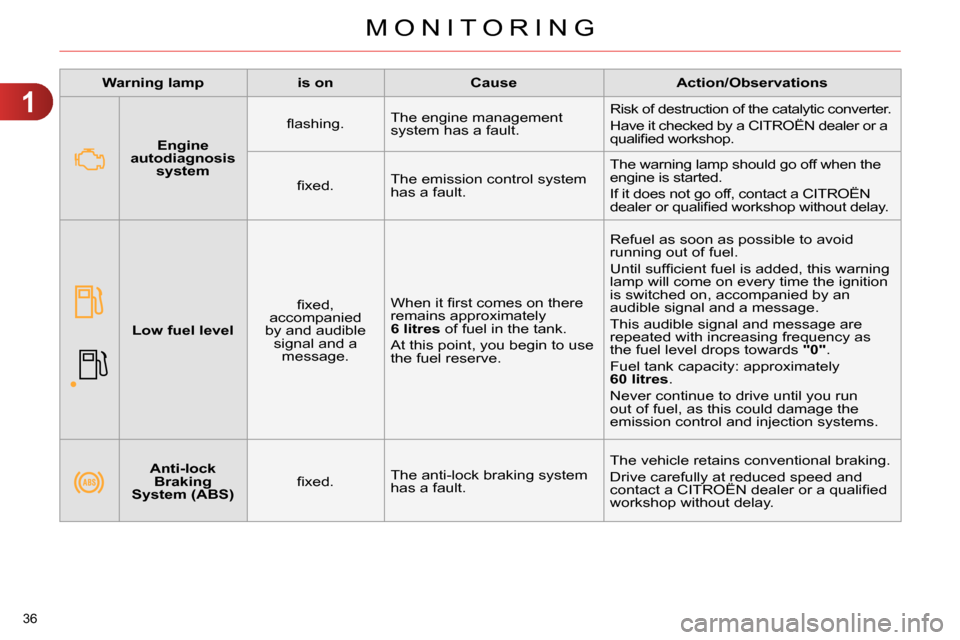
Anti-lock
Braking
System (ABS)
fi xed. The anti-lock braking system
has a fault. The vehicle retains conventional braking.
Drive carefully at reduced speed and
contact a CITROËN dealer or a qualifi ed
workshop without delay.
Engine
autodiagnosis
system
fl ashing. The engine management
system has a fault. Risk of destruction of the catalytic converter.
Have it checked by a CITROËN dealer or a
qualifi ed workshop.
fi xed. The emission control system
has a fault. The warning lamp should go off when the
engine is started.
If it does not go off, contact a CITROËN
dealer or qualifi ed workshop without delay.
Low fuel level
fi xed,
accompanied
by and audible
signal and a
message. When it fi rst comes on there
remains approximately
6
litres
of fuel in the tank.
At this point, you begin to use
the fuel reserve. Refuel as soon as possible to avoid
running out of fuel.
Until suffi cient fuel is added, this warning
lamp will come on every time the ignition
is switched on, accompanied by an
audible signal and a message.
This audible signal and message are
repeated with increasing frequency as
the fuel level drops towards "0"
.
Fuel tank capacity: approximately
60 litres
.
Never continue to drive until you run
out of fuel, as this could damage the
emission control and injection systems.
Page 40 of 328
1
MONITORING
38
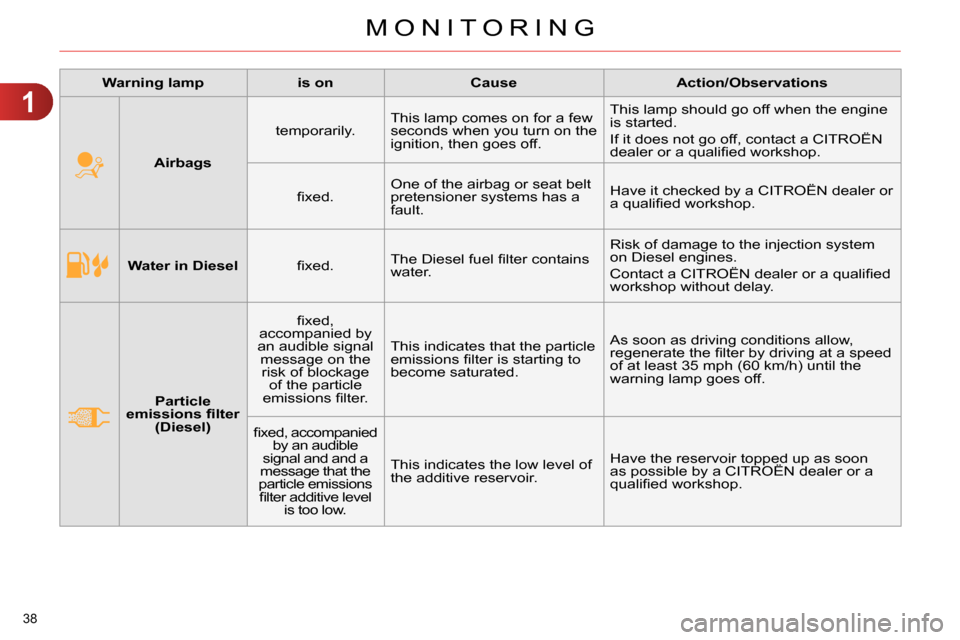
Water in Diesel
fi xed. The Diesel fuel fi lter contains
water. Risk of damage to the injection system
on Diesel engines.
Contact a CITROËN dealer or a qualifi ed
workshop without delay.
Particle
emissions fi lter
(Diesel)
fi xed,
accompanied by
an audible signal
message on the
risk of blockage
of the particle
emissions fi lter. This indicates that the particle
emissions fi lter is starting to
become saturated. As soon as driving conditions allow,
regenerate the fi lter by driving at a speed
of at least 35 mph (60 km/h) until the
warning lamp goes off.
fi xed, accompanied
by an audible
signal and and a
message that the
particle emissions
fi lter additive level
is too low. This indicates the low level of
the additive reservoir. Have the reservoir topped up as soon
as possible by a CITROËN dealer or a
qualifi ed workshop.
Warning lamp
is on
Cause
Action/Observations
Airbags
temporarily. This lamp comes on for a few
seconds when you turn on the
ignition, then goes off. This lamp should go off when the engine
is started.
If it does not go off, contact a CITROËN
dealer or a qualifi ed workshop.
fi xed. One of the airbag or seat belt
pretensioner systems has a
fault. Have it checked by a CITROËN dealer or
a qualifi ed workshop.
Page 47 of 328
1
MONITORING
45
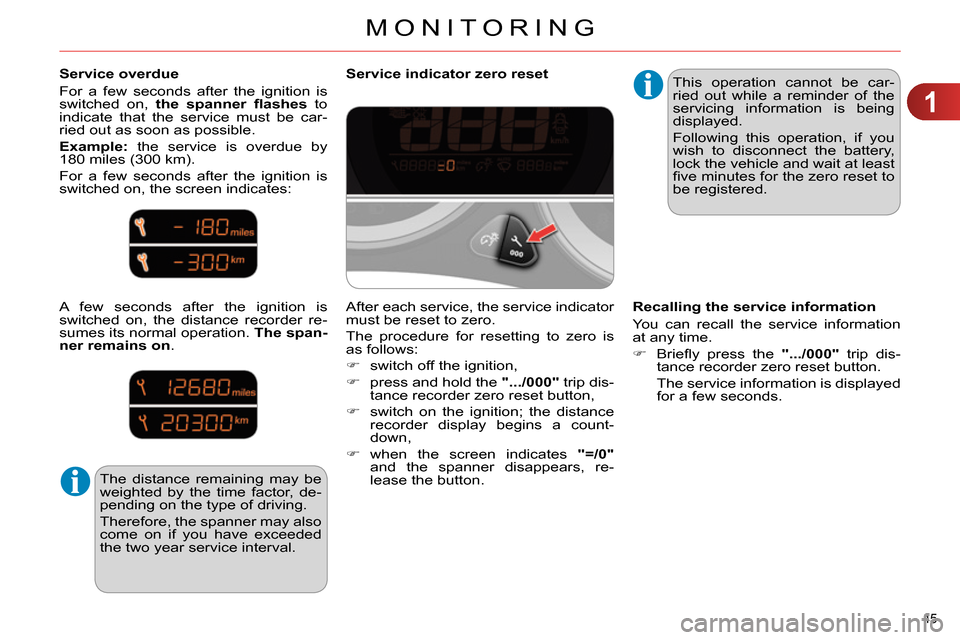
Service overdue
For a few seconds after the ignition is
switched on, the spanner fl ashes
to
indicate that the service must be car-
ried out as soon as possible.
Example:
the service is overdue by
180 miles (300 km).
For a few seconds after the ignition is
switched on, the screen indicates:
A few seconds after the ignition is
switched on, the distance recorder re-
sumes its normal operation. The span-
ner remains on
.
The distance remaining may be
weighted by the time factor, de-
pending on the type of driving.
Therefore, the spanner may also
come on if you have exceeded
the two year service interval.
Service indicator zero reset
This operation cannot be car-
ried out while a reminder of the
servicing information is being
displayed.
Following this operation, if you
wish to disconnect the battery,
lock the vehicle and wait at least
fi ve minutes for the zero reset to
be registered.
Recalling the service information
You can recall the service information
at any time.
Briefl y press the ".../000"
trip dis-
tance recorder zero reset button.
The service information is displayed
for a few seconds.
After each service, the service indicator
must be reset to zero.
The procedure for resetting to zero is
as follows:
switch off the ignition,
press and hold the ".../000"
trip dis-
tance recorder zero reset button,
switch on the ignition; the distance
recorder display begins a count-
down,
when the screen indicates "=/0"
and the spanner disappears, re-
lease the button.
Page 48 of 328
1
MONITORING
46
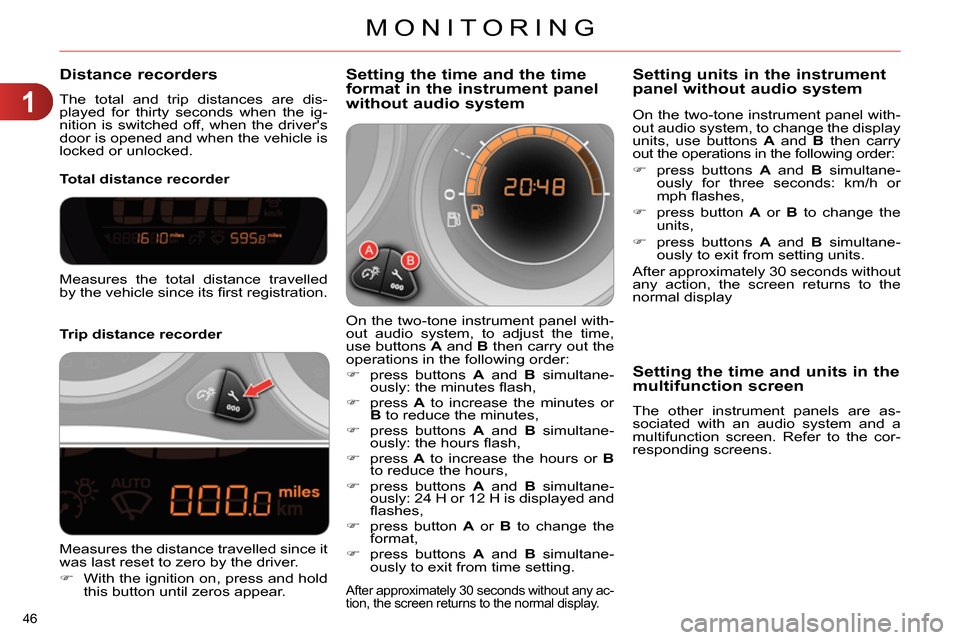
Distance recorders
The total and trip distances are dis-
played for thirty seconds when the ig-
nition is switched off, when the driver's
door is opened and when the vehicle is
locked or unlocked.
Trip distance recorder
Total distance recorder
Setting the time and the time
format in the instrument panel
without audio system
On the two-tone instrument panel with-
out audio system, to adjust the time,
use buttons A
and B
then carry out the
operations in the following order:
press buttons A
and B
simultane-
ously: the minutes fl ash,
press A
to increase the minutes or
B
to reduce the minutes,
press buttons A
and B
simultane-
ously: the hours fl ash,
press A
to increase the hours or B
to reduce the hours,
press buttons A
and B
simultane-
ously: 24 H or 12 H is displayed and
fl ashes,
press button A
or B
to change the
format,
press buttons A
and B
simultane-
ously to exit from time setting.
After approximately 30 seconds without any ac-
tion, the screen returns to the normal display.
Measures the total distance travelled
by the vehicle since its fi rst registration.
Measures the distance travelled since it
was last reset to zero by the driver.
With the ignition on, press and hold
this button until zeros appear.
On the two-tone instrument panel with-
out audio system, to change the display
units, use buttons A
and B
then carry
out the operations in the following order:
press buttons A
and B
simultane-
ously for three seconds: km/h or
mph fl ashes,
press button A
or B
to change the
units,
press buttons A
and B
simultane-
ously to exit from setting units.
After approximately 30 seconds without
any action, the screen returns to the
normal display
Setting units in the instrument
panel without audio system
Setting the time and units in the
multifunction screen
The other instrument panels are as-
sociated with an audio system and a
multifunction screen. Refer to the cor-
responding screens.