bonnet Citroen C4 RHD 2015 2.G Owner's Manual
[x] Cancel search | Manufacturer: CITROEN, Model Year: 2015, Model line: C4 RHD, Model: Citroen C4 RHD 2015 2.GPages: 328, PDF Size: 12.72 MB
Page 5 of 328
3
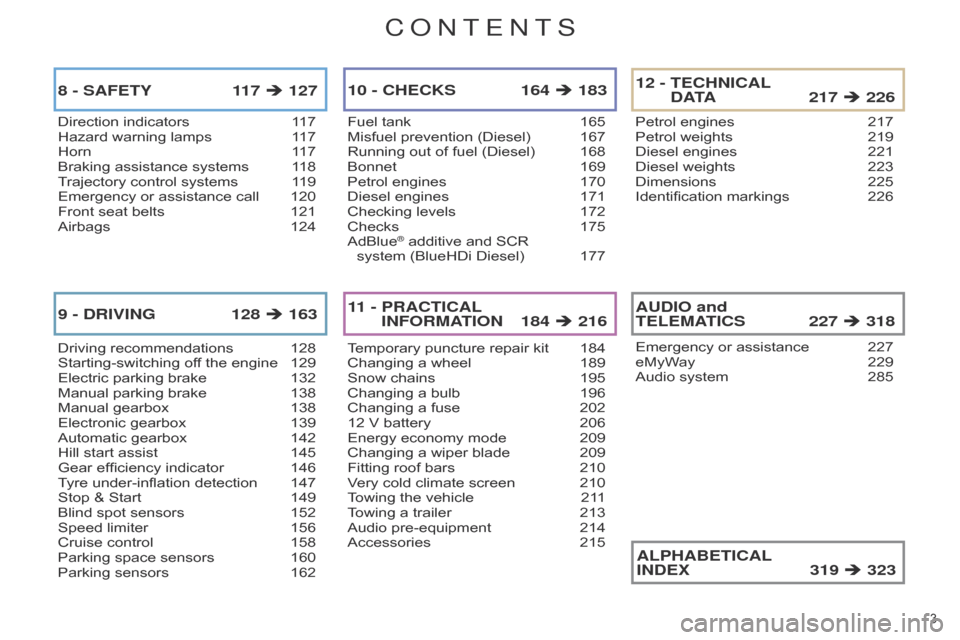
Direction indicators 117
Hazard warning lamps 1 17
Horn
1
17
Braking
assistance systems
1
18
Trajectory
control systems
1
19
Emergency
or assistance call
120
Front
seat belts
121
Airbags
124
8 - SAFETY 1 17 127
Driving recommendations 128
Starting-switching off the engine 129
Electric
parking brake
132
Manual
parking brake
138
Manual
gearbox
138
Electronic
gearbox
139
Automatic
gearbox
142
Hill
start assist
145
Gear
efficiency indicator
146
T
yre under-inflation detection
147
Stop
& Start
149
Blind
spot sensors
152
Speed
limiter
156
Cruise
control
158
Parking
space sensors
160
Parking
sensors
162
9 - DRIVING 128 163
Fuel tank 165
Misfuel prevention (Diesel) 167
Running
out of fuel (Diesel)
168
Bonnet
169
Petrol
engines
170
Diesel
engines
171
Checking
levels
172
Checks
175
AdBlue® additive and SCR
system (BlueHDi Diesel) 177
10 - CHECKS 164 183
Temporary puncture repair kit 184
Changing a wheel 189
Snow
chains
195
Changing
a bulb
196
Changing
a fuse
202
12
V battery
206
Energy
economy mode
209
Changing
a wiper blade
209
Fitting
roof bars
210
V
ery cold climate screen
210
T
owing the vehicle
21
1
Towing
a trailer
213
Audio
pre-equipment
214
Accessories
215
11 - PRACTICAL
INFORMATION 184 216
Petrol engines 217
Petrol weights 219
Diesel
engines
221
Diesel
weights
223
Dimensions
225
Identification
markings
226
12 - TECHNICAL
DATA 217 226
Emergency or assistance 227
eMyW ay 229
Audio
system
285
AUDIO and
TELEMATICS 227 318
ALPHABETICAL
INDEX
319
323
CONTENTS
Page 8 of 328
6 6
INSTRUMENTS AND CONTROLS
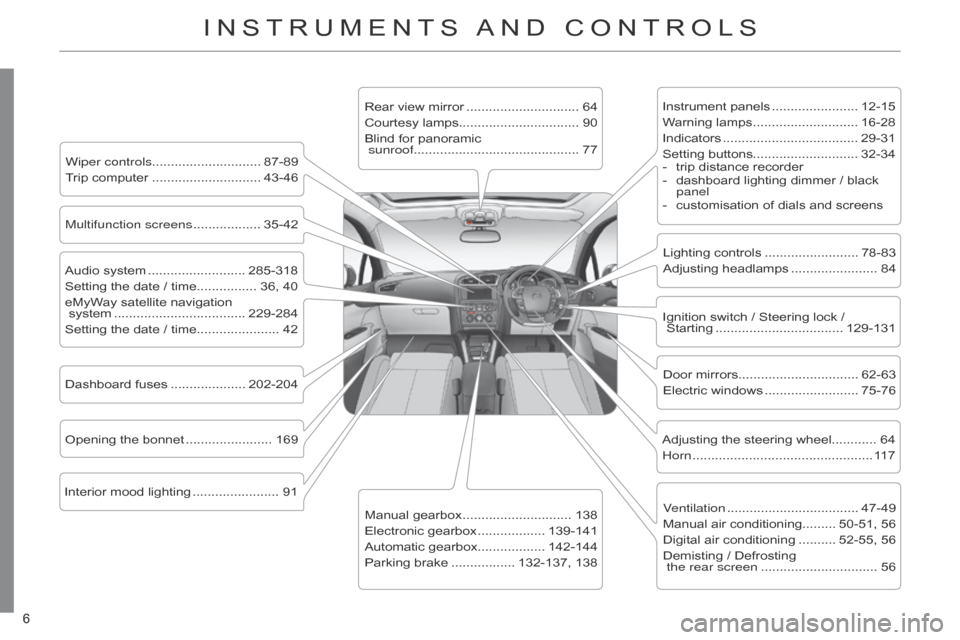
Instrument panels ....................... 12-15
W arning lamps ............................ 16-28
Indicators
.................................... 29-31
Setting
buttons............................ 32-34
-
trip
distance recorder
-
dashboard
lighting dimmer / black
panel
-
customisation
of dials and screens
Lighting
controls
......................... 78-83
Adjusting
headlamps
....................... 84
Door
mirrors
................................ 62-63
Electric
windows
......................... 75-76
Dashboard
fuses
.................... 202-204
Opening
the
bonnet
....................... 169 Adjusting
the steering wheel............ 64
Horn
................................................ 11
7
Audio
system
.......................... 285-318
Setting
the
date
/
time................ 36,
40
eMyWay
satellite
navigation
system
................................... 229-284
Setting
the
date
/
time...................... 42 Manual
gearbox
............................. 138
Electronic
gearbox
.................. 139-141
Automatic
gearbox.................. 142-144
Parking
brake
................. 132-137,
138
Wiper controls............................. 87-89
Trip
computer
............................. 43-46 Rear
view
mirror
.............................. 64
Courtesy
lamps................................ 90
Blind
for
panoramic
sunroof ............................................ 77
Interior
mood
lighting
....................... 91 Ignition
switch / Steering lock /
Starting
.................................. 129-131
Multifunction screens
.................. 35-42
V
entilation
................................... 47-49
Manual
air conditioning......... 50-51, 56
Digital
air conditioning
.......... 52-55,
56
Demisting
/ Defrosting
the rear screen
............................... 56
Page 11 of 328

9 9
TECHNICAL DATA - MAINTENANCE
Running out of Diesel fuel ............. 168
Checking levels
...................... 172-174
-
oil
-
brake
fluid
-
coolant
-
power
steering fluid
-
screenwash
/ headlamp wash fluid
-
additive
(Diesel with particle
emissions
filter)
AdBlue
additive....................... 177-183
Changing
bulbs....................... 196-201
-
front
-
rear Petrol
engines......................... 217-220
Diesel engines
........................ 221-224
Dimensions
.................................... 225
Identification
markings
................... 226
b
onnet
........................................... 169
Petrol
underbonnet
........................ 170
Diesel
underbonnet
....................... 171Checking
components
............ 175-176
-
battery
-
air
filter / passenger compartment
filter
-
oil
filter
-
particle
emissions filter (Diesel)
-
brake
pads / discs
b
attery
.................................... 206-208
Energy
economy mode.................. 209
Engine compartment fuses
.... 202,
205
oVERVIEW
Page 31 of 328
29
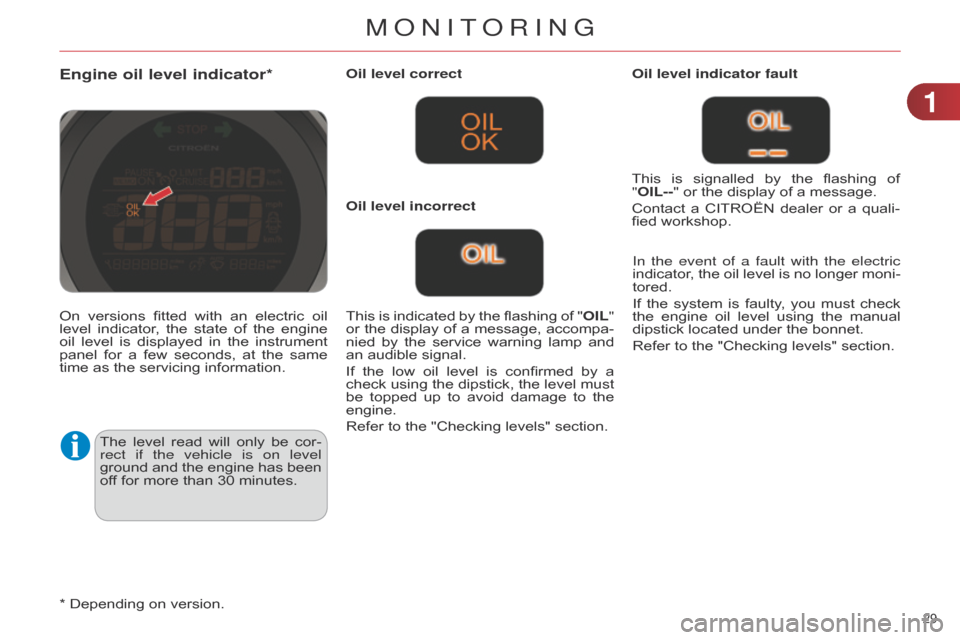
Engine oil level indicator*
The level read will only be cor -
rect if the vehicle is on level
ground
and
the
engine
has
been
of
f for more than 30 minutes.Oil level correct
This
is
indicated
by
the
flashing
of
"
OIL"
or
the
display
of
a
message,
accompa
-
nied
by
the
service
warning
lamp
and
an
audible signal.
If
the
low
oil
level
is
confirmed
by
a
check
using
the
dipstick,
the
level
must
be
topped
up
to
avoid
damage
to
the
engine.
Refer
to the "Checking levels" section.Oil level indicator fault
In the event of a fault with the electric
indicator,
the
oil
level
is
no
longer
moni
-
tored.
If
the
system
is
faulty
,
you
must
check
the
engine
oil
level
using
the
manual
dipstick
located under the bonnet.
Refer to the "Checking levels" section.
Oil level incorrect
This
is
signalled
by
the
flashing
of
"
OIL--" or the display of a message.
Contact
a
CITROËN
dealer
or
a
quali
-
fied workshop.
On
versions
fitted
with
an
electric
oil
level
indicator
,
the
state
of
the
engine
oil
level
is
displayed
in
the
instrument
panel
for
a
few
seconds,
at
the
same
time
as the servicing information.
*
Depending on version.
1
MONITORING
Page 73 of 328
71 * According to country.
ALARM*
System which protects and provides a deterrent
against theft and break-ins. It provides
the
following
types
of
monitoring.
-
exterior perimeter
The
system
checks
for
opening
of
the
vehicle.
The
alarm
is
triggered
if
anyone
tries
to
open
a door, the boot, the bonnet...
-
interior volumetric
The
system
checks
for
any
variation
in
the volume
in the passenger compartment.
The
alarm
is
triggered
if
anyone
breaks
a window
,
enters
the
passenger
compart
-
ment
or moves inside the vehicle.
-
tilt
The
system
checks
for
any
change
in
the
attitude of the vehicle.
The
alarm
is
triggered
if
the
vehicle
is
lifted,
moved or knocked.
Self-protection function
The
system
checks
for
the
putting
out
of
service of its components.
The
alarm
is
triggered
if
the
battery
,
the
central
control
or
the
siren
wiring
are
put
out of service or damaged.
For
all
work
on
the
alarm
sys
-
tem,
contact
a
CITROËN
dealer
or
a qualified workshop.
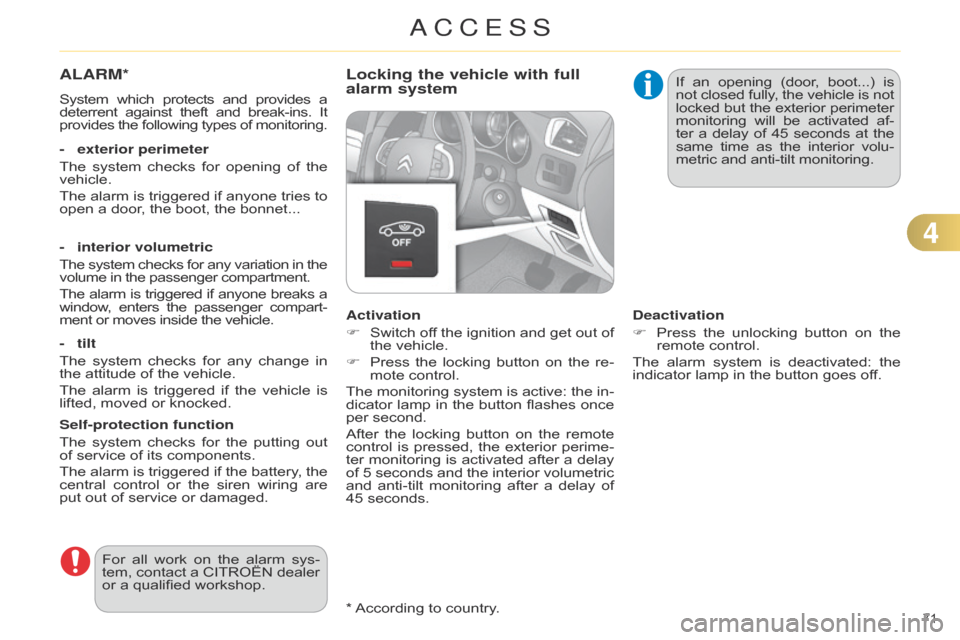
Locking the vehicle with full
alarm system
Activation
F
Switch
of
f
the
ignition
and
get
out
of
the
vehicle.
F
Press
the
locking
button
on
the
re
-
mote
control.
The
monitoring
system
is
active:
the
in
-
dicator
lamp
in
the
button
flashes
once
per
second.
After
the
locking
button
on
the
remote
control
is
pressed,
the
exterior
perime
-
ter
monitoring
is
activated
after
a
delay
of
5
seconds
and
the
interior
volumetric
and
anti-tilt
monitoring
after
a
delay
of
45
seconds. If
an
opening
(door
,
boot...)
is not
closed
fully
,
the
vehicle
is
not locked
but
the
exterior
perimeter monitoring
will
be
activated
af
-
ter
a
delay
of
45
seconds
at
the same
time
as
the
interior
volu
-
metric and anti-tilt monitoring.
Deactivation
F
Press
the
unlocking
button
on
the
remote
control.
The
alarm
system
is
deactivated:
the
indicator
lamp in the button goes off.
4
ACCESS
Page 90 of 328
55
88
Automatic rain sensitive
windscreen wipers
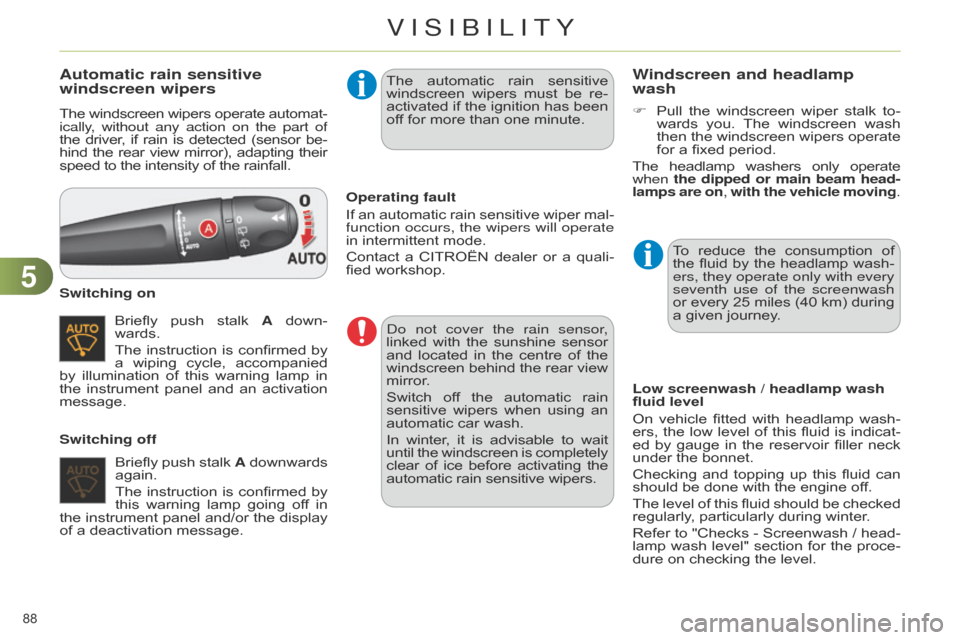
The windscreen wipers operate automat -
ically, without any action on the part of
the
driver
,
if
rain
is
detected
(sensor
be
-
hind
the
rear
view
mirror),
adapting
their speed
to the intensity of the rainfall.
Briefly
push
stalk
A
down
-
wards.
The
instruction
is
confirmed
by
a
wiping
cycle,
accompanied
by
illumination
of
this
warning
lamp
in
the
instrument
panel
and
an
activation
message. Switching on
Switching off Operating fault
If
an
automatic
rain
sensitive
wiper
mal
-
function occurs, the wipers will operate
in
intermittent mode.
Contact
a
CITROËN
dealer
or
a
quali
-
fied
workshop.
d
o not cover the rain sensor,
linked
with
the
sunshine
sensor
and
located
in
the
centre
of
the
windscreen
behind
the
rear
view
mirror
.
Switch
of
f
the
automatic
rain
sensitive
wipers
when
using
an
automatic
car wash.
In
winter
,
it
is
advisable
to
wait until
the
windscreen
is
completely clear
of
ice
before
activating
the automatic
rain sensitive wipers.
The
automatic
rain
sensitive
windscreen
wipers
must
be
re
-
activated if the ignition has been of
f for more than one minute.
Briefly
push
stalk
A
downwards
again.
The
instruction
is
confirmed
by
this
warning
lamp
going
of
f
in
the
instrument
panel
and/or
the
display
of
a deactivation message.
Windscreen and headlamp
wash
Low screenwash / headlamp wash
fluid level
On
vehicle
fitted
with
headlamp
wash
-
ers,
the
low
level
of
this
fluid
is
indicat
-
ed
by
gauge
in
the
reservoir
filler
neck
under
the bonnet.
Checking
and
topping
up
this
fluid
can
should
be done with the engine off.
The
level
of
this
fluid
should
be
checked
regularly
, particularly during winter.
Refer
to
"Checks
-
Screenwash
/
head
-
lamp
wash
level"
section
for
the
proce
-
dure
on checking the level.
F
Pull
the
windscreen
wiper
stalk
to
-
wards
you.
The
windscreen
wash
then
the
windscreen
wipers
operate
for
a fixed period.
The
headlamp
washers
only
operate when
the dipped or main beam head
-
lamps are on, with the vehicle moving.
To
reduce
the
consumption
of
the
fluid
by
the
headlamp
wash
-
ers, they operate only with every
seventh use of the screenwash
or
every
25
miles
(40
km)
during
a
given journey.
VISIBILITY
Page 153 of 328
99
151
Maintenance
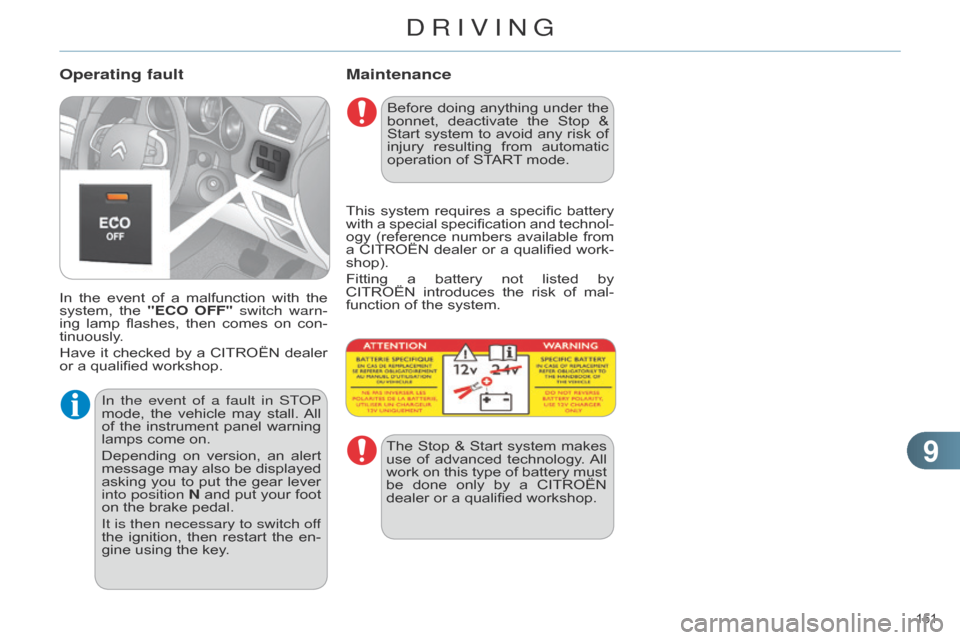
In the event of a malfunction with the system,
the "ECO OFF" switch warn-
ing
lamp
flashes,
then
comes
on
con
-
tinuously.
Have
it
checked
by
a
CITROËN
dealer
or
a qualified workshop.
Operating fault
Before doing anything under the bonnet,
deactivate the Stop &
Start
system
to
avoid
any
risk
of
injury
resulting
from
automatic
operation
of START
mode.
This
system
requires
a
specific
battery
with
a
special
specification
and
technol
-
ogy
(reference
numbers
available
from
a
CITROËN
dealer
or
a
qualified
work
-
shop).
Fitting
a
battery
not
listed
by
CITROËN
introduces
the
risk
of
mal
-
function
of the system.
The
Stop
&
Start
system
makes
use
of
advanced
technology
.
All
work
on
this
type
of
battery
must
be
done
only
by
a
CITROËN
dealer
or a qualified workshop.
In the event of a fault in ST
o
P
mode,
the
vehicle
may
stall.
All
of
the
instrument
panel
warning
lamps
come
on.
Depending
on
version,
an
alert
message
may
also
be
displayed
asking
you
to
put
the
gear
lever
into position
N
and
put
your
foot
on
the
brake
pedal.
It is then necessary to switch off
the
ignition,
then
restart
the
en
-
gine
using
the
key.
DRIVING
Page 170 of 328
1010
168
RUNNING OUT OF FUEL
(D IESEL )
1.6 HDi engine
F Fill the fuel tank with at least five li -
tres of diesel.
F
Open
the bonnet.
F
If
necessary
,
unclip
the
styling
cover
for
access to the priming pump.
F
Squeeze
and
release
the
priming
pump
repeatedly
until
resistance
is
felt
(there
may
be
resistance
at
the
first
press).
F
Operate
the
starter
until
the
engine
starts
(if
the
engine
does
not
start
at
the
first
attempt,
wait
around
15 seconds
before trying again).
F
If
the
engine
does
not
start
after
a
few
attempts,
operate
the
priming
pump
again then start the engine.
F
Refit
the
styling
cover
and
clip
it
in
place.
F
Close
the bonnet.
2.0 HDi engine
F Fill the fuel tank with at least five li -
tres of Diesel.
F
Open
the bonnet.
F
If necessary
, unclip the style cover
for
access to the priming pump.
F
Slacken
the bleed screw.
F
Squeeze
and
release
the
priming
pump
repeatedly
until
fuel
appears
in
the transparent pipe.
F
T
ighten the bleed screw.
F
Operate
the
starter
until
the
engine
starts
(if
the
engine
fails
to
start
at
the
first
attempt,
wait
around
15 seconds
before trying again).
F
If
the
engine
fails
to
start
after
a
few
attempts,
operate
the
priming
pump
again,
then the starter.
F
Put
the
style
cover
back
in
position
and
clip
it
in
place,
ensuring
that
it
has
clipped correctly.
F
Close
the bonnet.
If
the
engine
does
not
start
first
time,
don't
keep
trying
but
start
the
procedure
again
from
the
be
-
ginning.
On
vehicles
fitted
with
HDi
engines,
the
fuel
system
must
be
primed
if
you
run
out
of
fuel;
refer
to
the
corresponding
engine
compartment
view.
If
the
tank
on
your
vehicle
is
fitted
with
a
misfuel
prevention
device,
refer
to
the
"Misfuel
prevention
(Diesel)"
section.
1.6 BlueHDi engine
F Fill the fuel tank with at least five li -
tres of Diesel.
F
Switch
on
the
ignition
(without
start
-
ing
the engine).
F
W
ait
around
6
seconds
and
switch
of
f the ignition.
F
Repeat
the operation 10 times.
F
o perate the starter to run the en-
gine.
CHECKS
Page 171 of 328
1010
169
BONNET
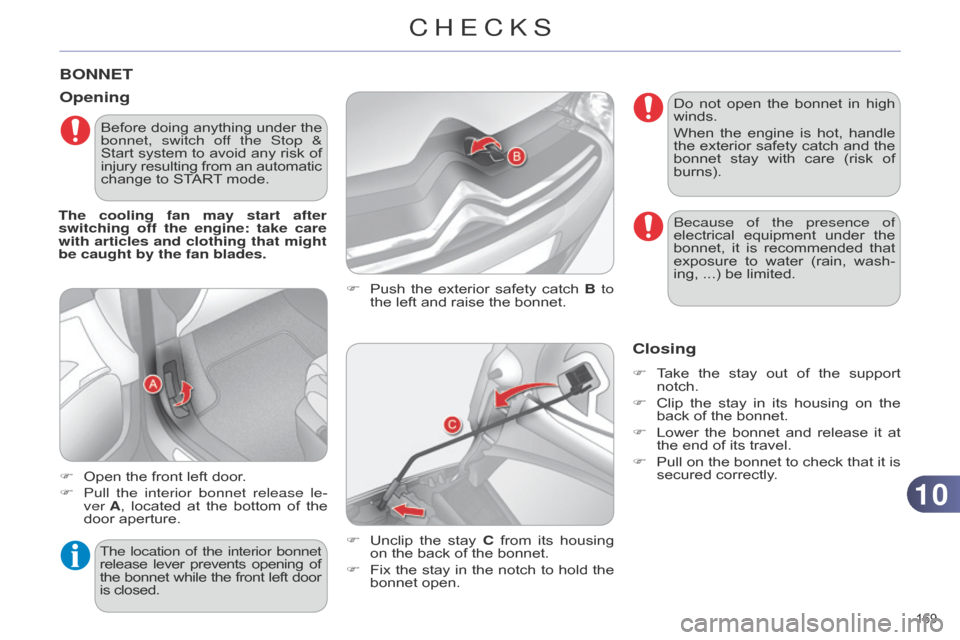
F Push the exterior safety catch B to
the left and raise the bonnet.
Opening
F Open the front left door.
F
Pull
the interior bonnet release le-
ver
A,
located
at
the
bottom
of
the
door
aperture. F
Unclip
the
stay
C
from
its
housing
on
the back of the bonnet.
F
Fix
the
stay
in
the
notch
to
hold
the
bonnet
open.
The location of the interior bonnet
release
lever
prevents
opening
of the
bonnet
while
the
front
left
door is
closed.
Closing
F Take the stay out of the support notch.
F
Clip
the
stay
in
its
housing
on
the
back
of the bonnet.
F
Lower
the
bonnet
and
release
it
at
the
end of its travel.
F
Pull
on
the
bonnet
to
check
that
it
is
secured
correctly.
Do
not
open
the
bonnet
in
high
winds.
When
the
engine
is
hot,
handle
the
exterior
safety
catch
and
the
bonnet
stay
with
care
(risk
of
burns).
Before
doing
anything
under
the
bonnet, switch of
f the Stop &
Start
system
to
avoid
any
risk
of
injury
resulting
from
an
automatic change
to
START
mode.
The cooling fan may start after
switching off the engine: take care
with articles and clothing that might
be caught by the fan blades.
b
ecause of the presence of
electrical
equipment
under
the
bonnet,
it
is
recommended
that
exposure
to
water
(rain,
wash
-
ing, ...) be limited.
CHECKS
Page 174 of 328
1010
172
CHECKING LEVELS
Take care when working under the bonnet, as certain areas of
the
engine
may
be
extremely
hot
(risk
of
burns)
and
the
cooling
fan
could
start
at
any
time
(even
with
the ignition off).
The
check
is
carried
out
either
when
the
ignition
is
switched
on
using
the
oil
level
indicator
in
the
instrument
panel
for
ve
-
hicles with an electric oil level
gauge,
or using the dipstick.
Engine oil level
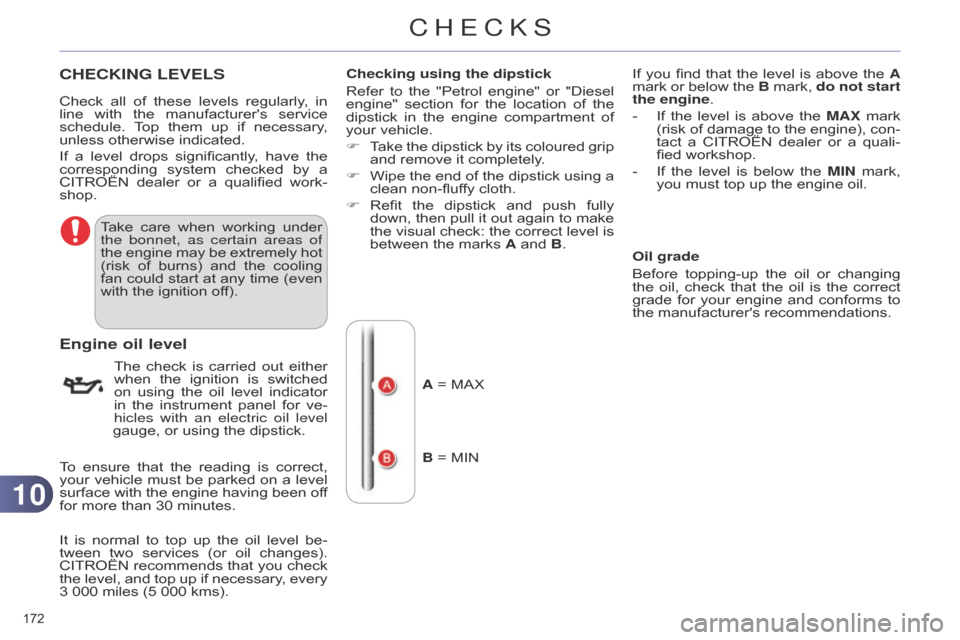
Checking using the dipstick
Refer
to
the
"Petrol
engine"
or
"Diesel
engine"
section
for
the
location
of
the
dipstick
in
the
engine
compartment
of
your
vehicle.
F
T
ake
the
dipstick
by
its
coloured
grip
and
remove it completely.
F
Wipe
the
end
of
the
dipstick
using
a
clean
non-fluffy cloth.
F
Refit
the
dipstick
and
push
fully
down,
then
pull
it
out
again
to
make
the
visual
check:
the
correct
level
is
between
the marks A and B.
Check
all
of
these
levels
regularly
,
in
line
with
the
manufacturer's
service
schedule.
T
op
them
up
if
necessary
,
unless
otherwise
indicated.
If
a
level
drops
significantly
,
have
the
corresponding
system
checked
by
a
CITROËN
dealer
or
a
qualified
work
-
shop.
To
ensure
that
the
reading
is
correct,
your
vehicle
must
be
parked
on
a
level
surface
with
the
engine
having
been
of
f
for
more
than
30
minutes.
It
is
normal
to
top
up
the
oil
level
be
-
tween
two
services
(or
oil
changes).
CITROËN
recommends
that
you
check
the
level,
and
top
up
if
necessary
,
every
3
000
miles
(5
000
kms). A
= MAX
B
= MIN If
you find that the level is above the A
mark or below the B mark, do not start
the engine.
-
If
the
level
is
above
the
MAX
mark
(risk
of
damage
to
the
engine),
con
-
tact
a
CITROËN
dealer
or
a
quali
-
fied
workshop.
-
If
the
level
is
below
the
MIN
mark,
you
must top up the engine oil.
Oil grade
Before
topping-up
the
oil
or
changing
the
oil,
check
that
the
oil
is
the
correct
grade
for
your
engine
and
conforms
to
the
manufacturer's recommendations.
CHECKS