change time Citroen C4 RHD 2015 2.G Owner's Manual
[x] Cancel search | Manufacturer: CITROEN, Model Year: 2015, Model line: C4 RHD, Model: Citroen C4 RHD 2015 2.GPages: 328, PDF Size: 12.72 MB
Page 12 of 328

10
Eco-driving is a range of everyday practices that allow the motorist to optimise their fuel consumption and CO2 emissions.
Optimise the use of your gearbox
With a manual gearbox, move of f gently and change up without
waiting. During acceleration change up early.
With
an
automatic
or
electronic
gearbox,
give
preference
to
automatic
mode
and
avoid
pressing
the
accelerator
pedal
heavily
or suddenly.
Drive smoothly
Maintain a safe distance between vehicles, use engine braking
rather than the brake pedal, and press the accel -
erator
progressively
.
These
practices
contribute
towards
a
reduction
in fuel consumption and CO
2 emissions and also helps
reduce
the
background
traffic
noise.
If
your
vehicle
has
cruise
control,
make
use
of
the
system
at speeds
above
25
mph
(40
km/h)
when
the
traffic
is
flowing well.
Control the use of your electrical equipment
Before moving of f, if the passenger compartment is too warm,
ventilate it by opening the windows and air vents
before
using the air conditioning.
Above
30
mph
(50
km/h),
close
the
windows
and
leave
the
air
vents open.
Remember
to
make
use
of
equipment
that
can
help
keep
the
temperature
in
the
passenger
compartment
down
(sun
-
roof
and window blinds...).
Switch
of
f
the
air
conditioning,
unless
it
has
automatic
regu
-
lation,
as soon as the desired temperature is attained.
Switch
of
f
the
demisting
and
defrosting
controls,
if
not
au
-
tomatic.
Switch
off the heated seat as soon as possible.
Switch
of
f
the
headlamps
and
front
foglamps
when
the
level of
light does not require their use.
Avoid
running
the
engine
before
moving
of
f,
particularly
in
winter;
your
vehicle
will
warm
up
much
faster
while
driving.
As
a
passenger
,
if
you
avoid
connecting
your
multimedia
devices
(film,
music,
video
game...),
you
will
contribute
to
-
wards
limiting
the
consumption
of
electrical
energy
,
and
so
of
fuel.
Disconnect
your
portable
devices
before
leaving
the
vehicle.
ECO-DRIVING
The gear efficiency indicator invites you engage the most suitable
gear: as soon as the indication is displayed in the
instrument
panel, follow it straight away.
For
vehicles
fitted
with
an
electronic
or
automatic
gearbox,
this
indicator appears only in manual mode.
Page 34 of 328
32
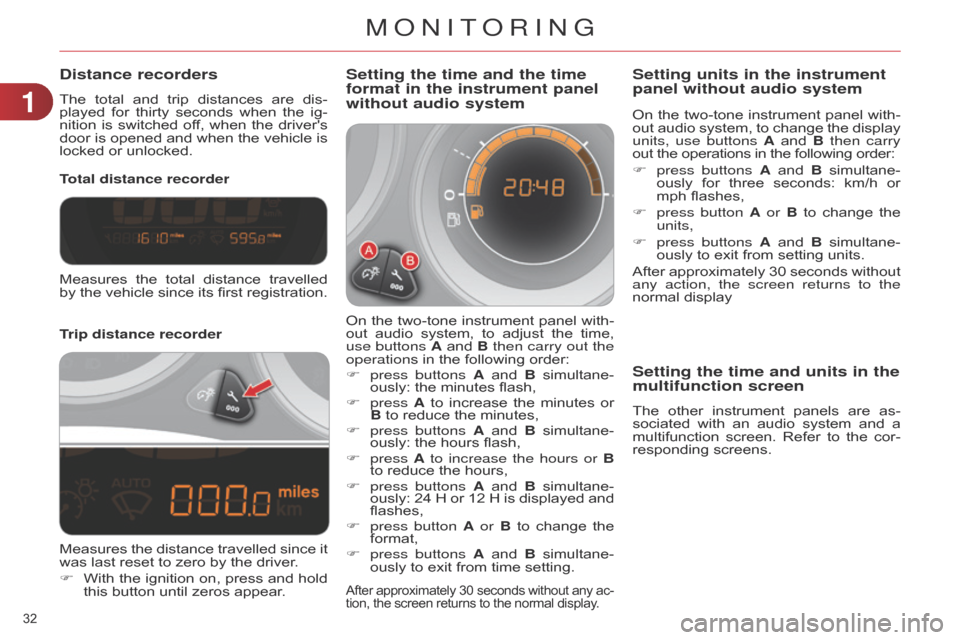
Distance recorders
The total and trip distances are dis -
played for thirty seconds when the ig -
nition
is
switched
of
f,
when
the
driver's
door
is
opened
and
when
the
vehicle
is
locked
or unlocked.
Trip distance recorder Total distance recorder
Setting the time and the time
format in the instrument panel
without audio system
On the two-tone instrument panel with -
out audio system, to adjust the time,
use buttons
A
and
B
then carry out the
operations
in the following order:
F
press buttons
A
and
B
simultane
-
ously:
the minutes flash,
F
press A
to
increase
the
minutes
or
B
to reduce the minutes,
F
press buttons
A
and
B
simultane
-
ously:
the hours flash,
F
press A to increase the hours or B
to
reduce the hours,
F
press buttons
A
and
B
simultane
-
ously:
24
H
or
12
H
is
displayed
and
flashes,
F
press button
A or B
to
change
the
format,
F
press buttons
A
and
B
simultane
-
ously
to exit from time setting.
After approximately 30 seconds without any ac -
tion, the screen returns to the normal display.
Measures the total distance travelled by
the vehicle since its first registration.
Measures
the
distance
travelled
since
it
was
last reset to zero by the driver.
F
With
the
ignition
on,
press
and
hold
this
button until zeros appear. On
the
two-tone
instrument
panel
with
-
out
audio
system,
to
change
the
display
units, use buttons
A
and
B
then carry
out the operations in the following order:
F
press buttons
A
and
B
simultane
-
ously
for
three
seconds:
km/h
or
mph
flashes,
F
press button
A or B
to
change
the
units,
F
press buttons
A
and
B
simultane
-
ously to exit from setting units.
After approximately 30 seconds without any action, the screen returns to the
normal
display
Setting units in the instrument
panel without audio system
Setting the time and units in the
multifunction screen
The other instrument panels are as -
sociated with an audio system and a
multifunction
screen.
Refer
to
the
cor
-
responding
screens.
1
MONITORING
Page 35 of 328
33
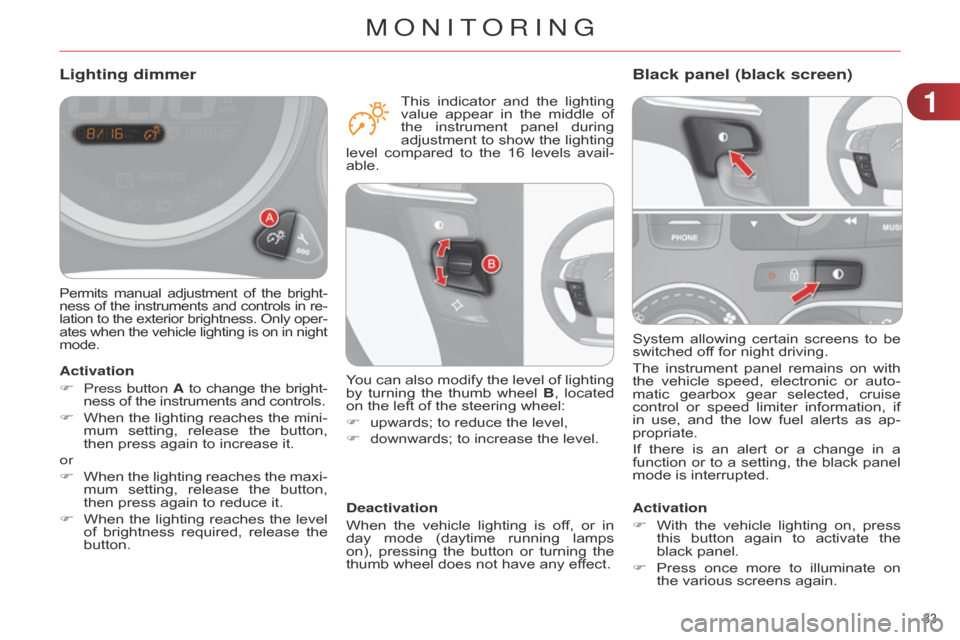
System allowing certain screens to be switched
off for night driving.
The
instrument
panel
remains
on
with
the
vehicle
speed,
electronic
or
auto
-
matic
gearbox
gear
selected,
cruise
control
or
speed
limiter
information,
if
in
use,
and
the
low
fuel
alerts
as
ap
-
propriate.
If
there
is
an
alert
or
a
change
in
a
function
or
to
a
setting,
the
black
panel
mode
is interrupted.
Black panel (black screen)
Activation
F
With
the
vehicle
lighting
on,
press
this
button
again
to
activate
the
black
panel.
F
Press
once
more
to
illu
minate
on
the
various screens again.
Permits manual adjustment of the bright -
ness of the instruments and controls in re -
lation
to
the
exterior
brightness.
Only
oper
-
ates
when
the
vehicle
lighting
is
on
in
night mode.
Lighting dimmer
Activation
F
Press button
A
to
change
the
bright
-
ness
of the instruments and controls.
F
When
the
lighting
reaches
the
mini
-
mum
setting,
release
the
button,
then
press again to increase it.
or
F
When
the
lighting
reaches
the
maxi
-
mum
setting,
release
the
button,
then
press again to reduce it.
F
When
the
lighting
reaches
the
level
of
brightness
required,
release
the
button.Deactivation
When
the
vehicle
lighting
is
of
f,
or
in
day
mode
(daytime
running
lamps
on),
pressing
the
button
or
turning
the
thumb
wheel does not have any effect.
You
can also modify the level of lighting
by
turning
the
thumb
wheel
B
,
located
on
the left of the steering wheel:
F
upwards;
to reduce the level,
F
downwards;
to increase the level.
This
indicator
and
the
lighting
value
appear
in
the
middle
of
the
instrument
panel
during
adjustment
to
show
the
lighting
level
compared
to
the
16
levels
avail
-
able.
1
MONITORING
Page 36 of 328
34
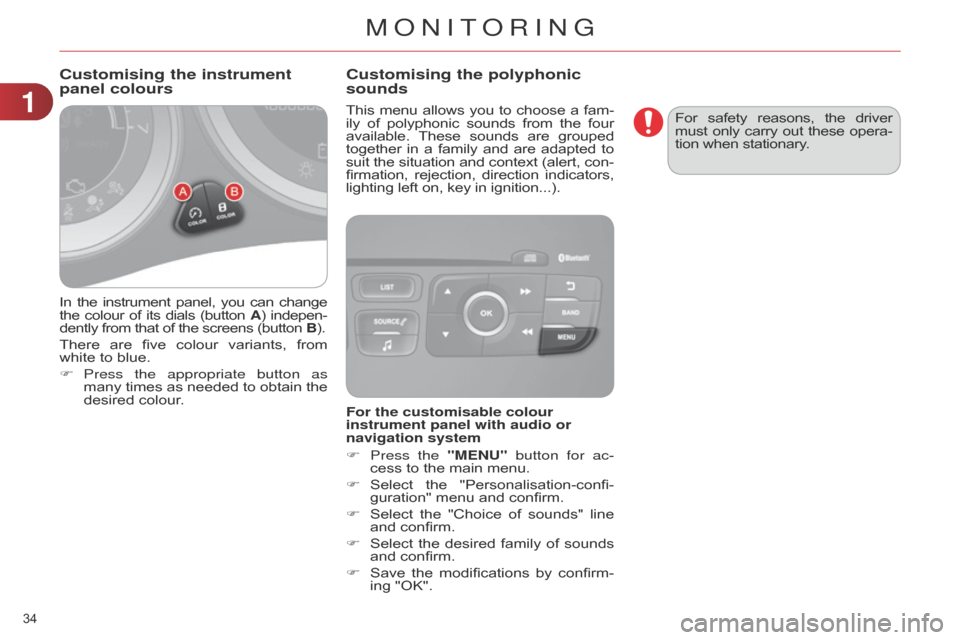
In the instrument panel, you can change the
colour of its dials (button A)
indepen -
dently
from that of the screens (button B).
There
are
five
colour
variants,
from
white
to blue.
F
Press the appropriate button as
many
times
as
needed
to
obtain
the
desired
colour. This
menu
allows
you
to
choose
a
fam
-
ily
of
polyphonic
sounds
from
the
four available.
These
sounds
are
grouped together
in
a
family
and
are
adapted
to suit
the
situation
and
context
(alert,
con
-
firmation,
rejection,
direction
indicators, lighting
left on, key in ignition...).
Customising the instrument
panel colours
Customising the polyphonic
sounds
For the customisable colour
instrument panel with audio or
navigation system
F
Press the
"MENU" button for ac-
cess
to the main menu.
F
Select
the
"Personalisation-confi
-
guration"
menu and confirm.
F
Select
the
"Choice
of
sounds"
line
and
confirm.
F
Select
the
desired
family
of
sounds
and
confirm.
F
Save
the
modifications
by
confirm
-
ing
"OK". For
safety
reasons,
the
driver must
only
carry
out
these
opera
-
tion when stationary.
1
MONITORING
Page 37 of 328
22
35
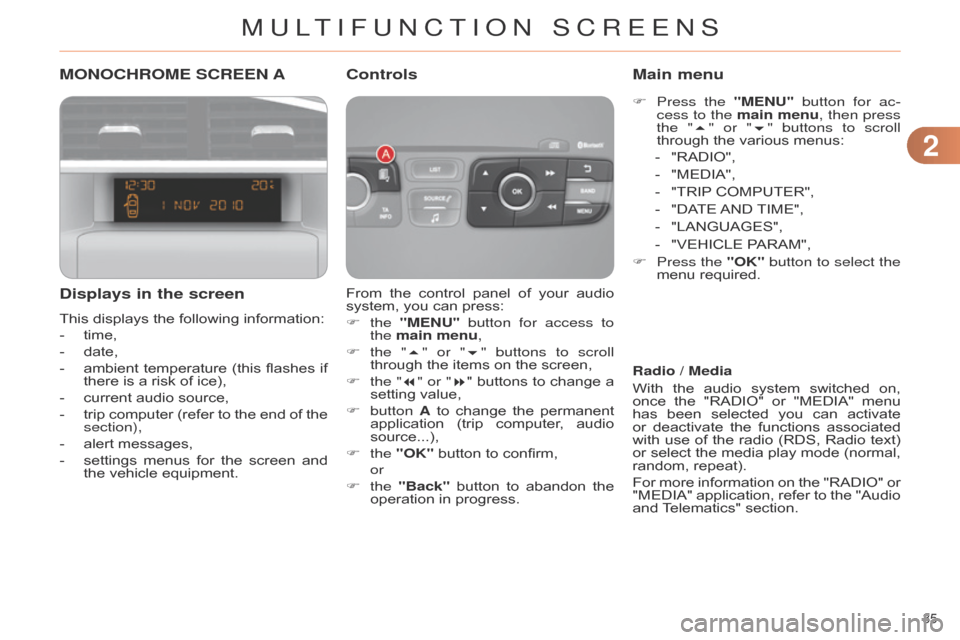
MONOCHROME SCREEN A
Displays in the screen
This displays the following information:
-
time,
-
date,
-
ambient
temperature
(this
flashes
if
there
is a risk of ice),
-
current
audio source,
-
trip
computer
(refer
to
the
end
of
the
section),
-
alert
messages,
-
settings
menus
for
the
screen
and
the
vehicle equipment. From
the
control
panel
of
your
audio
system,
you can press:
F the "MENU" button for access to
the main menu,
F
the "
5" or "6" buttons to scroll
through
the items on the screen,
F
the
"7" or "8"
buttons
to
change
a
setting
value,
F
button A
to
change
the
permanent
application
(trip
computer
,
audio
source...),
F
the "OK"
button to confirm,
or
F
the "Back"
button
to
abandon
the
operation
in progress.
Controls
F Press the "MENU" button for ac-
cess to the main menu, then press
the "5" or "6" buttons to scroll
through
the various menus:
-
"RADIO",
-
"MEDIA",
-
"TRIP
COMPUTER",
-
"DA
TE
AND
TIME",
-
"LANGUAGES",
-
"VEHICLE
PARAM",
F
Press
the "OK" button to select the
menu
required.
Main menu
Radio / Media
With
the
audio
system
switched
on,
once
the
"RADIO"
or
"MEDIA"
menu
has
been
selected
you
can
activate
or
deactivate
the
functions
associated
with
use
of
the
radio
(RDS,
Radio
text)
or
select
the
media
play
mode
(normal,
random,
repeat).
For
more
information
on
the
"RADIO"
or
"MEDIA"
application,
refer
to
the
"Audio
and
T
elematics" section.
MULTIFUNCTION SCREENS
Page 38 of 328
22
36
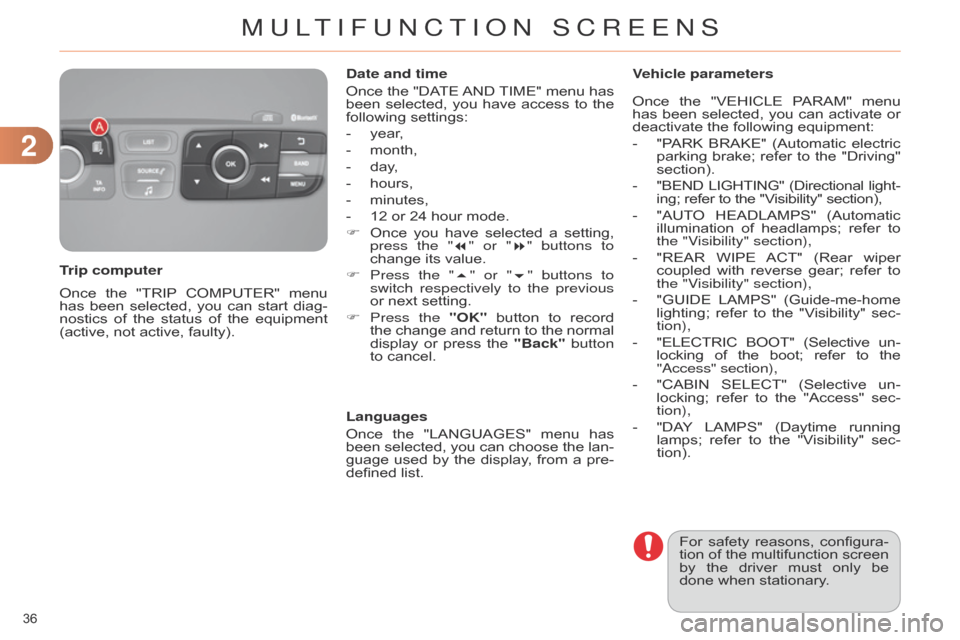
Once the "TRIP COMPUTER" menu has
been selected, you can start diag -
nostics
of
the
status
of
the
equipment
(active,
not active, faulty).
Trip computer Date and time
Once
the
"DA
TE
AND
TIME"
menu
has
been
selected,
you
have
access
to
the
following
settings:
-
year
,
-
month,
-
day
,
-
hours,
-
minutes,
-
12
or 24 hour mode.
F
Once
you
have
selected
a
setting,
press the "
7" or "8" buttons to
change its value.
F
Press the "
5" or "6" buttons to
switch respectively to the previous
or next setting.
F
Press
the "OK"
button
to
record
the
change
and
return
to
the
normal
display
or
press
the
"Back"
button
to
cancel.
Languages
Once
the
"LANGUAGES"
menu
has
been
selected,
you
can
choose
the
lan
-
guage
used
by
the
display
,
from
a
pre-
defined
list.For
safety
reasons,
configura
-
tion
of
the
multifunction
screen
by
the
driver
must
only
be
done
when stationary.
Vehicle parameters
Once
the
"VEHICLE
P
ARAM"
menu
has
been
selected,
you
can
activate
or
deactivate
the following equipment:
-
"P
ARK
BRAKE"
(Automatic
electric
parking
brake;
refer
to
the
"Driving"
section).
-
"BEND
LIGHTING"
(Directional
light
-
ing; refer to the "Visibility" section),
-
"AUT
O
HEADLAMPS"
(Automatic
illu
mination
of
headlamps;
refer
to
the "V
isibility" section),
-
"REAR
WIPE
ACT"
(Rear
wiper
coupled
with
reverse
gear;
refer
to
the "V
isibility" section),
- "GUIDE LAMPS" (Guide-me-home
lighting;
refer
to
the
"V
isibility"
sec
-
tion),
-
"ELECTRIC
BOOT"
(Selective
un
-
locking
of
the
boot;
refer
to
the "
a ccess" section),
-
"CABIN
SELECT"
(Selective
un
-
locking;
refer
to
the
"Access"
sec
-
tion),
-
"DA
Y
LAMPS"
(Daytime
running
lamps;
refer
to
the
"V
isibility"
sec
-
tion).
MULTIFUNCTION SCREENS
Page 39 of 328
22
37
MONOCHROME SCREEN C
Displays in the screen
This displays the following information:
-
time,
-
date,
-
ambient
temperature
(this
flashes
if
there
is a risk of ice),
-
parking
sensor information,
-
parking
space measurement,
-
current
audio source,
-
telephone
or
Bluetooth
system
in
-
formation,
-
trip
computer
(refer
to
the
end
of
the
section),
-
alert
messages,
-
settings
menus
for
the
screen
and
the
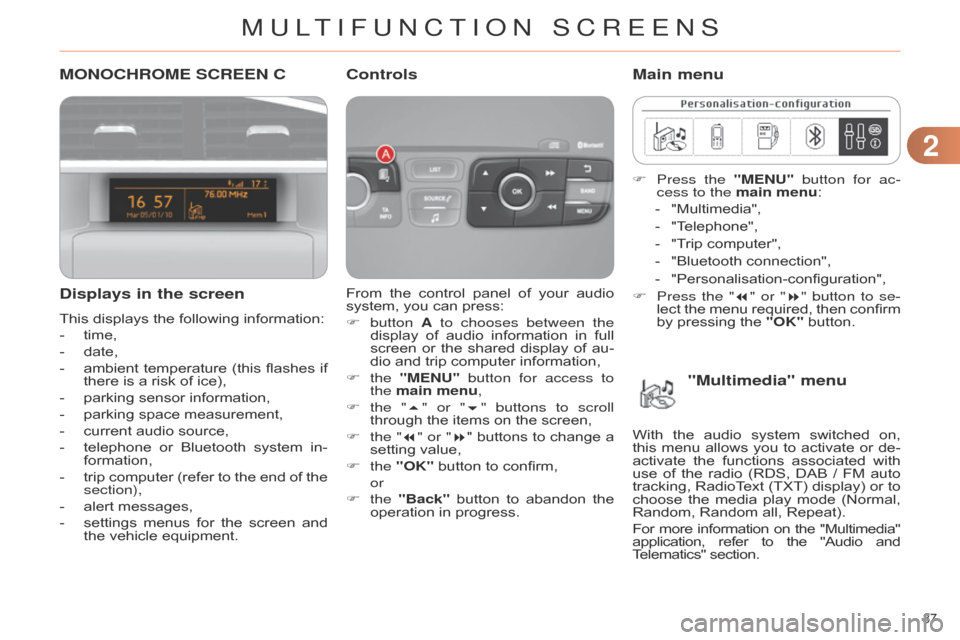
vehicle equipment. From
the
control
panel
of
your
audio
system,
you can press:
F button A to chooses between the
display
of
audio
information
in
full
screen
or
the
shared
display
of
au
-
dio
and trip computer information,
F
the "MENU" button for access to
the main menu,
F
the "
5" or "6" buttons to scroll
through
the items on the screen,
F
the
"7" or "8"
buttons
to
change
a
setting
value,
F
the "OK"
button to confirm,
or
F
the "Back"
button
to
abandon
the
operation
in progress.
Controls
F Press the "MENU" button for ac-
cess to the main menu:
-
"Multimedia",
-
"T
elephone",
-
"T
rip computer",
-
"Bluetooth
connection",
-
"Personalisation-configuration",
F
Press
the "7" or "8" button to se-
lect
the
menu
required,
then
confirm
by
pressing the "OK" button.
Main menu
"Multimedia" menu
With the audio system switched on, this
menu allows you to activate or de -
activate
the
functions
associated
with
use
of
the
radio
(RDS,
DAB
/ FM
auto
tracking,
RadioT
ext
(TXT)
display)
or
to
choose
the
media
play
mode
(Normal,
Random,
Random all, Repeat).
For
more
information
on
the
"Multimedia" application,
refer
to
the
"Audio
and T
elematics" section.
MULTIFUNCTION SCREENS
Page 48 of 328
22
46
A few definitions…
This value may vary following a change
in the style of driving or
the
relief,
resulting
in
a
signifi
-
cant
change
in
the
current
fuel
consumption.
If
dashes
are
displayed
continu
-
ously
while
driving
in
place
of
the digits,
contact
a
CITROËN
dealer or
a qualified workshop. This
function
is
only
displayed
from
20 mph (30 km/h).
Range
(miles or km)
This
indicates
the
distance
which
can
still
be
travelled
with
the
fuel
remaining
in
the
tank
in
relation
to
the
average
fuel
consump
-
tion
over
the
last
few
miles
(kilometres)
travelled.
When
the
range
falls
below
20
miles
(30
km),
dashes
are
displayed.
After
fillin
g
with
at
least
5
litres
of
fuel,
the
range
is
recalculated
and
is
displayed
when
it exceeds 60 miles (100 km).Current fuel consumption
(mpg
or l/100 km or km/l)
This
is
the
average
fuel
consump
-
tion during the last few seconds.
Average fuel consumption
(mpg or l/100 km or km/l)
This
is
the
average
fuel
con
-
sumption
since
the
last
trip
computer
zero reset.Average speed
(mph
or km/h)
This
is
the
average
speed
calcu
-
lated
since
the
last
trip
computer zero
reset (ignition on).
Distance travelled
(miles or km)
This
indicates
the
distance
travelled
since the last trip computer
zero reset.
Stop & Start time counter
(minutes/seconds
or
hours/
minutes)
If
your
vehicle
is
fitted
with
Stop
&
Start,
a
time
counter
calculates
the
time
spent
in
STOP
mode during a journey.
It
resets
to
zero
every
time
the
ignition
is
switched on with the key.
The
fuel
consumption
of
your
vehicle
will
be
higher
than
the
official
figures
obtained
by
CITROËN
during
the
first
3
000 miles
(5
000 km)
of
the
vehicle's
life.
MULTIFUNCTION SCREENS
Page 73 of 328
71 * According to country.
ALARM*
System which protects and provides a deterrent
against theft and break-ins. It provides
the
following
types
of
monitoring.
-
exterior perimeter
The
system
checks
for
opening
of
the
vehicle.
The
alarm
is
triggered
if
anyone
tries
to
open
a door, the boot, the bonnet...
-
interior volumetric
The
system
checks
for
any
variation
in
the volume
in the passenger compartment.
The
alarm
is
triggered
if
anyone
breaks
a window
,
enters
the
passenger
compart
-
ment
or moves inside the vehicle.
-
tilt
The
system
checks
for
any
change
in
the
attitude of the vehicle.
The
alarm
is
triggered
if
the
vehicle
is
lifted,
moved or knocked.
Self-protection function
The
system
checks
for
the
putting
out
of
service of its components.
The
alarm
is
triggered
if
the
battery
,
the
central
control
or
the
siren
wiring
are
put
out of service or damaged.
For
all
work
on
the
alarm
sys
-
tem,
contact
a
CITROËN
dealer
or
a qualified workshop.
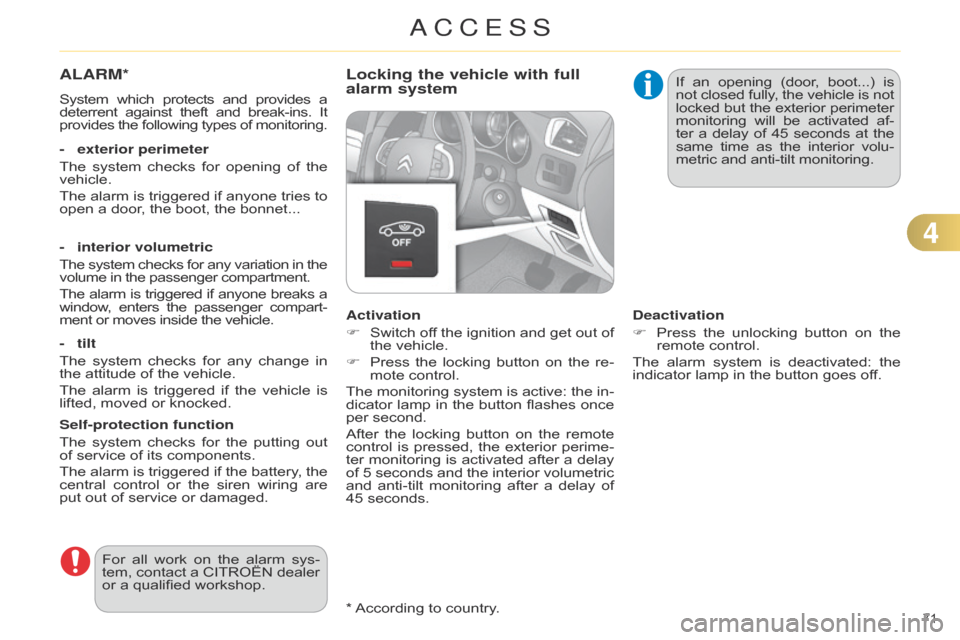
Locking the vehicle with full
alarm system
Activation
F
Switch
of
f
the
ignition
and
get
out
of
the
vehicle.
F
Press
the
locking
button
on
the
re
-
mote
control.
The
monitoring
system
is
active:
the
in
-
dicator
lamp
in
the
button
flashes
once
per
second.
After
the
locking
button
on
the
remote
control
is
pressed,
the
exterior
perime
-
ter
monitoring
is
activated
after
a
delay
of
5
seconds
and
the
interior
volumetric
and
anti-tilt
monitoring
after
a
delay
of
45
seconds. If
an
opening
(door
,
boot...)
is not
closed
fully
,
the
vehicle
is
not locked
but
the
exterior
perimeter monitoring
will
be
activated
af
-
ter
a
delay
of
45
seconds
at
the same
time
as
the
interior
volu
-
metric and anti-tilt monitoring.
Deactivation
F
Press
the
unlocking
button
on
the
remote
control.
The
alarm
system
is
deactivated:
the
indicator
lamp in the button goes off.
4
ACCESS
Page 143 of 328
99
141
You can change mode at any time
by moving the gear lever
from
A
to M or the other way
round.
At
low
high
speed,
if
reverse
gear
is
requested,
the
N
indicator
flashes
and
the
gearbox
goes
into
neutral
automati
-
cally.
T
o
engage
reverse,
put
the
gear
lever in position
N, then position R. When
immobilising the vehicle, with
the engine running, you
must
place
the
gear
lever
in
neu
-
tral N.
Before
carrying
out
any
work
in
the
engine
compartment,
ensure
that
the
gear
lever
is
in
neutral N
and
that
the
parking
brake
is
ap
-
plied.
Whatever
the
circumstances,
you
must
manually
apply
the
parking
brake
when
parking,
unless
the
parking
brake
is
pro
-
grammed
in automatic mode.
Reverse
To engage reverse gear R , the vehicle
must be immobilised with your foot on
the
brake pedal.
F
Select position
R.
Operating fault
With the ignition on, the flashing of AUT
O, accompanied by an audible sig -
nal
and
a
message
in
the
screen,
indi
-
cates
a malfunction of the gearbox.
Have
it
checked
by
a
CITROËN
dealer
or
a qualified workshop.
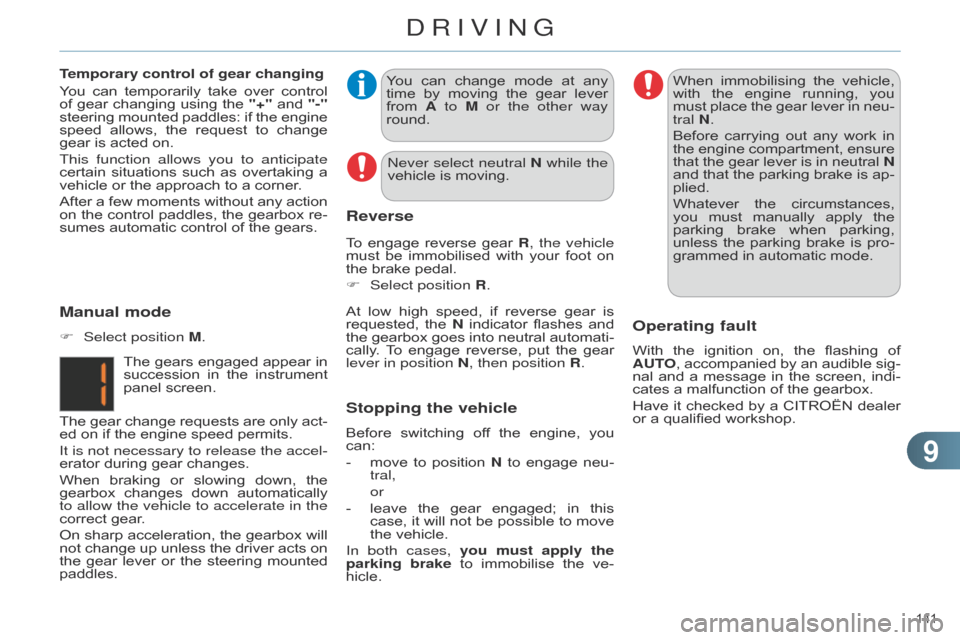
Manual mode
F Select position M.
The
gears
engaged
appear
in
succession
in
the
instrument
panel
screen.
The
gear
change
requests
are
only
act
-
ed
on if the engine speed permits.
It is not necessary to release the accel-
erator
during gear changes.
When
braking
or
slowing
down,
the
gearbox
changes
down
automatically
to allow the vehicle to accelerate in the
correct
gear.
On
sharp
acceleration,
the
gearbox
will
not
change
up
unless
the
driver
acts
on
the
gear
lever
or
the
steering
mounted
paddles. T
emporary control of gear changing
You
can
temporarily
take
over
control
of
gear
changing
using
the
"+"
and
"-"
steering
mounted
paddles:
if
the
engine
speed
allows,
the
request
to
change
gear
is acted on.
This function allows you to anticipate
certain
situations
such
as
overtaking
a
vehicle
or the approach to a corner.
After
a
few
moments
without
any
action
on
the
control
paddles,
the
gearbox
re
-
sumes automatic control of the gears.
n
ever select neutral N while the
vehicle is moving.
Stopping the vehicle
Before switching
of f the engine, you can:
-
move
to
position
N
to
engage
neu
-
tral,
or
-
leave
the
gear
engaged;
in
this
case,
it
will
not
be
possible
to
move
the
vehicle.
In both cases, you must apply the
parking brake
to
immobilise
the
ve
-
hicle.
DRIVING