mirror Citroen C4 RHD 2015 2.G Owner's Manual
[x] Cancel search | Manufacturer: CITROEN, Model Year: 2015, Model line: C4 RHD, Model: Citroen C4 RHD 2015 2.GPages: 328, PDF Size: 12.72 MB
Page 4 of 328
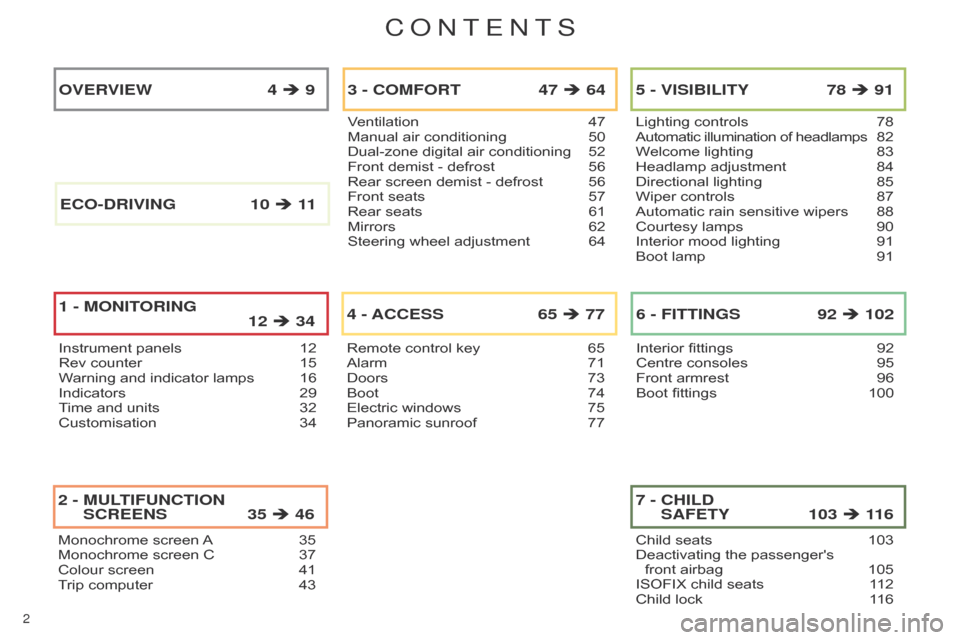
2
Monochromeô screenô Aô 35
Monochrome ô screen ô C ô 37
Colour
ô screen ô
41
T
rip ô computer ô
43
2 - MULTIFUNCTION SCREENS 35 ÿ´
46
Ventilationô 47
Manual ô air ô conditioning ô 50
Dual-zone
ô digital ô air ô conditioning ô
52
Front
ô demist ô - ô defrost ô
56
Rear
ô screen ô demist ô - ô defrost ô
56
Front
ô seats ô
57
Rear
ô seats ô
61
Mirrors
ô
62
Steering
ô wheel ô adjustment ô
64
3 - COMFORT 47 ÿ´ 64
Remoteô controlô keyô 65
Alarm ô 71
Doors
ô
73
Boot
ô
74
Electric
ô windows ô
75
Panoramic
ô sunroof ô
77
4 - ACCESS 65 ÿ´ 77
Lightingô controlsô 78
Automatic ô illumination ô of ô headlamps ô 8 2
Welcome
ô lighting ô
83
Headlamp
ô adjustment ô
84
Directional
ô lighting ô
85
Wiper
ô controls ô
87
Automatic
ô rain ô sensitive ô wipers ô
88
Courtesy
ô lamps ô
90
Interior
ô mood ô lighting ô
91
Boot
ô lamp ô
91
5 - VISIBILITY 78 ÿ´ 91
Interiorô fittingsô 92
Centre ô consoles ô 95
Front
ô armrest ô
96
Boot
ô fittings ô
100
6 - FITTINGS 92 ÿ´ 102
Instrumentô panelsô 12
Rev ô counter ô 15
W
arning ô and ô indicator ô lamps ô
16
Indicators
ô
29
T
ime ô and ô units ô
32
Customisation
ô
34
OVERVIEW 4 ÿ´ 9
1 -
MONITORING 12 ÿ´ 34
Childô seatsô 103
Deactivating ô the ô passenger's ô
front
ô airbag ô
105
ISOFIX
ô child ô seats ô
1
12
Child
ô lock ô
1
16
7 - CHILD SAFETY 103 ÿ´
11 6
E
CO
-
DRIVING
10
ÿ´ 11
ConTEnTS
Page 6 of 328
4ô 4ô
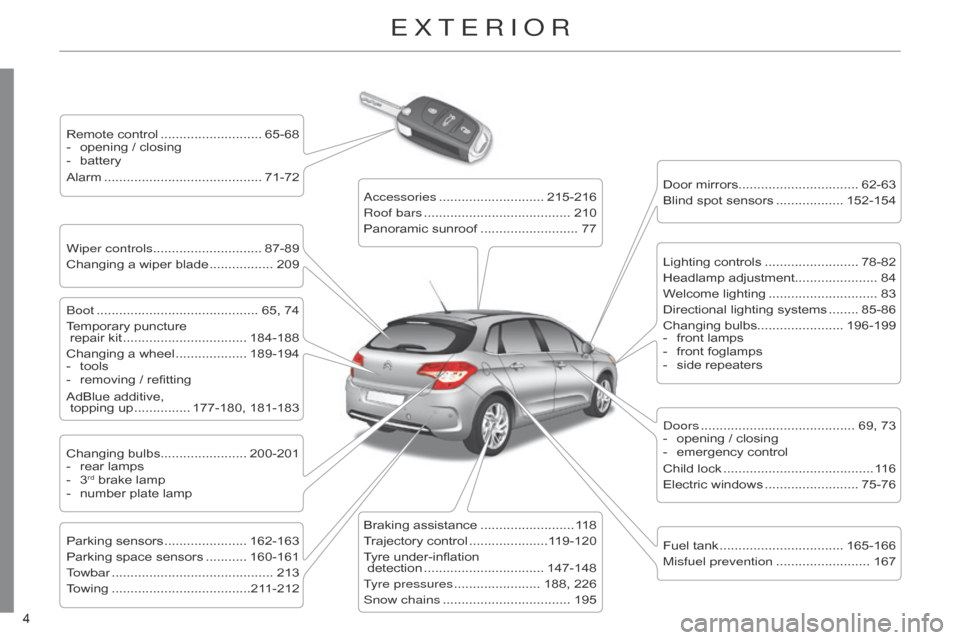
ExTERIoR
Remoteô controlô ........................... 65-68
- ô opening ô / ô closing
-
ô
battery
Alarm
ô
.......................................... 71-72
Wiper controls............................. 87-89
Changing
ô a ô wiper ô blade ô
................. 209 Door
ô mirrors ô
................................ 62-63
Blind
ô spot ô sensors ô
.................. 152-154
b
oot ô
........................................... 65,
ô 74
Temporary
ô puncture ô
ô
repair ô kit ô
................................. 184-188
Changing
ô a ô wheel ô
................... 189-194
-
ô
tools
-
ô
removing
ô / ô refitting
AdBlue
ô additive, ô
ô
topping ô up ô
............... 177-180,
ô 181-183
Changing
ô bulbs....................... 200-201
-
ô
rear
ô lamps
-
ô
3rdô brakeô lamp
-
ô number ô plate ô lamp
Parking
ô sensors ô
...................... 162-163
Parking
ô space ô sensors ô
........... 160-161
T
owbar ô
........................................... 213
T
owing ô
.....................................21
1-212
a
ccessories ô
............................ 215-216
Roof bars
ô
....................................... 210
Panoramic
ô sunroof ô
.......................... 77
Braking
ô assistance ô
.........................11
8
Trajectory
ô control ô
.....................1
19-120
Tyre
ô under-inflation ô
ô
detection ô
................................ 147-148
T
yre pressures ô
....................... 188,
ô 226
Snow chains
ô
.................................. 195Lighting
ô controls ô
......................... 78-82
Headlamp
ô adjustment...................... 84
Welcome ô lighting ô
............................. 83
Directional
ô lighting ô systems ô
........ 85-86
Changing
ô bulbs....................... 196-199
- ô
front
ô lamps
- ô
front
ô foglamps
- ô
side
ô repeaters
d
oors ô
......................................... 69,
ô 73
- ô
opening
ô / ô closing
- ô
emergency
ô control
Child ô lock ô ........................................
11 6
Electric ô windows ô ......................... 75-76
Fuel
ô tank ô
................................. 165-166
Misfuel prevention
ô
......................... 167
Page 8 of 328
6ô 6ô
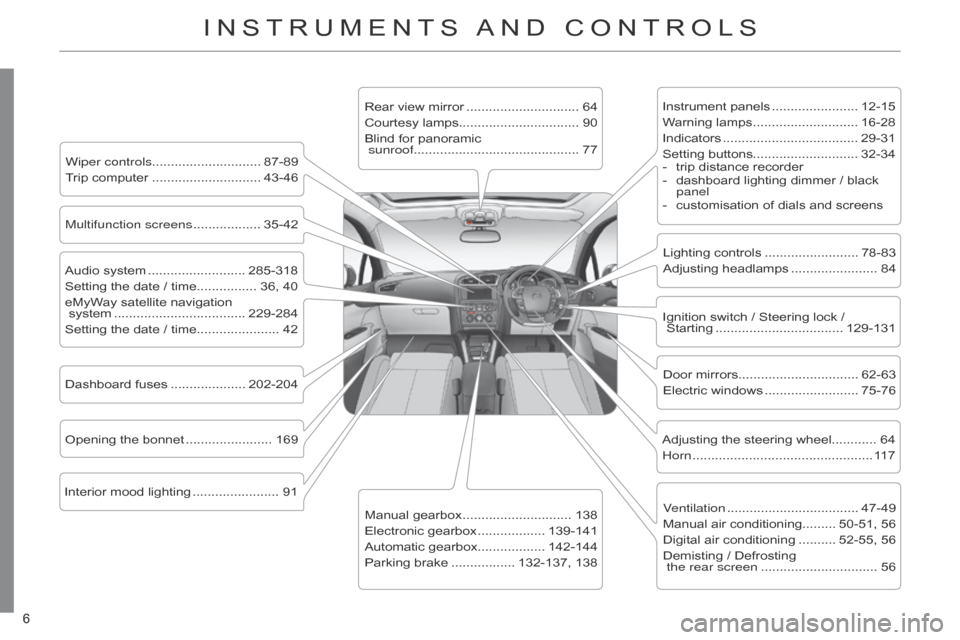
INSTRUMENTSô ANDô CONTROLS
Instrumentô panelsô ....................... 12-15
W arning ô lamps ô ............................ 16-28
Indicators
ô
.................................... 29-31
Setting
ô buttons............................ 32-34
-
ô
trip
ô distance ô recorder
-
ô
dashboard
ô lighting ô dimmer ô / ô black ô
panel
-
ô
customisation
ô of ô dials ô and ô screens
Lighting
ô controls ô
......................... 78-83
Adjusting
ô headlamps ô
....................... 84
Door
ô mirrors ô
................................ 62-63
Electric
ô windows ô
......................... 75-76
Dashboard
ô
fuses
ô
.................... 202-204
Opening
ô
the
ô
bonnet
ô
....................... 169 Adjusting
ô the ô steering ô wheel............ 64
Horn
ô
................................................ 11
7
Audio
ô
system
ô
.......................... 285-318
Setting
ô
the
ô
date
ô
/
ô
time................ 36,
ô
40
eMyWay
ô
satellite
ô
navigation
ô
ô
system
ô
................................... 229-284
Setting
ô
the
ô
date
ô
/
ô
time...................... 42 Manual
ô
gearbox
ô
............................. 138
Electronic
ô
gearbox
ô
.................. 139-141
Automatic
ô
gearbox.................. 142-144
Parking
ô
brake
ô
................. 132-137,
ô
138
Wiper controls............................. 87-89
Trip
ô
computer
ô
............................. 43-46 Rear
ô
view
ô
mirror
ô .............................. 64
Courtesy
ô
lamps................................ 90
Blind
ô
for
ô
panoramic
ô
sunroof ............................................ 77
Interior
ô
mood
ô
lighting
ô
....................... 91 Ignition
ô switch ô / ô Steering ô lock ô / ô
ô
Starting ô
.................................. 129-131
Multifunction screens
ô
.................. 35-42
V
entilation ô
................................... 47-49
Manual
ô air ô conditioning......... 50-51, ô 56
Digital
ô air ô conditioning ô
.......... 52-55,
ô 56
Demisting
ô / ô Defrosting ô
the rear screen
ô
............................... 56
Page 58 of 328
33
56ô
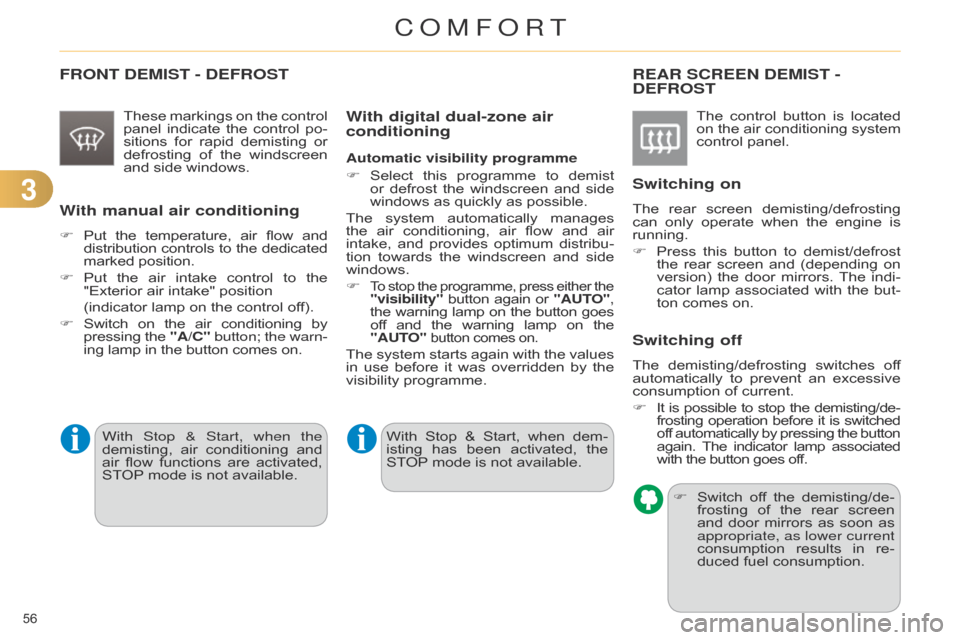
FRONT DEMIST - DEFROST
Theseô markingsô on ô the ô control ô panel
ô indicate ô the ô control ô po -
sitions
ô
for
ô
rapid
ô
demisting
ô
or
ô
defrosting
ô
of
ô
the
ô
windscreen
ô
and
ô side ô windows.
With manual air conditioning
Fô Putô the ô temperature, ô air ô flow ô andô distribution
ô controls ô to ô the ô dedicatedô marked
ô position.
F
ô
Put
ô
the
ô
air
ô
intake
ô
control
ô
to
ô
the
ô
"Exterior
ô air ô intake" ô position ô
ô
(indicator
ô lamp ô on ô the ô control ô off).
F
ô
Switch
ô
on
ô
the
ô
air
ô
conditioning
ô
byô pressing
ô
the
ô
"A/C"
button; the warn-
ing
ô lamp ô in ô the ô button ô comes ô on.
REAR SCREEN DEMIST - DEFROST
Theô controlô button ô is ô located ô on
ô the ô air ô conditioning ô system ô
control
ô panel.
Switching on
Theô rear ô screen ô demisting/defrosting ô can
ô only ô operate ô when ô the ô engine ô is ô
running.
F
ô
Press
ô
this
ô
button
ô
to
ô
demist/defrost
ô
the
ô
rear
ô
screen
ô
and
ô
(depending
ô
on
ô
version)
ô
the
ô
door
ô
mirrors.
ô
The
ô
indi
-
cator
ô
lamp
ô
associated
ô
with
ô
the
ô
but
-
ton
ô comes ô on.
Switching off
Theô demisting/defrosting ô switches ô of f ô automatically
ô to ô prevent ô an ô excessive ô
consumption
ô of ô current.
F
ô
It
ô
is
ô
possible
ô
to
ô
stop
ô
the
ô
demisting/de
-
frosting
ô
operation
ô
before
ô
it
ô
is
ô
switchedô of
f ô
automatically
ô
by
ô
pressing
ô
the
ô
buttonô again.
ô
The
ô
indicator
ô
lamp
ô
associatedô with
ô the ô button ô goes ô off.
F
ô
Switch
ô
of
f ô
the
ô
demisting/de
-
frosting
ô
of
ô
the
ô
rear
ô
screen
ô
and
ô
door
ô
mirrors
ô
as
ô
soon
ô
as
ô
appropriate, as lower current
consumption
ô
results
ô
in
ô
re
-
duced
ô fuel ô consumption.
With digital dual-zone air
conditioning
Automatic visibility programme
Fô
Select
ô
this
ô
programme
ô
to
ô
demist
ô
or
ô
defrost
ô
the
ô
windscreen
ô
and
ô
side
ô
windows
ô as ô quickly ô as ô possible.
The
ô
system
ô
automatically
ô
manages
ô
the
ô
air
ô
conditioning,
ô
air
ô
flow
ô
and
ô
air
ô
intake,
ô
and
ô
provides
ô
optimum
ô
distribu
-
tion
ô
towards
ô
the
ô
windscreen
ô
and
ô
side
ô
windows.
F
Toô stop ô the ô programme, ô press ô either ô theô "visibility"ô buttonô again ô or ô "AUT O",
the ô warning ô lamp ô on ô the ô button ô goesô of
f ô
and
ô
the
ô
warning
ô
lamp
ô
on
ô
theô "AUT
O"
buttonô comesô on.
Theô system ô starts ô again ô with ô the ô values ô in
ô use ô before ô it ô was ô overridden ô by ô the ô
visibility
ô programme.
With
ô
Stop
ô
&
ô
Start,
ô
when
ô
dem
-
isting
ô
has
ô
been
ô
activated,
ô
the
ô
ST
OP
ô
mode ô is ô not ô available.
With Stop & Start, when the
demisting,
ô
air
ô
conditioning
ô
and
ô
air
ô
flow
ô
functions
ô
are
ô
activated,
ô
ST
OP
ô
mode
ô
is
ô
not
ô
available.
COMFORT
Page 64 of 328

33
62ô
MIRRORS
Door mirrors
Eachô fittedô with ô an ô adjustable ô mirror ô glass
ô permitting ô the ô lateral ô rearward ô vi -
sion
ô
necessary
ô
for
ô
overtaking
ô
or
ô
park
-
ing.
ô
They
ô
can
ô
also
ô
be
ô
folded
ô
for
ô
parking
ô
in
ô confined ô spaces.
Demisting - Defrosting F
Move control
A ô
to
ô
the
ô
right
ô
or
ô
to
ô
the
ô
left
ô
to
ô
select
ô
the
ô
corresponding
ô
mir
-
ror.
F
Move control
B ô
in
ô
all
ô
four
ô
directions
ô
to
ô adjust.
F
Return control
A to the central posi-
tion.
Adjustment
If ô
the
ô
mirrors
ô
are
ô
folded
ô
using
ô
control
A
, ô
they
ô
will
ô
not
ô
unfold
ô
when
ô
the
ô
vehicle
ô
is
ô
unlocked.
ô
Pull
ô again ô on ô control ô A.
Folding
F ô
From
ô
outside:
ô
lock
ô
the
ô
vehicle
ô
using
ô
the
ô remote ô control ô or ô the ô key.
F ô
From
ô
inside:
ô
with
ô
the
ô
ignition
ô
on,
ô
pull the
control A in the central posi-
tion ô rearwards.
The ô
folding
ô
and
ô
unfolding
ô
of
ô
the
ô
door
ô
mirrors
ô
using
ô
the
ô
remote
ô
control
ô
can
ô
be
ô
deactivated
ô
by
ô
a
ô
CITROûN
ô
dealer
ô
or
ô
a
ô
qualified
ô
workshop.
Unfolding
F
ô
From
ô
outside:
ô
unlock
ô
the
ô
vehicle
ô
us
-
ing ô the ô remote ô control ô or ô the ô key.
F ô
From
ô
inside:
ô
with
ô
the
ô
ignition
ô
on,
ô pull the
control A in the central posi-
tion ô rearwards.
If
ô
necessary
ô
the
ô
mirrors
ô
can
ô
be
ô
folded
ô manually.
ô If
ô
your
ô
vehicle
ô
is
ô
fitted
ô
with
ô
heated
ô
mirrors,
ô
the
ô
demisting-
defrosting
ô
operates
ô
by
ô
switch
-
ing
ô
on
ô
the
ô
heated
ô
rear
ô
screen
ô
(refer to the "Rear screen
demist-defrost"
ô page).
As
ô
a
ô
safety
ô
measure,
ô
the
ô
mirrors
ô
should
ô
be
ô
adjusted
ô
to
ô
reduce
ô
the
ô
blind
ô spots.
The ô
objects
ô
observed
ô
are,
ô
in
ô
re
-
ality,
ô closer ô than ô they ô appear.
Take
ô
this
ô
into
ô
account
ô
in
ô
order
ô
to
ô
correctly
ô
judge
ô
the
ô
distance
ô
of
ô
vehicles
ô
approaching
ô
from
ô
be
-
hind.
COMFORT
Page 65 of 328
33
63ô
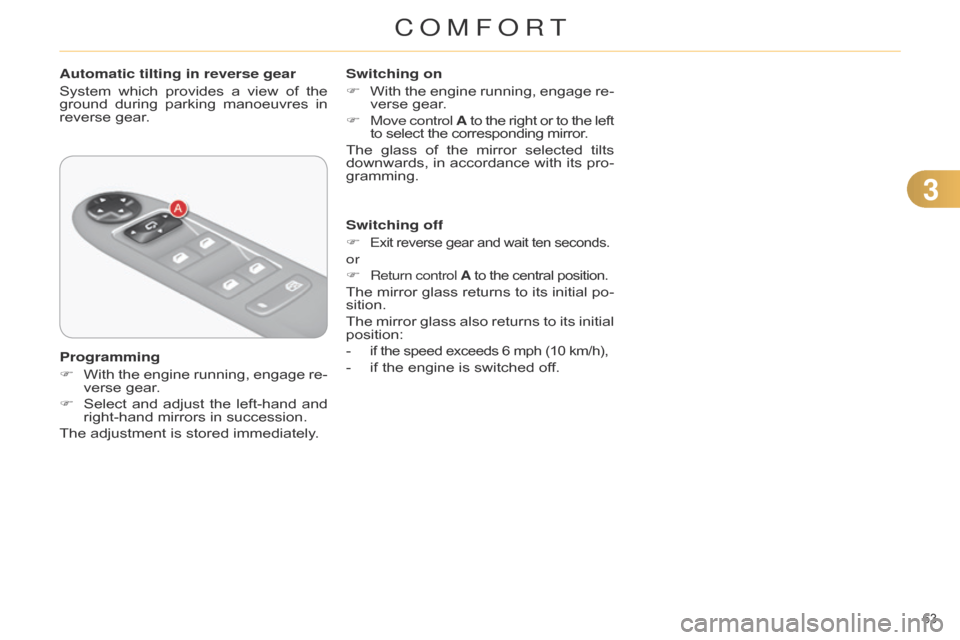
Automatic tilting in reverse gear
Systemô
which
ô
provides
ô
a
ô
view
ô
of
ô
the
ô
ground
ô
during
ô
parking
ô
manoeuvres
ô
in
ô
reverse
ô gear.
Programming
F
ô
With
ô
the
ô
engine
ô
running,
ô
engage
ô
re
-
verse
ô gear.
F
ô
Select
ô
and
ô
adjust
ô
the
ô
left-hand
ô
and
ô
right-hand
ô mirrors ô in ô succession.
The
ô adjustment ô is ô stored ô immediately.Switching on
F
ô
With
ô
the
ô
engine
ô
running,
ô
engage
ô
re
-
verse
ô gear.
F
Move control
A
ô to
ô
the
ô
right
ô
or
ô
to
ô
the
ô
leftô to
ô select ô the ô corresponding ô mirror.
The
ô
glass
ô
of
ô
the
ô
mirror
ô
selected
ô
tilts
ô
downwards,
ô
in
ô
accordance
ô
with
ô
its
ô
pro
-
gramming.
Switching off
F
Exitô reverseô gearô andô waitô tenô seconds.
or
F
Return control Aô to ô the ô central ô position.
Theô mirrorô glass ô returns ô to ô its ô initial ô po -
sition.
The
ô
mirror
ô
glass
ô
also
ô
returns
ô
to
ô
its
ô
initial
ô
position:
-
ô
ifô theô speedô exceedsô 6ô mphô (10ô km/h),
-ô if ô the ô engine ô is ô switched ô off.
COMFORT
Page 66 of 328
33
64ô
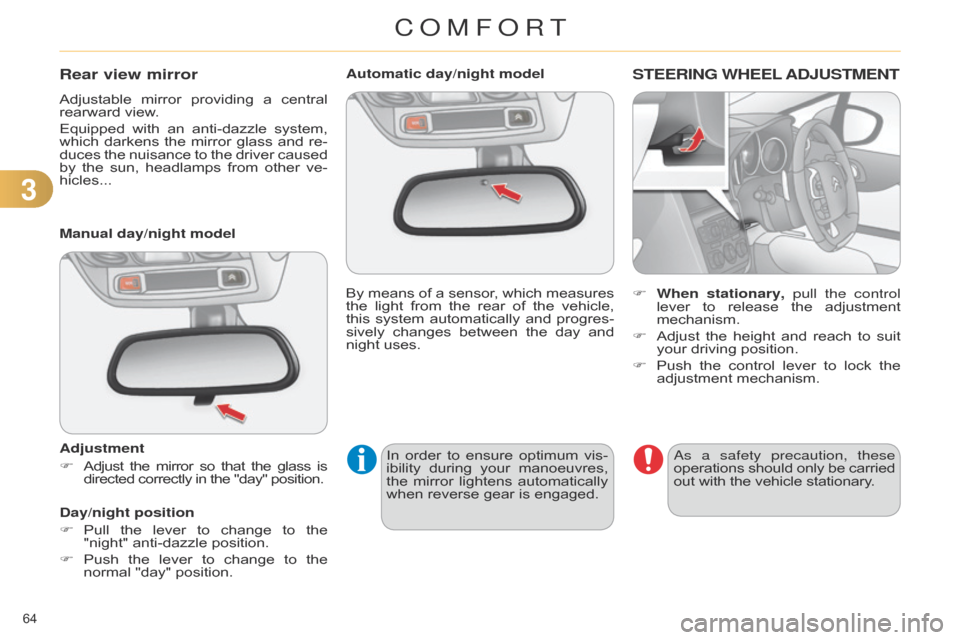
Automatic day/night model
Byô
means
ô
of
ô
a
ô
sensor
, ô
which
ô
measures
ô
the
ô
light
ô
from
ô
the
ô
rear
ô
of
ô
the
ô
vehicle,
ô
this
ô
system
ô
automatically
ô
and
ô
progres
-
sively
ô
changes
ô
between
ô
the
ô
day
ô
and
ô
night
ô uses.In
ô
order
ô
to
ô
ensure
ô
optimum
ô
vis
-
ibility
ô
during
ô
your
ô
manoeuvres,
ô
the
ô
mirror
ô
lightens
ô
automatically
ô
when
ô reverse ô gear ô is ô engaged.STEERING WHEEL AD j USTMENT
F When stationary, pull the control
lever ô to ô release ô the ô adjustment ô
mechanism.
F
ô
Adjust
ô
the
ô
height
ô
and
ô
reach
ô
to
ô
suit
ô
your
ô driving ô position.
F
ô
Push
ô
the
ô
control
ô
lever
ô
to
ô
lock
ô
the
ô
adjustment
ô mechanism.
a
s a safety precaution, these
operations
ô
should
ô
only
ô
be
ô
carriedô out
ô with ô the ô vehicle ô stationary.
Rear view mirror
Adjustableô mirrorô providing ô a ô central ô rearward
ô view.
Equipped
ô
with
ô
an
ô
anti-dazzle
ô
system,
ô
which
ô
darkens
ô
the
ô
mirror
ô
glass
ô
and
ô
re
-
duces
ô
the
ô
nuisance
ô
to
ô
the
ô
driver
ô
caused
ô
by
ô
the
ô
sun,
ô
headlamps
ô
from
ô
other
ô
ve
-
hicles...
Manual day/night model
Adjustment
F
ô Adjust
ô
the
ô
mirror
ô
so
ô
that
ô
the
ô
glass
ô
isô
directed
ô correctly ô in ô the ô "day" ô position.
Day/night position
F
ô
Pull
ô
the
ô
lever
ô
to
ô
change
ô
to
ô
the
ô
"night"
ô anti-dazzle ô position.
F
ô
Push
ô
the
ô
lever
ô
to
ô
change
ô
to
ô
the
ô
normal
ô "day" ô position.
COMFORT
Page 67 of 328

65ô
REMOTE CONTROL KEY
Systemô whichô permits ô central ô unlocking ô or
ô locking ô of ô the ô vehicle ô using ô the ô door ô
lock
ô
or
ô
from
ô
a
ô
distance.
ô
It
ô
is
ô
also
ô
used
ô
to
ô
locate
ô
and
ô
start
ô
the
ô
vehicle,
ô
as
ô
well
ô
as
ô providing ô protection ô against ô theft.
Unlocking the vehicle
Unfolding the key
Fô
Press
ô this ô button ô to ô unfold ô the ô key.
F
ô
Press
ô
the
ô
open
ô
padlock
ô
to
ô
unlock
ô
the
ô
vehicle
ô
com
-
pletely. F
ô
Press
ô
the
ô
open
ô
padlock
ô
once
ô
to
ô
unlock
ô
the
ô
driver's
ô
door
ô only.
Selective unlocking using the
remote control
Complete unlocking using
the remote control F
ô
Press
ô
the
ô
open
ô
padlock
ô
again
ô
to
ô
un
-
lock ô the ô other ô doors ô and ô the ô boot.
F
Maintain the press on the
open
ô
padlock
ô
until
ô
the
ô
de
-
sired ô position ô is ô obtained. ô The
ô windows ô stop ô as ô soon ô as
ô you ô release ô the ô button.
Opening the windows using the
remote control
Unlocking using the key
F
ô
T
urn ô
the
ô
key
ô
forwards
ô
in
ô
the
ô
driver's
ô
door
ô
lock
ô
to
ô
unlock
ô
the
ô
vehicle
ô
com
-
pletely.
Programming the unlocking
The ô
complete
ô
or
ô
selective
ô
door
ô
unlocking
ô
parameter
ô
is
ô
set
ô
via
ô
the
ô
vehicle
ô
configuration
ô
menu.The
ô
direction
ô
indicators
ô
flash
ô
for
ô
a
ô few ô seconds.
The ô
spotlamps
ô
in
ô
the
ô
door
ô
mir
-
rors ô come ô on.
Depending ô
on
ô
version,
ô
the
ô
door
ô
mirrors
ô
unfold,
ô
the
ô
welcome
ô
lighting
ô
comes
ô
on,
ô
the
ô
alarm
ô
is
ô
deactivated.
Selective unlocking of the boot F
Press the central button
on
ô
the
ô
remote
ô
control
ô
to
ô
unlock
ô
the
ô
boot.
ô
The
ô
doors
ô
remain
ô locked.
The ô
complete
ô
or
ô
selective
ô
boot
ô
unlocking
ô
parameter
ô
is
ô
set
ô
via
ô
the
ô
vehicle
ô
configuration
ô
menu.
Programming the unlocking If
ô
selective
ô
unlocking
ô
of
ô
the
ô
boot
ô
is
ô
de
-
activated, ô
pressing
ô
this
ô
button
ô
also
ô
un
-
locks ô the ô doors.
Don't ô forget ô to ô lock ô the ô boot ô again
ô by ô pressing ô the ô closed ô padlock
ô button.
Selective
ô
unlocking
ô
of
ô
the
ô
boot
ô
is
ô
acti
-
vated
ô by ô default.
4
ACCESS
Page 68 of 328

66ô
Locking the vehicle
Fô Pressô the ô closed ô padlock ô to ô lock
ô the ô vehicle.
Normal locking using the remote
control
Normal locking using the key
F
ô
T
urn
ô
the
ô
key
ô
towards
ô
the
ô
rear
ô
in
ô
the
ô
driver's
ô
door
ô
lock
ô
to
ô
lock
ô
the
ô
vehicle.
The
ô
direction
ô
indicators
ô
flash
ô
for
ô
a
ô
fewô seconds.
Depending
ô
on
ô
version,
ô
the
ô
door
ô
mirrors
ô
fold,
ô
the
ô alarm ô is ô activated.
If
ô
one
ô
of
ô
the
ô
doors
ô
or
ô
the
ô
boot
ô
is
ô
still
ô
open,
ô
the
ô
central
ô
locking
ô
does
ô not ô take ô place.
However,
ô
the
ô
alarm
ô
(if
ô
present)
ô
will
ô
be
ô
completely
ô
activated
ô
after
ô
about
ô 45 ô seconds.
If
ô
the
ô
vehicle
ô
is
ô
unlocked
ô
inad
-
vertently
ô
and
ô
with
ô
no
ô
action
ô
on
ô
the
ô
doors
ô
or
ô
boot,
ô
the
ô
vehicle
ô
will
ô
lock
ô
itself
ô
again
ô
automatically
ô
af
-
ter
ô about ô 30 ô seconds.
If
ô
the
ô
alarm
ô
had
ô
previously
ô
beenô activated,
ô
it
ô
will
ô
not
ô
be
ô
reactivatedô automatically
. The
ô
folding
ô
and
ô
unfolding
ô
of
ô
the
ô
door
ô
mirrors
ô
using
ô
the
ô
remote
ô
control
ô
can
ô
be
ô
deactivated
ô
by
ô
a
ô
CITROûN
ô
dealer
ô
or
ô
a
ô
qualified
ô workshop.
Closing the windows using the
remote controlF
ô
Press
ô
and
ô
hold
ô
down
ô
the
ô
closed
ô
padlock
ô
until
ô
the
ô
de
-
sired
ô
position
ô
is
ô
obtained.
ô
The
ô
windows
ô
stop
ô
when
ô
you
ô release ô the ô button.
When
ô
closing
ô
the
ô
windows
ô
using
ô
the
ô
remote
ô
control
ô
you
ô
must
ô
en
-
sure
ô
that
ô
nothing
ô
prevents
ô
them
ô
from
ô closing ô correctly.
If
ô
you
ô
want
ô
to
ô
leave
ô
the
ô
windows
ô
partly
ô
open,
ô
you
ô
must
ô
deactivate
ô
the
ô volumetric ô alarm ô monitoring.
Deadlocking using the remote
control
Deadlocking using the key
F
ô
T
urn ô
the
ô
key
ô
to
ô
the
ô
rear
ô
in
ô
the
ô
driv
-
er's
ô
door
ô
lock
ô
to
ô
lock
ô
the
ô
vehicle
ô
completely
.
F
ô
T
urn ô
the
ô
key
ô
to
ô
the
ô
rear
ô
again
ô
withinô five
ô
seconds
ô
to
ô
deadlock
ô
the
ô
vehicle.
Deadlocking
ô
is
ô
confirmed
ô
by
ô
fixed
ô
light
-
ing
ô
of
ô
the
ô
direction
ô
indicators
ô
for
ô
ap
-
proximately
ô two ô seconds.
According
ô
to
ô
version,
ô
the
ô
door
ô
mirrors
ô
fold
ô at ô the ô same ô time.
In
ô
low
ô
light,
ô
deadlocking
ô
also
ô
brings
ô
on
ô
the
ô
guide-me-home
ô
lighting
ô
(see
ô
"V
isibility"). Deadlocking
ô
renders
ô
the
ô
exteriorô and
ô
interior
ô
door
ô
controls
ô
inopera
-
tive.
It ô also ô deactivates ô the ô central ô locking
ô control ô button.
Therefore, never leave anyone
inside
ô
the
ô
vehicle
ô
when
ô
it
ô
is
ô
deadlocked.
F
ô
Press
ô
the
ô
closed
ô
padlock
ô
to
ô
lock
ô
the
ô
vehicle
ô
completely
.
F
ô
Press
ô
the
ô
closed
ô
padlock
ô
again
ô
within
ô
five
ô
seconds
ô
to
ô
deadlock
ô
the
ô
vehicle.
4
ACCESS
Page 84 of 328
55
82ô
Automatic illumination of
headlamps
Theô sidelampsô and ô dipped ô beam ô head -
lamps ô are ô switched ô on ô automatically , ô
without any action on the part of the
driver
, ô
when
ô
a
ô
low
ô
level
ô
of
ô
external
ô
light
ô
is
ô
detected
ô
or
ô
in
ô
certain
ô
cases
ô
of
ô
activa
-
tion
ô of ô the ô windscreen ô wipers.
As
ô
soon
ô
as
ô
the
ô
brightness
ô
returns
ô
to
ô
a
ô
sufficient
ô
level
ô
or
ô
after
ô
the
ô
windscreen
ô
wipers
ô
are
ô
switched
ô
of
f, ô
the
ô
lamps
ô
are
ô
switched
ô off ô automatically.
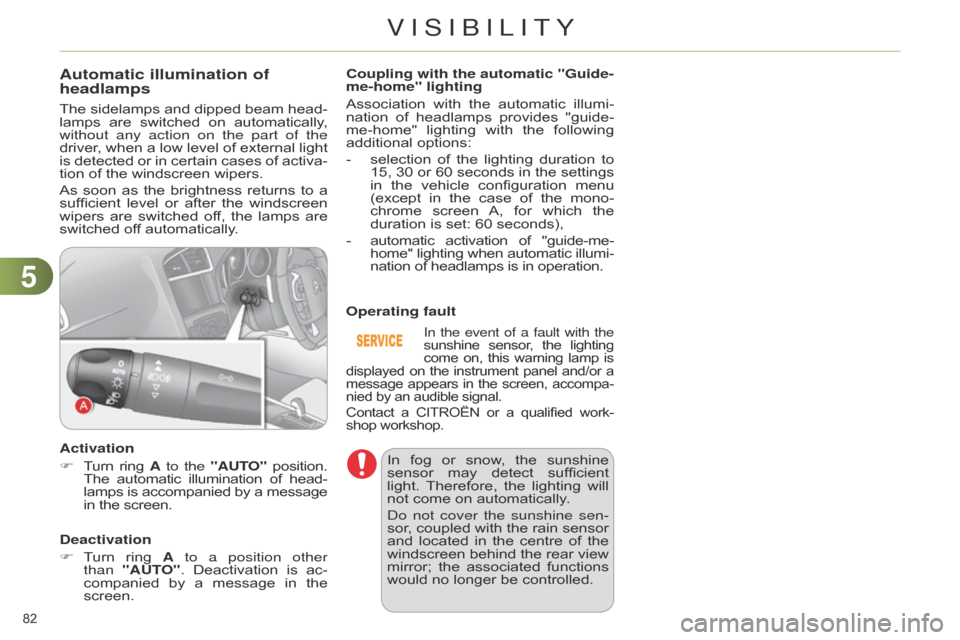
Activation
F
ô
T
urn ô
ring
ô
A to the
"AUTO" ô
position.ô The
ô
automatic
ô
illumination
ô
of
ô
head
-
lamps
ô is ô accompanied ô by ô
a
ô
messageô in
ô the ô screen.
Deactivation
F
ô
T
urn ô
ring
ô
A
to a position other
than
"AUT
O". ô
Deactivation
ô
is
ô
ac
-
companied
ô
by
ô
a
ô
message
ô
in
ô
the
ô
screen.Coupling with the automatic "Guide-
me-home" lighting
Association
ô with ô the ô automatic ô illumi -
nation ô of ô headlamps ô provides ô "guide-
me-home"
ô
lighting
ô
with
ô
the
ô
followingô additional
ô options:
-
ô
selection
ô
of
ô
the
ô
lighting
ô
duration
ô
to
ô
15,
ô
30
ô
or
ô
60
ô
seconds
ô
in
ô
the
ô
settings
ô
in
ô
the
ô
vehicle
ô
configuration
ô
menu
ô
(except
ô
in
ô
the
ô
case
ô
of
ô
the
ô
mono
-
chrome
ô
screen
ô
A,
ô
for
ô
which
ô
the
ô
duration
ô is ô set: ô 60 ô seconds),
-
ô automatic
ô
activation
ô
of
ô
"guide-me-
home"
ô
lighting
ô
when
ô
automatic
ô
illumi
-
nation
ô of ô headlamps ô is ô in ô operation.
In the event of a fault with the
sunshineô sensor , ô the ô lightingô come
ô
on,
ô
this
ô
warning
ô
lamp
ô
isô displayed
ô
on
ô
the
ô
instrument
ô
panel
ô
and/or
ô
aô message
ô
appears
ô
in
ô
the
ô
screen,
ô
accompa
-
nied
ô
by
ô
an
ô
audible ô signal.
Contact
ô
a
ô
CITROûN
ô
or
ô
a
ô
qualified
ô
work
-
shop
ô
workshop.
Operating fault
In ô
fog
ô
or
ô
snow
, ô
the
ô
sunshine
ô
sensor
ô
may
ô
detect
ô
sufficient
ô
light.
ô
Therefore,
ô
the
ô
lighting
ô
will
ô
not
ô come ô on ô automatically.
d
o not cover the sunshine sen-
sor,
ô
coupled
ô
with
ô
the
ô
rain
ô
sensor
ô
and
ô
located
ô
in
ô
the
ô
centre
ô
of
ô
the
ô
windscreen
ô
behind
ô
the
ô
rear
ô
view
ô
mirror;
ô
the
ô
associated
ô
functions
ô
would
ô no ô longer ô be ô controlled.
VISIBILITY