service indicator Citroen C5 2015 (RD/TD) / 2.G Owner's Manual
[x] Cancel search | Manufacturer: CITROEN, Model Year: 2015, Model line: C5, Model: Citroen C5 2015 (RD/TD) / 2.GPages: 344, PDF Size: 12.95 MB
Page 23 of 344

21
C5_en_Chap01_controle-de-marche_ed01-2014
Service indicator
More than 2 000 miles (3 000 km)
remain before the next service is
due
When the ignition is switched on, no service
information appears on the instrument panel
central screen.
Between 600 miles (1 000 km)
and 2 000 miles (3 000 km) remain
before the next service is due
For 7 seconds after the ignition is switched on, the
spanner symbolising the service operations comes
on. The instrument panel central screen indicates the
distance remaining before the next service is due.
Example: 1 900 miles remain before the next service
is due.
For 7 seconds after the ignition is switched on, the
central screen indicates:
Less than 600 miles (1 000 km)
remain before the next service is due
Example: 500 miles remain before the next
service is due.
For 7 seconds after the ignition is switched on,
the central screen indicates:
The spanner remains on in the screen to
indicate that a service must be carried out
soon.
Indicators
This information is displayed for a few seconds
when the ignition is switched on. It informs
the driver when the next service is due, in
accordance with the manufacturer's servicing
schedule.
The point at which the service is due is
calculated from the last indicator zero reset. It
is determined by two parameters:
-
t
he distance travelled,
-
t
he time elapsed since the last service.
1
Monitoring
Page 24 of 344

22
C5_en_Chap01_controle-de-marche_ed01-2014
Service indicator zero resetService overdue
For 7 seconds after the ignition is switched
on, the spanner flashes to indicate that
the service must be carried out as soon as
possible.
Example: the service is overdue by 180 miles.
For 7 seconds after the ignition is switched on,
the central screen indicates:
The spanner remains on in the screen to
indicate that a service should have been
carried out. The distance remaining may be
weighted by the time factor, depending
on the driver's driving routine.
Therefore, the spanner may also come
on if you have exceeded the period
since the last service, indicated in the
manufacturer's service schedule.
After each service, the service indicator must
be reset to zero.
The procedure for resetting to zero is as
follows:
F
s
witch off the ignition,
F
p
ress and hold the trip distance recorder
zero reset button,
F
s
witch on the ignition; the distance recorder
display begins a countdown,
F
w
hen the display indicates "=0", release
the button; the spanner disappears.
Following this operation, if you wish to
disconnect the battery, lock the vehicle and
wait at least five minutes for the zero reset to
be taken into account.
Monitoring
Page 25 of 344
23
C5_en_Chap01_controle-de-marche_ed01-2014
Engine oil level indicator*
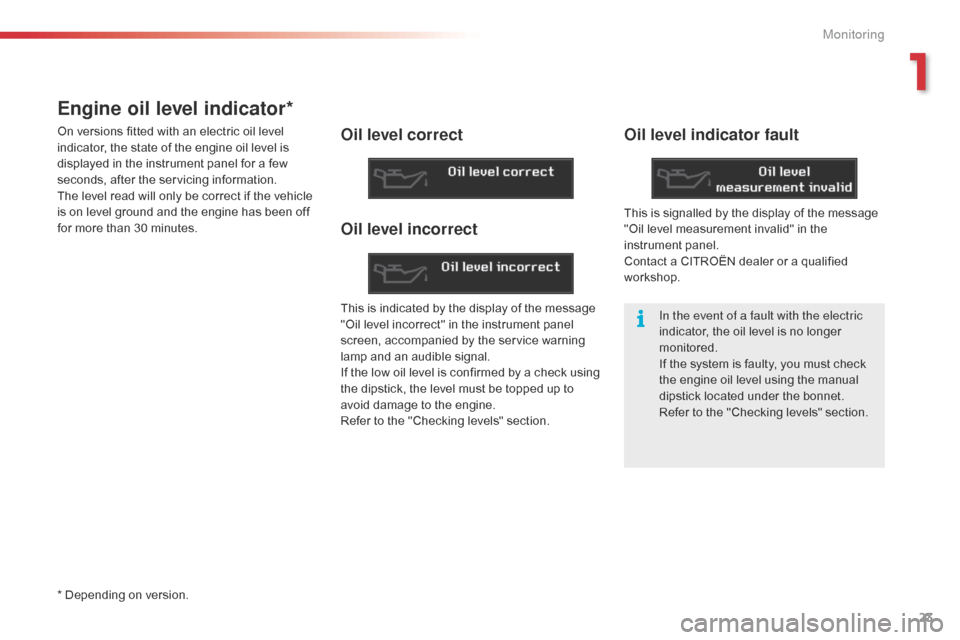
On versions fitted with an electric oil level
indicator, the state of the engine oil level is
displayed in the instrument panel for a few
seconds, after the servicing information.
The level read will only be correct if the vehicle
is on level ground and the engine has been off
for more than 30 minutes.Oil level correct
This is indicated by the display of the message
"Oil level incorrect" in the instrument panel
screen, accompanied by the service warning
lamp and an audible signal.
If the low oil level is confirmed by a check using
the dipstick, the level must be topped up to
avoid damage to the engine.
Refer to the "Checking levels" section.
Oil level indicator fault
* Depending on version.In the event of a fault with the electric
indicator, the oil level is no longer
monitored.
If the system is faulty, you must check
the engine oil level using the manual
dipstick located under the bonnet.
Refer to the "Checking levels" section.
Oil level incorrect
This is signalled by the display of the message
"Oil level measurement invalid" in the
instrument panel.
Contact a CITROËN dealer or a qualified
workshop.
1
Monitoring
Page 28 of 344
26
C5_en_Chap01_controle-de-marche_ed01-2014
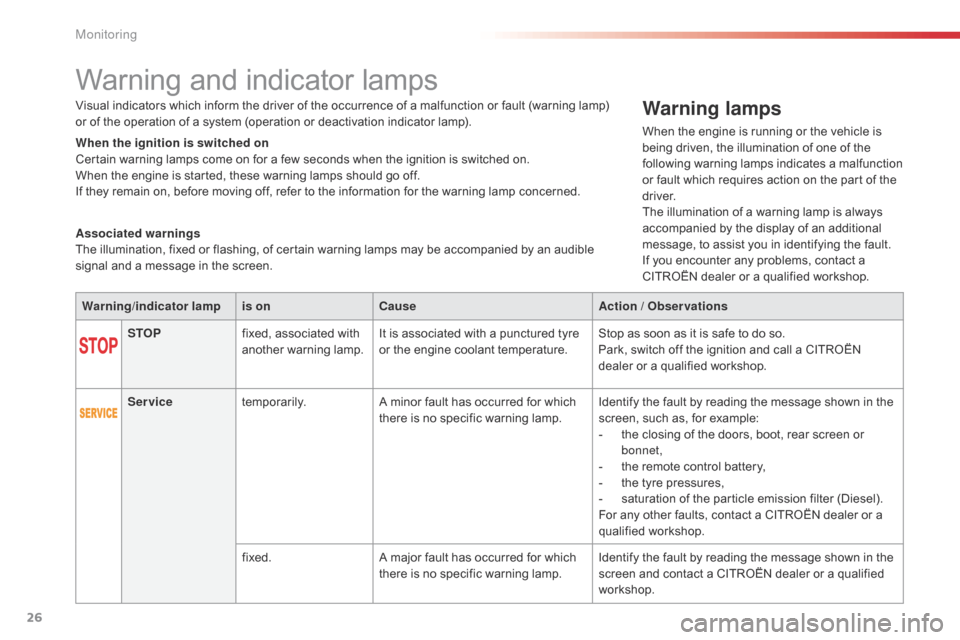
Warning and indicator lamps
Warning/indicator lampis on Cause Action / Observations
STOP fixed, associated with
another warning lamp. It is associated with a punctured tyre
or the engine coolant temperature. Stop as soon as it is safe to do so.
Park, switch off the ignition and call a CITROËN
dealer or a qualified workshop.
Service temporarily. A minor fault has occurred for which
there is no specific warning lamp. Identify the fault by reading the message shown in the
screen, such as, for example:
-
t
he closing of the doors, boot, rear screen or
bonnet,
-
t
he remote control battery,
-
t
he tyre pressures,
-
s
aturation of the particle emission filter (Diesel).
For any other faults, contact a CITROËN dealer or a
qualified workshop.
fixed. A major fault has occurred for which
there is no specific warning lamp. Identify the fault by reading the message shown in the
screen and contact a CITROËN dealer or a qualified
workshop.
Visual indicators which inform the driver of the occurrence of a malfunction or fault (warning lamp)
or of the operation of a system (operation or deactivation indicator lamp).
When the ignition is switched on
Certain warning lamps come on for a few seconds when the ignition is switched on.
When the engine is started, these warning lamps should go off.
If they remain on, before moving off, refer to the information for the warning lamp concerned.
Associated warnings
The illumination, fixed or flashing, of certain warning lamps may be accompanied by an audible
signal and a message in the screen.
Warning lamps
When the engine is running or the vehicle is
being driven, the illumination of one of the
following warning lamps indicates a malfunction
or fault which requires action on the part of the
driver.
The illumination of a warning lamp is always
accompanied by the display of an additional
message, to assist you in identifying the fault.
If you encounter any problems, contact a
CITROËN dealer or a qualified workshop.
Monitoring
Page 32 of 344

30
C5_en_Chap01_controle-de-marche_ed01-2014
Warning/indicator lampis on Cause Action / Observations
Under-inflation fixed. The pressure in one or more wheels
is too low. Check the pressure of the tyres as soon as possible.
This check should preferably be carried out when the
tyres are cold.
+ flashing then fixed,
accompanied by the
Service warning lamp.The tyre pressure monitoring system
has a fault or no sensor is detected
on one of the wheels. Under-inflation detection is not assured.
Have the system checked by a CITROËN dealer or a
qualified workshop.
Monitoring
Page 46 of 344
44
C5_en_Chap02_ouverture_ed01-2014
Alarm*
- exterior perimeter
The system checks for opening of the vehicle.
The alarm is triggered if anyone tries to open a
door, the boot, the bonnet...
- interior volumetric
The system checks for any variation in the
volume in the passenger compartment.
The alarm is triggered if anyone breaks a
window, enters the passenger compartment or
moves inside the vehicle.
- tilt
The system checks for any change in the
attitude of the vehicle.
The alarm is triggered if the vehicle is lifted,
moved or knocked.
Locking the vehicle with full
alarm system
Activation
* According to country.
Self-protection function
The system checks for the putting out of
service of its components.
The alarm is triggered if the battery, the
central control or the siren wiring are
put out of service or damaged.
For all work on the alarm system,
contact a CITROËN dealer or a
qualified workshop.
System which protects and provides a deterrent
against theft and break-ins. It provides the
following types of monitoring:
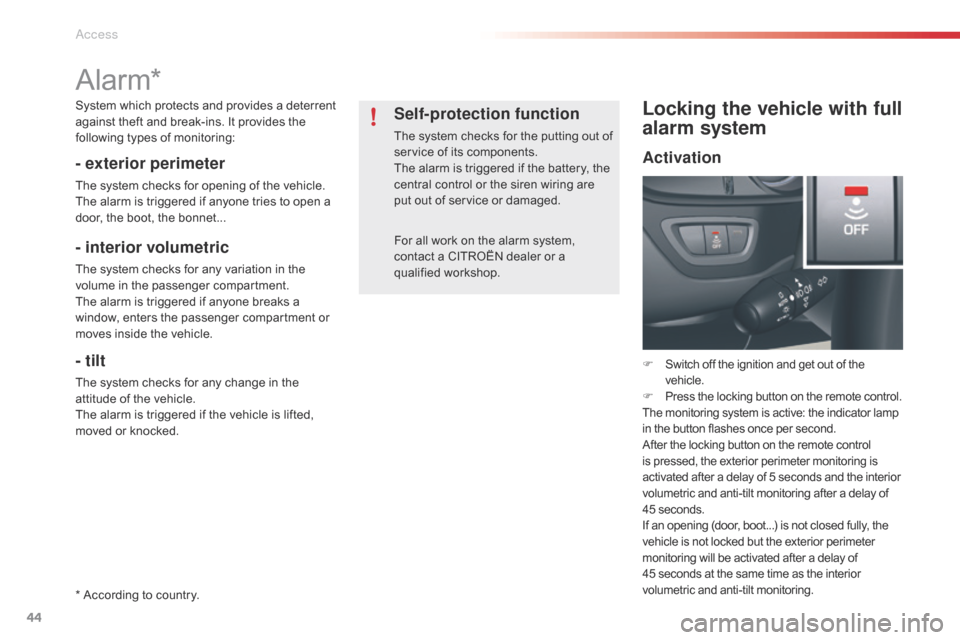
F
Switch off the ignition and get out of the
vehicle.
F Press the locking button on the remote control.
The monitoring system is active: the indicator lamp
in the button flashes once per second.
After the locking button on the remote control
is pressed, the exterior perimeter monitoring is
activated after a delay of 5 seconds and the interior
volumetric and anti-tilt monitoring after a delay of
45 seconds.
If an opening (door, boot...) is not closed fully, the
vehicle is not locked but the exterior perimeter
monitoring will be activated after a delay of
45
seconds at the same time as the interior
volumetric and anti-tilt monitoring.
Access
Page 148 of 344

134
C5_en_Chap04_conduite_ed01-2014
Lane departure warning system
This system is particularly useful on motor ways
and main roads.
Activation
F Press this button, the indicator lamp comes on.
Deactivation
F Press this button again, the indicator lamp goes off.
The status of the system remains in the
memory when the ignition is switched off.
Detection
You are warned by the vibration of the driver's
seat cushion:
-
o
n the right-hand side, if the marking on
the ground has been crossed on the right,
-
o
n the left-hand side, if the marking on the
ground has been crossed on the left.
No warning is transmitted while the direction
indicator is active and for approximately
20 seconds after the direction indicator is
switched off.
A warning may be transmitted if a direction
marking (e.g. arrow) or non-standard marking
(e.g. graffiti) is crossed.
Operating fault
In the event of a malfunction, the service
warning lamp comes on, accompanied by an
audible signal and a message in the screen.
Contact a CITROËN dealer or a qualified
workshop.
System which detects the involuntary crossing
of longitudinal traffic lane markings on the
ground (solid or broken line).
Sensors, fitted below the front bumper, trigger
a warning if the vehicle drifts over a lane
marking (speed higher than 50 mph (80 km/h)).
The detection may be impeded:- if the sensors are dirty (mud, snow...),- if the markings on the ground are worn,
- if there is little contrast between the
markings on the ground and the road
sur face.
The lane departure warning system
cannot in any circumstances replace
the need for vigilance on the part of the
driver.
It is necessary to observe driving
regulations and take a break every two
hours.
Driving
Page 237 of 344
235
C5_en_Chap09_verification_ed01-2014
Checking levels
Engine oil level
The check is carried out either when
the ignition is switched on using the
oil level indicator in the instrument
panel for vehicles with an electric oil
level gauge, or using the dipstick.
Check all of these levels regularly, in line with the manufacturer's service schedule. Top them up if necessary, unless other wise indicated.
If a level drops significantly, have the corresponding system checked by a CITROËN dealer or a qualified workshop.
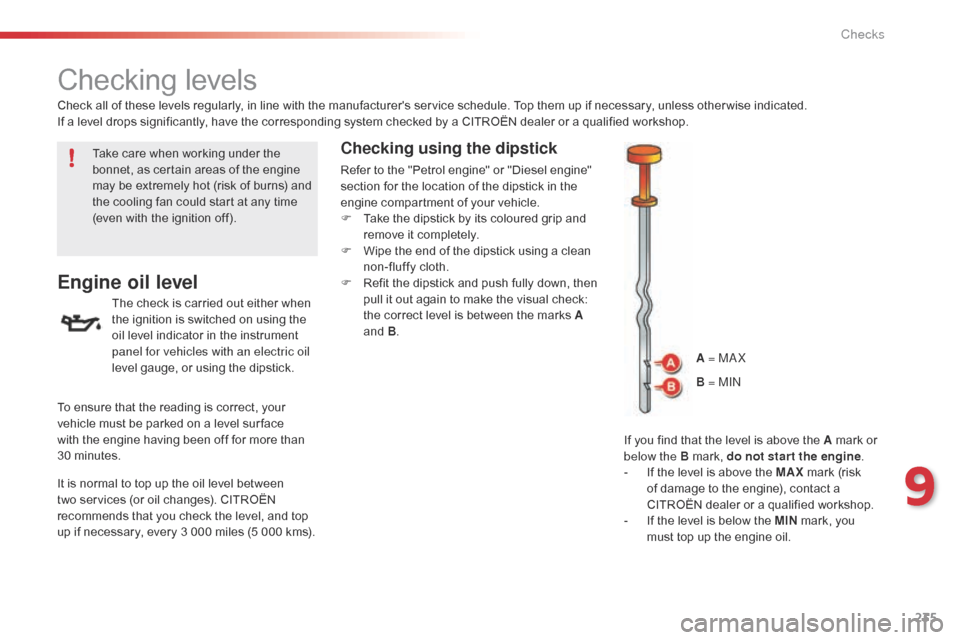
If you find that the level is above the A mark or
below the B mark, do not star t the engine.
-
I
f the level is above the MAX mark (risk
of damage to the engine), contact a
CITROËN dealer or a qualified workshop.
-
I
f the level is below the MIN mark, you
must top up the engine oil.
Take care when working under the
bonnet, as certain areas of the engine
may be extremely hot (risk of burns) and
the cooling fan could start at any time
(even with the ignition off).
To ensure that the reading is correct, your
vehicle must be parked on a level sur face
with the engine having been off for more than
30 minutes.
It is normal to top up the oil level between
two services (or oil changes). CITROËN
recommends that you check the level, and top
up if necessary, every 3 000 miles (5 000 kms).
Checking using the dipstick
Refer to the "Petrol engine" or "Diesel engine"
section for the location of the dipstick in the
engine compartment of your vehicle.
F
T
ake the dipstick by its coloured grip and
remove it completely.
F
W
ipe the end of the dipstick using a clean
non-fluffy cloth.
F
R
efit the dipstick and push fully down, then
pull it out again to make the visual check:
the correct level is between the marks A
and B .
A = M
aX
B
= MI
n
9
Checks
Page 238 of 344

236
C5_en_Chap09_verification_ed01-2014
Oil grade
Before topping-up the oil or changing the oil,
check that the oil is the correct grade for your
engine and conforms to the manufacturer's
recommendations.
Topping up the engine oil level
Refer to the "Petrol engine" or "Diesel engine"
section for the location of the oil filler cap in the
engine compartment of your vehicle.
F
U
nscrew the oil filler cap to reveal the filler
aperture.
F
A
dd oil in small quantities, avoiding any
spills on engine components (risk of fire).
F
W
ait a few minutes before checking the
level again using the dipstick.
F
A
dd more oil if necessary.
F
A
fter checking the level, carefully refit the
oil filler cap and the dipstick in its tube.
After topping up the oil, the check when
switching on the ignition with the oil level
indicator in the instrument panel is not valid
during the 30 minutes after topping up.
Engine oil change
Refer to the manufacturer's service schedule
for details of the interval for this operation.
In order to maintain the reliability of the engine
and emission control system, never use
additives in the engine oil.
Checks
Page 337 of 344
335
C5_en_Chap12_index-alpha_ed01-2014
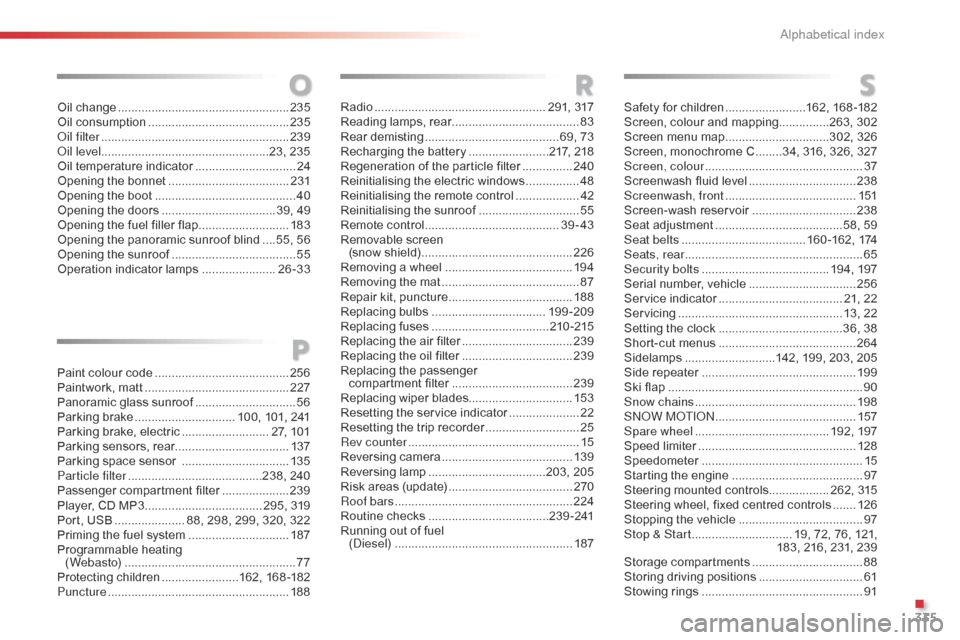
P
Paint colour code ........................................25 6
Paintwork, matt ........................................... 2
27
Panoramic glass sunroof
..............................56
P
arking brake
.............................. 1
00, 101, 241
Parking brake, electric
.......................... 2
7, 101
Parking sensors, rear.................................. 137
Parking space sensor
................................13
5
Particle filter
........................................2
38, 240
Passenger compartment filter
.................... 23
9
Player, CD MP3
...............................
.... 295, 319
Port, USB
..................... 8
8, 298, 299, 320, 322
Priming the fuel system
..............................18
7
Programmable heating
(Webasto)
................................................... 77
P
rotecting children
.......................16
2, 168 -182
Puncture
................
...................................... 188
ROS
Radio ................................................... 291, 317
Reading lamps, rear ...................................... 83
R
ear demisting
........................................ 6
9, 73
Recharging the battery
........................21
7, 218
Regeneration of the particle filter
...............24
0
Reinitialising the electric windows
................48
R
einitialising the remote control
...................42
R
einitialising the sunroof
..............................55
R
emote control
........................................ 3
9-43
Removable screen (snow shield)
...............................
..............226
Removing a wheel
..............................
........19 4
Removing the mat
...............................
.......... 87
Repair kit, puncture
..................................... 18
8
Replacing bulbs
..............................
....19 9 -209
Replacing fuses
..............................
.....210 -215
Replacing the air filter
.................................23
9
Replacing the oil filter
.................................23
9
Replacing the passenger
compartment filter
.................................... 23
9
Replacing wiper blades............................... 153
Resetting the service indicator
.....................2
2
Resetting the trip recorder
............................25
R
ev counter
................................................... 15
R
eversing camera
...............................
........13 9
Reversing lamp
...................................2
03, 205
Risk areas (update)
..................................... 2
70
Roof bars
..................................................... 2
24
Routine checks
.................................... 2
3 9 - 2 41
Running out of fuel (
die
sel)
..................................................... 18
7Safety for children
........................16
2, 168 -182
Screen, colour and mapping...............263, 302
Screen menu map
...............................3
02, 326
Screen, monochrome C
........3
4, 316, 326, 327
Screen, colour
............................................... 37
S
creenwash fluid level
................................23
8
Screenwash, front
....................................... 1
51
Screen-wash reservoir
............................... 23
8
Seat adjustment
...............................
.......58, 59
Seat belts
..................................... 16
0 -162, 174
Seats, rear
..................................................... 65
S
ecurity bolts
......................................19
4, 197
Serial number, vehicle
................................25
6
Service indicator
..................................... 2
1, 22
Servicing
...............................
.................. 13, 22
Setting the clock
.....................................3
6, 38
Short-cut menus
..............................
...........264
Sidelamps
...........................1
42, 199, 203, 205
Side repeater
..............................
................19 9
Ski flap
..............................
............................90
Snow chains
................................................ 19
8
S
no
W
M
oT
I
o
n
..........................................15
7
Spare wheel
...............................
.........192, 197
Speed limiter
...............................
................128
Speedometer
..............................
..................15
Starting the engine
.......................................97
S
teering mounted controls.................. 262, 315
Steering wheel, fixed centred controls
.......12
6
Stopping the vehicle
.....................................97
St
op & Start
.............................. 1
9, 72, 76, 121,
183, 216, 231, 239
Storage compartments
................................. 88
S
toring driving positions
...............................61
S
towing rings
..............................
..................91
Oil change
...............................
.................... 235
Oil consumption
.......................................... 23
5
oil
filter
...............
......................................... 239
oi
l level ..................................................23, 235
Oil temperature indicator
.............................. 24
O
pening the bonnet
.................................... 2
31
Opening the boot
..............................
............ 40
Opening the doors
...............................
... 39, 49
Opening the fuel filler flap
........................... 18
3
Opening the panoramic sunroof blind
....5
5, 56
Opening the sunroof
..................................... 55
O
peration indicator lamps
...................... 26
-33
.
alphabetical index