run flat CITROEN C5 AIRCROSS 2022 Handbook (in English)
[x] Cancel search | Manufacturer: CITROEN, Model Year: 2022, Model line: C5 AIRCROSS, Model: CITROEN C5 AIRCROSS 2022Pages: 276, PDF Size: 7.92 MB
Page 4 of 276

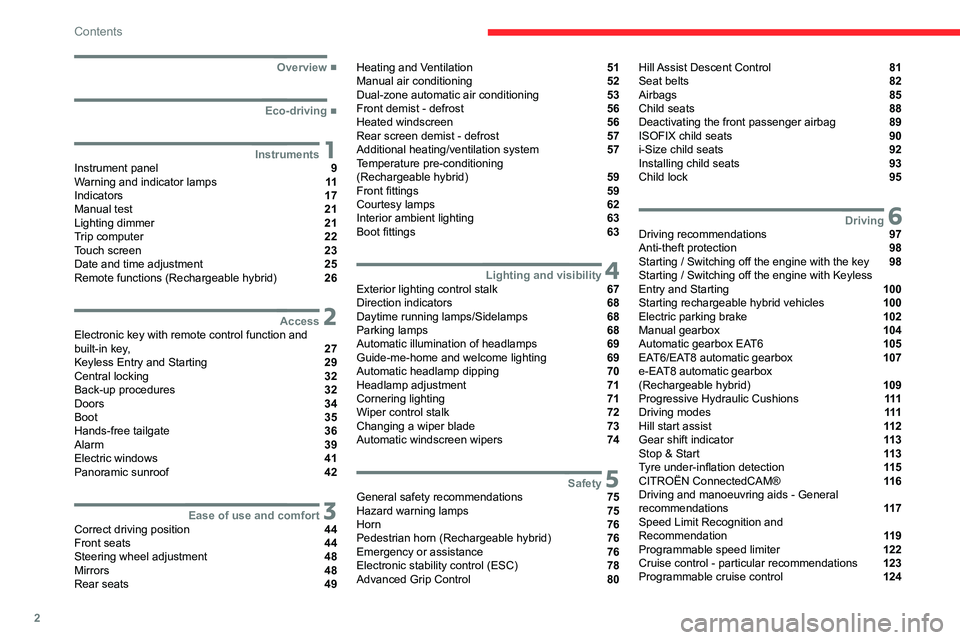
2
Contents
■
Overview
■
Eco-driving
1InstrumentsInstrument panel 9
Warning and indicator lamps 11
Indicators 17
Manual test 21
Lighting dimmer 21
Trip computer 22
Touch screen 23
Date and time adjustment 25
Remote functions (Rechargeable hybrid) 26
2AccessElectronic key with remote control function and
built-in key, 27
Keyless Entry and Starting 29
Central locking 32
Back-up procedures 32
Doors 34
Boot 35
Hands-free tailgate 36
Alarm 39
Electric windows 41
Panoramic sunroof 42
3Ease of use and comfortCorrect driving position 44
Front seats 44
Steering wheel adjustment 48
Mirrors 48
Rear seats 49
Heating and Ventilation 51
Manual air conditioning 52
Dual-zone automatic air conditioning 53
Front demist - defrost 56
Heated windscreen 56
Rear screen demist - defrost 57
Additional heating/ventilation system 57
Temperature pre-conditioning
(Rechargeable hybrid)
59
Front fittings 59
Courtesy lamps 62
Interior ambient lighting 63
Boot fittings 63
4Lighting and visibilityExterior lighting control stalk 67
Direction indicators 68
Daytime running lamps/Sidelamps 68
Parking lamps 68
Automatic illumination of headlamps 69
Guide-me-home and welcome lighting 69
Automatic headlamp dipping 70
Headlamp adjustment 71
Cornering lighting 71
Wiper control stalk 72
Changing a wiper blade 73
Automatic windscreen wipers 74
5SafetyGeneral safety recommendations 75
Hazard warning lamps 75
Horn 76
Pedestrian horn (Rechargeable hybrid) 76
Emergency or assistance 76
Electronic stability control (ESC) 78
Advanced Grip Control 80
Hill Assist Descent Control 81
Seat belts 82
Airbags 85
Child seats 88
Deactivating the front passenger airbag 89
ISOFIX child seats 90
i-Size child seats 92
Installing child seats 93
Child lock 95
6DrivingDriving recommendations 97
Anti-theft protection 98
Starting / Switching off the engine with the key 98
Starting / Switching off the engine with Keyless
Entry and Starting
100
Starting rechargeable hybrid vehicles 100
Electric parking brake 102
Manual gearbox 104
Automatic gearbox EAT6 105
EAT6/EAT8 automatic gearbox 107
e-EAT8 automatic gearbox
(Rechargeable hybrid)
109
Progressive Hydraulic Cushions 111
Driving modes 111
Hill start assist 11 2
Gear shift indicator 11 3
Stop & Start 11 3
Tyre under-inflation detection 11 5
CITROËN ConnectedCAM® 11 6
Driving and manoeuvring aids - General
recommendations
11 7
Speed Limit Recognition and
Recommendation
11 9
Programmable speed limiter 122
Cruise control - particular recommendations 123
Programmable cruise control 124
Page 167 of 276

165
Practical information
7► Insert the key into the lock 7.
► Open the lock using the key .
► Hold the towball 5 firmly in one hand; using
the other hand, pull and turn the wheel 6 fully in
a clockwise direction; do not release the wheel.
►
Extract the towball from the bottom of its
carrier
1.
►
Release the wheel; it automatically stops in
the unlocked position (position B
).
► Refit the protective plug 2 to the carrier 1.
► Stow the towball in its bag away from knocks
and dirt.
Maintenance
Correct operation is only possible if the towball
and its carrier are kept clean.
Before cleaning the vehicle with a high-pressure
jet wash, the towball must be removed and the
protective plug fitted to the carrier.
Affix the enclosed label in a clearly visible location, close to the carrier or in the
boot.
Contact a CITROËN dealer or a qualified
workshop for any work on the towball system.
Energy economy mode
This system manages the duration of use of
certain functions, in order to conserve a sufficient
level of charge in the battery with the ignition off.
After switching off the engine, you can still
use functions such as the audio and telematic
system, the wipers and the dipped beam
headlamps or courtesy lamps, for a combined
duration of approximately 40 minutes.
Selecting the mode
A confirmation message is displayed when
energy economy mode is entered, and the active
functions are placed on standby.
If a telephone call is in progress at the
time, it will be maintained for around 10
minutes via the audio system’s hands-free
system.
Exiting the mode
These functions are automatically reactivated the
next time the vehicle is used.
To restore the use of these functions
immediately, start the engine and let it run:
–
For less than 10 minutes, to use the
equipment for approximately 5 minutes.
–
For more than 10 minutes, to use the
equipment for approximately 30 minutes.
Let the engine run for the specified duration to
ensure that the battery charge is sufficient.
T
o recharge the battery, avoid repeatedly or
continuously restarting the engine.
A flat battery prevents the engine from starting.
For more information on the 12
V battery,
refer to the corresponding section.
Load reduction mode
This system manages the use of certain
functions according to the level of charge
remaining in the battery.
When the vehicle is being driven, the load
reduction function temporarily deactivates certain
Page 176 of 276

174
Practical information
► With an AdBlue® pump: insert the nozzle and
fill the tank until the nozzle automatically cuts
out.
In order not to overfill the AdBlue® tank:
– Add between 10 and 13 litres using
AdBlue
® containers.
– Stop after the nozzle’s first automatic cut-
out, if you are refilling at a service station.
The system only registers AdBlue
® top-ups of
5 litres or more.
If the AdBlue® tank is completely empty
– which is confirmed by the message
"Top up AdBlue: Starting impossible" – it is
essential to add at least 5 litres.
Free-wheeling
In certain situations, you must allow the vehicle
to free-wheel (while being towed, on a rolling
road, in an automatic car wash, or being
transported by rail or sea freight, etc.).
The procedure varies according to the type of
gearbox and parking brake.
With manual or EAT6
automatic gearbox and
electric parking brake
/
For the correct operation of the SCR
system:
–
Use
only AdBlue
® fluid that meets the ISO
22241 standard.
–
Never
transfer AdBlue
® to another container
as it would lose its purity.
–
Never
dilute AdBlue
® with water.
You can obtain AdBlue
® from a CITROËN dealer
or a qualified workshop, as well as service
stations equipped with AdBlue
® pumps specially
designed for passenger vehicles.
Recommendations on storage
AdBlue® freezes at about -11°C and deteriorates
above +25°C. Containers should be stored in a
cool area and protected from direct sunlight.
Under these conditions, the fluid can be kept for
at least a year.
If the fluid has frozen, it can be used once it has
completely thawed out at room temperature.
Never store AdBlue® containers in your
vehicle.
Precautions for use
AdBlue® is a urea-based solution. This fluid is
non-flammable, colourless and odourless (when
kept in a cool place).
In the event of contact with the skin, wash the
affected area with soap and running water. In the
event of contact with the eyes, immediately rinse
the eyes with large amounts of water or with an
eye wash solution for at least 15 minutes. Seek
medical attention if you feel a persistent burning
sensation or irritation.
If swallowed, immediately wash out the mouth
with clean water and then drink plenty of water.
In certain conditions (high temperature, for
example), the risk of release of ammonia cannot
be excluded: do not inhale the fluid. Ammonia
vapours have an irritant effect on mucous
membranes (eyes, nose and throat).
Store AdBlue® out of the reach of
children, in its original container.
Procedure
Before starting the top-up procedure, ensure that
the vehicle is parked on a flat and level surface.
In wintry conditions, ensure that the temperature
of the vehicle is above -11
°C. Otherwise, the
AdBlue
® may be frozen and therefore cannot
be poured into its tank. Park your vehicle in a
warmer area for a few hours to allow the top-up
to be carried out.
Never pour AdBlue® into the Diesel fuel
tank.
If any AdBlue® is splashed, or if there are
any spillages on the bodywork, rinse
immediately with cold water or wipe with a
damp cloth.
If the fluid has crystallised, clean it off using a
sponge and hot water.
Important: in the event of a top-up after
a breakdown because of a lack of
AdBlue, it is essential to wait around 5
minutes before switching on the ignition,
without opening the driver’s door,
unlocking the vehicle, introducing the key
into the ignition switch, or introducing the
key of the “Keyless Entry and Starting
”
system into the passenger compartment
.
Switch on the ignition, then wait for 10
seconds before starting the engine.
►
Switch off the ignition and remove the key
from the switch to switch off the engine.
or
►
With Keyless Entry and Starting, press the
"
START/STOP" button to switch off the engine.
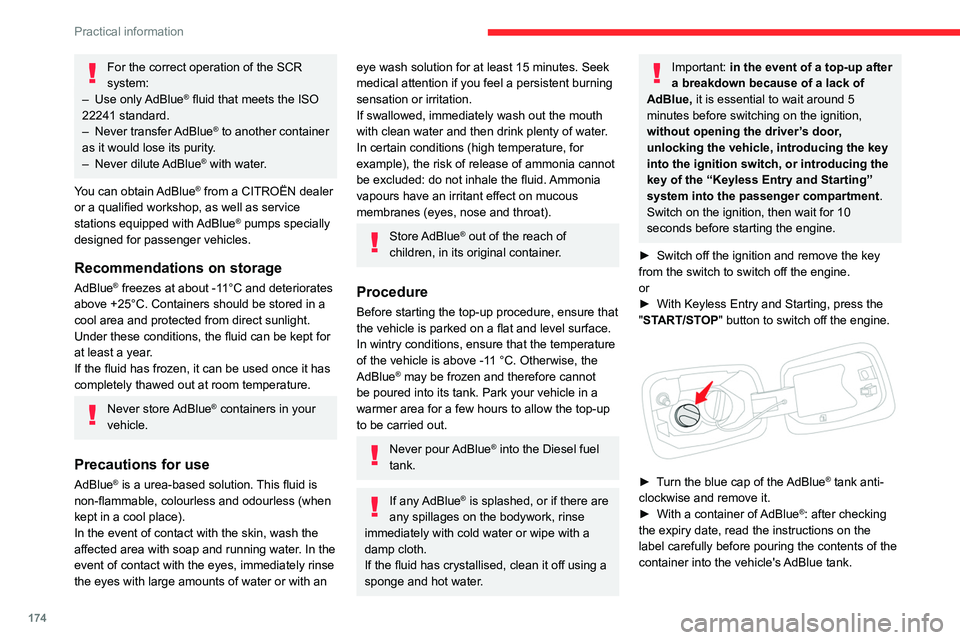
► Turn the blue cap of the AdBlue® tank anti-
clockwise and remove it.
►
With a container of
AdBlue
®: after checking
the expiry date, read the instructions on the
label carefully before pouring the contents of the
container into the vehicle's AdBlue tank.
Page 188 of 276

186
In the event of a breakdown
Front lamps
Model A
1.Daytime running lamps/Sidelamps/Direction
indicators (LED)
2. Dipped beam/main beam headlamps (LED)
Model B
1.Daytime running lamps/Sidelamps/Direction
indicators (LED)
2. Dipped beam headlamps (LED)
3. Main beam headlamps (LED)
Model C
1.Daytime running lamps/Sidelamps (LED)
2. Direction indicators (WY21W)
3. Dipped beam headlamps (LED)
4. Main beam headlamps (LED)
Model D
1.Daytime running lamps/Sidelamps /Direction
indicators (LED)
2. Dipped beam headlamps (H7-55W).
3. Main beam headlamps (HB3-65W)
Model E
1.Daytime running lamps/Sidelamps (LED)
2. Direction indicators (WY21W)
3. Dipped beam headlamps (H7-55W).
4. Main beam headlamps (HB3-65W)
Direction indicators
Rapid flashing of the indicator lamp for a
direction indicator
(left or right) indicates
that one of the bulbs on the corresponding
side has failed.
► Turn the bulb holder a quarter turn
anti-clockwise.
►
Pull the bulb and bulb holder assembly
backwards.
►
Replace the bulb.
Amber-coloured bulbs, such as the direction indicators, must be replaced by
bulbs with identical colour and specifications.
Main beam headlamps
► Remove the protective cover.
► Disconnect the bulb connector.
► Turn the bulb holder anti-clockwise.
► Remove the bulb and replace it.
Dipped beam headlamps
► Remove the protective cover.
► Disconnect the bulb connector.
► Turn the bulb a quarter turn anti-clockwise
and replace it.
Foglamps (P21W)
► Insert a flat screwdriver into the hole in the
trim.
Page 196 of 276

194
In the event of a breakdown
Fuse No.Rating
(Amps) Functions
F24 40Trailer power supply.
F26 25Front foglamps.
12 V battery
Procedure for starting the engine using another
battery or for charging a discharged battery.
Lead-acid starter batteries
These batteries contain harmful
substances (sulphuric acid and lead).
They must be disposed of in accordance
with regulations and must never under any
circumstances be discarded with household
waste.
Take used remote control batteries and
vehicle batteries to a special collection point.
Protect your eyes and face before
handling the battery.
All operations on the battery must be carried
out in a well ventilated area and away from
naked flames and sources of sparks, to avoid
any risk of explosion or fire.
Wash your hands afterwards.
Access to the battery
The battery is located under the bonnet.
For access to the (+) terminal:
► Unlock the bonnet by activating the internal
release lever
, then the external safety catch.
►
Raise the bonnet.
(+)
Positive terminal.
It has a quick-release clamp.
(-) Negative terminal.
As the battery's negative terminal is not
accessible, a remote earth point is placed near
the battery.
Starting using another
battery
If your vehicle's battery is flat, the engine can be
started using a backup battery (either external or
from another vehicle) and jump leads or using a
battery booster.
Never start the engine by connecting a
battery charger.
Never use a 24
V or higher battery booster.
Check beforehand that the backup battery
has a nominal voltage of 12
V and a capacity
at least equal to that of the discharged
battery.
The two vehicles must not be in contact with
each other.
Switch off all electricity-consuming equipment
on both vehicles (audio system, wipers,
lighting, etc.).
Make sure that the jump leads are well away
from the engine’s moving parts (fan, belt,
etc.).
Do not disconnect the (+) terminal while the
engine is running.
Page 197 of 276

195
In the event of a breakdown
8
► Lift the plastic cover on the (+) terminal, if the
vehicle has one.
►
Connect the red cable to the (+) terminal of
flat battery
A (at the metal elbow), then to the
(+) terminal of the backup battery
B or of the
booster.
►
Connect one end of the green or black cable
to the (-) terminal of the backup battery
B or of
the booster (or to an earth point on the assisting
vehicle).
►
Connect the other end of the green or black
cable to the earth point
C
.
►
Start the engine on the assisting vehicle and
leave it running for a few minutes.
►
Operate the starter on the broken down
vehicle and let the engine run.
If the engine does not start immediately
, switch
off the ignition and wait a few moments before
trying again.
►
W
ait for it to return to idle.
►
Disconnect the jump leads in reverse order.
► Refit the plastic cover to the (+) terminal, if
the vehicle has one.
►
Allow the engine to run for at least
30
minutes, with the vehicle stationary, so that
the battery reaches an adequate state of charge.
Drive cautiously during the first 30
minutes after starting the engine.
With an automatic gearbox, never try to
start the engine by pushing the vehicle.
Charging the battery using a
battery charger
For optimum service life of the battery, it is
essential to maintain an adequate state of
charge.
In some circumstances, it may be necessary to
charge the battery:
–
When using the vehicle mainly for short
journeys.
–
If the vehicle is to be taken off the road for
several weeks.
Contact a CITROËN dealer or a qualified
workshop.
To charge the vehicle's battery yourself, use only a charger compatible with
lead-acid batteries with a nominal voltage of
12
V.
Follow the instructions provided by the
manufacturer of the charger.
Never reverse polarities.
It is not necessary to disconnect the
battery.
►
Switch the ignition off.
►
Switch off all electrical consumers (audio
system, lighting, wipers, etc.).
► Switch off charger B before connecting
the cables to the battery, so as to avoid any
dangerous sparks.
►
Ensure that the charger cables are in good
condition.
►
Lift the plastic cover on the (+) terminal, if the
vehicle has one.
►
Connect the cables of charger B
as follows:
•
the positive (+) red cable to the (+) terminal
of battery
A,
•
the negative (-) black cable to earth point C
on the vehicle.
Page 201 of 276

199
In the event of a breakdown
8
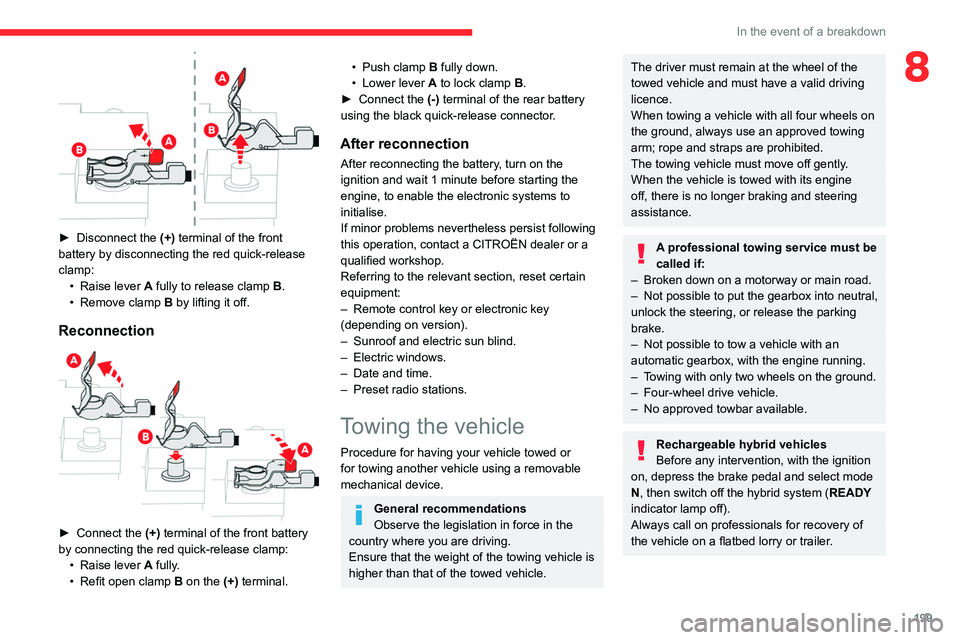
► Disconnect the (+) terminal of the front
battery by disconnecting the red quick-release
clamp: •
Raise lever
A
fully to release clamp
B
.
•
Remove clamp
B
by lifting it off.
Reconnection
► Connect the (+) terminal of the front battery
by connecting the red quick-release clamp: •
Raise lever
A
fully.
•
Refit open clamp
B
on the (+) terminal.
• Push clamp B fully down.
• Lower lever A to lock clamp B.
►
Connect the
(-) terminal of the rear battery
using the black quick-release connector.
After reconnection
After reconnecting the battery, turn on the
ignition and wait 1 minute before starting the
engine, to enable the electronic systems to
initialise.
If minor problems nevertheless persist following
this operation, contact a CITROËN dealer or a
qualified workshop.
Referring to the relevant section, reset certain
equipment:
–
Remote control key or electronic key
(depending on version).
–
Sunroof and electric sun blind.
–
Electric windows.
–
Date and time.
–
Preset radio stations.
Towing the vehicle
Procedure for having your vehicle towed or
for towing another vehicle using a removable
mechanical device.
General recommendations
Observe the legislation in force in the
country where you are driving.
Ensure that the weight of the towing vehicle is
higher than that of the towed vehicle.
The driver must remain at the wheel of the
towed vehicle and must have a valid driving
licence.
When towing a vehicle with all four wheels on
the ground, always use an approved towing
arm; rope and straps are prohibited.
The towing vehicle must move off gently.
When the vehicle is towed with its engine
off, there is no longer braking and steering
assistance.
A professional towing service must be
called if:
–
Broken down on a motorway or main road.
–
Not possible to put
the gearbox into neutral,
unlock the steering, or release the parking
brake.
–
Not possible to tow a vehicle with an
automatic gearbox, with the engine running.
–
T
owing with only two wheels on the ground.
–
Four-wheel drive vehicle.
–
No approved towbar available.
Rechargeable hybrid vehicles
Before any intervention, with the ignition
on, depress the brake pedal and select mode
N, then switch off the hybrid system (READY
indicator lamp off).
Always call on professionals for recovery of
the vehicle on a flatbed lorry or trailer.
Page 251 of 276

249
Alphabetical index
O
Obstacle detection 141
Oil change
169
Oil consumption
169
OIl, engine
169
On-board tools
66, 178–180
Opening the bonnet
168
Opening the boot
29, 35
Opening the doors
29, 34
Opening the windows
27
P
Pads, brake 172
Paint
176, 206
Paint colour code
206
Parcel shelf, rear
63
Park Assist
147–149
Parking brake, electric
102–104, 172
Parking sensors, audible and visual
141
Parking sensors, front
142
Parking sensors, rear
142
Personalisation
10
Plates, identification
206
Player, Apple®
213, 236
Player, USB
212, 235
Port, USB
60, 212, 214, 231, 235
Power
20
Power indicator (Rechargeable hybrid)
8, 20
Pressures, tyres
172, 180, 206
Pre-tensioning seat belts 85
Priming the fuel system
178
Profiles
217, 240
Programmable cruise control
124
Programmable speed limiter
122
Protecting children
86, 88–92
Puncture
180, 182
Q
Quiet vehicle warning sound 76
R
Radar (warnings) 11 7
Radio
210–211, 234
Radio, digital (Digital Audio Broadcasting -
DAB)
212, 235
Range, AdBlue®
18, 171
RDS
211, 234
Reading lamps
63–64
READY lamp
168
Rear screen, demisting
57
Rechargeable hybrid engine
8, 24, 168, 199, 205
Rechargeable hybrid system
5, 8, 24,
100, 112, 154
Recharging the battery
195, 197–198
Recharging the traction battery
157
Recharging the traction battery
(Rechargeable hybrid)
154, 160–162
Recirculation, air
54–55
Recovery
199, 201
Recovery of the vehicle
199, 201
Reduction of electrical load
165
Regeneration of the particle filter
172
Regenerative braking (deceleration by
engine braking)
11 0
Reinitialisation of the under-inflation
detection system
11 6
Reinitialising the remote control
34
Reminder, key in ignition
99
Reminder, lighting on
67–68
Remote control
27–32
Remote functions
161
Removing a wheel
183–184
Removing the mat
62
Replacing bulbs
185–188
Replacing fuses
189–190
Replacing the air filter
172
Replacing the oil filter
172
Replacing the passenger compartment
filter
171
Reservoir, screenwash
171
Resetting the trip recorder
20–21
Reset trip
22
Rev counter
9–10
Reversing camera
118, 143–145
Reversing lamps
187–188
Roof bars
167–168
Running out of fuel (Diesel)
178