ESP CITROEN C5 AIRCROSS DAG 2020 Handbook (in English)
[x] Cancel search | Manufacturer: CITROEN, Model Year: 2020, Model line: C5 AIRCROSS DAG, Model: CITROEN C5 AIRCROSS DAG 2020Pages: 292, PDF Size: 8.59 MB
Page 2 of 292
Access to the Handbook
The Handbook is available on the CITROËN website, in
the "MyCitroën" section or at the following address:
http://service.citroen.com/ACddb/
Access to the Handbook .
Select:
-
t
he language,
-
t
he vehicle, its body style,
-
t
he issue period of your handbook corresponding to the date of 1
st
registration of your vehicle.
Then select:
-
t
he vehicle,
-
t
he issue period corresponding to the date of 1
st registration of your
vehicle.
Download the content of the vehicle's Handbook .
From the appropriate Store, download the Scan MyCitroën
smartphone application.
This symbol indicates the latest information
available.
Page 12 of 292
10
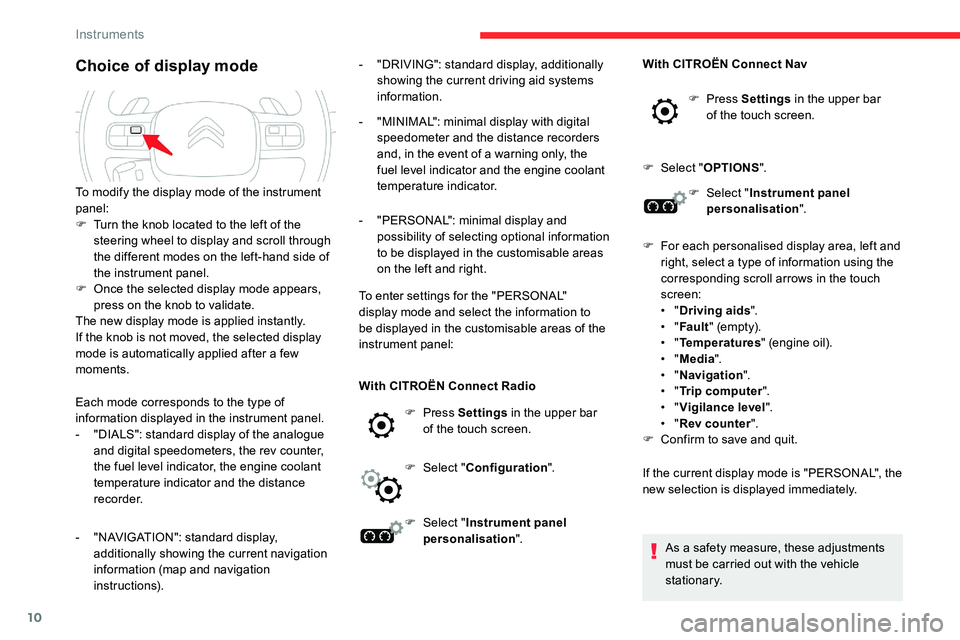
Choice of display mode
Each mode corresponds to the type of
information displayed in the instrument panel.
-
"
DIALS": standard display of the analogue
and digital speedometers, the rev counter,
the fuel level indicator, the engine coolant
temperature indicator and the distance
recorder.
-
"
NAVIGATION": standard display,
additionally showing the current navigation
information (map and navigation
instructions). -
"
DRIVING": standard display, additionally
showing the current driving aid systems
information.
-
"
MINIMAL": minimal display with digital
speedometer and the distance recorders
and, in the event of a warning only, the
fuel level indicator and the engine coolant
temperature indicator.
-
"
PERSONAL": minimal display and
possibility of selecting optional information
to be displayed in the customisable areas
on the left and right.
To enter settings for the "PERSONAL"
display mode and select the information to
be displayed in the customisable areas of the
instrument panel:
To modify the display mode of the instrument
panel:
F
T
urn the knob located to the left of the
steering wheel to display and scroll through
the different modes on the left-hand side of
the instrument panel.
F
O
nce the selected display mode appears,
press on the knob to validate.
The new display mode is applied instantly.
If the knob is not moved, the selected display
mode is automatically applied after a few
moments.
With CITROËN Connect Radio
F Press Settings in the upper bar
of the touch screen.
F
Sel
ect "Configuration ".
F
Sel
ect "Instrument panel
personalisation ". With CITROËN Connect Nav
F Press
Settings in the upper bar
of the touch screen.
F
Sel
ect "
OPTIONS ".
F
Sel
ect "
Instrument panel
personalisation ".
F
F
or each personalised display area, left and
right, select a type of information using the
corresponding scroll arrows in the touch
screen:
• "
Driving aids ".
• "
Fault " (empt y).
• "
Temperatures " (engine oil).
• "
Media ".
• "
Navigation ".
• "
Trip computer ".
• "Vigilance level ".
•
"Rev counter ".
F
C
onfirm to save and quit.
If the current display mode is "PERSONAL", the
new selection is displayed immediately.
As a
safety measure, these adjustments
must be carried out with the vehicle
stationary.
Instruments
Page 13 of 292
11
Warning and indicator
lamps
Associated warnings
The illumination of a lamp can be accompanied
b y an audible signal and/or a message
displayed in a
screen.
Relating the type of alert to the operating status
of the vehicle allows you to determine whether
the situation is normal or a
fault has occurred:
refer to the description of each lamp for further
information.
When the ignition is switched on
Certain red or orange warning lamps come on
for a few seconds when the ignition is switched
on. These warning lamps should go off as soon
as the engine is started.
For more information on equipment or
a
function, refer to the corresponding section.
Persistent warning lamp
When the engine is running or the vehicle is
being driven, the illumination of a red or orange
warning lamp indicates a
fault that needs
further investigation, using any associated
message and the description of the warning
lamp in the documentation.
Where a warning lamp remains lit
The references (1) , (2) and (3) in the warning
and indicator lamp description indicate whether
you should contact a
qualified professional
in addition to the immediate recommended
actions.
(1) : You must stop as soon as it is safe to do
so and switch off the ignition.
(2): Contact a
CITROËN dealer or a qualified
workshop.
(3) : Go to a
CITROËN dealer or a qualified
workshop.
Displayed as symbols, visual indicators
which inform the driver of the occurrence
of a
malfunction (warning lamps) or of the
operating status of a
system (operation or
deactivation indicator lamps). Certain lamps
light up in two ways (fixed or flashing) and/or in
several colours.
1
Instruments
Page 29 of 292
27
Retrieving the service
information
You can access the ser vice information at any
time in the instrument panel.The distance indicated (in miles or
kilometres) is calculated according to the
distance covered and the time elapsed
since the last ser vice.
The alert may be triggered close to a
due
date.
F
P
ress this button to temporarily display the
service information.
Engine oil level indicator
(Depending on version.)
On versions fitted with an electric oil level
indicator, the state of the engine oil level is
displayed in the instrument panel for a
few
seconds after switching the ignition on, after
the ser vicing information, in the form of
messages. The level read will only be correct if the
vehicle is on level ground and the engine
has been off for more than 30
minutes.
Low oil level
This is indicated by the display of a message
p rompting you to top up, accompanied by the
Service warning lamp and an audible signal.
If the low oil level is confirmed by a
check using
the dipstick, the level must be topped up to
avoid damage to the engine.
For more information on Checking levels ,
refer to the corresponding section.
Oil level indicator fault
This is signalled by the display of the " Oil
level measurement invalid " message in the
instrument panel.
Contact a
CITROËN dealer or a qualified
workshop. In the event of a
fault with the electric
indicator, the oil level is no longer
monitored.
If the system is faulty, you must check the
engine oil level using the manual dipstick
located under the bonnet.
For more information on Checking levels ,
refer to the corresponding section.
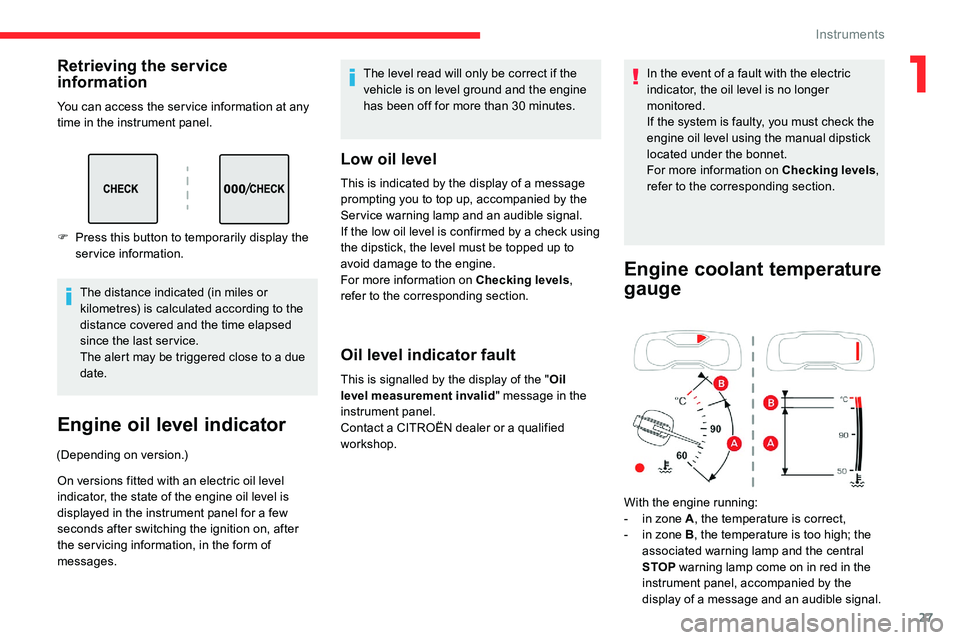
Engine coolant temperature
gauge
With the engine running:
- i n zone A , the temperature is correct,
-
i
n zone B , the temperature is too high; the
associated warning lamp and the central
STOP warning lamp come on in red in the
instrument panel, accompanied by the
display of a
message and an audible signal.
1
Instruments
Page 30 of 292
28
You must stop the vehicle as soon as it is
safe to do so.
Wait a few minutes before switching off the
engine.
After switching off the ignition, carefully
open the bonnet and check the coolant
level.
For more information on Checking levels ,
refer to the corresponding section.
AdBlue® range indicators
(BlueHDi)
The Diesel BlueHDi engines are equipped with
a
system that associates the SCR (Selective
Catalytic Reduction) emissions control system
and the Diesel particle filter (DPF) for the
treatment of exhaust gases. They cannot
function without AdBlue
® fluid.
The engine starting prevention system
required by regulations is activated
automatically once the AdBlue
® tank is
empty. It is then no longer possible to
start the engine until the minimum level of
AdBlue
® has been topped up.
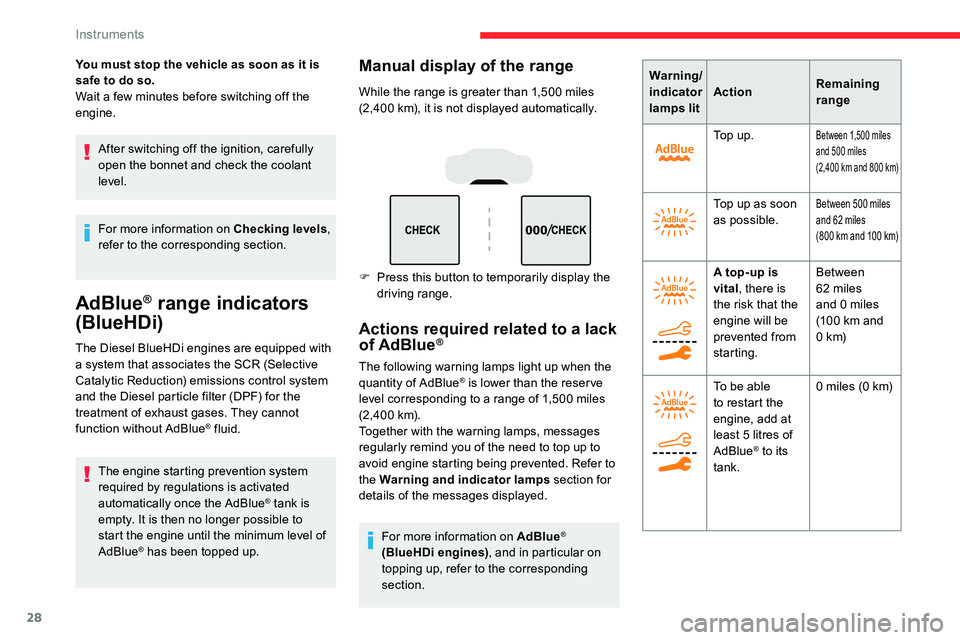
Manual display of the range
While the range is greater than 1,500 miles
( 2,400 km), it is not displayed automatically.
F
P
ress this button to temporarily display the
driving range.
Actions required related to a lack
of AdBlue®
The following warning lamps light up when the
quantity of AdBlue® is lower than the reser ve
level corresponding to a range of 1,500 miles
(2, 4 0 0
k m).
Together with the warning lamps, messages
regularly remind you of the need to top up to
avoid engine starting being prevented. Refer to
the Warning and indicator lamps section for
details of the messages displayed.
For more information on AdBlue
®
(BlueHDi engines) , and in particular on
topping up, refer to the corresponding
section. Warning/
indicator
lamps lit
Action
Remaining
range
To p u p .
Between 1,500 miles
a nd 500 miles
(2,400
km and 800 km)
Top up as soon
as possible.Between 500 miles
a nd 62 miles
(800
km and 100 km)
A top-up is
vital, there is
the risk that the
engine will be
prevented from
starting. Between
62
miles
and 0
miles
(100
km and
0
k m)
To be able
to restart the
engine, add at
least 5
litres of
AdBlue
® to its
tank. 0
miles (0 km)
Instruments
Page 35 of 292
33
Use the buttons arranged below the touch
screen for access to the menus, then press the
virtual buttons in the touch screen.
Some menus may display across two pages:
press the "OPTIONS" button to access the
second page. For safety reasons, the vehicle must
always be stationar y for the driver to
perform operations that require close
attention.
Some functions are not accessible when
driving.
Principles
To deactivate/activate a function, select "
O FF"
or " ON".
After a
few moments with no action on the
second page, the first page is displayed
automatically.
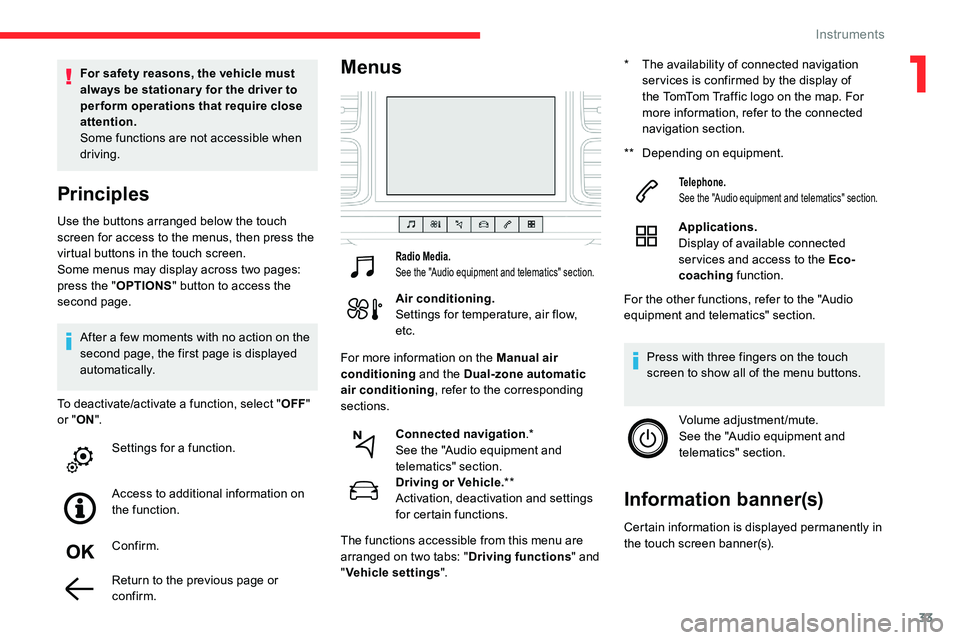
Menus
Radio Media.
See the "Audio equipment and telematics" section.
Air conditioning.
Settings for temperature, air flow,
etc.
Driving or Vehicle. **
Activation, deactivation and settings
for certain functions.
Telephone.
See the "Audio equipment and telematics" section.
Applications.
Display of available connected
ser vices and access to the Eco-
coaching function.
Confirm.
Return to the previous page or
confirm. Connected navigation
.*
See the "Audio equipment and
telematics" section. **
D
epending on equipment.
The functions accessible from this menu are
arranged on two tabs: " Driving functions" and
" Vehicle settings ".
Settings for a
function.
Access to additional information on
the function. *
T
he availability of connected navigation
ser vices is confirmed by the display of
the TomTom Traffic logo on the map. For
more information, refer to the connected
navigation section.
For more information on the Manual air
conditioning and the Dual-zone automatic
air conditioning , refer to the corresponding
sections. Volume adjustment/mute.
See the "Audio equipment and
telematics" section.
Press with three fingers on the touch
screen to show all of the menu buttons.
For the other functions, refer to the "Audio
equipment and telematics" section.
Information banner(s)
Certain information is displayed permanently in
the touch screen banner(s).
1
Instruments
Page 36 of 292
34
CITROËN Connect Nav side banners
Left-hand side
- E xterior temperature (a blue warning lamp
appears when there is a
risk of ice).
-
A
ccess to the Settings of the touch screen
and digital instrument panel (date/time,
languages, units, etc.).
-
R
eminder of the air conditioning information,
and direct access to the corresponding
menu.
Right-hand side
-
Time.
-
Notifications.
-
R
eminder of the air conditioning information,
and direct access to the corresponding
menu.
Date and time adjustment
With CITROËN Connect
Radio
F Select the Settings menu in
the upper banner of the touch
screen.
F
Sel
ect " Configuration ".
F
Sel
ect "Date and time ".
F
Sel
ect " Date " or "Time ".
F
C
hoose the display formats.
F
C
hange the date and/or time using the
numeric keypad.
F
C
onfirm with " OK".
With CITROËN Connect Nav
Setting of the time and date is only available if
synchronisation with the GPS is deactivated.
F
Sel
ect the Settings menu in the
touch screen banner.
F
P
ress the " OPTIONS " button to go to the
secondary page. F
Sel
ect "
Setting the time- date".
F
Sel
ect the "
Date" or "Time " tab.
F
S
et the date and/or time using the numeric
keypad.
F
C
onfirm with "
OK".
Additional settings
You can choose:
-
T he time zone.
-
T
he display format of the date and time
(12 h / 24 h).
-
T
he summer time management function
(+1
h o ur).
-
T
he synchronisation with GPS (UTC).
The system does not automatically
manage the change between winter and
summer time (depending on the country
of s a l e).
CITROËN Connect Radio upper
banner
- Time and exterior temperature (a blue warning lamp appears when there is a risk
of i c e).
-
R
eminder of the air conditioning information,
and direct access to the corresponding
menu.
-
R
eminder of the Radio Media and
Telephone menus information.
-
Notifications.
-
A
ccess to the Settings of the touch screen
and digital instrument panel (date/time,
languages, units, etc.).
Instruments
Page 37 of 292
35
Electronic key with remote
control function and built-
in key
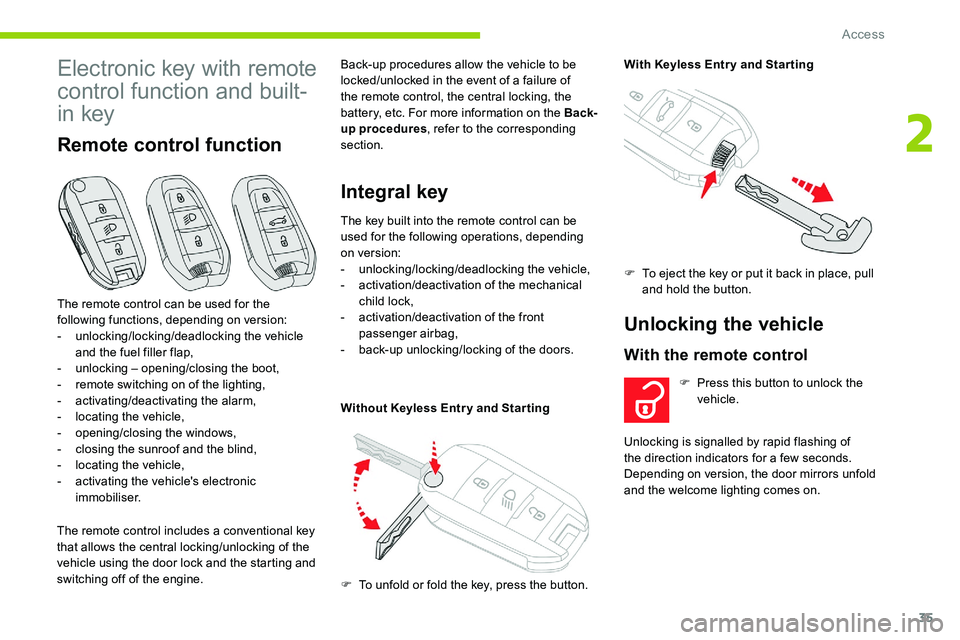
Remote control function
The remote control includes a conventional key
t hat allows the central locking/unlocking of the
vehicle using the door lock and the starting and
switching off of the engine. Back-up procedures allow the vehicle to be
locked/unlocked in the event of a
failure of
the remote control, the central locking, the
battery, etc. For more information on the Back-
up procedures , refer to the corresponding
section.
Integral key
The remote control can be used for the
following functions, depending on version:
-
u
nlocking/locking/deadlocking the vehicle
and the fuel filler flap,
-
u
nlocking – opening/closing the boot,
-
r
emote switching on of the lighting,
-
a
ctivating/deactivating the alarm,
-
l
ocating the vehicle,
-
o
pening/closing the windows,
-
c
losing the sunroof and the blind,
-
l
ocating the vehicle,
-
a
ctivating the vehicle's electronic
immobiliser. The key built into the remote control can be
used for the following operations, depending
on version:
-
u
nlocking/locking/deadlocking the vehicle,
-
a
ctivation/deactivation of the mechanical
child lock,
- a ctivation/deactivation of the front
passenger airbag,
-
b
ack-up unlocking/locking of the doors.
Without Keyless Entr y and Star ting With Keyless Entr y and Star ting
Unlocking the vehicle
With the remote control
F To unfold or fold the key, press the button.
F
T
o eject the key or put it back in place, pull
and hold the button.
F
P
ress this button to unlock the
vehicle.
Unlocking is signalled by rapid flashing of
the direction indicators for a few seconds.
Depending on version, the door mirrors unfold
and the welcome lighting comes on.
2
Access
Page 39 of 292
37
Ensure that no person or object could
prevent the correct closing of the windows
and sunroof.
If, on versions with alarm, you want to
leave the windows and/or sunroof partly
open, you must first deactivate the
volumetric alarm protection.
For more information on the Alarm, refer
to the corresponding section.
Deadlocking
Deadlocking deactivates the exterior
and interior door controls, as well as the
central locking button on the dashboard.
The horn remains operational.
You must therefore never leave anyone
inside the vehicle when it is deadlocked.
If your vehicle is fitted with an alarm,
activation is confirmed by fixed
illumination of the direction indicators for
a
few seconds.
With the remote control
F Within 5 seconds of locking the
vehicle, press the button again to
deadlock it.
With the key
F Within 5 seconds of locking the vehicle, turn
the key to the rear again to deadlock it.
Locating your vehicle
This function allows you to identify your vehicle
from a distance, particularly in poor light. Your
vehicle must be locked.
F
P
ress this button. The courtesy
lamps will come on and the
direction indicators will flash for
a
few seconds.
Welcome lighting
Availability of this function depends on version. F
B
riefly press this button. The
sidelamps, dipped beam
headlamps, number plate lamps
and door mirror spotlamps come
on for 30 seconds.
Pressing again before the end of the timed
period switches off the lamps immediately.
Keyless Entry and
Starting
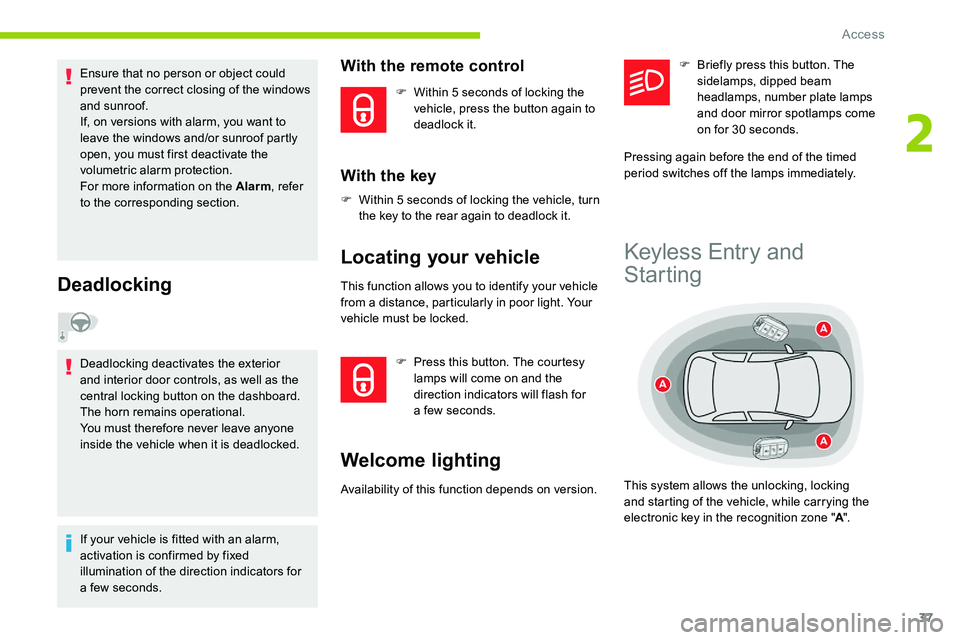
This system allows the unlocking, locking
and starting of the vehicle, while carrying the
electronic key in the recognition zone " A".
2
Access
Page 40 of 292
38
The electronic key is also used as
a remote control. For more information
on the Remote control , refer to the
corresponding section.
Unlocking the vehicle
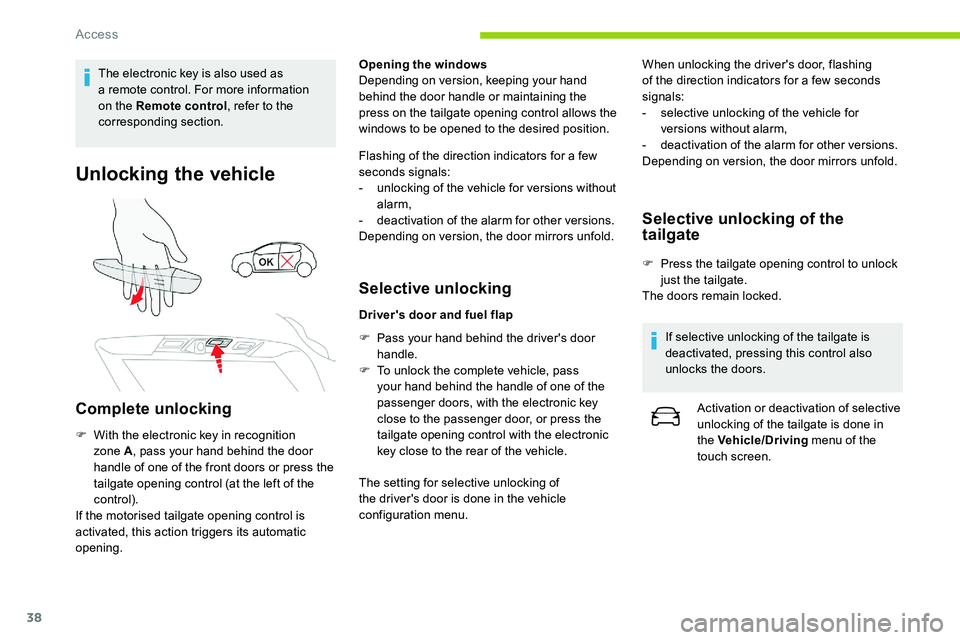
Complete unlocking
F With the electronic key in recognition zone A , pass your hand behind the door
handle of one of the front doors or press the
tailgate opening control (at the left of the
control).
If the motorised tailgate opening control is
activated, this action triggers its automatic
opening. Opening the windows
Depending on version, keeping your hand
behind the door handle or maintaining the
press on the tailgate opening control allows the
windows to be opened to the desired position.
Flashing of the direction indicators for a
few
seconds signals:
-
u
nlocking of the vehicle for versions without
alarm,
-
d
eactivation of the alarm for other versions.
Depending on version, the door mirrors unfold.
Selective unlocking
Driver's door and fuel flap
F
P
ass your hand behind the driver's door
handle.
F
T
o unlock the complete vehicle, pass
your hand behind the handle of one of the
passenger doors, with the electronic key
close to the passenger door, or press the
tailgate opening control with the electronic
key close to the rear of the vehicle.
The setting for selective unlocking of
the driver's door is done in the vehicle
configuration menu. When unlocking the driver's door, flashing
of the direction indicators for a
few seconds
signals:
-
s
elective unlocking of the vehicle for
versions without alarm,
-
d
eactivation of the alarm for other versions.
Depending on version, the door mirrors unfold.
Selective unlocking of the
tailgate
F Press the tailgate opening control to unlock just the tailgate.
The doors remain locked.
If selective unlocking of the tailgate is
deactivated, pressing this control also
unlocks the doors. Activation or deactivation of selective
unlocking of the tailgate is done in
the Vehicle/Driving menu of the
touch screen.
Access