light CITROEN C5 AIRCROSS DAG 2022 Handbook (in English)
[x] Cancel search | Manufacturer: CITROEN, Model Year: 2022, Model line: C5 AIRCROSS DAG, Model: CITROEN C5 AIRCROSS DAG 2022Pages: 276, PDF Size: 7.92 MB
Page 176 of 276
174
Practical information
► With an AdBlue® pump: insert the nozzle and
fill the tank until the nozzle automatically cuts
out.
In order not to overfill the AdBlue® tank:
– Add between 10 and 13 litres using
AdBlue
® containers.
– Stop after the nozzle’s first automatic cut-
out, if you are refilling at a service station.
The system only registers AdBlue
® top-ups of
5 litres or more.
If the AdBlue® tank is completely empty
– which is confirmed by the message
"Top up AdBlue: Starting impossible" – it is
essential to add at least 5 litres.
Free-wheeling
In certain situations, you must allow the vehicle
to free-wheel (while being towed, on a rolling
road, in an automatic car wash, or being
transported by rail or sea freight, etc.).
The procedure varies according to the type of
gearbox and parking brake.
With manual or EAT6
automatic gearbox and
electric parking brake
/
For the correct operation of the SCR
system:
–
Use
only AdBlue
® fluid that meets the ISO
22241 standard.
–
Never
transfer AdBlue
® to another container
as it would lose its purity.
–
Never
dilute AdBlue
® with water.
You can obtain AdBlue
® from a CITROËN dealer
or a qualified workshop, as well as service
stations equipped with AdBlue
® pumps specially
designed for passenger vehicles.
Recommendations on storage
AdBlue® freezes at about -11°C and deteriorates
above +25°C. Containers should be stored in a
cool area and protected from direct sunlight.
Under these conditions, the fluid can be kept for
at least a year.
If the fluid has frozen, it can be used once it has
completely thawed out at room temperature.
Never store AdBlue® containers in your
vehicle.
Precautions for use
AdBlue® is a urea-based solution. This fluid is
non-flammable, colourless and odourless (when
kept in a cool place).
In the event of contact with the skin, wash the
affected area with soap and running water. In the
event of contact with the eyes, immediately rinse
the eyes with large amounts of water or with an
eye wash solution for at least 15 minutes. Seek
medical attention if you feel a persistent burning
sensation or irritation.
If swallowed, immediately wash out the mouth
with clean water and then drink plenty of water.
In certain conditions (high temperature, for
example), the risk of release of ammonia cannot
be excluded: do not inhale the fluid. Ammonia
vapours have an irritant effect on mucous
membranes (eyes, nose and throat).
Store AdBlue® out of the reach of
children, in its original container.
Procedure
Before starting the top-up procedure, ensure that
the vehicle is parked on a flat and level surface.
In wintry conditions, ensure that the temperature
of the vehicle is above -11
°C. Otherwise, the
AdBlue
® may be frozen and therefore cannot
be poured into its tank. Park your vehicle in a
warmer area for a few hours to allow the top-up
to be carried out.
Never pour AdBlue® into the Diesel fuel
tank.
If any AdBlue® is splashed, or if there are
any spillages on the bodywork, rinse
immediately with cold water or wipe with a
damp cloth.
If the fluid has crystallised, clean it off using a
sponge and hot water.
Important: in the event of a top-up after
a breakdown because of a lack of
AdBlue, it is essential to wait around 5
minutes before switching on the ignition,
without opening the driver’s door,
unlocking the vehicle, introducing the key
into the ignition switch, or introducing the
key of the “Keyless Entry and Starting
”
system into the passenger compartment
.
Switch on the ignition, then wait for 10
seconds before starting the engine.
►
Switch off the ignition and remove the key
from the switch to switch off the engine.
or
►
With Keyless Entry and Starting, press the
"
START/STOP" button to switch off the engine.
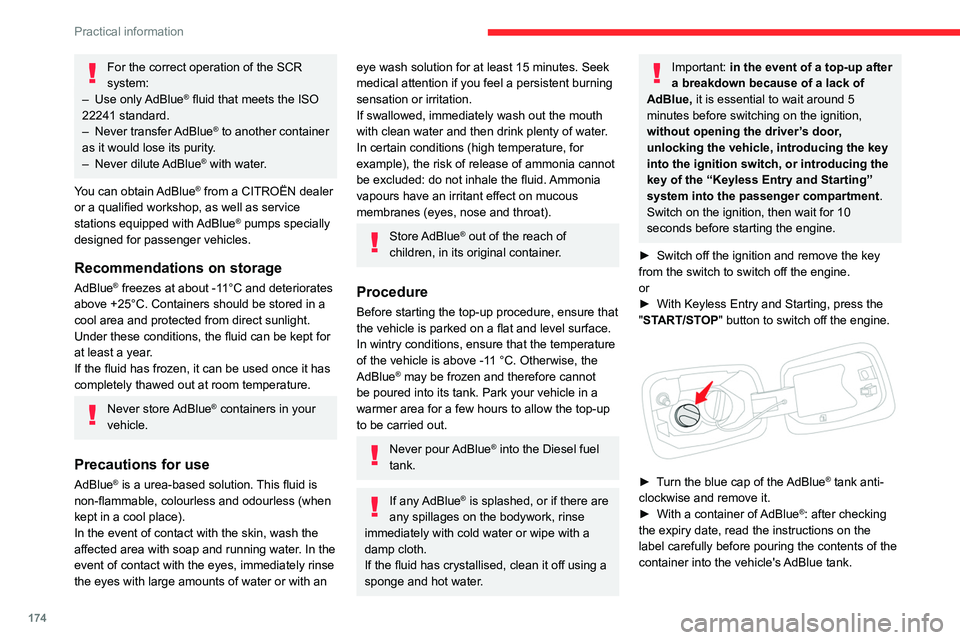
► Turn the blue cap of the AdBlue® tank anti-
clockwise and remove it.
►
With a container of
AdBlue
®: after checking
the expiry date, read the instructions on the
label carefully before pouring the contents of the
container into the vehicle's AdBlue tank.
Page 187 of 276

185
In the event of a breakdown
8After changing a wheel
Store the punctured wheel in the boot or,
depending on version, remove the central cover
first to store it beneath the floor in place of the
spare wheel.
With a "space-saver" type spare wheel
Deactivate certain driving aid functions
(Active Safety Brake, Adaptive Cruise Control,
etc.).
Do not exceed the maximum authorised
speed of 50 mph (80 km/h).
Driving with more than one "space-saver"
type spare wheel is prohibited.
Go to a CITROËN dealer or a qualified
workshop.
Have the tightening of the spare wheel's bolts
and its tyre pressure checked.
Have the punctured tyre examined. After
inspection, the technician will advise you on
whether the tyre can be repaired or if it must
be replaced.
Changing a bulb
In some weather conditions (e.g. low
temperature or humidity), misting on the
internal surface of the glass of the headlamps
and rear lamps is normal, and will disappear
after the lamps have been on for a few
minutes.
The headlamps have polycarbonate lenses with a protective coating:
–
Do not clean them with a dry or abrasive
cloth, nor with detergent or solvent
products.
–
Use a sponge and soapy water or a pH
neutral product.
–
When using a high-pressure washer on
persistent marks, do not keep the lance
directed towards the headlamps, lamps or
their edges for too long, so as not to damage
their protective coating and seals.
Changing a bulb must only be done with
the ignition off and after the headlamp /
lamp has been switched off for several
minutes - risk of serious burns!
Do not touch the bulb directly with your
fingers; use a lint-free cloth.
It is essential only to use anti-ultraviolet
(UV) type bulbs, so as not to damage the
headlamp.
Always replace a failed bulb with a new bulb
of the same type and specification. To avoid
lighting imbalance, replace the bulbs in pairs.
Refitting the lamp units
Perform the operations in the reverse
order to dismantling.
Halogen bulbs
To ensure good quality lighting, check
that the bulb is correctly positioned in its
housing.
Light-emitting diode (LED)
headlamps and lamps
Depending on version, the affected types of
headlamps/lamps are:
–
Full LED technology headlamps.
–
Daytime running lamps/sidelamps.
–
Direction indicator side repeaters.
–
Direction indicators.
–
Side spotlamps.
–
3D rear lamps.
–
Third brake lamp.
–
Number plate lamps.
If you need to replace this type of bulb,
you must contact a CITROËN dealer or a
qualified workshop.
Do not touch the "Full LED" technology
headlamps or lamps - risk of electrocution!
Page 190 of 276

188
In the event of a breakdown
► Open the tailgate, then unclip the access
cover on the side in question.
►
Unblock the lamp fixing nut with a 10
mm box
spanner.
►
T
o avoid losing the nut in the wing trim if it
drops, first place a cloth below it.
►
Manually unscrew and remove the lamp
fixing nut.
►
Disengage the retaining clip, while slightly
pushing the lamp back.
► From the outside, carefully remove the lamp
by pulling it to the rear , then up.
►
Disengage the cable sleeve from the body
panel.
►
T
urn the bulb holder a quarter turn using a
universal pair of pliers, if necessary, and pull it
out.
►
Remove the bulb and replace it.
Reversing lamps (on the tailgate)
► Open the tailgate, then insert a flat
screwdriver into the cut-out to unclip the access
cover on the side in question.
►
Unblock the lamp fixing nut with a 10
mm box
spanner.
►
Manually unscrew and remove the lamp
fixing nut.
►
Disengage the retaining clip, while slightly
pushing the lamp back.
► From the outside, carefully remove the lamp
by pulling it to the rear .
►
Disconnect the lamp connector by pressing
on each side.
► Turn the bulb holder a quarter turn and
remove it.
►
Remove the bulb and replace it.
Foglamps
These bulbs are replaced from outside the rear
bumper.
►
Pass your hand under the bumper
.
►
T
urn the bulb holder a quarter turn and
remove it.
►
T
urn the bulb a quarter turn and replace it.
When changing the bulb within a few
minutes of switching off the ignition, take
care not to touch the exhaust - risk of burns!
Number plate lamps (W5W)
► Insert a thin screwdriver into one of the cut-
outs in the lens.
► Push it outwards to unclip it.
► Remove the lens.
► Replace the faulty bulb.
To refit, press the lens to clip it in.
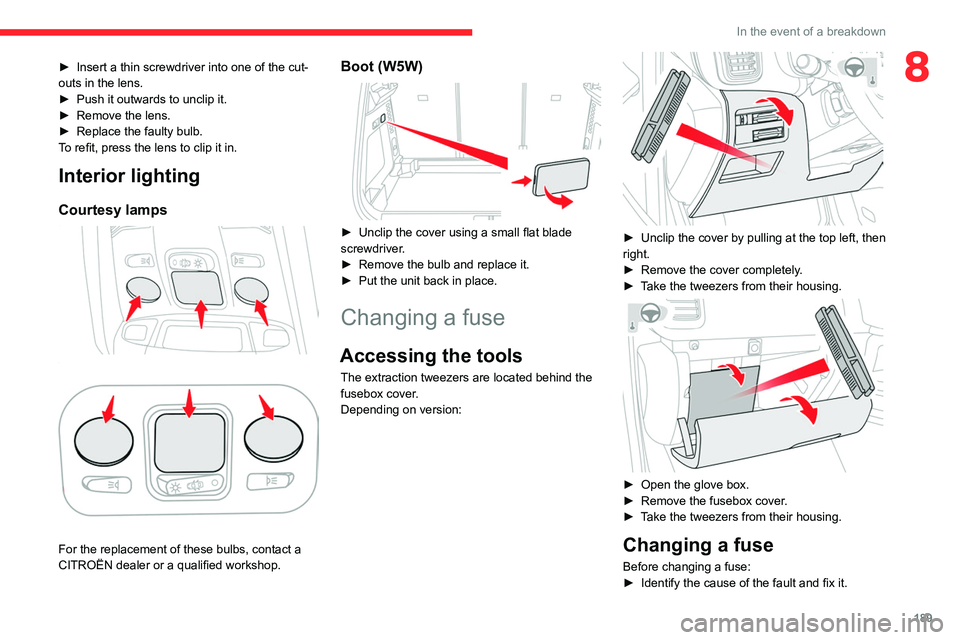
Interior lighting
Courtesy lampsFront courtesy lamp
Rear courtesy lamp
For the replacement of these bulbs, contact a
CITROËN dealer or a qualified workshop.
Page 191 of 276
189
In the event of a breakdown
8► Insert a thin screwdriver into one of the cut-
outs in the lens.
►
Push it outwards to unclip it.
►
Remove the lens.
►
Replace the faulty bulb.
T
o refit, press the lens to clip it in.
Interior lighting
Courtesy lampsFront courtesy lamp
Rear courtesy lamp
For the replacement of these bulbs, contact a
CITROËN dealer or a qualified workshop.
Boot (W5W)
► Unclip the cover using a small flat blade
screwdriver .
►
Remove the bulb and replace it.
►
Put the unit back in place.
Changing a fuse
Accessing the tools
The extraction tweezers are located behind the
fusebox cover.
Depending on version:
► Unclip the cover by pulling at the top left, then
right.
►
Remove the cover completely
.
►
T
ake the tweezers from their housing.
► Open the glove box.
► Remove the fusebox cover .
►
T
ake the tweezers from their housing.
Changing a fuse
Before changing a fuse:
► Identify the cause of the fault and fix it.
Page 194 of 276
192
In the event of a breakdown
Fuse No.Rating
(Amps) Functions
F31 10Cigarette lighter/Front 12
V accessory socket.
F34 5Wireless smartphone charger.
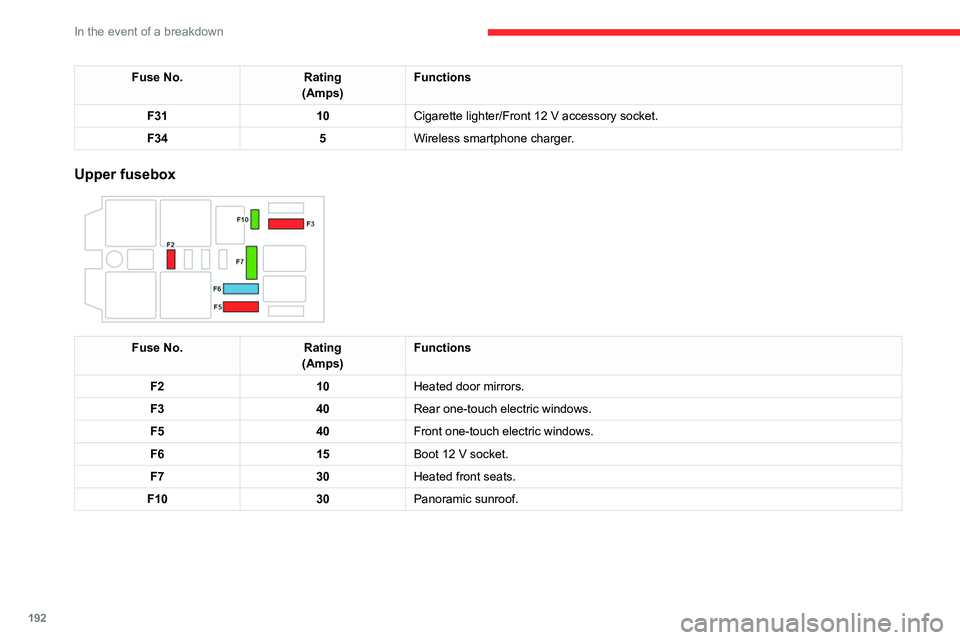
Upper fusebox
Fuse No. Rating
(Amps) Functions
F2 10Heated door mirrors.
F3 40Rear one-touch electric windows.
F5 40Front one-touch electric windows.
F6 15Boot 12
V socket.
F7 30Heated front seats.
F10 30Panoramic sunroof.
Engine compartment fuses
The fusebox is placed in the engine
compartment near the battery.
Fuse No. Rating
(Amps) Functions
F1 40Air conditioning ventilation motor.
F16 20Heated windscreen.
F18 10Right-hand main beam headlamp.
F19 10Left-hand main beam headlamp.
Page 196 of 276

194
In the event of a breakdown
Fuse No.Rating
(Amps) Functions
F24 40Trailer power supply.
F26 25Front foglamps.
12 V battery
Procedure for starting the engine using another
battery or for charging a discharged battery.
Lead-acid starter batteries
These batteries contain harmful
substances (sulphuric acid and lead).
They must be disposed of in accordance
with regulations and must never under any
circumstances be discarded with household
waste.
Take used remote control batteries and
vehicle batteries to a special collection point.
Protect your eyes and face before
handling the battery.
All operations on the battery must be carried
out in a well ventilated area and away from
naked flames and sources of sparks, to avoid
any risk of explosion or fire.
Wash your hands afterwards.
Access to the battery
The battery is located under the bonnet.
For access to the (+) terminal:
► Unlock the bonnet by activating the internal
release lever
, then the external safety catch.
►
Raise the bonnet.
(+)
Positive terminal.
It has a quick-release clamp.
(-) Negative terminal.
As the battery's negative terminal is not
accessible, a remote earth point is placed near
the battery.
Starting using another
battery
If your vehicle's battery is flat, the engine can be
started using a backup battery (either external or
from another vehicle) and jump leads or using a
battery booster.
Never start the engine by connecting a
battery charger.
Never use a 24
V or higher battery booster.
Check beforehand that the backup battery
has a nominal voltage of 12
V and a capacity
at least equal to that of the discharged
battery.
The two vehicles must not be in contact with
each other.
Switch off all electricity-consuming equipment
on both vehicles (audio system, wipers,
lighting, etc.).
Make sure that the jump leads are well away
from the engine’s moving parts (fan, belt,
etc.).
Do not disconnect the (+) terminal while the
engine is running.
Page 197 of 276

195
In the event of a breakdown
8
► Lift the plastic cover on the (+) terminal, if the
vehicle has one.
►
Connect the red cable to the (+) terminal of
flat battery
A (at the metal elbow), then to the
(+) terminal of the backup battery
B or of the
booster.
►
Connect one end of the green or black cable
to the (-) terminal of the backup battery
B or of
the booster (or to an earth point on the assisting
vehicle).
►
Connect the other end of the green or black
cable to the earth point
C
.
►
Start the engine on the assisting vehicle and
leave it running for a few minutes.
►
Operate the starter on the broken down
vehicle and let the engine run.
If the engine does not start immediately
, switch
off the ignition and wait a few moments before
trying again.
►
W
ait for it to return to idle.
►
Disconnect the jump leads in reverse order.
► Refit the plastic cover to the (+) terminal, if
the vehicle has one.
►
Allow the engine to run for at least
30
minutes, with the vehicle stationary, so that
the battery reaches an adequate state of charge.
Drive cautiously during the first 30
minutes after starting the engine.
With an automatic gearbox, never try to
start the engine by pushing the vehicle.
Charging the battery using a
battery charger
For optimum service life of the battery, it is
essential to maintain an adequate state of
charge.
In some circumstances, it may be necessary to
charge the battery:
–
When using the vehicle mainly for short
journeys.
–
If the vehicle is to be taken off the road for
several weeks.
Contact a CITROËN dealer or a qualified
workshop.
To charge the vehicle's battery yourself, use only a charger compatible with
lead-acid batteries with a nominal voltage of
12
V.
Follow the instructions provided by the
manufacturer of the charger.
Never reverse polarities.
It is not necessary to disconnect the
battery.
►
Switch the ignition off.
►
Switch off all electrical consumers (audio
system, lighting, wipers, etc.).
► Switch off charger B before connecting
the cables to the battery, so as to avoid any
dangerous sparks.
►
Ensure that the charger cables are in good
condition.
►
Lift the plastic cover on the (+) terminal, if the
vehicle has one.
►
Connect the cables of charger B
as follows:
•
the positive (+) red cable to the (+) terminal
of battery
A,
•
the negative (-) black cable to earth point C
on the vehicle.
Page 198 of 276
196
In the event of a breakdown
► At the end of the charging operation, switch
off charger B
before disconnecting the cables
from battery A.
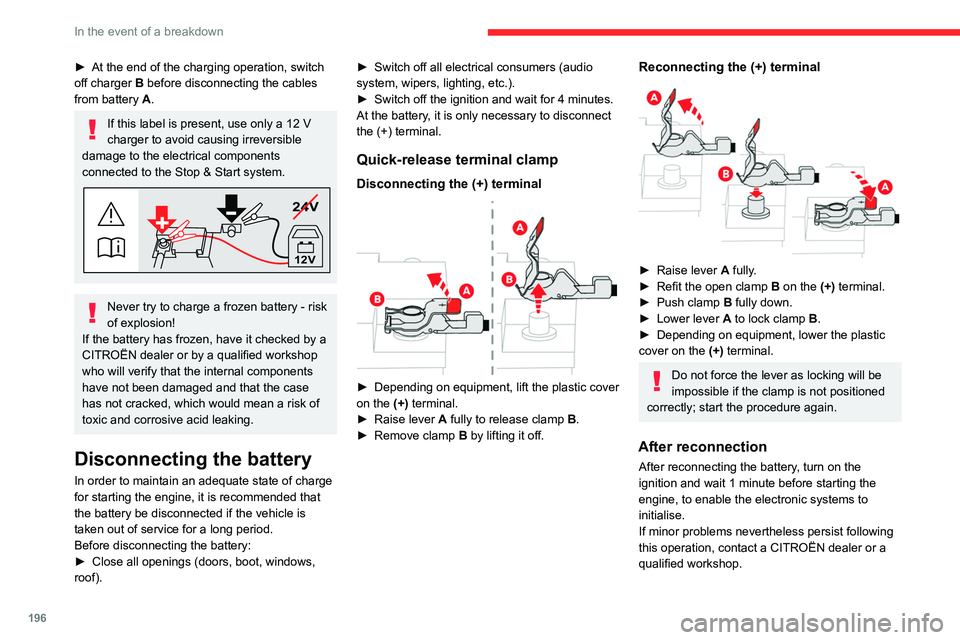
If this label is present, use only a 12 V
charger to avoid causing irreversible
damage to the electrical components
connected to the Stop & Start system.
24V
12V
Never try to charge a frozen battery - risk
of explosion!
If the battery has frozen, have it checked by a
CITROËN dealer or by a qualified workshop
who will verify that the internal components
have not been damaged and that the case
has not cracked, which would mean a risk of
toxic and corrosive acid leaking.
Disconnecting the battery
In order to maintain an adequate state of charge
for starting the engine, it is recommended that
the battery be disconnected if the vehicle is
taken out of service for a long period.
Before disconnecting the battery:
►
Close all openings (doors, boot, windows,
roof). ►
Switch off all electrical consumers (audio
system, wipers, lighting, etc.).
►
Switch off the ignition and wait for 4
minutes.
At the battery, it is only necessary to disconnect
the (+) terminal.
Quick-release terminal clamp
Disconnecting the (+) terminal
► Depending on equipment, lift the plastic cover
on the (+) terminal.
►
Raise lever
A
fully to release clamp
B
.
►
Remove clamp
B
by lifting it off.
Reconnecting the (+) terminal
► Raise lever A fully.
► Refit the open clamp B on the (+) terminal.
►
Push clamp
B fully down.
►
Lower lever
A
to lock clamp B.
►
Depending on equipment, lower the plastic
cover on the
(+) terminal.
Do not force the lever as locking will be
impossible if the clamp is not positioned
correctly; start the procedure again.
After reconnection
After reconnecting the battery, turn on the
ignition and wait 1 minute before starting the
engine, to enable the electronic systems to
initialise.
If minor problems nevertheless persist following
this operation, contact a CITROËN dealer or a
qualified workshop.
Referring to the relevant section, reset certain
equipment:
– Remote control key or electronic key
(depending on version).
– Sunroof and electric sun blind.
– Electric windows.
– Date and time.
– Preset radio stations.
The Stop & Start system may not be
operational during the trip following the
first engine start.
In this case, the system will only be
available again after a continuous period of
immobilisation of the vehicle, a period which
depends on the exterior temperature and the
state of charge of the battery (up to about 8
hours).
Accessory battery (Rechargeable hybrid)
The rechargeable hybrid system has two
accessory batteries: one at the front and one at
the rear of the vehicle.
The batteries contain harmful substances (sulphuric acid and lead).
They must be disposed of in accordance
with regulations and must never under any
circumstances be discarded with household
waste.
Page 200 of 276

198
In the event of a breakdown
– If the vehicle is to be taken off the road for
several weeks.
Consult a CITROËN dealer or a qualified
workshop.
To charge the vehicle's front battery yourself, use only a charger compatible
with lead-acid batteries with a nominal voltage
of 12
V.
Follow the instructions provided by the
manufacturer of the charger.
Never reverse polarities.
It is not necessary to disconnect the
battery.
►
Switch the ignition off.
►
Switch off all electrical consumers (audio
system, lighting, wipers, etc.).
► Switch off charger B before connecting
the cables to the battery, so as to avoid any
dangerous sparks.
►
Ensure that the charger cables are in good
condition.
►
Lift the plastic cover on the (+) terminal, if the
vehicle has one.
►
Connect the cables of charger B
as follows:
•
the positive (+) red cable to the (+) terminal
of battery
A,
•
the negative (-) black cable to earth point C
on the vehicle.
►
At the end of the charging operation, switch
off charger B
before disconnecting the cables
from battery A.
Never try to charge a frozen battery - risk
of explosion!
If the battery has frozen, have it checked by a
CITROËN dealer or by a qualified workshop
who will verify that the internal components
have not been damaged and that the case
has not cracked, which would mean a risk of
toxic and corrosive acid leaking.
Disconnection/reconnection
of the batteries
Procedure for disconnecting/reconnecting the
batteries in the event of long-term immobilisation
of the vehicle.
Before disconnecting the batteries:
►
Open the driver's door and boot.
►
Close all other doors.
►
Switch off all electrical consumers (audio
system, wipers, lamps, etc.).
►
Switch
off the ignition and wait for the READY
indicator lamp to go out.
►
Observe a waiting time of 4 minutes.
Never reverse the order of the battery
disconnection and reconnection steps
- risk of irreversible damage!
Disconnection
► Disconnect the (-) terminal of the rear battery
using the black quick-release connector.
► Disconnect the (+) terminal of the front
battery by disconnecting the red quick-release
clamp: • Raise lever A fully to release clamp B.
• Remove clamp B by lifting it off.
Reconnection
► Connect the (+) terminal of the front battery
by connecting the red quick-release clamp: • Raise lever A fully.
• Refit open clamp B on the (+) terminal.
Page 204 of 276
202
Technical data
Engine technical data and
towed loads
Engines
The engine specifications are given in the
vehicle's registration document, as well as in
sales brochures.
Only the values available at the time of
publication are presented in the tables.
Contact a CITROËN dealer or a qualified
workshop to obtain the missing values.
The maximum power corresponds to the value type-approved on a test bed, under
conditions defined by European legislation
(Directive 1999/99/EC).
For more information, contact a CITROËN dealer
or a qualified workshop.
Weights and towed loads
The weights and towed loads relating to
the vehicle are indicated on the registration
document, as well as in sales brochures.
These values are also indicated on the
manufacturer's plate or label.
For more information, contact a CITROËN dealer
or a qualified workshop.
The GTW (Gross Train Weight) and towed load
values indicated are valid up to a maximum
altitude of 1,000 metres. The towed load value
must be reduced by 10% for each additional
1,000 metres of altitude.
The maximum authorised nose weight
corresponds to the weight permitted on the
towball.
When exterior temperatures are high, the
vehicle performance may be limited in
order to protect the engine. When the exterior
temperature is higher than 37°C, reduce the
towed weight.
Towing even with a lightly loaded vehicle can adversely affect its road holding.
Braking distances are increased when towing
a trailer.
When using a vehicle to tow, never exceed
a speed of 62 mph (100
km/h) (observe the
local legislation in force).
Engines and towed loads - Petrol
Engines THP 150 THP 165 PureTech 130
S&SPureTech 130 S&S Euro 6.3 PureTech 180
S&SPureTech 180
S&S Euro 6.3
Gearboxes EAT6
(Automatic 6-speed) BVM6
(Manual
6-speed) BVM6
(Manual
6-speed) EAT8
(Automatic 8-speed) EAT8
(Automatic 8-speed)
Codes EP6FDTMD AT6IIIEB2ADTS
STTd MB6E EB2ADTS
STTd MB6E EB2ADTS
STTd ATN8 EP6FADTXD STTd ATN8
Model codes
J... 5GX/5GS - 5GY
HNSHNS 5GF
Cubic capacity (cc) 1,5981,1991,199 1,598
Max. power: EC
standard (kW) 11 0
9696 133
Fuel UnleadedUnleadedUnleaded Unleaded
Braked trailer (within
the GTW limit) (kg)
on a 10% or 12%
gradient 550
1,3501,350/1,300 1,500
Unbraked trailer (kg) 550739740 750
Maximum authorised
nose weight (kg) 64
5465 64/65