Ignition Citroen C5 DAG 2007.5 (DC/DE) / 1.G Owner's Manual
[x] Cancel search | Manufacturer: CITROEN, Model Year: 2007.5, Model line: C5 DAG, Model: Citroen C5 DAG 2007.5 (DC/DE) / 1.GPages: 231, PDF Size: 8.02 MB
Page 5 of 231
I
8
9
10
1718
11
1
2
1213
14
153
5
8
6
4
7
16
19
20
21
IN BRIEF
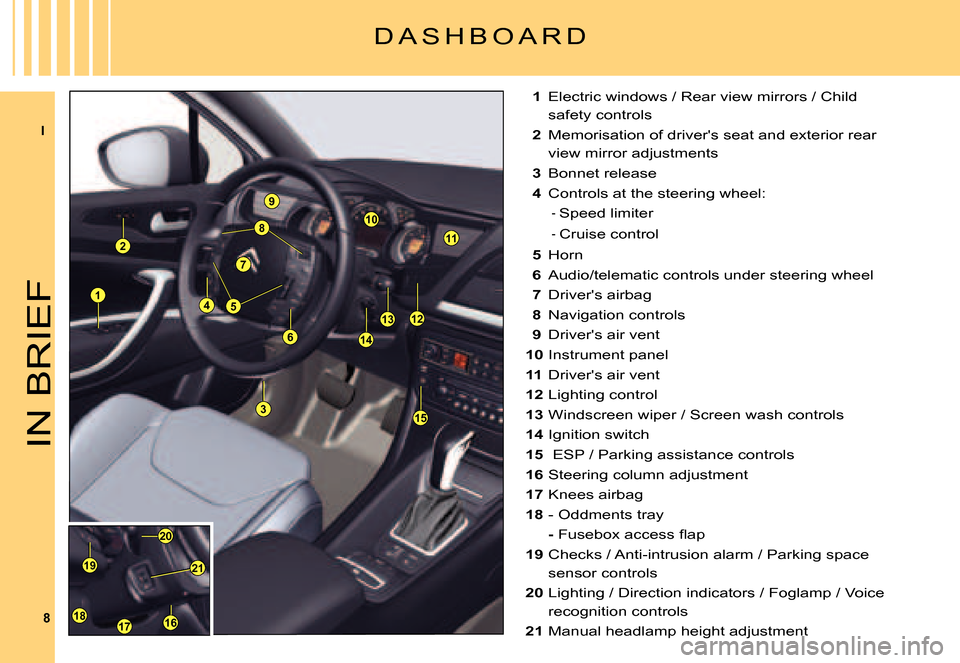
1 Electric windows / Rear view mirrors / Child
safety controls
2 Memorisation of driver's seat and exterior rear
view mirror adjustments
3 Bonnet release
4 Controls at the steering wheel:
Speed limiter
Cruise control
5 Horn
6 Audio/telematic controls under steering wheel
7 Driver's airbag
8 Navigation controls
9 Driver's air vent
10 Instrument panel
11 Driver's air vent
12 Lighting control
13 Windscreen wiper / Screen wash controls
14 Ignition switch
15 ESP / Parking assistance controls
16 Steering column adjustment
17 Knees airbag
18 - Oddments tray
- �F�u�s�e�b�o�x� �a�c�c�e�s�s� �fl� �a�p
19 Checks / Anti-intrusion alarm / Parking space
sensor controls
20 Lighting / Direction indicators / Foglamp / Voice
recognition controls
21 Manual headlamp height adjustment
-
-
D A S H B O A R D
Page 9 of 231
I
12
A4
31
2
ba
c
IN BRIEF
G E T T I N G S T A R T E D
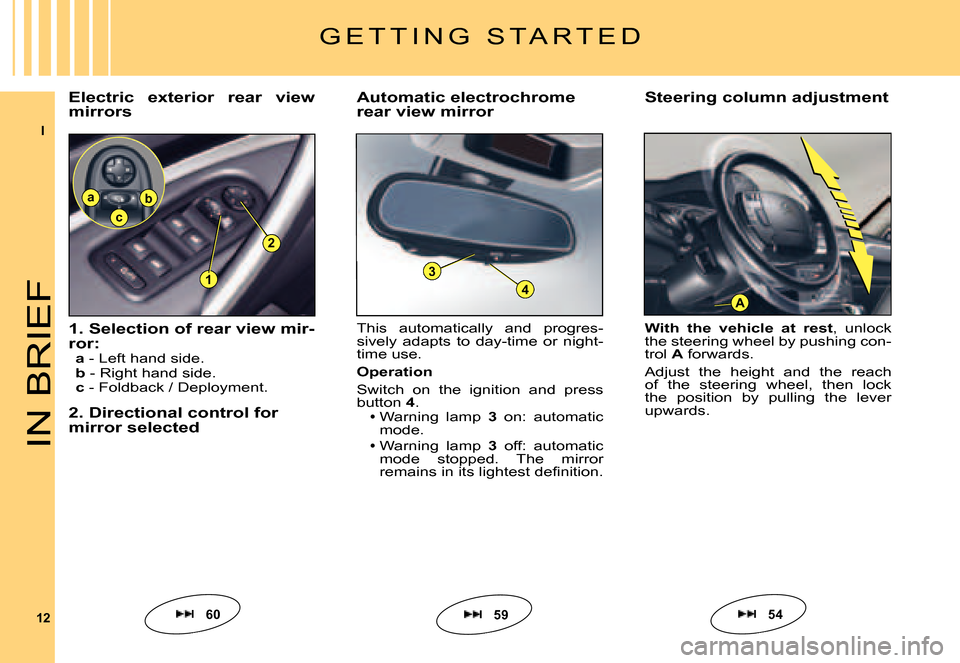
Automatic electrochrome rear view mirror
6054
This automatically and progres-sively adapts to day-time or night-time use.
Operation
Switch on the ignition and press button 4.Warning lamp 3 on: automatic mode.
Warning lamp 3 off: automatic mode stopped. The mirror �r�e�m�a�i�n�s� �i�n� �i�t�s� �l�i�g�h�t�e�s�t� �d�e�fi� �n�i�t�i�o�n�.
Page 11 of 231
I
14
B
A
IN BRIEF
D R I V I N G
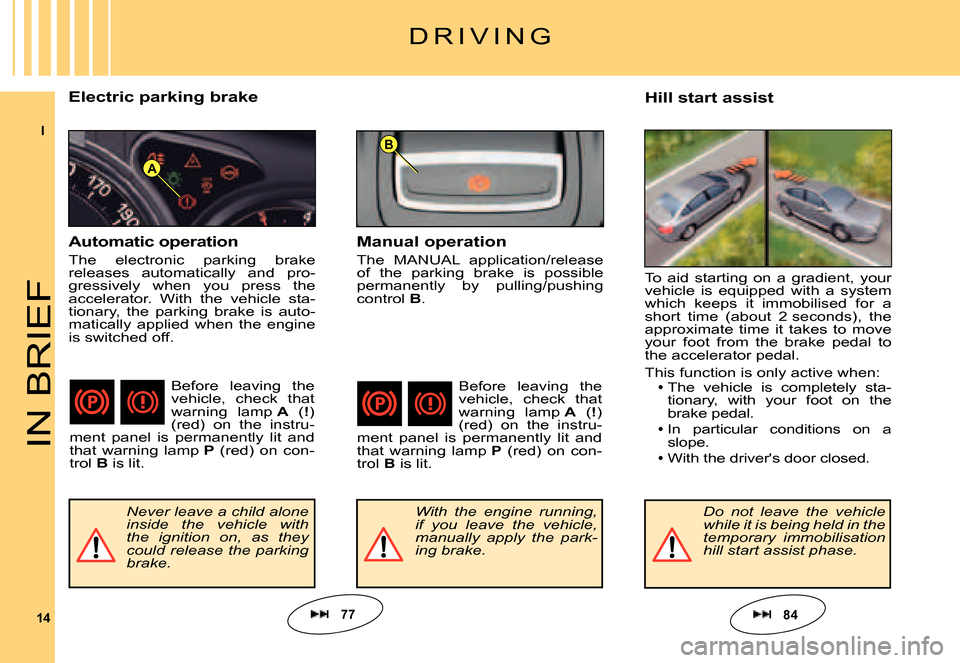
Electric parking brake
77
Never leave a child alone inside the vehicle with the ignition on, as they could release the parking brake.
Hill start assist
Manual operation
The MANUAL application/release of the parking brake is possible permanently by pulling/pushing control B.
Before leaving the vehicle, check that warning lamp A (!) (red) on the instru-ment panel is permanently lit and that warning lamp P (red) on con-trol B is lit.
With the engine running, if you leave the vehicle, manually apply the park-ing brake.
Do not leave the vehicle while it is being held in the temporary immobilisation hill start assist phase.
To aid starting on a gradient, your vehicle is equipped with a system which keeps it immobilised for a short time (about 2 seconds), the approximate time it takes to move your foot from the brake pedal to the accelerator pedal.
This function is only active when:The vehicle is completely sta-tionary, with your foot on the brake pedal.
In particular conditions on a slope.With the driver's door closed.
Page 15 of 231
I
18
E
D
FAJ
CI
B
H
G
IN BRIEF
Instrument panel
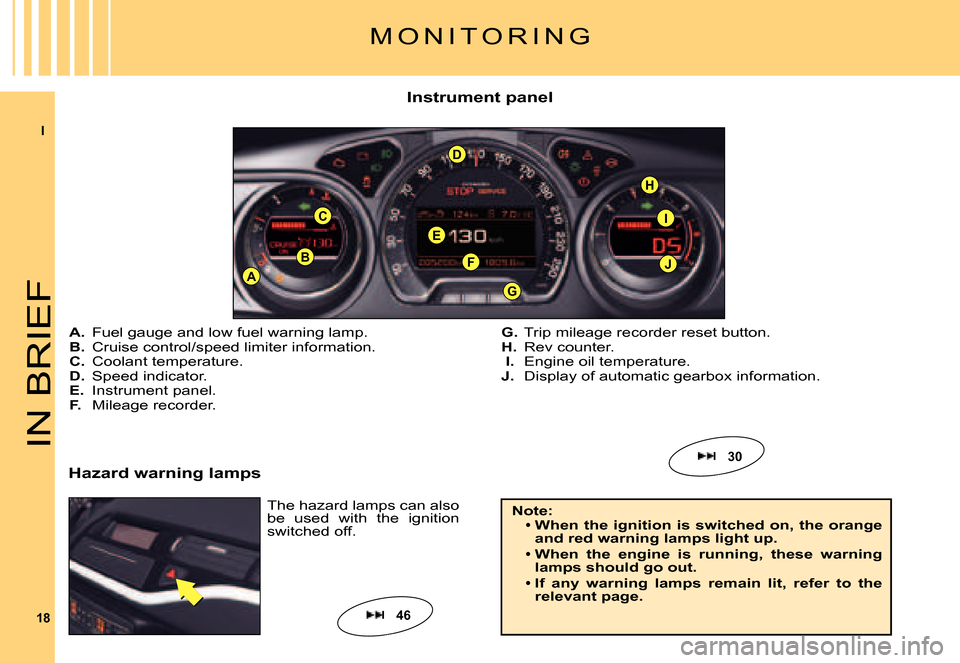
The hazard lamps can also be used with the ignition switched off.
M O N I T O R I N G
A. Fuel gauge and low fuel warning lamp.B. Cruise control/speed limiter information.C. Coolant temperature.D. Speed indicator.E. Instrument panel.F. Mileage recorder.
G. Trip mileage recorder reset button.H. Rev counter. I. Engine oil temperature.J. Display of automatic gearbox information.
Note:When the ignition is switched on, the orange and red warning lamps light up.
When the engine is running, these warning lamps should go out.
If any warning lamps remain lit, refer to the relevant page.
Page 18 of 231
II
2121
J
I
ABFG
HCDE
IN BRIEF
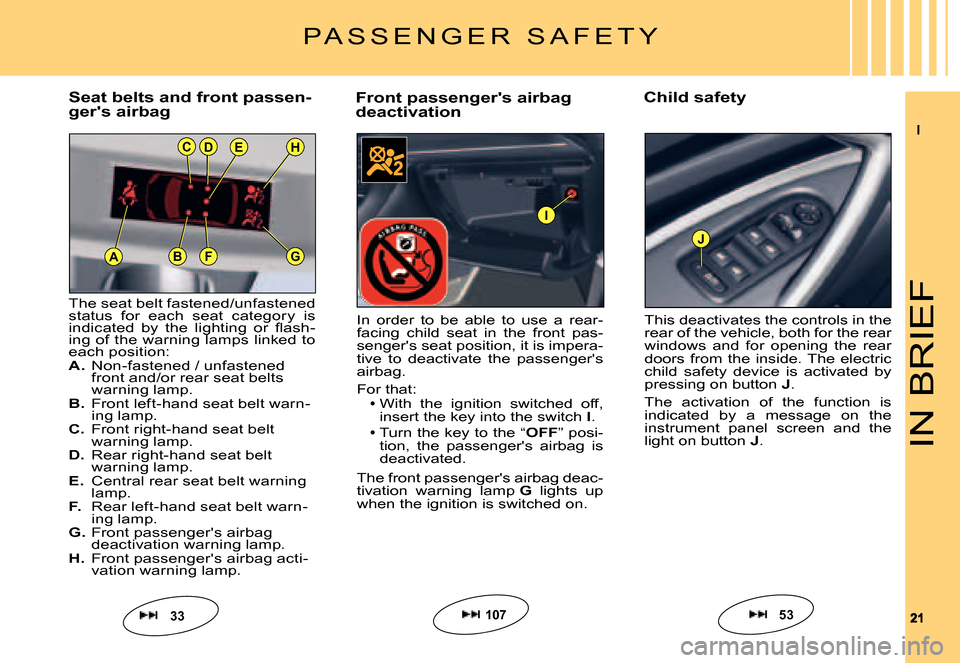
Front passenger's airbag deactivationChild safety
In order to be able to use a rear-facing child seat in the front pas-senger's seat position, it is impera-tive to deactivate the passenger's airbag.
For that:With the ignition switched off, insert the key into the switch I.
Turn the key to the “OFF” posi-tion, the passenger's airbag is deactivated.
The front passenger's airbag deac-tivation warning lamp G lights up when the ignition is switched on.
Page 20 of 231
23
II
R E M O T E C O N T R O L
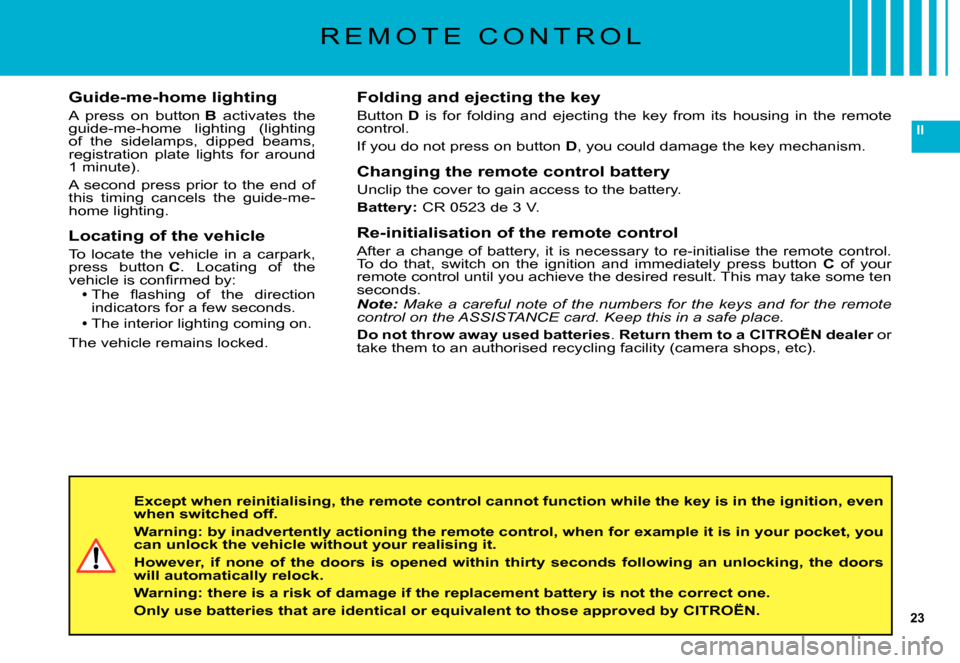
Folding and ejecting the key
Button D is for folding and ejecting the key from its housing in the remote control.
If you do not press on button D, you could damage the key mechanism.
Changing the remote control battery
Unclip the cover to gain access to the battery.
Battery: CR 0523 de 3 V.
Re-initialisation of the remote control
After a change of battery, it is necessary to re-initialise the remote control. To do that, switch on the ignition and immediately press bu tton C of your remote control until you achieve the desired result. This may take some ten seconds.Note: Make a careful note of the numbers for the keys and for the remot e control on the ASSISTANCE card. Keep this in a safe place.
Do not throw away used batteries. Return them to a CITROËN dealer or dealertake them to an authorised recycling facility (camera shops, etc).
Except when reinitialising, the remote control cannot function while the key is in the ignition, even when switched off.
Warning: by inadvertently actioning the remote control, when for example it is in your pocket, you can unlock the vehicle without your realising it.
However, if none of the doors is opened within thirty seconds following an unlocking, the doors will automatically relock.
Warning: there is a risk of damage if the replacement batte ry is not the correct one.
Only use batteries that are identical or equivalent to those approved by CITROËN.
Guide-me-home lighting
A press on button B activates the guide-me-home lighting (lighting of the sidelamps, dipped beams, registration plate lights for around 1 minute).
A second press prior to the end of this timing cancels the guide-me-home lighting.
Locating of the vehicle
To locate the vehicle in a carpark, press button C. Locating of the �v�e�h�i�c�l�e� �i�s� �c�o�n�fi� �r�m�e�d� �b�y�:�T�h�e� �fl� �a�s�h�i�n�g� �o�f� �t�h�e� �d�i�r�e�c�t�i�o�n� indicators for a few seconds.The interior lighting coming on.
The vehicle remains locked.
Page 21 of 231
24
II
K E Y S
It is dangerous to operate the deadlocking when a person is inside the vehicle as unlocking is impossible from the inside without the remote control.
The key number is on the label attached to the key.
Should you lose your key or remote control, a CITROËN dealer can supply replacements.
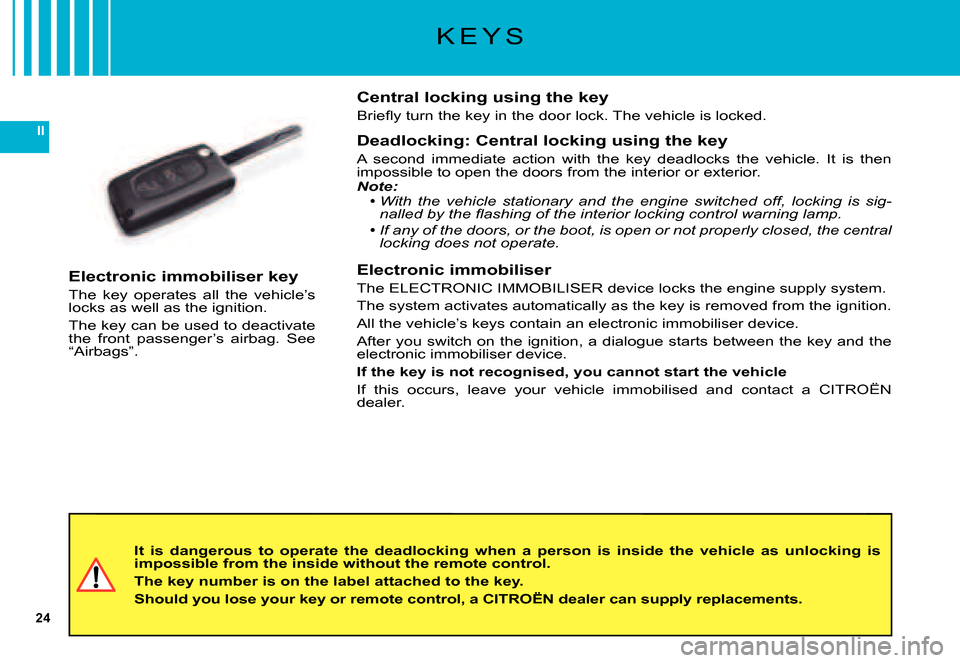
Central locking using the key
�B�r�i�e�fl� �y� �t�u�r�n� �t�h�e� �k�e�y� �i�n� �t�h�e� �d�o�o�r� �l�o�c�k�.� �T�h�e� �v�e�h�i�c�l�e� �i�s� �l�o�c�k�e�d�.
Deadlocking: Central locking using the key
A second immediate action with the key deadlocks the vehicle. I t is then impossible to open the doors from the interior or exterior.Note:With the vehicle stationary and the engine switched off, locking is sig-�n�a�l�l�e�d� �b�y� �t�h�e� �fl� �a�s�h�i�n�g� �o�f� �t�h�e� �i�n�t�e�r�i�o�r� �l�o�c�k�i�n�g� �c�o�n�t�r�o�l� �w�a�r�n�i�n�g� �l�a�m�p�.
If any of the doors, or the boot, is open or not properly clo sed, the central locking does not operate.
Electronic immobiliser
The ELECTRONIC IMMOBILISER device locks the engine supply system.
The system activates automatically as the key is removed from the igni tion.
All the vehicle’s keys contain an electronic immobiliser device.
After you switch on the ignition, a dialogue starts between the key and the electronic immobiliser device.
If the key is not recognised, you cannot start the vehicle
If this occurs, leave your vehicle immobilised and contact a CITRO ËN dealer.
Page 24 of 231
27
II
A N T I - I N T R U S I O N A L A R M
Operating the alarm
First make sure all the doors are closed.
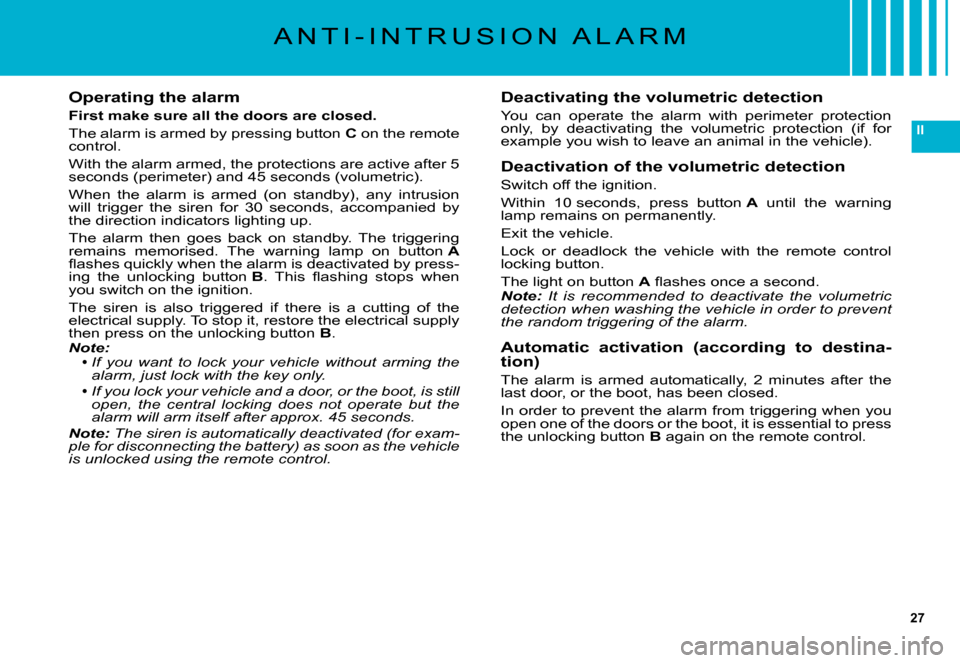
The alarm is armed by pressing button C on the remote control.
With the alarm armed, the protections are active after 5 seconds (perimeter) and 45 seconds (volumetric).
When the alarm is armed (on standby), any intrusion will trigger the siren for 30 seconds, accompanied by the direction indicators lighting up.
The alarm then goes back on standby. The triggering remains memorised. The warning lamp on button A�fl� �a�s�h�e�s� �q�u�i�c�k�l�y� �w�h�e�n� �t�h�e� �a�l�a�r�m� �i�s� �d�e�a�c�t�i�v�a�t�e�d� �b�y� �p�r�e�s�s�-ing the unlocking button B�.� �T�h�i�s� �fl� �a�s�h�i�n�g� �s�t�o�p�s� �w�h�e�n� you switch on the ignition.
The siren is also triggered if there is a cutting of the electrical supply. To stop it, restore the electrical supply then press on the unlocking button B.Note:If you want to lock your vehicle without arming the alarm, just lock with the key only.
If you lock your vehicle and a door, or the boot, is still open, the central locking does not operate but the alarm will arm itself after approx. 45 seconds.Note: The siren is automatically deactivated (for exam-ple for disconnecting the battery) as soon as the vehicle is unlocked using the remote control.
Page 25 of 231
28
II
S T E E R I N G L O C K - I G N I T I O N - S T A R T E R
NEVER REMOVE THE IGNITION KEY BEFORE THE ENGINE HAS COME TO A COMPLETE STOP.
IT IS ESSENTIAL ALWAYS TO DRIVE WITH THE ENGINE RUNNING, SO AS TO RETAIN STEERING AND BRAKING ASSISTANCE (risk of the steering lock engaging and loss of safety features).
When stationary, having removed the key, carefully turn the steering wheel if you wish to lock the steering.
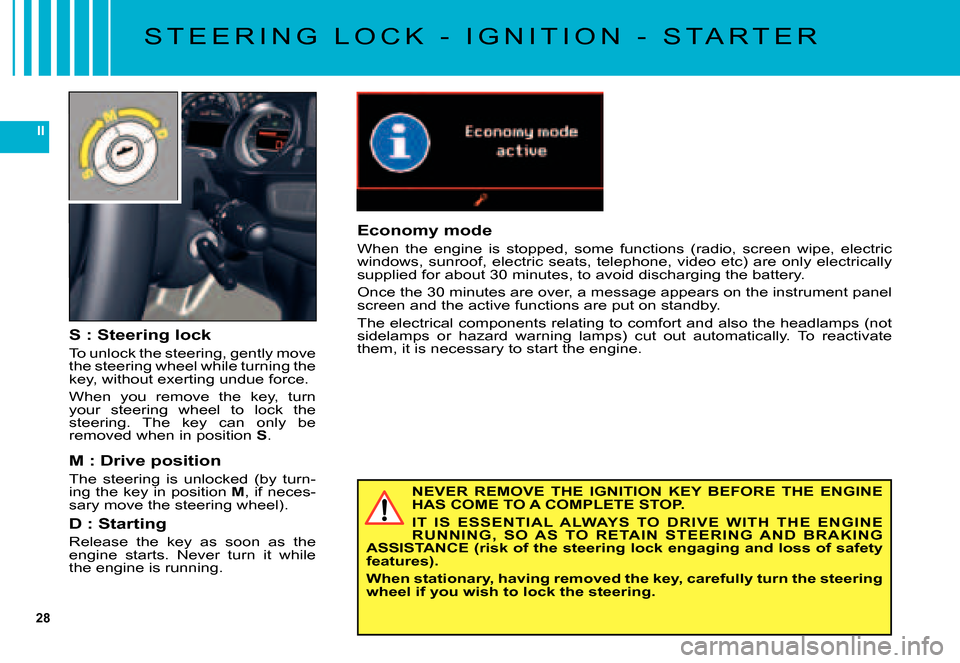
S : Steering lock
To unlock the steering, gently move the steering wheel while turning the key, without exerting undue force.
When you remove the key, turn your steering wheel to lock the steering. The key can only be removed when in position S.
M : Drive position
The steering is unlocked (by turn-ing the key in position M, if neces-sary move the steering wheel).
D : Starting
Release the key as soon as the engine starts. Never turn it while the engine is running.
Economy mode
When the engine is stopped, some functions (radio, screen wipe , electric windows, sunroof, electric seats, telephone, video etc) are only electrically supplied for about 30 minutes, to avoid discharging the battery.
Once the 30 minutes are over, a message appears on the instrumen t panel screen and the active functions are put on standby.
The electrical components relating to comfort and also the headlamps (not sidelamps or hazard warning lamps) cut out automatically. To react ivate them, it is necessary to start the engine.
Page 28 of 231
43
II
A
2121
I N S T R U M E N T P A N E L
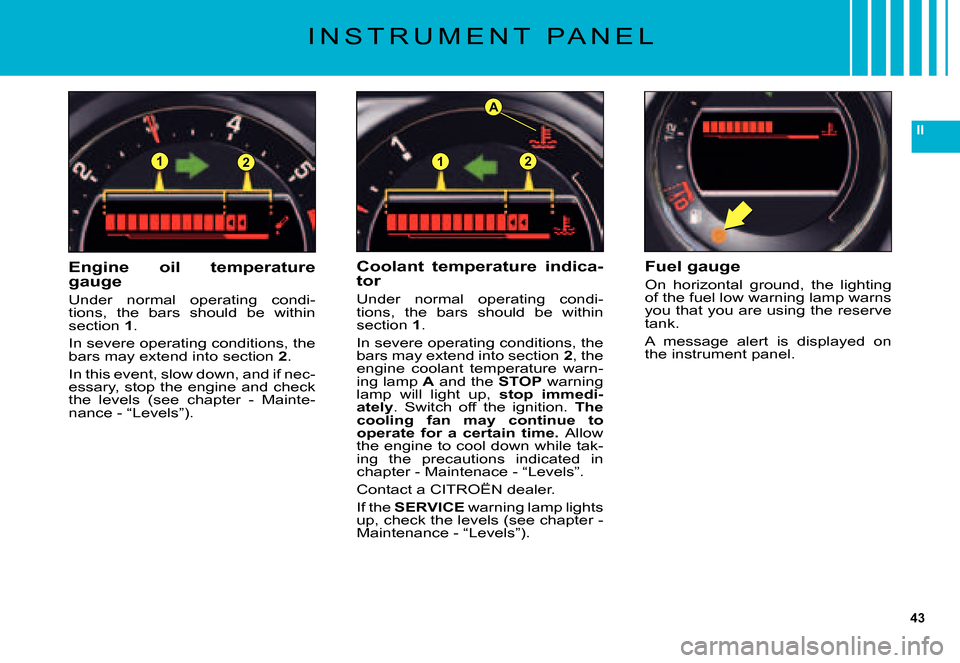
Engine oil temperature gauge
Under normal operating condi-tions, the bars should be within section 1.
In severe operating conditions, the bars may extend into section 2.
In this event, slow down, and if nec-essary, stop the engine and check the levels (see chapter - Mainte-nance - “Levels”).
Fuel gauge
On horizontal ground, the lighting of the fuel low warning lamp warns you that you are using the reserve tank.
A message alert is displayed on the instrument panel.
Coolant temperature indica-tor
Under normal operating condi-tions, the bars should be within section 1.
In severe operating conditions, the bars may extend into section 2, the engine coolant temperature warn-ing lamp A and the STOP warning lamp will light up, stop immedi-ately.Switch off the ignition. The cooling fan may continue to operate for a certain time. Allow the engine to cool down while tak-ing the precautions indicated in chapter - Maintenace - “Levels”.
Contact a CITROËN dealer.
If the SERVICE warning lamp lights up, check the levels (see chapter - Maintenance - “Levels”).