tailgate Citroen C5 RHD 2015 (RD/TD) / 2.G Owner's Manual
[x] Cancel search | Manufacturer: CITROEN, Model Year: 2015, Model line: C5 RHD, Model: Citroen C5 RHD 2015 (RD/TD) / 2.GPages: 362, PDF Size: 32.4 MB
Page 60 of 362

58
Boot (Saloon)
F Press upwards on lever 1 and lift up the
boot lid. With the vehicle stationary, this is carried out
using:
-
The remote control.
- The key in a door lock.
- The interior central locking/ unlocking control.
The boot automatically locks when the vehicle
is moving at a speed of over 6 mph (10 km/h),
even if automatic central locking is deactivated.
It is unlocked when a door is opened or when
the central locking button is pressed (speed
lower than 6 mph (10 km/h)).
Opening Locking/unlocking Emergency boot release
Unlocking
F Fold back the rear seats to gain access to
the lock from inside the boot.
F Insert a small screwdriver into hole A of the
lock to unlock the tailgate.
F Push the white part, located inside the
lock, to the left to unlock the boot.
System for mechanical unlocking of the boot
in the event of a battery or central locking
malfunction.
Access
Page 61 of 362

59
Motorised opening
Boot (Tourer)
Manual opening
F Press upwards on lever A and lift up the
tailgate. F
Press upwards on lever A , or press of more
than one second on button B of the remote
control.
Manual closing
F Lower the tailgate using the interior
handle C .
Motorised closing
F Press the push-button D to close the
tailgate.
Do not interrupt the closing of the tailgate;
if any obstacle prevents it closing, the
operation will stop and the tailgate will
automatically rise by a few centimetres.
Do not attempt to help the opening of
the tailgate manually after pressing the
control A
.
2
Access
Page 62 of 362

60
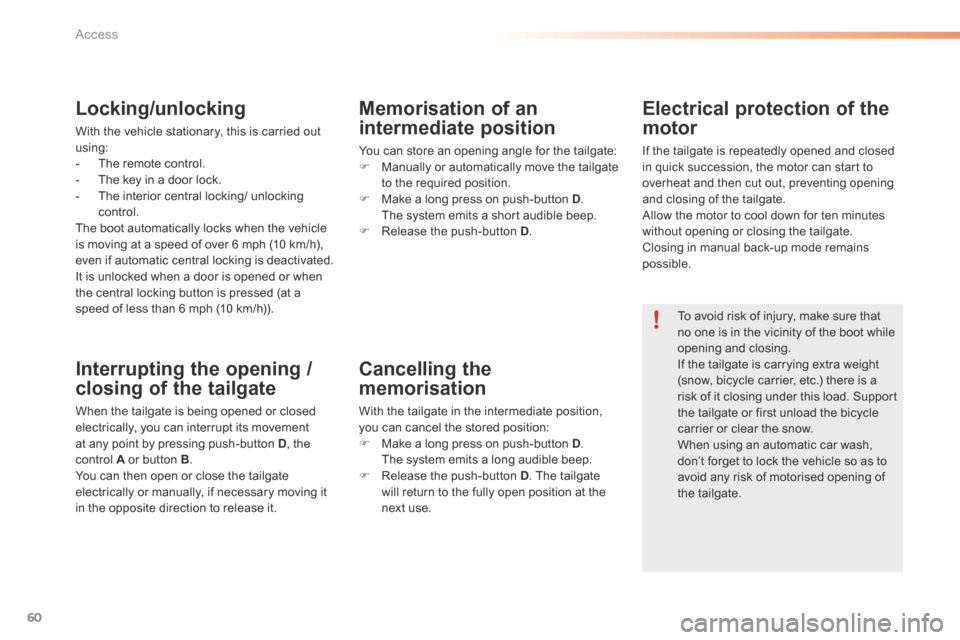
Cancelling the
memorisation
With the tailgate in the intermediate position,
you can cancel the stored position:
F Make a long press on push-button D .
The system emits a long audible beep.
F Release the push-button D . The tailgate
will return to the fully open position at the
next use.
Electrical protection of the
motor
If the tailgate is repeatedly opened and closed
in quick succession, the motor can start to
overheat and then cut out, preventing opening
and closing of the tailgate.
Allow the motor to cool down for ten minutes
without opening or closing the tailgate.
Closing in manual back-up mode remains
possible.
To avoid risk of injury, make sure that
no one is in the vicinity of the boot while
opening and closing.
If the tailgate is carrying extra weight
(snow, bicycle carrier, etc.) there is a
risk of it closing under this load. Support
the tailgate or first unload the bicycle
carrier or clear the snow.
When using an automatic car wash,
don’t forget to lock the vehicle so as to
avoid any risk of motorised opening of
the tailgate.
Memorisation of an
intermediate position
You can store an opening angle for the tailgate:
F Manually or automatically move the tailgate
to the required position.
F Make a long press on push-button D .
The system emits a short audible beep.
F Release the push-button D .
Interrupting the opening /
closing of the tailgate
When the tailgate is being opened or closed
electrically, you can interrupt its movement
at any point by pressing push-button D , the
control A or button B .
You can then open or close the tailgate
electrically or manually, if necessary moving it
in the opposite direction to release it.
Locking/unlocking
With the vehicle stationary, this is carried out
using:
- The remote control.
- The key in a door lock.
- The interior central locking/ unlocking
control.
The boot automatically locks when the vehicle
is moving at a speed of over 6 mph (10 km/h),
even if automatic central locking is deactivated.
It is unlocked when a door is opened or when
the central locking button is pressed (at a
speed of less than 6 mph (10 km/h)).
Access
Page 147 of 362

145
Rear wiper (Tourer)
B. rear wiper selection ring:
park,
intermittent wipe,
wash-wipe (set duration).
Reverse gear
When reverse gear is engaged, the rear
wiper operates if the windscreen wipers are
operating.
Programming
The function is activated or deactivated via the
vehicle parameters menu.
This function is activated by default.
Windscreen and headlamp
wash
F Pull the windscreen wiper stalk towards
you. The windscreen wash then the
windscreen wipers operate for a fixed
period.
The headlamp washers only operate when
the dipped beam headlamps are on .
If a significant accumulation of snow or
ice is present, or when using a tailgate
bicycle carrier, deactivate the automatic
rear wiper via the vehicle parameters
menu.
5
Visibility
Page 201 of 362

199
Tailgate-mounted lamps
Rear lamps (Tourer)
Identify the failed bulb.
1. Brake lamps and sidelamps: P21W/5 W
2. Sidelamps: R5W
3. Reversing lamps: H21W
4. Foglamps: H21W
5. Direction indicators: PY21W F
Refit the bulb holder H ensuring that it is
correctly clipped in place.
F Position the lamp in its housing.
F Tighten the fixing nut G .
F Refit the connector F .
F Position and clip in place the plastic
cover E .
F
Open the boot.
F Using a flat screwdriver, remove the plastic
cover E .
F d isconnect the connector F .
F Unscrew the fixing nut G .
F Disengage the lamp from its housing.
F Unclip the bulb holder H .
F Replace the failed bulb.
You can use the wheelbrace to screw or
unscrew the fixing nut G.
8
Practical information
Page 208 of 362

206
Fusebox B
Fuse N°Rating Function
G29 -Not used
G30 5 AHeated door mirrors
G31 5 ARain and sunshine sensor
G32 5 ASeat belt not fastened warning lamps
G33 5 AElectrochrome rear view mirror
G34 20 ASunroof (Saloon)
G35 5 APassenger door lighting - passenger door mirror adjustment
G36 30 AElectric tailgate (tourer)
G37 20 AHeated front seats
G38 30 ADriver’s electric seat
G39 30 APassenger’s electric seat - Hi-Fi amplifier
G40 3 ATrailer relay unit supply
Fuse N° Rating Function
G36 15 A6 speed automatic gearbox
G37 10 ADaytime running lamps - Diagnostic socket
G38 3 ADSC/ASR
G39 10 AHydraulic suspension
G40 3 ASToP switch
Fusebox A
Practical information
Page 209 of 362

207
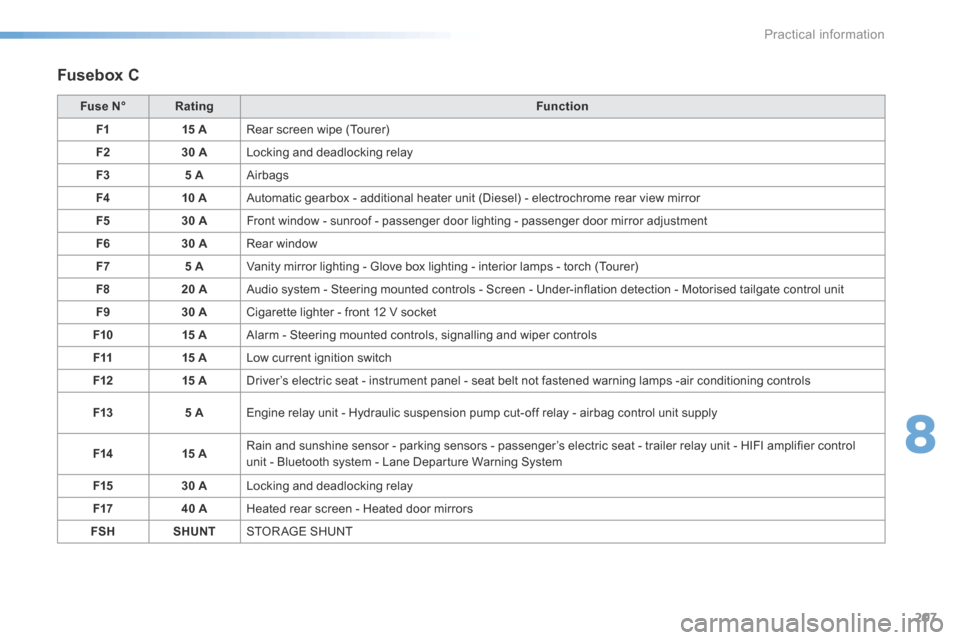
Fusebox C
Fuse N°Rating Function
F1 15 ARear screen wipe (Tourer)
F2 30 ALocking and deadlocking relay
F3 5 AAirbags
F4 10 AAutomatic gearbox - additional heater unit (Diesel) - electrochrome rear view mirror
F5 30 AFront window - sunroof - passenger door lighting - passenger door mirror adjustment
F6 30 ARear window
F7 5 AVanity mirror lighting - Glove box lighting - interior lamps - torch (Tourer)
F8 20 AAudio system - Steering mounted controls - Screen - Under-inflation detection - Motorised tailgate control unit
F9 30 ACigarette lighter - front 12 V socket
F10 15 AAlarm - Steering mounted controls, signalling and wiper controls
F11 15 ALow current ignition switch
F12 15 ADriver’s electric seat - instrument panel - seat belt not fastened warning lamps -air conditioning controls
F13 5 AEngine relay unit - Hydraulic suspension pump cut-off relay - airbag control unit supply
F14 15 ARain and sunshine sensor - parking sensors - passenger’s electric seat - trailer relay unit - HIFI amplifier control
unit - Bluetooth system - Lane Departure Warning System
F15 30 ALocking and deadlocking relay
F17 40 AHeated rear screen - Heated door mirrors
FSH SHUNTSTOR AGE SHUNT
8
Practical information
Page 220 of 362

218
Roof bars
The design of your vehicle requires the use
of roof bars that are tested and approved by
CITROËN, for your safety and to avoid damage
to the roof and tailgate.
Regardless of the type of loading equipment
to be transported on the roof (bicycle carrier,
ski carrier...), it is imperative that you add
transverse roof bars. Any securing or lashing to
components other than the roof bars is strictly
prohibited.
Recommendations
F Distribute your load evenly, avoiding
overloading on one side.
F Arrange the heaviest part of the load as
close as possible to the roof.
F Anchor the load securely and draw
attention to it if any part of it is
overhanging.
F Drive gently, as the vehicle will be more
liable to the effects of side winds (vehicle
stability may be altered).
F Remove the roof bars as soon as they are
no longer needed. Maximum load that can be distributed
on the roof bars (for a loading height
not exceeding 40 cm; except bicycle
carrier): 80 kg.
If the height exceeds 40 cm, adapt your
speed to the profile of the road to avoid
damaging the roof bars and the fixings
on the roof.
Please refer to national legislation in
order to comply with the regulations
concerning the transportation of objects
which are longer than the vehicle.
Practical information
Page 243 of 362

241
F Refit the blue cap to the tank and turn
it a 6th of a turn clockwise, to its stop.
F Refit the black cap and turn it a quarter of
a turn clockwise without pressing. Ensure
that the indicator on the cap lines up with
the indicator on the support.
F Depending on equipment, return the spare
wheel and/or the storage box to the bottom
of the boot.
F Refit the boot carpet and close the tailgate. Important:
in the event of a top-up
after a breakdown because of a lack
of additive , signalled by the message
"Top up emissions additive: Starting
prevented", you must wait around
5 minutes before switching on the ignition,
without opening the driver's door,
locking the vehicle or introducing the
key into the ignition switch .
Switch on the ignition, then, after
10 seconds, start the engine.
Never dispose of AdBlue® additive
bottles in the household waste. Place
them in a special container provided
this purpose or take them to your dealer.
If any additive is split or splashed, wash
immediately with cold water or wipe with
a damp cloth.
If the additive has crystallised, clean it
off using a sponge and hot water.
F
After emptying the bottle, wipe away any
spillage around the tank filler using a damp
cloth.
Important : if your vehicle's
AdBlue
® tank is completely empty -
which is confirmed by the alert
messages and the impossibility of
starting the engine, you must add at
least 3.8 litres (so two 1.89 litre bottles).
F
Obtain a bottle of AdBlue
®. After first
checking the use-by date, read carefully
the instructions on use on the label before
pouring the contents of the bottle into your
vehicle's AdBlue
® tank.
9
Checks