phone Citroen C5 RHD 2016 (RD/TD) / 2.G Owner's Manual
[x] Cancel search | Manufacturer: CITROEN, Model Year: 2016, Model line: C5 RHD, Model: Citroen C5 RHD 2016 (RD/TD) / 2.GPages: 362, PDF Size: 32.49 MB
Page 12 of 362

10
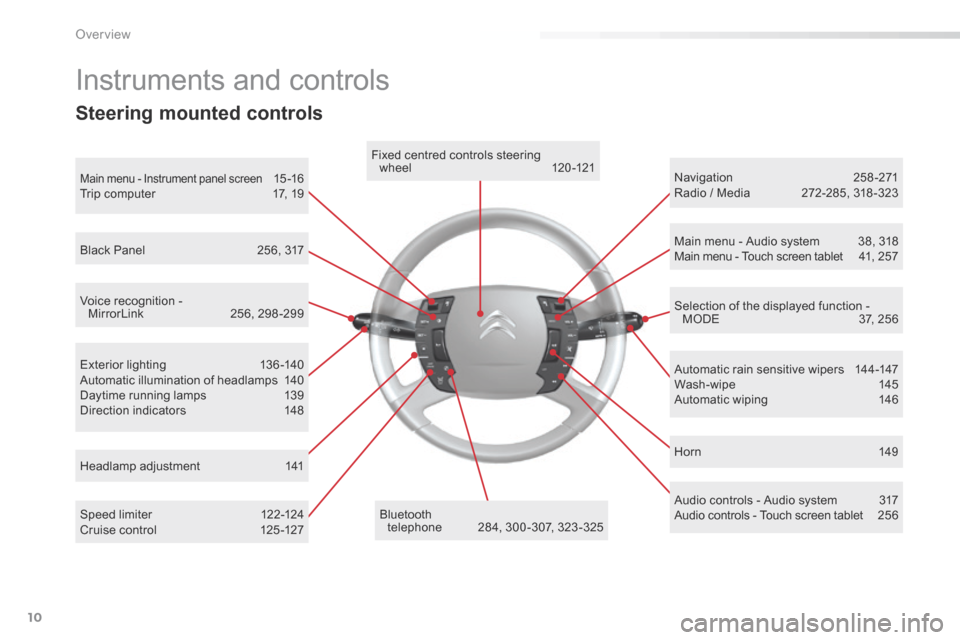
Exterior lighting 136-140
Automatic illumination of headlamps 140
Daytime running lamps 139
Direction indicators 148
Instruments and controls
Speed limiter 122-124
Cruise control 125 -127 Automatic rain sensitive wipers
144-147
Wash-wipe 145
Automatic wiping 146
Headlamp adjustment 141
Main menu - Instrument panel screen 15 -16
Trip computer 17, 19Fixed centred controls steering
wheel 120 -121
bluetooth telephone 284, 300 -307, 323 -325 Hor n
149
Navigation
258-271
Radio / Media 272-285, 318 -323
Selection of the displayed function - MODE 37, 256
Main menu - Audio system
38, 318
Main menu - Touch screen tablet 41, 257
Voice recognition - MirrorLink 256, 298 -299
Black Panel
256, 317
Audio controls - Audio system 317
Audio controls - Touch screen tablet 256
Steering mounted controls
over view
Page 40 of 362

38
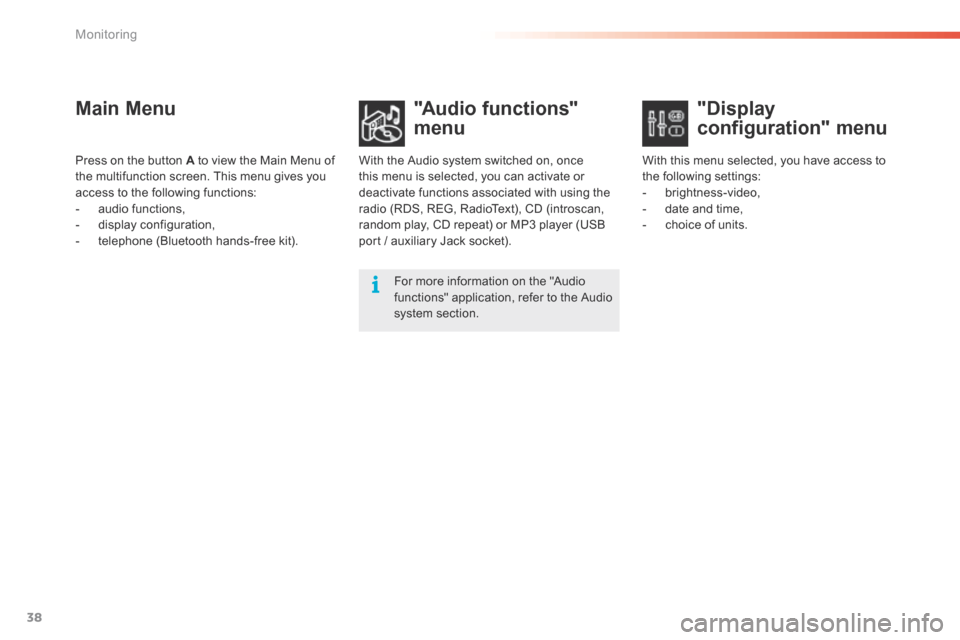
Main Menu"Audio functions"
menu
With the Audio system switched on, once
this menu is selected, you can activate or
deactivate functions associated with using the
radio (RDS, REG, RadioText), CD (introscan,
random play, CD repeat) or MP3 player (USB
port / auxiliary Jack socket).
For more information on the "Audio
functions" application, refer to the Audio
system section.
Press on the button A to view the Main Menu of
the multifunction screen. This menu gives you
access to the following functions:
-
audio functions,
- display configuration,
- telephone (Bluetooth hands-free kit). With this menu selected, you have access to
the following settings:
-
brightness-video,
- date and time,
- choice of units.
"Display
configuration" menu
Monitoring
Page 41 of 362

39
With the Audio system switched on, once
this menu is selected, you can configure
your Bluetooth hands-free kit (pairing), view
the different telephone directories (calls log,
services...) and manage your calls (start a call,
end a call, double call, secret mode...).Adjusting the date and time
"Bluetooth - Telephone -
Audio" menu
For safety reasons, configuration of the
multifunction screen by the driver must
only be done when stationary. For more information, refer to the Audio
system section.
F Press on A .
F Use C to select the "Date and time" menu,
then confirm your choice with a press on C
on the steering wheel or D on the audio
system.
F Select the screen configuration using C .
Confirm with a press on C on the steering
wheel or D on the audio system.
F Select the date and the time settings,
using B. Confirm with a press on C on the
steering wheel or D on the audio system.
F Press C to select the values you wish to
modify. Confirm your choice with a press
on C on the steering wheel or D on the
audio system.
F Confirm with "OK" on the screen.
1
Monitoring
Page 42 of 362

40
Touch screen tablet
This system gives access to:
- menus for adjusting settings for vehicle
functions and systems,
- audio and display settings menus,
- audio system and telephone controls and
the display of associated information,
- the display of the ambient temperature
(a blue snowflake appears if there is a risk
of ice),
- the display of the trip computer.
And, depending on equipment, it also allows:
- the display of visual parking sensors
information,
- access to the controls for the navigation
system and Internet services, and the
display of associated information.
For reasons of safety, the driver
should only carr y out operations
that require close attention, with the
vehicle stationary.
Some functions are not accessible
when driving. After a few moments with no action on
the secondary page, the primary page
is displayed automatically.General operation
Recommendations
It is necessary to press firmly, particularly for
"flick" gestures (scrolling through lists, moving
the map...). A light wipe is not enough.
The screen does not recognise pressing with
more than one finger.
This technology allows use at all temperatures
and when wearing gloves.
Principles
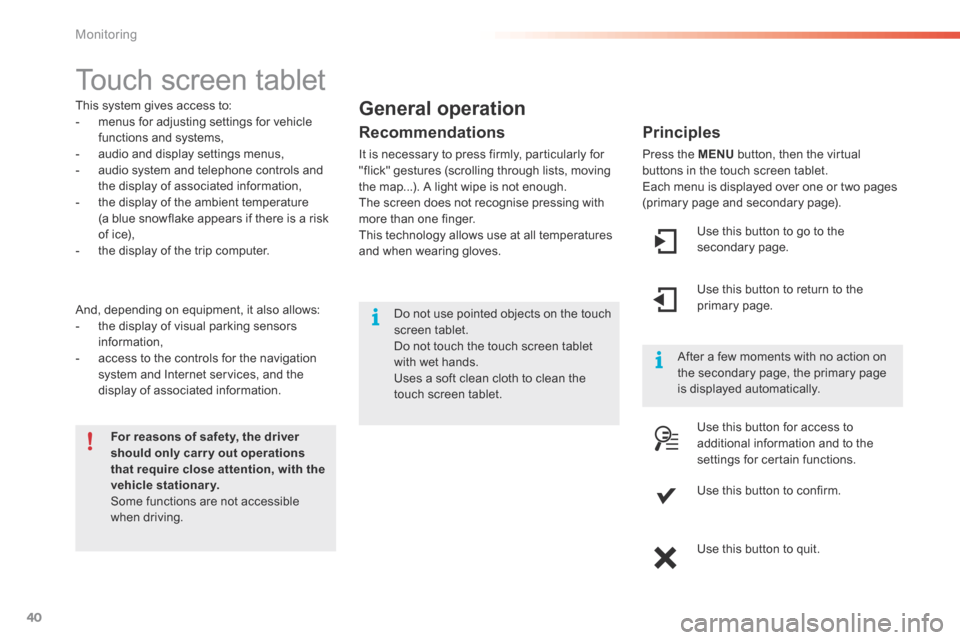
Press the MENU
button, then the virtual
buttons in the touch screen tablet.
Each menu is displayed over one or two pages
(primary page and secondary page).
Use this button to go to the
secondary page.
Use this button to return to the
primary page.
Use this button for access to
additional information and to the
settings for certain functions.
Use this button to confirm.
Use this button to quit.
Do not use pointed objects on the touch
screen tablet.
d
o not touch the touch screen tablet
with wet hands.
Uses a soft clean cloth to clean the
touch screen tablet.
Monitoring
Page 43 of 362

41
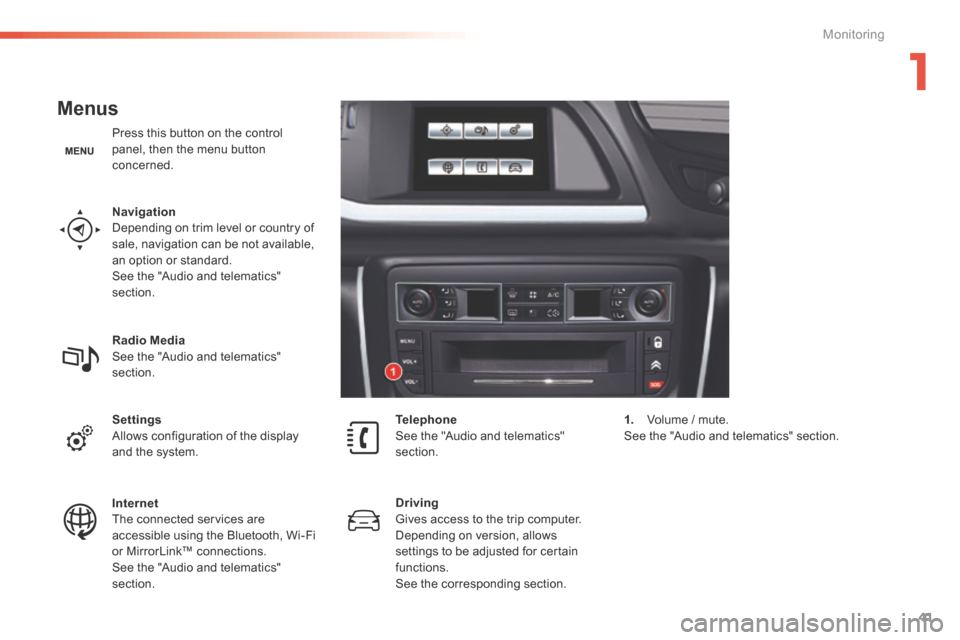
Menus
Press this button on the control
panel, then the menu button
concerned.
Navigation
Depending on trim level or country of
sale, navigation can be not available,
an option or standard.
See the "Audio and telematics"
section.
Radio Media
See the "Audio and telematics"
section.
Settings
Allows configuration of the display
and the system.
Internet
The connected services are
accessible using the Bluetooth, Wi-Fi
or MirrorLink™ connections.
See the "Audio and telematics"
section.Telephone
See the "Audio and telematics"
section.
Driving
Gives access to the trip computer.
Depending on version, allows
settings to be adjusted for certain
functions.
See the corresponding section.1.
Volume / mute.
See the "Audio and telematics" section.
1
Monitoring
Page 90 of 362

88
Front armrest
Comfort and storage system for the driver and front passenger.
Adjustment
To optimise your driving position:
F lift the control A ,
F push the armrest for wards.
The armrest returns to its initial position when
you push it rear wards.
USB port
The USB port allows the connection of a
portable device, such as a digital player of the
iPod
® type or a USB memory stick.
The USB player reads your audio files, which
are sent to the audio system so that they can
be heard via the vehicle's speakers.
Compartment
The front armrest includes a cup holder and a
USB port and/or auxiliary JACK socket*.
F Lift the armrest for access to the cup
holder, USB port and/or auxiliary JACK
socket.
* Depending on equipment. When connected to the USB port,
the portable device is recharged
automatically.
While charging, a message is displayed
if the power consumption of the
portable device exceeds the rating of
the vehicle's port.
Auxiliary Jack socket
The auxiliary Jack socket allows the connection
of a portable device, such as a digital player,
so that your audio files can be heard via the
vehicle's speakers.
The management of these files is from your
portable device.
For more information, refer to the
corresponding audio section in "Audio
and telematics".
The USB also allows a telephone to be
connected by a MirrorLink™ connection, so
that use can be made in the touch screen tablet
of certain applications on the telephone. The management of these files is with the
steering mounted controls or from the audio
system.
Ease of use and comfort
Page 91 of 362

89
Rear armrest
Comfort and storage system for the rear passengers.
Cup-holder
The rear cup-holder A is located in the rear
central armrest.
F Lower the rear armrest.
F Pull for wards to extract the cup-holder.
Storage
F Lift up the upper part of the rear central
armrest to access storage space B .
12 V accessory socket
This is located in the rear ashtray.
Max power: 100 W.
The connection of an electrical device
not approved by CITROËN, such as a
USB charger, may adversely affect the
operation of vehicle electrical systems,
causing faults such as poor telephone
reception or inter ference with displays
in the screens.
Rear fittings
3
Ease of use and comfort
Page 104 of 362

102
Release
The electric parking brake releases
automatically and progressively when you
press the accelerator:
F with a manual gearbox (first gear or
reverse gear engaged), press down fully
on the clutch pedal then press on the
accelerator pedal and move off.
F with an automatic gearbox , accelerate
with the selector in position D , M or R.
Full release of the parking brake is
confirmed by: - warning lamp P in the control
lever A going off,
- display of a message " Parking brake
released " in the instrument panel screen.
Activation / Deactivation of the
automatic functions
Depending on the country of sale, automatic
application when switching off the engine and
automatic release when moving off can be
deactivated. The activation / deactivation is
done in the vehicle parameters menu.
deactivation of these functions is
signalled by this warning lamp in the
instrument panel.
- this warning lamp in the
instrument panel going off, In some special circumstances, with
the engine not running, (towing, icy
conditions...) the automatic parking
brake can be released manually, with
the key in the running position.
If the vehicle parameters menu does
not have the option to activate /
deactivate the automatic functions, this
can be done by a CITROËN dealer or a
qualified workshop.
With the automatic functions deactivated, the
parking brake must be applied and released
manually.
When stationary, with the engine
running, do not press the accelerator
pedal unnecessarily (particularly when
starting the engine, including in neutral),
as you may release the parking brake.
Do not place any object (packet of
cigarettes, telephone...) between the
gear lever and the electric parking
brake control.
Driving
Page 122 of 362

120
Fixed centred controls steering wheel
1Rotate
●
Scroll the various pages of information in the instrument panel screen.
● Move through the various menus in the instrument panel screen.
● Increase / Decrease values.
Short press ●
Open the main menu in the instrument panel screen ( only when stationary).
● Select and confirm information.
Long press Reset the trip data for the trip selected (if the corresponding trip computer page is
displayed).
2 Short press
●
Cancel the current operation.
● Return to the previous screen in the instrument panel screen.
Long press Return to the initial page in the instrument panel screen.
3 Short press
Increase the speed in steps of 1 mph (1 km/h) / Store the speed.
Press and hold Increase the speed in steps of 5 mph (5 km/h).
4 Short press
Decrease the speed in steps of 1 mph (1 km/h) / Store the speed.
Press and hold Decrease the speed in steps of 5 mph (5 km/h).
5 Short press Suspend or resume cruise control/speed limiter (depending on the mode
selected).
6 Short press Select cruise control or speed limiter mode (the cycle on this button will always
begin with selection of the speed limiter).
7 Short press Deactivate cruise control/speed limiter.
8 Short press ●
Accept an incoming call.
● End the current call.
● Open the telephone short-cut menu.
● Confirm in the list and in the telephone menu.
Long press Reject an incoming call.
9 Short press / Long press Horn.
10 Short press Activate / Deactivate Black Panel mode (comfortable night driving display).
11 Long press Activate voice recognition on the telephone via MirrorLink.
Driving
Page 215 of 362

213
Energy economy mode
System which manages the duration of use of
certain functions to conserve a sufficient level
of charge in the battery.
After the engine has stopped, you can
still use functions such as the audio and
telematics system, windscreen wipers, dipped
beam headlamps, courtesy lamps, etc. for
a maximum combined duration of about
forty minutes.Switching to economy mode
A message then appears in the instrument
panel screen indicating that the vehicle has
switched to economy mode and the active
functions are put on standby.
If a telephone call is being made at this
time, it will be maintained for around
10 minutes with the Bluetooth hands-
free system of your audio system.
Exiting economy mode
These functions are reactivated automatically
next time the vehicle is driven.
In order to restore the use of these functions
immediately, start the engine and let it run:
- for less than ten minutes, to use the
equipment for approximately five minutes,
- for more than ten minutes, to use the
equipment for up to approximately
thirty minutes.
Let the engine run for the duration specified to
ensure that the battery charge is sufficient.
Do not repeatedly and continuously restart the
engine in order to charge the battery.
A flat battery prevents the engine from
starting (refer to the "Battery" section).
8
Practical information