door lock Citroen C6 2011 1.G Owner's Manual
[x] Cancel search | Manufacturer: CITROEN, Model Year: 2011, Model line: C6, Model: Citroen C6 2011 1.GPages: 216, PDF Size: 10.31 MB
Page 8 of 216
6
B
A
IN BRIE
F
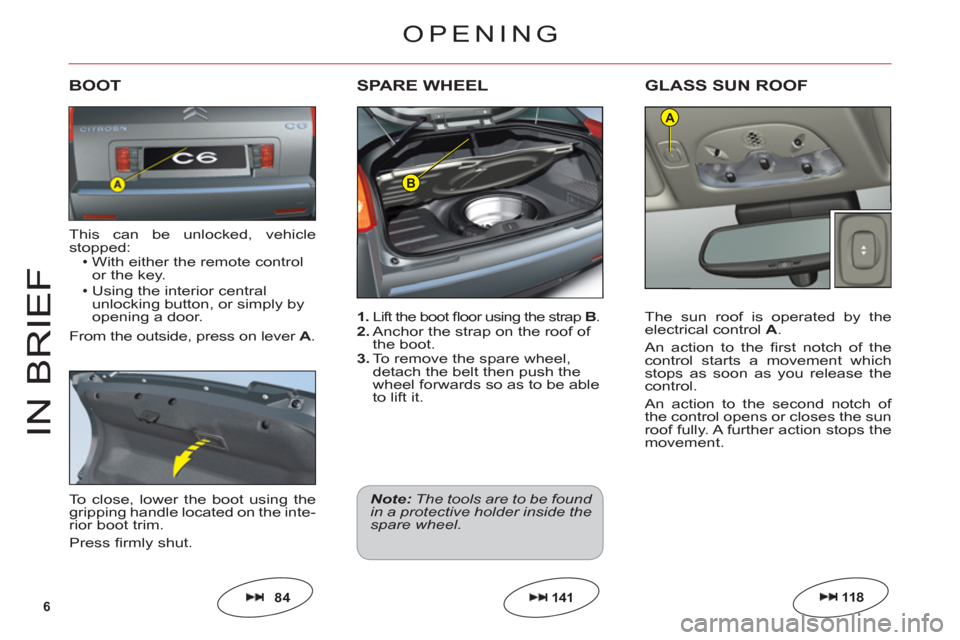
1. Lift the boot fl oor using the strapB.2. Anchor the strap on the roof of
the boot.3. To remove the spare wheel,
detach the belt then push the
wheel forwards so as to be ableto lift it.
SPARE WHEEL
Note: The tools are to be found in a protective holder inside thespare wheel.
141
OPENING
This can be unlocked, vehiclestopped:With either the remote controlor the key.Using the interior central
unlocking button, or simply by
openin
g a door.
From the outside, press on lever A.
•
•
BOOT
To close, lower the boot using the
gripping handle located on the inte-
rior boot trim.
Press fi rmly shut.
84
GLASS SUN ROOF
The sun roof is operated by theelectrical controlA.
An action to the fi rst notch of thecontrol starts a movement whichstops as soon as you release thecontrol.
An action to the second notch of
the control opens or closes the sunroof fully. A further action stops themovement.
118
Page 11 of 216
9
23
24
25
33
27
28
29
32
20
30
26
22
19
2131
IN BRIE
F
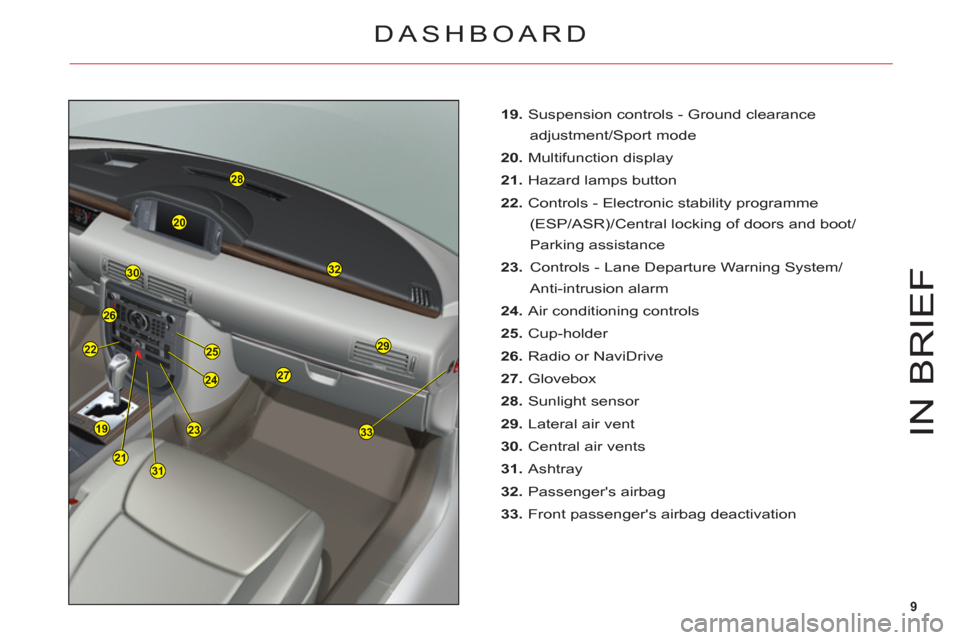
19. Suspension controls - Ground clearance
adjustment/Sport mode
20. Multifunction display
21. Hazard lamps button
22.Controls - Electronic stability programme
(ESP/ASR)/Central locking of doors and boot/
Parking assistance
23. Controls - Lane Departure Warning System/
Anti-intrusion alarm
24. Air conditioning controls
25. Cup-holder
26. Radio or NaviDrive
27. Glovebox
28. Sunlight sensor
29. Lateral air vent
30. Central air vents
31. Ashtray
32. Passenger's airbag
33.Front passenger's airbag deactivation
DASHBOARD
Page 14 of 216
12
154
212
ba
c
3
IN BRIE
F
5663
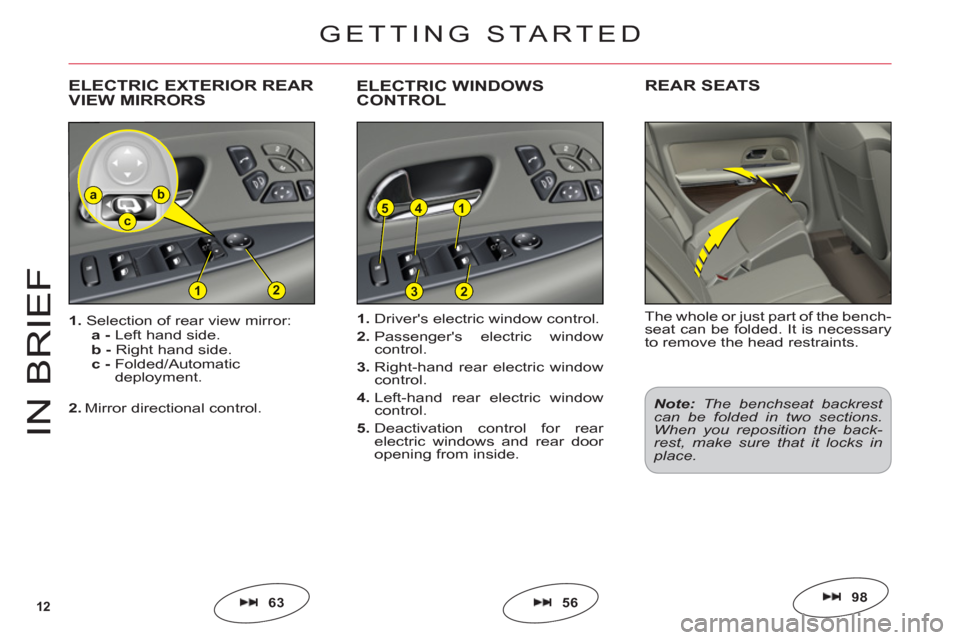
1.Driver's electric window control.
2.Passenger's electric window control.
3.Right-hand rear electric window control.
4.Left-hand rear electric window control.
5.Deactivation control for rear electric windows and rear door
opening from inside. 1
. Selection of rear view mirror:a -Left hand side.
b -Right hand side.
c -
Folded/Automatic
deployment.
2.Mirror directional control.
ELECTRIC EXTERIOR REAR VIEW MIRRORSELECTRIC WINDOWSCONTROL
GETTING STARTED
The whole or just part of the bench-seat can be folded. It is necessaryto remove the head restraints.
REAR SEATS
98
Note:The benchseat backrest can be folded in two sections.When you reposition the back-rest, make sure that it locks inplace.
Page 25 of 216
23
II
ABDC
REMOTE CONTROL
Note:The simultaneous use of other high frequency equipment (mobile telephones, domestic
alarms, etc.) may momentar-ily hinder the operation of the remote control.
If there is a permanent fault, the remote control has to bereinitialised. See "Changing the remote control battery".
•
•
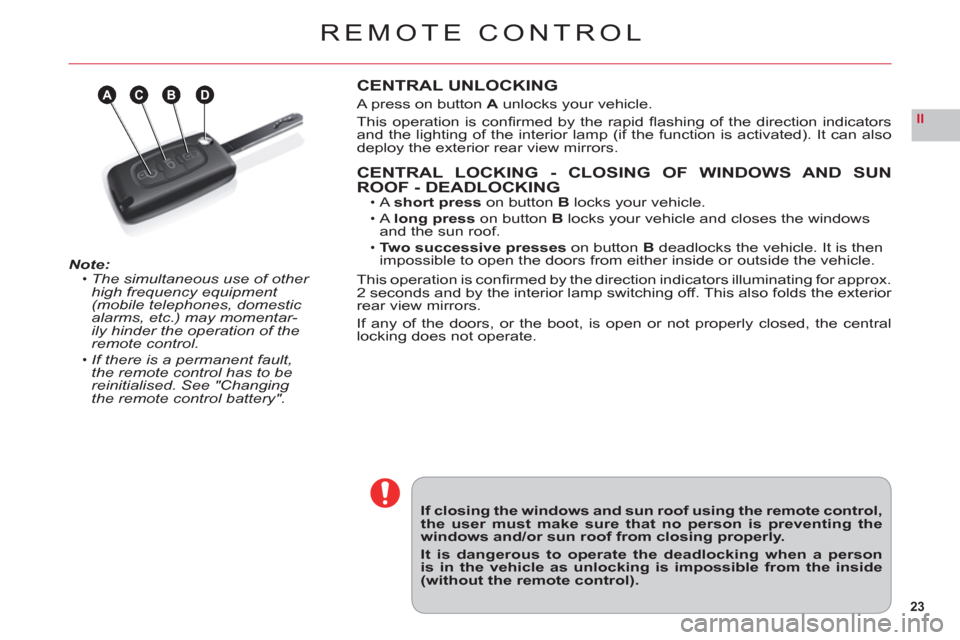
CENTRAL UNLOCKING
A press on button A unlocks your vehicle.
This operation is confi rmed b
y the rapid fl ashing of the direction indicators
and the lighting of the interior lamp (if the function is activated). It can alsodeploy the exterior rear view mirrors.
CENTRAL LOCKING - CLOSING OF WINDOWS AND SUN
ROOF - DEADLOCKINGA short presson buttonB locks your vehicle.
Along presson buttonB locks your vehicle and closes the windows and the sun roof.Two successive presses on button Bdeadlocks the vehicle. It is then
impossible to open the doors from either inside or outside the vehicle.
This operation is confi rmed b
y the direction indicators illuminating for approx.
2 seconds and by the interior lamp switching off. This also folds the exterior
rear view mirrors.
If any of the doors, or the boot, is open or not properly closed, the centrallocking does not operate.
•
•
•
If closing the windows and sun roof using the remote control,the user must make sure that no person is preventing thewindows and/or sun roof from closing properly.
It is dangerous to operate the deadlocking when a personis in the vehicle as unlocking is impossible from the inside(without the remote control).
Page 26 of 216
24
II
REMOTE CONTROL
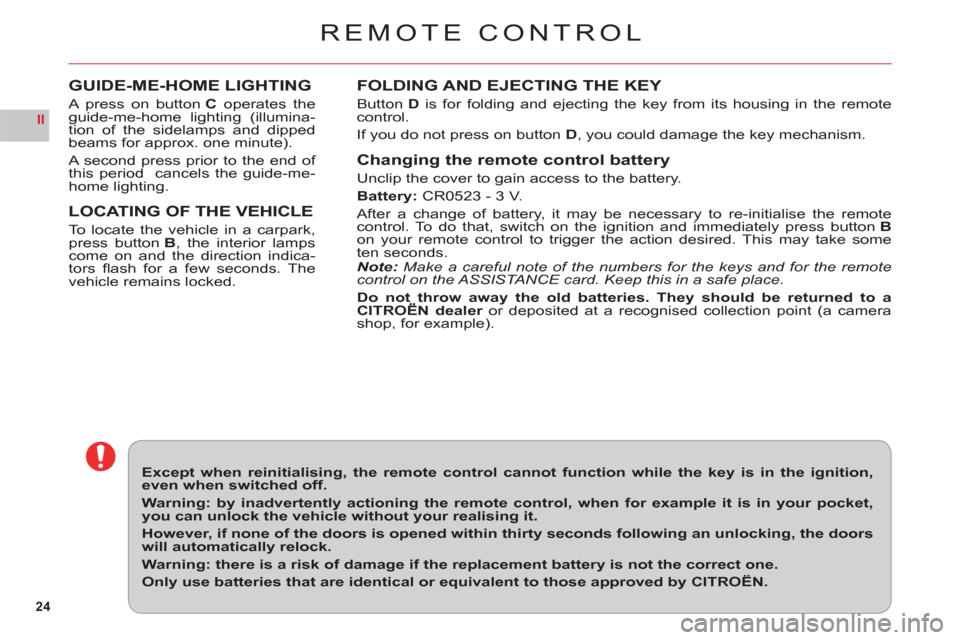
FOLDING AND EJECTING THE KEY
ButtonD is for folding and ejecting the key from its housing in the remotecontrol.
If
you do not press on button D, you could damage the key mechanism.
Changing the remote control battery
Unclip the cover to gain access to the battery.
Battery:CR0523 - 3 V.
After a change of battery, it may be necessary to re-initialise the remotecontrol. To do that, switch on the ignition and immediately press buttonBon your remote control to trigger the action desired. This may take some
ten seconds.Note: Make a careful note of the numbers for the keys and for the remote
control on the ASSISTA NCE card. Keep this in a safe place.
Do not throw away the old batteries. They should be returned to aCITROËN dealer or deposited at a recognised collection point (a camerarshop, for example).
Except when reinitialising, the remote control cannot function while the key is in the ignition,even when switched off.
Warning: by inadvertently actioning the remote control, when for example it is in your pocket,you can unlock the vehicle without your realising it.
However, if none of the doors is opened within thirty seconds following an unlocking, the doorswill automatically relock.
Warning: there is a risk of damage if the replacement battery is not the correct one.
Only use batteries that are identical or equivalent to those approved by CITROËN.
GUIDE-ME-HOME LIGHTING
A press on buttonC operates theguide-me-home lighting (illumina-
tion of the sidelamps and dipped
beams for approx. one minute).
A second press prior to the end of
this period cancels the guide-me-home lighting.
LOCATING OF THE VEHICLE
To locate the vehicle in a carpark,press button B, the interior lampscome on and the direction indica-
tors fl ash for a few seconds. Thevehicle remains locked.
Page 27 of 216
25
II
KEYS
It is dangerous to operate the deadlocking when a person is in the vehicle as unlocking is impossible from the inside (without the remote control).
The key number is on the label attached to the key.
Should you lose your key or remote control, a CITROËN dealer can supply replacements.
If you unlock your vehicle using the key because of a problem with the battery, be aware that opening/closing a door with the window closed can seriously damage the glass, even to the point of breaking it. See "Access".
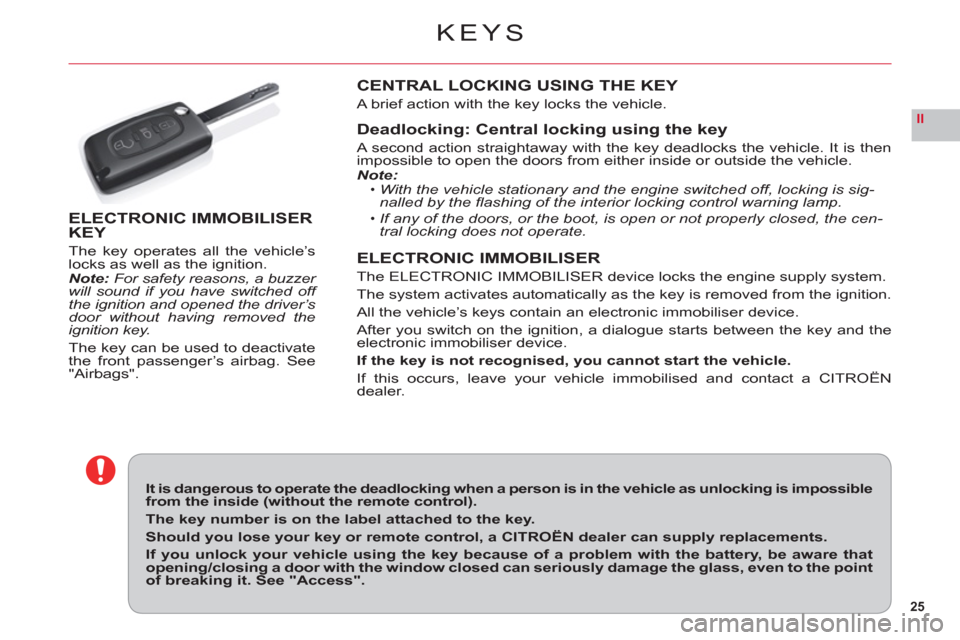
ELECTRONIC IMMOBILISER KEY
The key operates all the vehicle’slocks as well as the ignition.Note: For safety reasons, a buzzer will sound if you have switched off the ignition and opened the driver’s
door without having removed the
ignition key.
The ke
y can be used to deactivate
the front passenger’s airbag. See"Airbags".
CENTRAL LOCKING USING THE KEY
A brief action with the key locks the vehicle.
Deadlocking: Central locking using the key
A second action straightaway with the key deadlocks the vehicle. It is then
impossible to open the doors from either inside or outside the vehicle.Note:With the vehicle stationary and the engine switched off, locking is sig-nalled by the fl ashing of the interior locking control warning lamp.
If any of the doors, or the boot, is open or not properly closed, the cen-tral locking does not operate.
ELECTRONIC IMMOBILISER
The ELECTRONIC IMMOBILISER device locks the engine supply system.
The s
ystem activates automatically as the key is removed from the ignition.
All the vehicle
’s keys contain an electronic immobiliser device.
A
fter you switch on the ignition, a dialogue starts between the key and theelectronic immobiliser device.
If the ke
y is not recognised, you cannot start the vehicle.
If this occurs, leave your vehicle immobilised and contact a CITROËNdealer.
•
•
Page 28 of 216
26
II
A
ANTI-INTRUSION ALARM
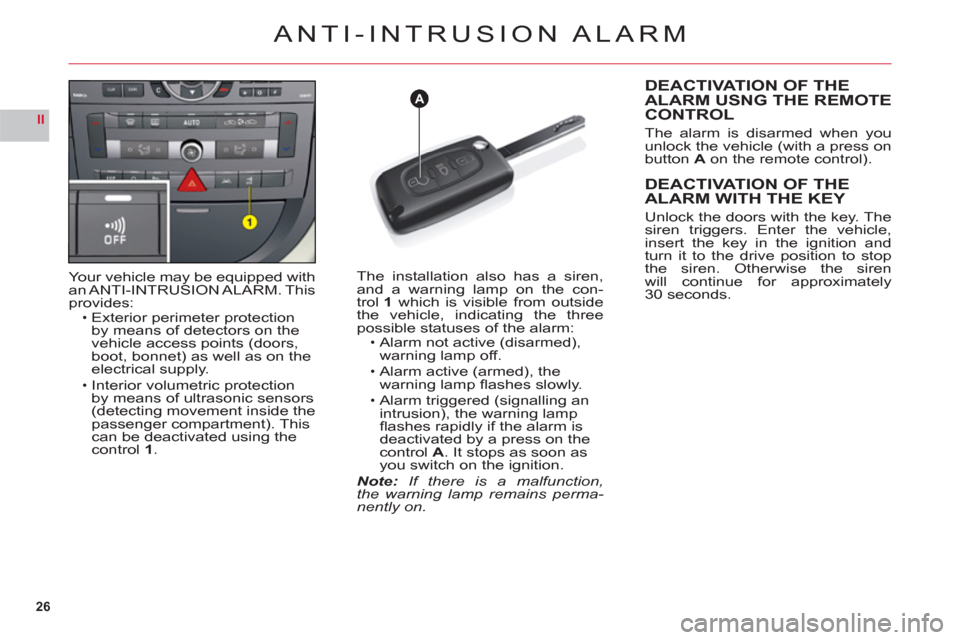
Your vehicle may be equipped with
an ANTI-INTRUSION ALARM. Thisprovides:Exterior perimeter protection
by means of detectors on the
vehicle access points (doors,
boot, bonnet) as well as on the electrical supply.
Interior volumetric protection
by means of ultrasonic sensors (detecting movement inside thepassenger compartment). This can be deactivated using thecontrol1.
•
•
The installation also has a siren,
and a warning lamp on the con-
trol1 which is visible from outside
the vehicle, indicating the three
possible statuses of the alarm:Alarm not active (disarmed),
warning lamp off.
Alarm active
(armed), the
warning lamp fl ashes slowly.
Alarm tri
ggered (signalling an
intrusion), the warning lamp
fl ashes rapidly if the alarm is deactivated by a press on thecontrol A. It stops as soon as you switch on the ignition.Note: If there is a malfunction,
the warning lamp remains perma-nently on.
•
•
•
DEACTIVATION OF THE
ALARM USNG THE REMOTE
CONTROL
The alarm is disarmed when youunlock the vehicle (with a press onbutton Aon the remote control).
DEACTIVATION OF THEALARM WITH THE KEY
Unlock the doors with the key. Thesiren triggers. Enter the vehicle,
insert the key in the ignition and
turn it to the drive position to stopthe siren. Otherwise the siren
will continue for approximately30 seconds.
Page 29 of 216
27
II
AB
ANTI-INTRUSION ALARM
OPERATING THE ALARM
First make sure all the doors are closed.
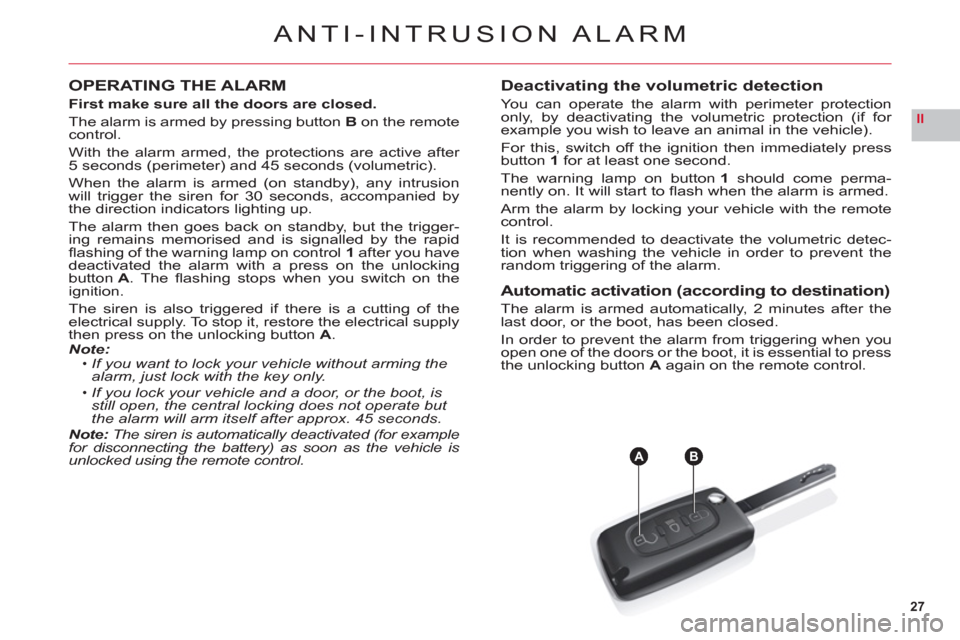
The alarm is armed by pressing button Bon the remote control.
With the alarm armed, the protections are active after 5 seconds (perimeter) and 45 seconds (volumetric).
When the alarm is armed (on standby), any intrusion
will trigger the siren for 30 seconds, accompanied by
the direction indicators lighting up.
The alarm then
goes back on standby, but the trigger-
ing remains memorised and is signalled by the rapid fl ashing of the warning lamp on control1 after you have deactivated the alarm with a press on the unlocking button A. The fl ashing stops when you switch on the ignition.
The siren is also tri
ggered if there is a cutting of the electrical supply. To stop it, restore the electrical supply
then press on the unlocking button A.Note:If you want to lock your vehicle without arming the
alarm, just lock with the key only.
If you lock your vehicle and a door, or the boot, is still open, the central locking does not operate but the alarm will arm itself after approx. 45 seconds.Note: The siren is automatically deactivated (for example for disconnecting the battery) as soon as the vehicle is unlocked using the remote control.
•
•
Deactivating the volumetric detection
You can operate the alarm with perimeter protection
only, by deactivating the volumetric protection (if for example you wish to leave an animal in the vehicle).
For this, switch o
ff the ignition then immediately pressbutton1 for at least one second.
The warning lamp on button1should come perma-nently on. It will start to fl ash when the alarm is armed.
Arm the alarm b
y locking your vehicle with the remotecontrol.
It is recommended to deactivate the volumetric detec-
tion when washing the vehicle in order to prevent the
random triggering of the alarm.
Automatic activation (according to destination)
The alarm is armed automatically, 2 minutes after the
last door, or the boot, has been closed.
In order to prevent the alarm from triggering when you
open one of the doors or the boot, it is essential to press
the unlocking button A again on the remote control.
Page 37 of 216
35
II
00
00A
A
INSTRUMENT PANEL
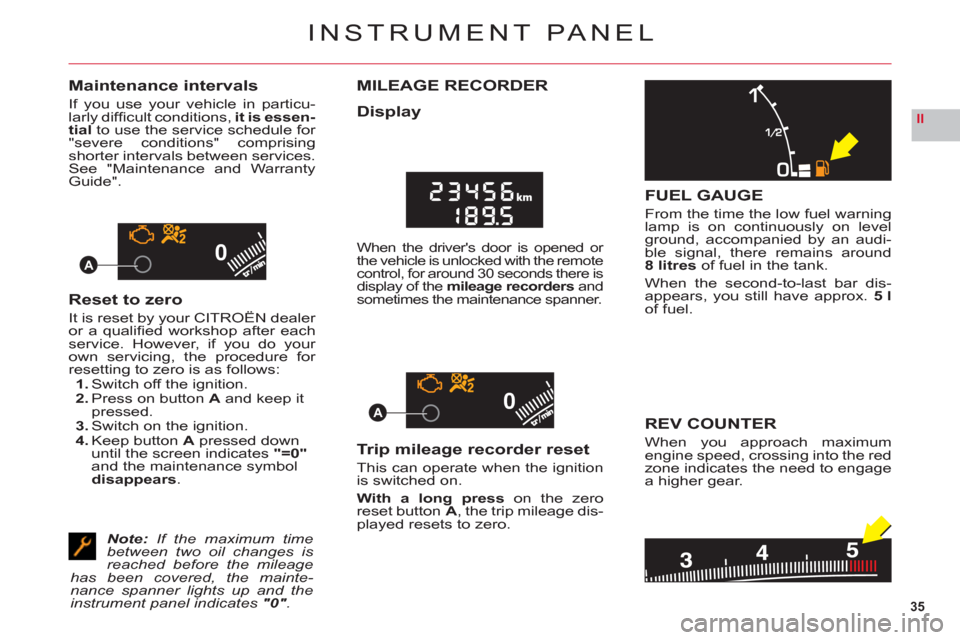
Maintenance intervals
If you use your vehicle in particu-larly diffi cult conditions, it is essen-
tialto use the service schedule for "severe conditions" comprisingshorter intervals between services.See "Maintenance and WarrantyGuide".
Reset to zero
It is reset by your CITROËN dealer
or a qualifi ed workshop after eachservice. However, if you do your
own servicing, the procedure for resetting to zero is as follows:1. Switch off the ignition.2. Press on button A and keep it pressed.3. Switch on the ignition.4. Keep buttonA pressed down until the screen indicates"=0"
and the maintenance symboldisappears.
Note:If the maximum time between two oil changes is reached before the mileage has been covered, the mainte-nance spanner lights up and the instrument panel indicates "0".
MILEAGE RECORDER
Display
When the driver's door is opened or
the vehicle is unlocked with the remote control, for around 30 seconds there is
display of the mileage recorders and sometimes the maintenance spanner.
Trip mileage recorder reset
This can operate when the ignition is switched on.
With a long press on the zero
reset buttonA, the trip mileage dis-
played resets to zero.
FUEL GAUGE
From the time the low fuel warninglamp is on continuously on levelground, accompanied by an audi-
ble signal, there remains around8 litresof fuel in the tank.
When the second-to-last bar dis-
appears, you still have approx. 5 lof fuel.
REV COUNTER
When you approach maximumengine speed, crossing into the redzone indicates the need to engage
a higher gear.
Page 59 of 216
57
II
STEERING COLUMN ADJUSTMENT –
SEAT BELT HEIGHT ADJUSTMENT
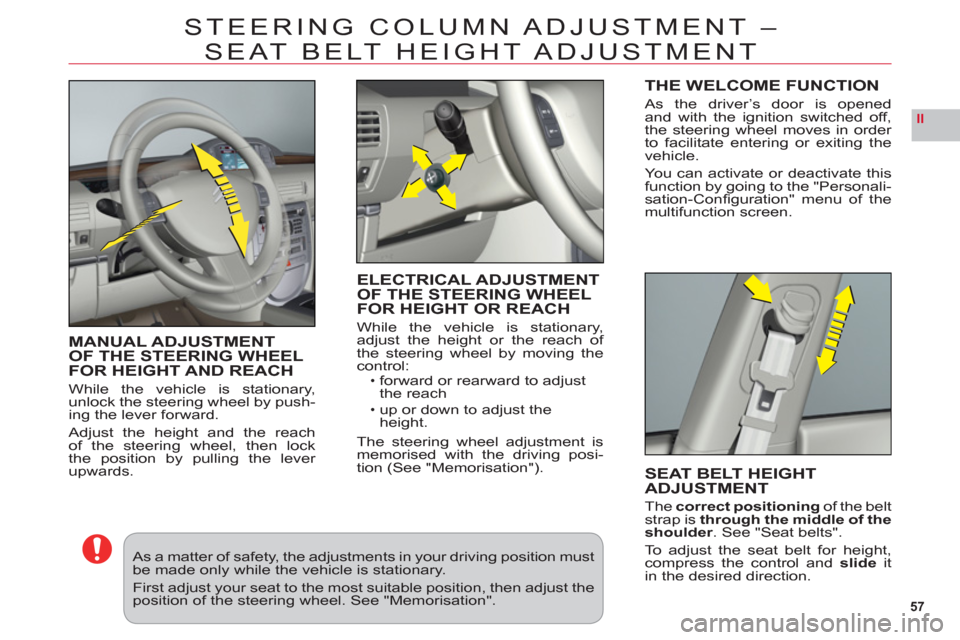
MANUAL ADJUSTMENT
OF THE STEERING WHEEL
FOR HEIGHT AND REAC
H
While the vehicle is stationary,unlock the steering wheel by push-
ing the lever forward.
Adjust the height and the reach
of the steering wheel, then lock
the position by pulling the lever upwards.
ELECTRICAL ADJUSTMENT
OF THE STEERING WHEEL
FOR HEIGHT OR REAC
H
While the vehicle is stationary,
adjust the height or the reach of
the steering wheel by moving the control:forward or rearward to adjust
the reach
up or down to adjust the
height.
The steering wheel adjustment is
memorised with the driving posi-
tion (See "Memorisation").
•
•
SEAT BELT HEIGHT
ADJUSTMENT
Thecorrect positioningof the beltstrap is through the middle of the
shoulder. See "Seat belts".
To a d
just the seat belt for height,compress the control andslideitin the desired direction.
As a matter of safety, the adjustments in your driving position must be made only while the vehicle is stationary.
First adjust your seat to the most suitable position, then adjust the position of the steering wheel. See "Memorisation".
THE WELCOME FUNCTION
As the driver’s door is opened
and with the ignition switched off,
the steering wheel moves in order
to
facilitate entering or exiting the
vehicle.
Yo u can activate or deactivate thisfunction by going to the "Personali-sation-Confi guration" menu of themultifunction screen.