key battery Citroen C6 2011 1.G Owner's Manual
[x] Cancel search | Manufacturer: CITROEN, Model Year: 2011, Model line: C6, Model: Citroen C6 2011 1.GPages: 216, PDF Size: 10.31 MB
Page 26 of 216
24
II
REMOTE CONTROL
FOLDING AND EJECTING THE KEY
ButtonD is for folding and ejecting the key from its housing in the remotecontrol.
If
you do not press on button D, you could damage the key mechanism.
Changing the remote control battery
Unclip the cover to gain access to the battery.
Battery:CR0523 - 3 V.
After a change of battery, it may be necessary to re-initialise the remotecontrol. To do that, switch on the ignition and immediately press buttonBon your remote control to trigger the action desired. This may take some
ten seconds.Note: Make a careful note of the numbers for the keys and for the remote
control on the ASSISTA NCE card. Keep this in a safe place.
Do not throw away the old batteries. They should be returned to aCITROËN dealer or deposited at a recognised collection point (a camerarshop, for example).
Except when reinitialising, the remote control cannot function while the key is in the ignition,even when switched off.
Warning: by inadvertently actioning the remote control, when for example it is in your pocket,you can unlock the vehicle without your realising it.
However, if none of the doors is opened within thirty seconds following an unlocking, the doorswill automatically relock.
Warning: there is a risk of damage if the replacement battery is not the correct one.
Only use batteries that are identical or equivalent to those approved by CITROËN.
GUIDE-ME-HOME LIGHTING
A press on buttonC operates theguide-me-home lighting (illumina-
tion of the sidelamps and dipped
beams for approx. one minute).
A second press prior to the end of
this period cancels the guide-me-home lighting.
LOCATING OF THE VEHICLE
To locate the vehicle in a carpark,press button B, the interior lampscome on and the direction indica-
tors fl ash for a few seconds. Thevehicle remains locked.
Page 27 of 216
25
II
KEYS
It is dangerous to operate the deadlocking when a person is in the vehicle as unlocking is impossible from the inside (without the remote control).
The key number is on the label attached to the key.
Should you lose your key or remote control, a CITROËN dealer can supply replacements.
If you unlock your vehicle using the key because of a problem with the battery, be aware that opening/closing a door with the window closed can seriously damage the glass, even to the point of breaking it. See "Access".
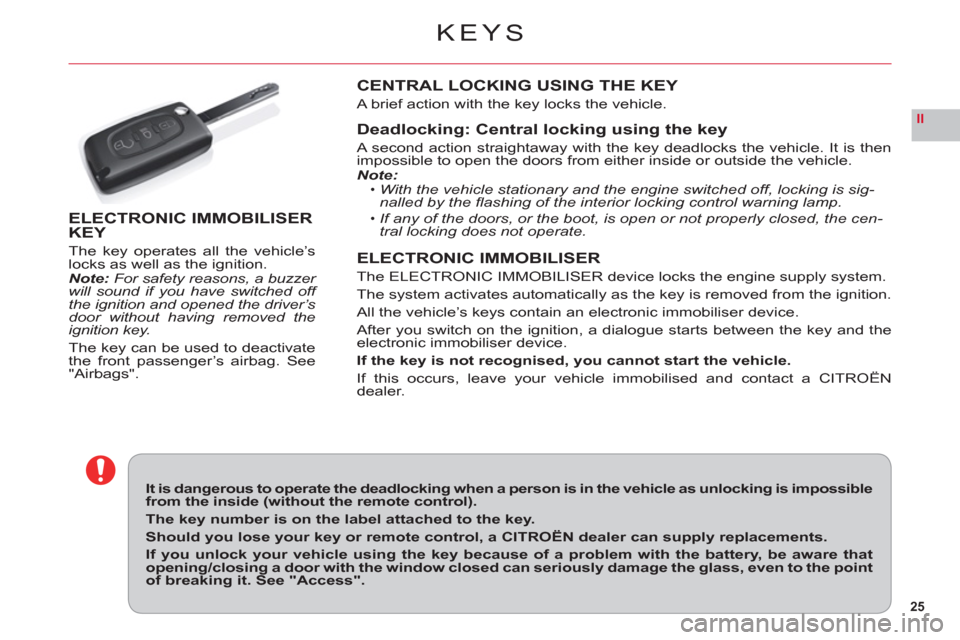
ELECTRONIC IMMOBILISER KEY
The key operates all the vehicle’slocks as well as the ignition.Note: For safety reasons, a buzzer will sound if you have switched off the ignition and opened the driver’s
door without having removed the
ignition key.
The ke
y can be used to deactivate
the front passenger’s airbag. See"Airbags".
CENTRAL LOCKING USING THE KEY
A brief action with the key locks the vehicle.
Deadlocking: Central locking using the key
A second action straightaway with the key deadlocks the vehicle. It is then
impossible to open the doors from either inside or outside the vehicle.Note:With the vehicle stationary and the engine switched off, locking is sig-nalled by the fl ashing of the interior locking control warning lamp.
If any of the doors, or the boot, is open or not properly closed, the cen-tral locking does not operate.
ELECTRONIC IMMOBILISER
The ELECTRONIC IMMOBILISER device locks the engine supply system.
The s
ystem activates automatically as the key is removed from the ignition.
All the vehicle
’s keys contain an electronic immobiliser device.
A
fter you switch on the ignition, a dialogue starts between the key and theelectronic immobiliser device.
If the ke
y is not recognised, you cannot start the vehicle.
If this occurs, leave your vehicle immobilised and contact a CITROËNdealer.
•
•
Page 29 of 216
27
II
AB
ANTI-INTRUSION ALARM
OPERATING THE ALARM
First make sure all the doors are closed.
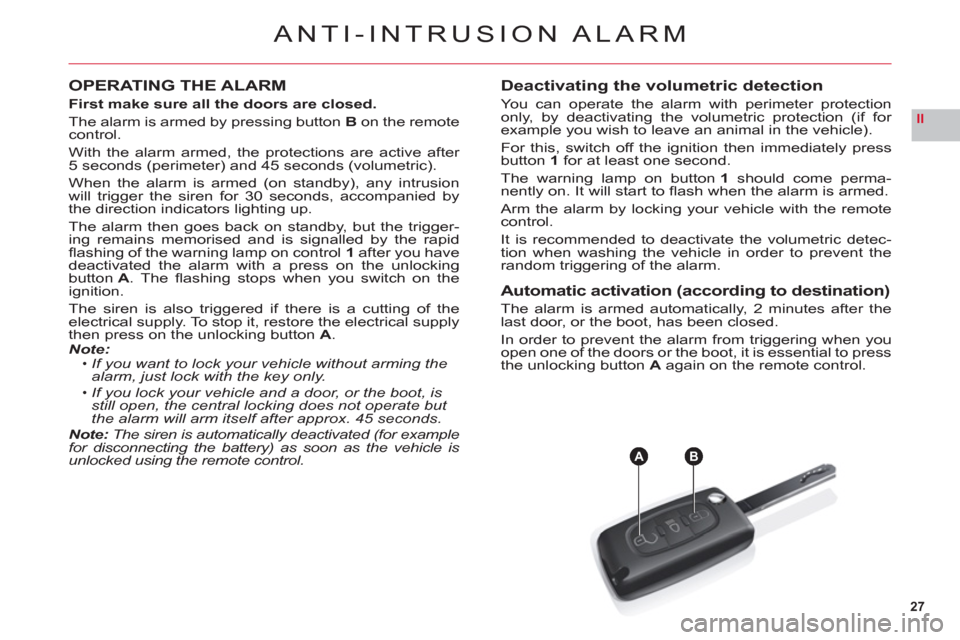
The alarm is armed by pressing button Bon the remote control.
With the alarm armed, the protections are active after 5 seconds (perimeter) and 45 seconds (volumetric).
When the alarm is armed (on standby), any intrusion
will trigger the siren for 30 seconds, accompanied by
the direction indicators lighting up.
The alarm then
goes back on standby, but the trigger-
ing remains memorised and is signalled by the rapid fl ashing of the warning lamp on control1 after you have deactivated the alarm with a press on the unlocking button A. The fl ashing stops when you switch on the ignition.
The siren is also tri
ggered if there is a cutting of the electrical supply. To stop it, restore the electrical supply
then press on the unlocking button A.Note:If you want to lock your vehicle without arming the
alarm, just lock with the key only.
If you lock your vehicle and a door, or the boot, is still open, the central locking does not operate but the alarm will arm itself after approx. 45 seconds.Note: The siren is automatically deactivated (for example for disconnecting the battery) as soon as the vehicle is unlocked using the remote control.
•
•
Deactivating the volumetric detection
You can operate the alarm with perimeter protection
only, by deactivating the volumetric protection (if for example you wish to leave an animal in the vehicle).
For this, switch o
ff the ignition then immediately pressbutton1 for at least one second.
The warning lamp on button1should come perma-nently on. It will start to fl ash when the alarm is armed.
Arm the alarm b
y locking your vehicle with the remotecontrol.
It is recommended to deactivate the volumetric detec-
tion when washing the vehicle in order to prevent the
random triggering of the alarm.
Automatic activation (according to destination)
The alarm is armed automatically, 2 minutes after the
last door, or the boot, has been closed.
In order to prevent the alarm from triggering when you
open one of the doors or the boot, it is essential to press
the unlocking button A again on the remote control.
Page 58 of 216
56
II
A
WINDOWS
After a battery disconnection or if there has been a malfunction, you have to reinitialise the anti-
pinch function for each window:Lower the window fully usingthe control, then close. It willrise only a few centimetres.
Press repeatedly on the controluntil the window is fully closed.
Keep the control pressed for atleast a few seconds after the
window has fully closed.
WARNING
During this operation, the anti-
pinch protection does not work.
•
•
CHILD SAFETY
This deactivates the controls in therear of the vehicle, both for the rear
windows and for opening the rear doors from the inside.
For Pack Lounge seats, the seatslide adjustments, and those for
the front seats from the rear of thevehicle, are also deactivated.
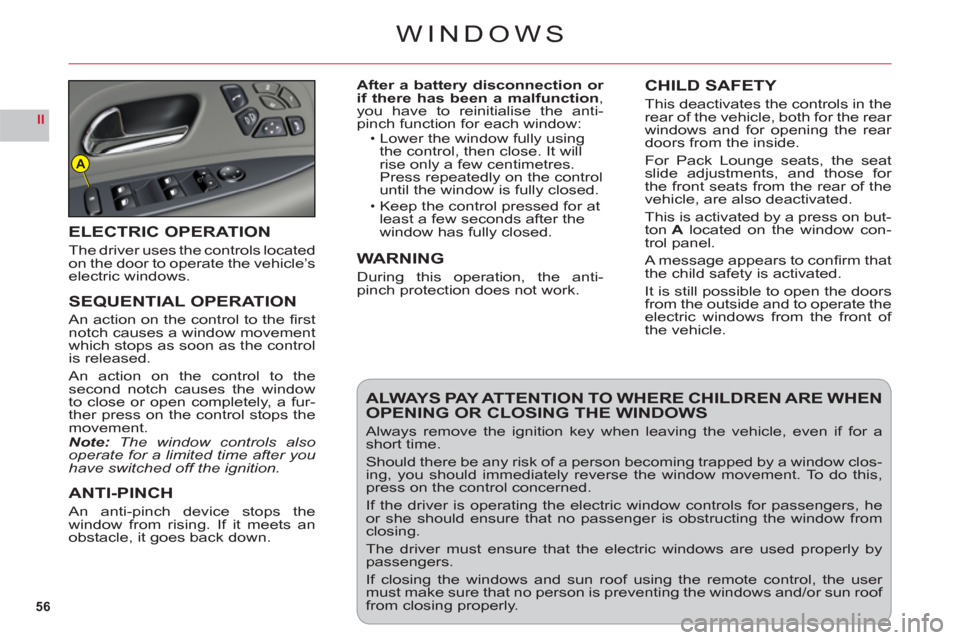
This is activated by a press on but-
tonA located on the window con-
trol panel.
A message appears to confi rm that
the child safety is activated.
It is still possible to open the doorsfrom the outside and to operate theelectric windows from the front of
the vehicle.
ELECTRIC OPERATION
The driver uses the controls locatedon the door to operate the vehicle’selectric windows.
SEQUENTIAL OPERATION
An action on the control to the fi rstnotch causes a window movement
which stops as soon as the control
is released.
An action on the control to thesecond notch causes the window
to close or open completely, a fur-
ther press on the control stops themovement.Note:The window controls alsooperate for a limited time after you have switched off the ignition.
ANTI-PINCH
An anti-pinch device stops the
window from rising. If it meets an
obstacle, it goes back down.
ALWAYS PAY ATTENTION TO WHERE CHILDREN ARE WHENOPENING OR CLOSING THE WINDOWS
Always remove the ignition key when leaving the vehicle, even if for ashort time.
Should there be any risk of a person becoming trapped by a window clos-ing, you should immediately reverse the window movement. To do this,press on the control concerned.
If the driver is operating the electric window controls for passengers, heor she should ensure that no passenger is obstructing the window fromclosing.
The driver must ensure that the electric windows are used properly bypassengers.
If closing the windows and sun roof using the remote control, the user must make sure that no person is preventing the windows and/or sun roof from closing properly.
Page 84 of 216
82
III
LOCKING/UNLOCKING
FROM THE INSIDE
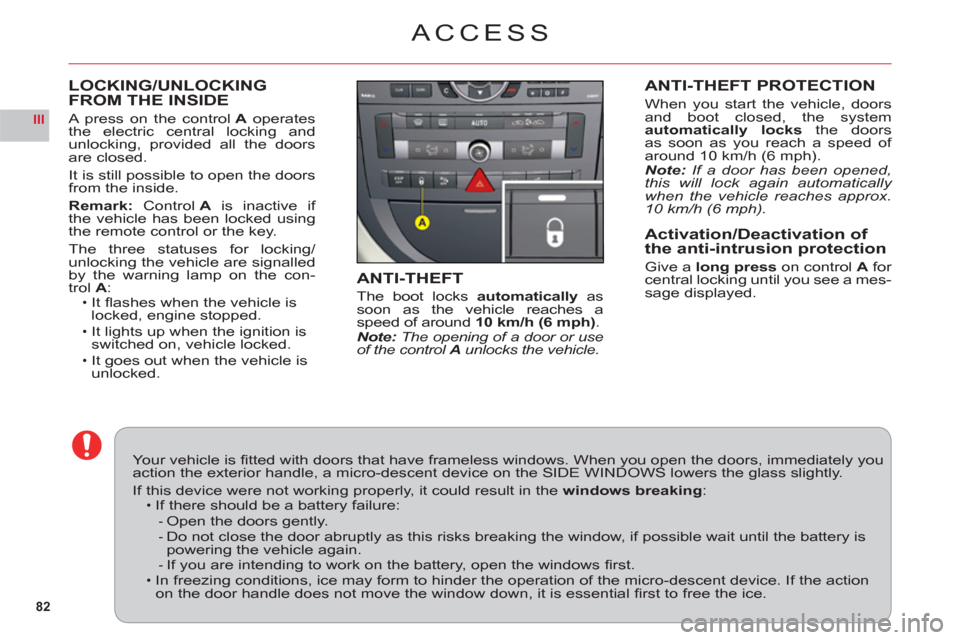
A press on the controlA operates
the electric central locking andunlocking, provided all the doorsare closed.
It is still possible to open the doorsfrom the inside.
Remark: Control Ais inactive if
the vehicle has been locked usingthe remote control or the key.
The three statuses
for locking/unlocking the vehicle are signalledby the warning lamp on the con-
trol A:It fl ashes when the vehicle is
locked, engine stopped.
It lights up when the ignition is switched on, vehicle locked.It goes out when the vehicle is unlocked.
ï
ï
ï
ACCESS
ANTI-THEFT PROTECTION
When you start the vehicle, doors
and boot closed, the system
automatically locksthe doorsas soon as you reach a speed of
around 10 km/h (6 mph).Note: If a door has been opened,this will lock again automatically when the vehicle reaches approx.10 km/h (6 mph).
Activation/Deactivation of
the anti-intrusion protection
Give a long press on control Afor central locking until you see a mes-sage displayed.ANTI-THEFT
The boot locks automatically as soon as the vehicle reaches a
speed of around10 km/h (6 mph).Note: The opening of a door or use of the control A unlocks the vehicle.
Your vehicle is fi tted with doors that have frameless windows. When you open the doors, immediately youaction the exterior handle, a micro-descent device on the SIDE WINDOWS lowers the glass slightly.
If this device were not working properly, it could result in thewindows breaking:If there should be a battery failure:
Open the doors gently.Do not close the door abruptly as this risks breaking the window, if possible wait until the battery ispowering the vehicle again.If you are intending to work on the battery, open the windows fi rst.In freezing conditions, ice may form to hinder the operation of the micro-descent device. If the actionon the door handle does not move the window down, it is essential fi rst to free the ice.
ï
--
-ï
Page 85 of 216
83
IIIA
ACCESS
To make it easier to open the doors,
the windows automatically open bya few millimetres.
Note: This movement occurs imme-diately you touch an interior door handle.
The window recloses, automati-
cally adjusting for a perfect seal.
IMPORTANT
This function has no anti-pinch. Donot leave your hand on the window
when you close the door.
Any interruption of your vehicle'selectrical supply will prevent the
windows from opening and closingcorrectly.
Remark: Travelling at high speed,closing of windows may be hin-
dered by the aerodynamic pres-sure. Acoustic comfort may then
be adversely affected.
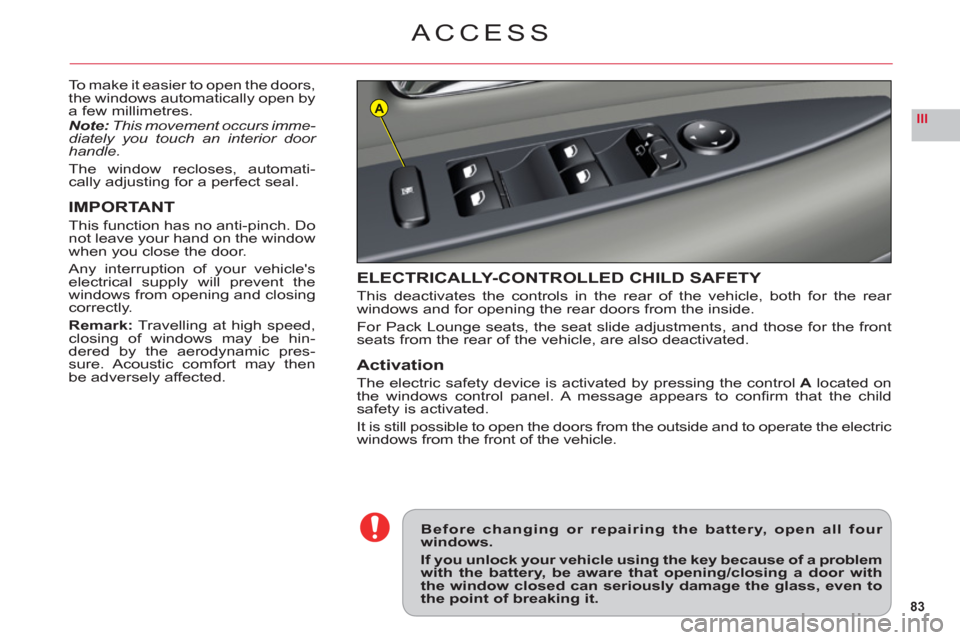
ELECTRICALLY-CONTROLLED CHILD SAFETY
This deactivates the controls in the rear of the vehicle, both for the rear
windows and for opening the rear doors from the inside.
For Pack Lounge seats, the seat slide adjustments, and those for the front
seats from the rear of the vehicle, are also deactivated.
Activation
The electric safety device is activated by pressing the controlA located on
the windows control panel. A message appears to confi rm that the child
safety is activated.
It is still possible to open the doors from the outside and to operate the electric
win
dows from the front of the vehicle.
Before changing or repairing the battery, open all four windows.
If you unlock your vehicle using the key because of a problemwith the battery, be aware that opening/closing a door withthe window closed can seriously damage the glass, even tothe point of breaking it.
Page 120 of 216

118
III
A
SUN ROOF
Glass sun roof
The sun roof is operated by theelectrical controlA.
An action to the fi rst notch of thecontrol starts a movement whichstops as soon as you release thecontrol.
An action to the second notch of
the control opens or closes the sun
roof fully. A further action stops themovement.
ANTI-PINCH
An anti-pinch device is present to stop the sun roof from sliding shut. If it
meets an obstacle it slides in the opposite direction.
After a battery disconnection or if there has been a malfunction, youhave to re-initialisethe anti-pinch function.
To do that, move the control Ato the second notch to make the sun roof open fully, then keep the control A pressed for at least1seconds.
Warnin
g: During this manœuvre, the anti-pinch does not operate.
Your vehicle's sun roof has a manually-
operated blind.
Always remove the ignition key when leaving the vehicle, even if for a Short time.
In the event of anything being caught by the sun roof closing, you must reverse the roof movement.
To do that, reverse the position of the control concerned.
When the driver is operating the sun roof, he or she must always make sure that the passengers are not preventing it from closing properly.
The driver must ensure that passengers use the sun roof control correctly.
PAY ESPECIAL ATTENTION TO WHERE CHILDREN ARE WHEN OPERATING THE SUN ROOF.
Page 126 of 216

124
IV
A
D
C
B
BATTERY LOCATION AND
ACCESS
The battery is located in the bootunder the left hand wing trim. To
access the battery, rotate the pin
on the fl ap by a 1/4.
CHANGING THE BATTERY (Contact a CITROËN dealer or a qualifi ed
workshop).
1.Release the two pins on each side at the back of the boot, and remove
the boot fl oor.2.On each side trim, release the two fi xing pinsA.3.Undo the two screws Bon each side and remove the sill embellisher.4.On the side trim close to the battery, release the pin D.5.Separate the side trim close to the battery, pulling hard to free the other
fi xing points.
6.Unclip the boot lamp C.7.Disconnect both battery terminals.8.Release the battery from its support.9.Remove the battery.
Before changing or repairing the battery, open all four windows.
If you have to unlock your vehicle with the key because of a problem with the battery, any opening/closingof a door with the window closed may seriously damage the glass to the point of breaking it.
12 V BATTERY
Page 127 of 216

125
IV
STARTING THE ENGINE AFTER DISCONNECTING AND RECONNECTING THE BATTERY
1. Turn the ignition key.2. Wait approximately 1 minute before operating the starter in order to allow the electronic systems to re-initialise.
After the battery has been disconnected for a lengthy period of time, it may be necessary to re-initialise the followingfunctions:The anti-pinch on the windows.
The anti-pinch on the sun roof.
The multifunction display parameters (date, time, language, units of distance and of temperature).
Th
e Radio stations.
The NaviDrive.
See the NaviDrive chapter.
IMPORTANT
In the event of a battery failure, and if the boot is closed, it is then necessary to feed an electrical supply to your
vehicle. See following page.
•
••
•
•
12 V BATTERY
Page 209 of 216
149
INDEX
12 V battery ..............124→126 - XIV
A
ABS system..................................74
Access.................................82 → 84
Access to the boot.................84 - 99
Adjusting the front seats........58 - 59
Adjustment of rear seats....97 → 100
Adjustment of the rear view mirrors.................................63 - 64
Advice on driving............................X
Air conditioning............42 - 85 → 92
Air distribution........................89 - 92
Air fi lter.......................................r121
Air fl ow...................................89 - 92
Air recirculation ñ Entry of air from outside ................................90
Airbags ........................101 - V → VII
Anti-intrusion alarm................26 - 27
Anti-pinch.............................56 - 118
Anti-theft bolts....................141 - 143
Anti-theft protection......................82
Ashtray........................................11 4
Audio system........39 - 43, 7.42-7.58
Automatic gearbox...............65 → 68
Automatic lightingof headlamps ..............................51
B
Badge reader...............................r11 6
Batter
y replacement ...................124
B
onnet........................................120
Boot ..............................84 – 99 -11 7
Brake fl uid...................................121
B
Brakes..........................................74
Braking system ............................XIII
Brightness sensor.........................r37
C
Capacities ................................... 132
Card-holder..................................116
Catalytic converter......................rXVII
CD changer.................................r11 7
Central locking....................... 23 - 25
Central unlocking..........................23
Changing a wheel............141 → 143
Changing the remote control
battery………………………........24
Changing bulbs................134 → 138
Changing the vehicle
battery......................................124
Checks........................................121
Child restraints.................103 → 105
Child safety ............56 - 83 - 103 → 105 -
VIII→IX
Child seats.....103 → 105 - VIII → IX
Cigar-lighter.................................r11 3
Cold weather shield.................... 140
Colour screen C...................39 → 42
Controls at the steeringwheel............................................8
Coolant temperature.....................46
Cruise control........................69 - 70
Cup-holders .................................111
D
Dashboard .................................8 - 9
Date................................39 - 41 - 43
Daytime-running lamps.................52
Deactivation of passenger’s airbag.......................................101
Deadlocking ...........................23 - 25
Diesel particle fi lter system ...........81
Diesel preheating..........................29
Dimensions........................146 - 147
Dipped beams ..............................51
Direction indicators.......................50
Driverís fl oor mat.........................113
Driver’s oddments tray ................111
Driver’s seat belt fasteningsensor.........................................r61
Driving.................................18 → 20
Driving position...............................II
Driving positions....................37 - 60
Dust/pollen fi lter............................r86
E
Eco-driving............................... 21-22
Economy mode.............................28
Ejecting the key ............................24
Electric exterior rear
view mirrors.........................63 - 64
Electric parking brake ............75 - 76
Electric steering column adjustment..................................57
Electric windows control...............56
Electrical accessories ................XVIII
Electronic immobiliser...................25