display CITROEN DISPATCH SPACETOURER 2017 Handbook (in English)
[x] Cancel search | Manufacturer: CITROEN, Model Year: 2017, Model line: DISPATCH SPACETOURER, Model: CITROEN DISPATCH SPACETOURER 2017Pages: 774, PDF Size: 48.25 MB
Page 257 of 774

255
180° rear vision
This system allows the near surroundings of the
vehicle to be viewed in the display screen using
cameras located at the rear of the vehicle. The
parking sensors in the rear and/or front bumper
complete the information on the view from
above the vehicle (right-hand part).
In addition to the view from above the vehicle
(right-hand part) several types of view can be
displayed (left-hand part):
-
s
tandard rear view,
-
1
80° rear view,
-
r
econstructed zoom rear view.
Principle of image
reconstruction
The system displays the contextual view (left-
hand part) as well as the view from above the
vehicle in its close surroundings.
By default, automatic mode is activated.
In this mode, the system chooses the best view
to display (standard or zoom) according to the
information received from the parking sensors.
The 180° view is only available through the
menus. The display disappears above
approximately 6 mph (10 km/h).
The system is automatically deactivated
about 7 seconds after coming out of
reverse or on opening a door or the
boot. This system is a visual aid and cannot
in any circumstances replace the need
for vigilance on the part of the driver.
The images provided by the cameras
may appear distorted by the
surroundings (exterior conditions,
driving mode,
...).
The presence of areas in shadow, bright
sunlight, or poor lighting conditions
may make the image dark and reduce
contrast.
Using the rear camera, the system records the
vehicle's surroundings during a manoeuvre.
An image from above your vehicle in its close
surroundings is reconstructed (represented
between the blue brackets) in real time and as
the manoeuvre progresses.
This representation facilitates the alignment of
your vehicle when parking and allows you to
see all of the obstacles close to the vehicle.
This reconstructed view is automatically erased
if the vehicle remains stationary for too long.
6
Driving
Page 258 of 774

256
"Standard view""180° view"
"Zoom view" (reconstructed)
The camera records the surroundings during a
manoeuvre in order to create a reconstruction
of the view from above the rear of the vehicle in
its close surroundings, allowing the vehicle to
be manoeuvred among the obstacles nearby.
This view is available with AUTO view or by
selecting of the view in the change view menu.
180° view makes it possible to reverse out of
a parking space while being able to see the
arrival of vehicles, pedestrians or cyclists.
This view is not recommended for carrying out
a complete manoeuvre.
It is made up of the following:
The area to the rear of your vehicle is displayed
in the screen.
The blue outline represents the width of your
vehicle (with mirrors): its orientation depends
on the position of the steering wheel.
The red line represents a distance of 30
cm
from the rear bumper and the two blue lines,
1
m and 2 m respectively.
Rear views
Engage reverse gear to activate the camera,
located on the tailgate or rear door.
The rear parking sensors also
provide information on the vehicle's
surroundings.
Obstacles may appear further away
than they are in reality.
It is important to check the side views
using the mirrors during the manoeuvre.
Driving
Page 259 of 774

257
Activation
Activation is automatic on engaging reverse.
The function is displayed in the touch screen.
To close the window displayed, press on the
red cross at the top left of the screen.On display of the sub-menu, select one of the
four views:
"Standard view".
"180° view".
"Zoom view".
"AUTO mode".
You can choose the display mode at any time
by pressing on this area. Check the cleanliness of the camera
lenses regularly.
Periodically clean the reversing camera
with a soft dry cloth.
"AUTO mode"
This mode is activated by default.
Using sensors in the rear bumper, the
automatic view allows a change from the rear
view to the view from above as an obstacle is
approached during a manoeuvre.
The system is automatically deactivated
when towing a trailer or carrying a
bicycle on the towbar (vehicle fitted with
a towbar installed as recommended by
the manufacturer).
Quick start mode
This mode displays, as quickly as possible, the
contextual view (left-hand part) and the view
from above the vehicle. High pressure jet wash (if muddy, for
example)
When washing your vehicle, do not
place the tip of the lance within 30 cm of
the camera lenses, as other wise there
is a risk of damaging them.
A message is displayed advising you to check
your vehicle's surroundings before starting the
manoeuvre.
6
Driving
Page 261 of 774

259
Under-inflation alertReinitialisation
Before reinitialising the system, ensure
that the pressures of the four tyres are
correct for the use of the vehicle and in
line with the recommendations on the
tyre pressure label.
The under-inflation alert can only
be relied on if the reinitialisation of
the system has been done with the
pressures in the four tyres correctly
adjusted.
The under-inflation detection system
does not give a warning if a pressure is
incorrect at the time of reinitialisation.
This is given by fixed illumination of
this warning lamp, accompanied by
an audible signal and, depending on
equipment, the display of a message.
It is necessary to reinitialise the system every
time one or more tyre pressures are adjusted,
and after changing one or more wheels.
F
R
educe speed immediately, avoid
excessive steering movements and sudden
braking.
F
S
top the vehicle as soon as it is safe to
do
so. F
I
n the event of a puncture, use the
temporary puncture repair kit or the spare
wheel (depending on equipment),
or
F
i
f you have a compressor, such as the one
in the temporary puncture repair kit, check
the pressures of the four tyres when cold,
or
F
i
f it is not possible to make this check
immediately, drive carefully at reduced
speed.
The loss of pressure detected does not
always cause visible bulging of the tyre.
Do not satisfy yourself with just a visual
check. The alert is maintained until the system
is reinitialised.
Initialisation of the system is done with the
ignition on and the vehicle stationary.The new pressure settings registered
are considered to be reference values
by the system.
6
Driving
Page 315 of 774

313
FuseN° Rating
(A) Functions
F1 10Electric power steering, clutch switch.
F4 15Horn.
F5 20Front/rear screenwash pump.
F6 20Front/rear screenwash pump.
F7 10Rear 12 V accessory socket.
F8 20Single or double rear wipers.
F10/F11 30Front /rear exterior and interior locks.
F13 10Front air conditioning controls, audio system controls, gear
lever, head-up display.
F14 5Alarm, emergency and assistance calls.
F17 5Instrument panel.
F19 3Steering mounted controls.
F21 3"Keyless Entry and Starting" system or ignition switch.
F22 3Rain and sunshine sensor, multifunction detection camera.
F23 5Seat belt unfastened or not fastened display screen.
F24 5Touch screen, reversing camera and parking sensors.
F25 5Airbags.
F29 20Audio system, touch screen, CD player, navigation.
F31 15Audio system (battery +).
F32 15Front 12 V accessory socket.
F34 5Blind spot monitoring system, door mirror electric controls.
F35 5Heated washer jets, headlamp beam height control.
F36 5Torch charger, rear courtesy lamp.Version 1 (Eco)
The fuses described hereafter vary according
to the equipment in your vehicle.
8
In the event of a breakdown
Page 316 of 774

314
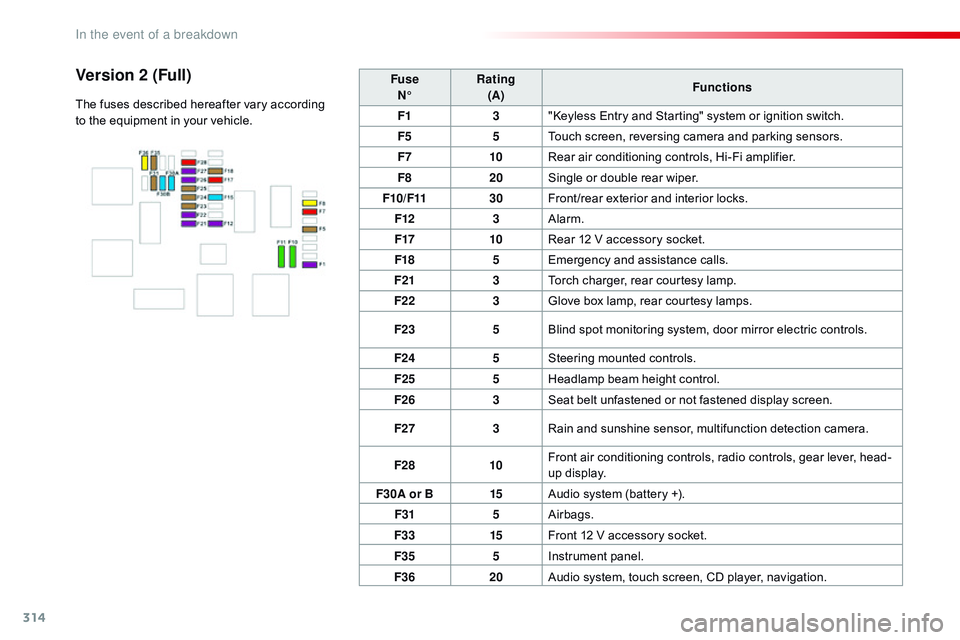
FuseN° Rating
(A) Functions
F1 3"Keyless Entry and Starting" system or ignition switch.
F5 5Touch screen, reversing camera and parking sensors.
F7 10Rear air conditioning controls, Hi-Fi amplifier.
F8 20Single or double rear wiper.
F10/F11 30Front /rear exterior and interior locks.
F12 3Alarm.
F17 10Rear 12 V accessory socket.
F18 5Emergency and assistance calls.
F21 3Torch charger, rear courtesy lamp.
F22 3Glove box lamp, rear courtesy lamps.
F23 5Blind spot monitoring system, door mirror electric controls.
F24 5Steering mounted controls.
F25 5Headlamp beam height control.
F26 3Seat belt unfastened or not fastened display screen.
F27 3Rain and sunshine sensor, multifunction detection camera.
F28 10Front air conditioning controls, radio controls, gear lever, head-
up display.
F30A or B 15Audio system (battery +).
F31 5Airbags.
F33 15Front 12 V accessory socket.
F35 5Instrument panel.
F36 20Audio system, touch screen, CD player, navigation.Version 2 (Full)
The fuses described hereafter vary according
to the equipment in your vehicle.
In the event of a breakdown
Page 333 of 774

331
CITROËN Connect Nav
GPS satellite navigation - Connectivity - Multimedia audio - Bluetooth® telephone
Contents
First steps
3 32
Steering mounted controls
3
34
Menus
335
V
oice commands
3
36
Navigation
3
42
Connected navigation
3
58
Connectivity
3
68
Radio Media
3
78
Telephone
3
90
Settings
4
02
Frequently asked questions
4
12
The system is protected in such a way that it will only operate in
your vehicle.
The link below gives access to OSS (Open Source Software)
codes for the system.
http://www.psa-peugeot-citroen.com/oss As a safety measure and because it requires sustained attention
by the driver, the pairing of a Bluetooth mobile telephone with
the Bluetooth hands-free system of your audio system must be
done with the vehicle stationary
and the ignition on.
The display of the energy economy mode message signals that
a change to standby is imminent. For more information on the
Energy economy mode refer to the corresponding section.
.
Audio and Telematics
Page 334 of 774

332
FM/87.5 MHz
87.5MHz12:13
23 °C 87.5 MHz
First steps
With the engine running, a press
mutes the sound.
With the ignition off, a press turns the
system on.
Volume. Use the buttons either side of the touch screen
for access to the menus, then press the virtual
buttons in the touch screen. All of the touch
areas of the screen are white.
Each menu is displayed in one or two pages
(primary page and secondary page).
Secondary page
Primary page The touch screen is of the
"capacitive"
t
ype.
To clean the screen, use a soft,
non-abrasive cloth (spectacles cloth)
with no additional product.
Do not use sharp objects on the
screen.
Do not touch the screen with wet
hands.
Audio and Telematics
Page 336 of 774

334
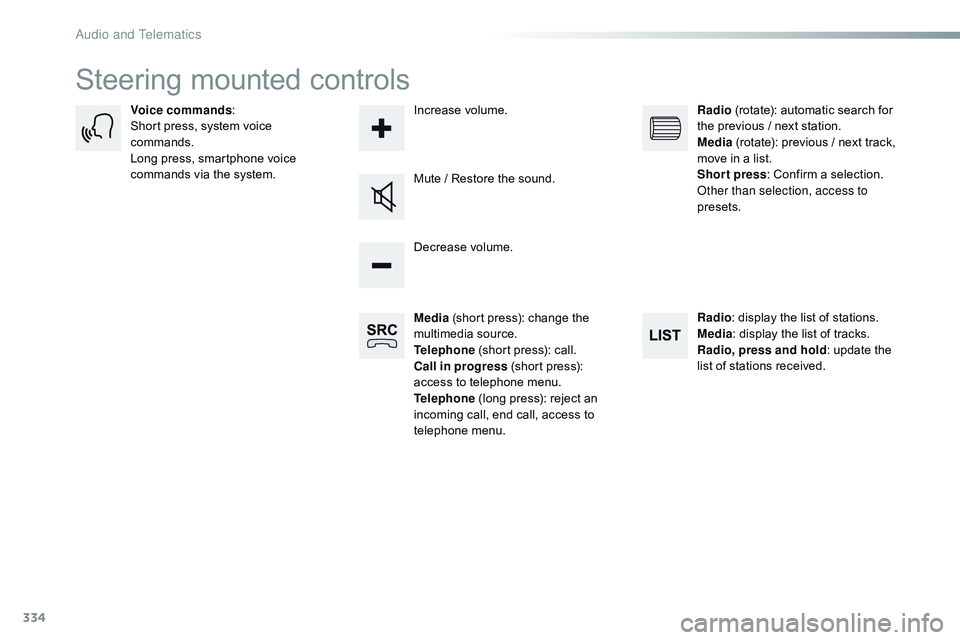
Steering mounted controls
Media (short press): change the
multimedia source.
Telephone (short press): call.
Call in progress (short press):
access to telephone menu.
Telephone (long press): reject an
incoming call, end call, access to
telephone menu. Decrease volume.
Voice commands
:
Short press, system voice
commands.
Long press, smartphone voice
commands via the system. Mute / Restore the sound.Radio
(rotate): automatic search for
the previous / next station.
Media (rotate): previous / next track,
move in a list.
Short press : Confirm a selection.
Other than selection, access to
presets.
Radio : display the list of stations.
Media : display the list of tracks.
Radio, press and hold : update the
list of stations received.
Increase volume.
Audio and Telematics
Page 337 of 774

335
12:13
23 °C12:13
23 °C531 kHz
FM/87.5 MHz
87.5MHz 12:13
23 °C 87.5 MHz
12:13
23 °C531 kHz12:13
23 °C
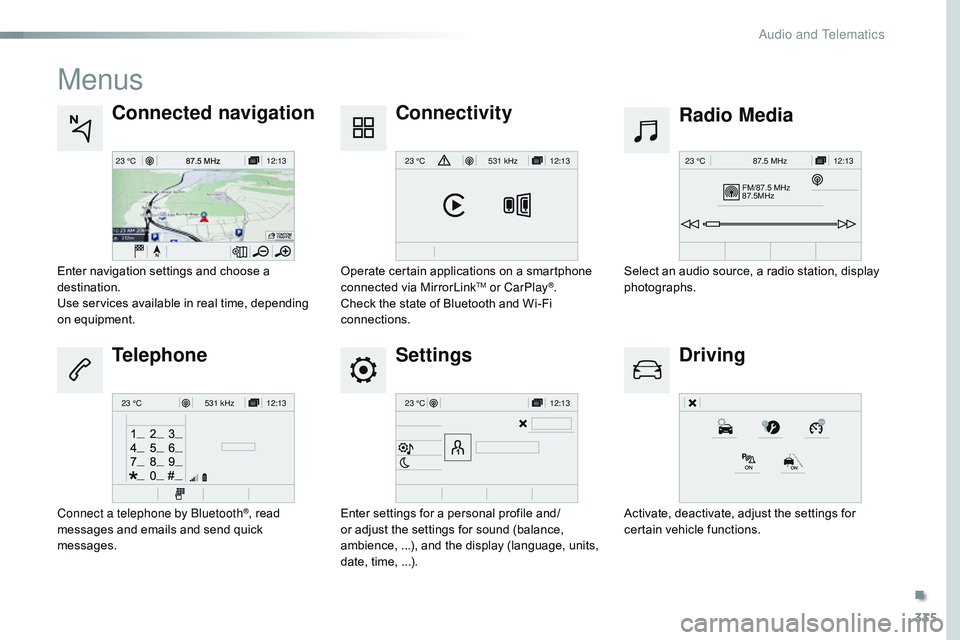
Menus
Settings Radio Media
Connected navigation
Driving
Connectivity
Telephone
Enter settings for a personal profile and/
or adjust the settings for sound (balance,
ambience, ...), and the display (language, units,
date, time, ...). Select an audio source, a radio station, display
photographs.
Enter navigation settings and choose a
destination.
Use services available in real time, depending
on equipment.
Activate, deactivate, adjust the settings for
certain vehicle functions.
Operate certain applications on a smartphone
connected via MirrorLink
TM or CarPlay®.
Check the state of Bluetooth and Wi-Fi
connections.
Connect a telephone by Bluetooth
®, read
messages and emails and send quick
messages.
.
Audio and Telematics