key CITROEN DISPATCH SPACETOURER 2020 Handbook (in English)
[x] Cancel search | Manufacturer: CITROEN, Model Year: 2020, Model line: DISPATCH SPACETOURER, Model: CITROEN DISPATCH SPACETOURER 2020Pages: 324, PDF Size: 10.89 MB
Page 156 of 324

154
Engine restarting (START mode)
The engine automatically restarts as soon as
the driver indicates the intention of moving off
again.
With a manual gearbox: with the clutch pedal
fully depressed.
With an automatic gearbox :
-
W
ith the selector in position D or M : with the
brake pedal released.
-
W
ith the selector in position N and the brake
pedal released: with the selector at D or M .
-
W
ith the selector in position P and the brake
pedal depressed: with the selector at R , N,
D or M .
-
R
everse gear engaged.
With an electronic gearbox :
-
W
ith the selector in position A or M : with the
brake pedal released.
-
W
ith the selector in position N and the brake
pedal released: with the selector at A or M .
-
R
everse gear engaged.
Special cases
The engine restarts automatically if all the
operating conditions are met again and in the
following cases.
-
W
ith a manual gearbox : vehicle speed
exceeds 16
mph (25 km/h) or 2 mph
(3
km/h) (depending on engine).
-
W
ith an automatic gearbox : vehicle speed
exceeds 2.5
mph (3 km/h). In these cases, this indicator lamp
flashes for a few seconds, then goes
of f.
Malfunctions
Depending on the vehicle’s equipment:
F
H
ave the vehicle checked by a CITROËN
dealer or a qualified workshop.
The vehicle stalls in STOP mode
All of the instrument panel warning lamps come
on if this fault occurs.
Depending on version, a warning message may
also be displayed, asking you to place the gear
selector in position N and to press the brake
pedal.
F
Switch off the ignition then start the engine again with the key or the " START/STOP"
button. The Stop & Start system requires a
12
V battery of specific technology and
specification.
All work concerning the battery must be
carried out only by a CITROËN dealer or a
qualified workshop.
In the event of a fault with the system,
this warning lamp flashes in the
instrument panel.
The warning lamp in this button
flashes and a message appears,
accompanied by an audible signal.
Tyre under-inflation
detection
This system automatically checks the
pressures of the tyres while driving.
It compares the information given by the wheel
speed sensors with reference values, which
must be reinitialised ever y time the tyre
pressures are adjusted or a wheel changed .
The system triggers an alert as soon as it
detects a drop in the inflation pressure of one
or more tyres.
Driving
Page 162 of 324
160
F Enter the new value using the numerical keypad and confirm.
F
C
onfirm to record the changes and quit the
menu.
Memorised speeds are recalled
by pressing this button.
F
P
ress the button corresponding to the
speed setting you want to change.
Speed Limit recognition
and recommendation
Refer to the General recommendations on
the use of driving and manoeuvring aids .
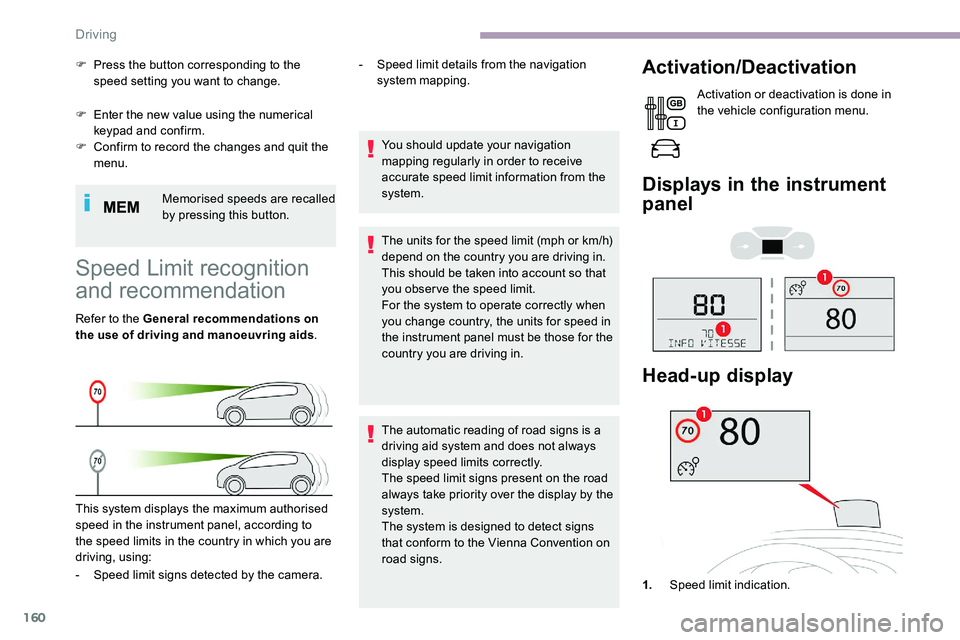
This system displays the maximum authorised
speed in the instrument panel, according to
the speed limits in the country in which you are
driving, using: -
S
peed limit details from the navigation
system mapping.
You should update your navigation
mapping regularly in order to receive
accurate speed limit information from the
system.
The units for the speed limit (mph or km/h)
depend on the country you are driving in.
This should be taken into account so that
you obser ve the speed limit.
For the system to operate correctly when
you change country, the units for speed in
the instrument panel must be those for the
country you are driving in.
The automatic reading of road signs is a
driving aid system and does not always
display speed limits correctly.
The speed limit signs present on the road
always take priority over the display by the
system.
The system is designed to detect signs
that conform to the Vienna Convention on
road signs.
Activation/Deactivation
Activation or deactivation is done in
the vehicle configuration menu.
Displays in the instrument
panel
- Speed limit signs detected by the camera. 1.Speed limit indication.
Head-up display
Driving
Page 188 of 324
186
Refuelling
At least 8 litres of fuel must be added, in order
t o be registered by the fuel gauge.
Opening the filler cap may create a noise
caused by an inrush of air. This vacuum is
entirely normal, resulting from the sealing of the
fuel system.
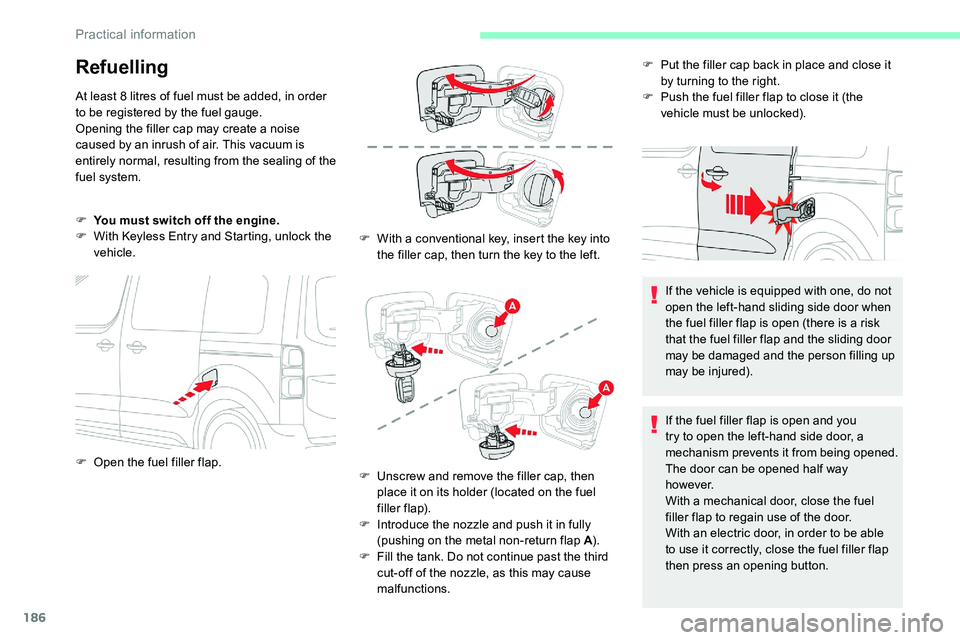
F
Y
ou must switch off the engine.
F
W
ith Keyless Entry and Starting, unlock the
vehicle. F
W
ith a conventional key, insert the key into
the filler cap, then turn the key to the left. F
P
ut the filler cap back in place and close it
by turning to the right.
F P ush the fuel filler flap to close it (the
vehicle must be unlocked).
If the vehicle is equipped with one, do not
open the left-hand sliding side door when
the fuel filler flap is open (there is a risk
that the fuel filler flap and the sliding door
may be damaged and the person filling up
may be injured).
If the fuel filler flap is open and you
try to open the left-hand side door, a
mechanism prevents it from being opened.
The door can be opened half way
h o w eve r.
With a mechanical door, close the fuel
filler flap to regain use of the door.
With an electric door, in order to be able
to use it correctly, close the fuel filler flap
then press an opening button.
F
O
pen the fuel filler flap. F
U
nscrew and remove the filler cap, then
place it on its holder (located on the fuel
filler flap).
F
I
ntroduce the nozzle and push it in fully
(pushing on the metal non-return flap A ).
F
F
ill the tank. Do not continue past the third
cut-off of the nozzle, as this may cause
malfunctions.
Practical information
Page 200 of 324

198
Keep AdBlue® out of the reach of children,
in its original container.
Procedure
Before starting the top-up procedure, ensure
that the vehicle is parked on a flat and level
sur face.
In wintry conditions, ensure that the
temperature of the vehicle is above -11
°C.
Otherwise the AdBlue
® may be frozen and so
cannot be poured into its tank. Park the vehicle
in a warmer area for a few hours to allow the
top-up to be carried out.
Never put the AdBlue
® into the Diesel fuel
tank.
If any AdBlue
® is splashed, or if there
are any spillages on the bodywork, rinse
immediately with cold water or wipe with a
damp cloth.
If the fluid has crystallised, clean it off
using a sponge and hot water. F
S
witch off the ignition and remove the key
from the switch to switch off the engine.
or
F
W
ith Keyless Entry and Starting, press the
" START/STOP " button to switch off the
engine.
Access to the AdBlue® tank
F From below, pull the black c ove r.
In certain conditions (high temperature, for
example), risks of the release of ammonia
cannot be excluded: do not inhale the vapour.
Vapours containing ammonia have an irritant
effect on mucous membranes (eyes, nose and
throat).
F
T
urn the blue cap 1/6 of a turn anti-
clockwise.
F
L
ift off the cap.
F
O
btain a container of AdBlue
®. After first
checking the use-by date, carefully read
the instructions for use on the label before
pouring the contents of the container into
the vehicle's AdBlue tank.
Or F
I
nsert the AdBlue
® pump nozzle and refill
the tank until the nozzle stops automatically.
F
A
fter refilling, carry out the same operations
in reverse order.
F
R
efit the black cover, starting
at the top.
F
F
or access to the AdBlue
® tank, open the
front left-hand door. To avoid over flowing the AdBlue
® tank:
•
T
op up between 10 and 13
litres using
AdBlue
® containers.
Or
•
D
o not continue after the nozzle’s first
automatic cut-off if you are refilling at a
service station.
Practical information
Page 201 of 324

199
If your vehicle's AdBlue® tank is
completely empty – which is confirmed
by the message "Top up AdBlue: Starting
impossible", you must top up with at least
5
litres.
Important: in the event of a top-up after
a breakdown because of a lack of
AdBlue, you must wait around 5
minutes
before switching on the ignition, without
opening the driver’s door, locking
the vehicle, introducing the key into
the ignition switch, or introducing
the key of the Keyless Entr y and
Star ting system into the passenger
compartment .
Switch on the ignition, then wait for
10
seconds before starting the engine.
Advice on care
General recommendations on the care and
maintenance of your vehicle are given in the
warranty and maintenance record. Observe the following recommendations to avoid damaging your vehicle:
-
D
o not clean your headlamps with a dry or abrasive cloth, nor with detergent or solvent
products. Use a sponge and soapy water or a pH neutral product.
-
W
hen using a high-pressure washer on stubborn dirt, avoid prolonged use on the
headlamps, the lamps and their edges to avoid damaging their lacquer finish and seals.
-
N
ever use an abrasive sponge to clean persistent dirt, as this may scratch the paint
sur face. Use a soft cloth with soapy water instead.
-
W
hen washing your vehicle, never clean the interior with a water jet.
-
W
hen washing your vehicle in an automatic roller-brush car wash, be sure to lock your
doors and, depending on version, remove the key and deactivate the " Hands-Free
Access " system.
-
N
ever use high-pressure washing to clean the engine compartment, in order to avoid
damaging the electrical units.
-
L
iquids carried in an open vessel (e.g. a cup or mug) could be spilt, presenting a risk of
damage on contact with the controls in the dashboard and centre console. Be careful.
Depending on version, in order to avoid damaging or unpeeling the stickers on the bodywork,
you are strongly advised against using high-pressure cleaners to wash your vehicle. It is
recommended that you wash it using a high-flow water jet and rinse the vehicle down using
demineralised water.
Only a microfibre cloth is recommended for wiping your vehicle ; it must be clean and used
g e nt l y.
It is always preferable to have paint repairs carried out by a CITROËN dealer or a qualified
workshop.
7
Practical information
Page 224 of 324
222
Disconnecting the battery
In order to maintain an adequate state
of charge for starting the engine, it is
recommended that the battery be disconnected
if the vehicle is taken out of ser vice for a long
period.
Before disconnecting the battery:
F
c
lose the windows and the doors before
disconnecting the battery,
F
s
witch off all electrical consumers (audio
system, wipers, lighting, etc.).
F
s
witch off the ignition and wait for
four
minutes.
At the battery, detach the (+) terminal only.
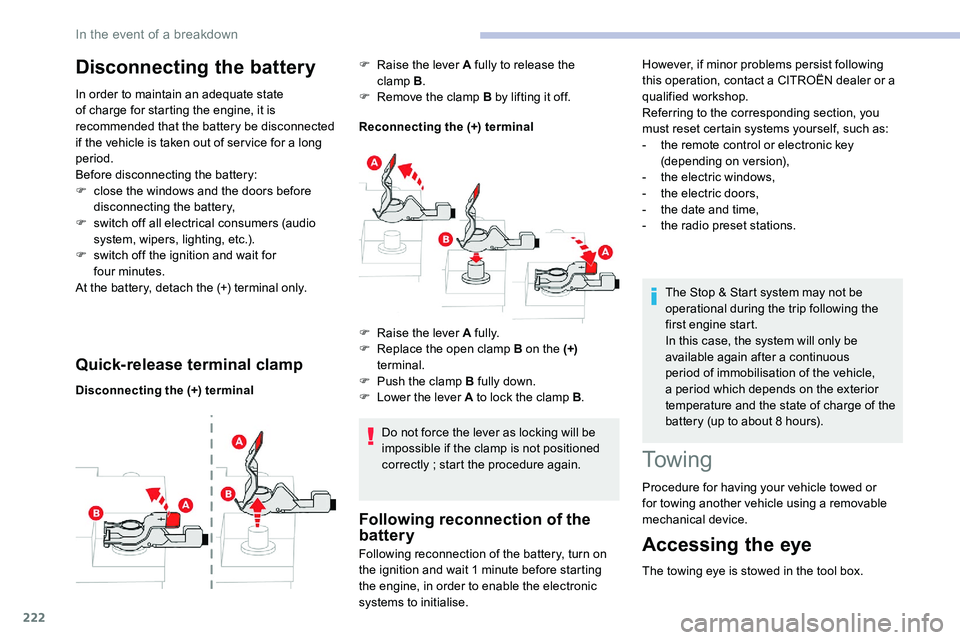
Quick-release terminal clamp
Disconnecting the (+) terminal Reconnecting the (+) terminal
Do not force the lever as locking will be
impossible if the clamp is not positioned
correctly ; start the procedure again.
Following reconnection of the
battery
F Raise the lever A fully to release the clamp B.
F
R
emove the clamp B by lifting it off.
Following reconnection of the battery, turn on
the ignition and wait 1
minute before starting
the engine, in order to enable the electronic
systems to initialise. The Stop & Start system may not be
operational during the trip following the
first engine start.
In this case, the system will only be
available again after a continuous
period of immobilisation of the vehicle,
a period which depends on the exterior
temperature and the state of charge of the
battery (up to about 8 hours).
To w i n g
Procedure for having your vehicle towed or
for towing another vehicle using a removable
mechanical device.
Accessing the eye
The towing eye is stowed in the tool box.
F
Ra
ise the lever A fully.
F
R
eplace the open clamp B on the (+)
terminal.
F
P
ush the clamp B fully down.
F
L
ower the lever A to lock the clamp B
.However, if minor problems persist following
this operation, contact a CITROËN dealer or a
qualified workshop.
Referring to the corresponding section, you
must reset certain systems yourself, such as:
-
t
he remote control or electronic key
(depending on version),
-
t
he electric windows,
-
t
he electric doors,
-
t
he date and time,
-
t
he radio preset stations.
In the event of a breakdown
Page 243 of 324
9
CD player
Insert circular compact discs only.
Some anti-pirating systems, on original discs
or CDs copied using a personal recorder, may
cause faults which are no reflection on the
quality of the original player.
Insert a CD in the player, play begins
automatically.External CD players connected via the
USB port are not recognised by the
system. To play a disc which has already
been inserted, press the SOURCE
button several times in succession
and select " CD".
Press one of the buttons to select a
track on the CD.
Press the LIST button to display the
list of tracks on the CD.
Press and hold one of these buttons
for fast for ward or rewind.
Playing an MP3 compilation
Insert an MP3 compilation in the CD player.
The audio equipment searches for all of the
music tracks, which may take anything between
a few seconds and several tens of seconds,
before play begins.
On a single disc, the CD player can
read up to 255 MP3 files spread over 8
directory levels.
However, it is advisable to keep to a limit
of two levels to reduce the access time
before the CD is played.
The folder structure is not obser ved during
playback.
All of the files are displayed on a single
level. To play a disc which has already
been inserted, press the SOURCE
button several times in succession
and select " CD".
Press one of the buttons to select a
folder on the CD.
Press one of the buttons to select a
track on the CD. Press the LIST
button to display
the list of directories of the MP3
compilation.
Press and hold one of these buttons
for fast for ward or rewind.
Bluetooth® audio streaming
Streaming allows music files on the telephone
to be played via the vehicle's loudspeakers.
Connect the telephone.
(Refer to the " Pairing a Bluetooth®
telephone " section).
Activate the streaming source by
pressing SOURCE.
In certain cases, play of the audio
files must be initiated from the
keypad.
Audio files can be selected using the buttons
on the audio system control panel and the
steering mounted controls. The contextual
information can be displayed in the screen.
If the telephone supports the function. The
audio quality depends on the quality of
transmission by the telephone.
.
Bluetooth® audio system
Page 247 of 324
13
With certain telephones connected by
Bluetooth you can send a contact to the
directory of the audio system.
Contacts imported in this way are saved
in a permanent directory visible to all,
whatever the telephone connected.
The menu for the directory is not
accessible if it is empty.
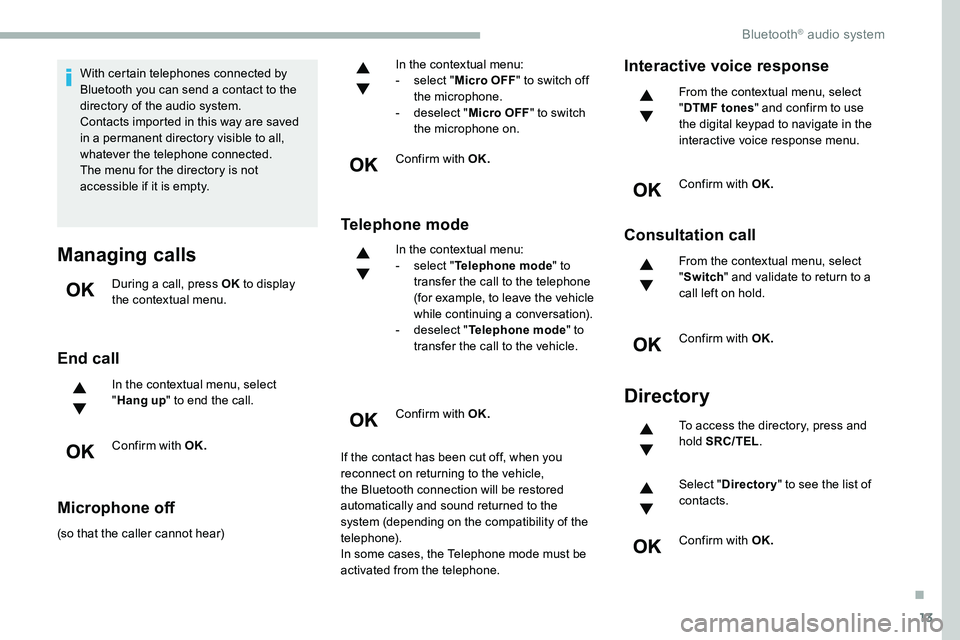
Managing calls
During a call, press OK to display
the contextual menu.
End call
In the contextual menu, select
" Hang up " to end the call.
Confirm with OK.
Microphone off
(so that the caller cannot hear) In the contextual menu:
-
s
elect "
Micro OFF " to switch off
the microphone.
-
d
eselect "
Micro OFF " to switch
the microphone on.
Confirm with OK.
Telephone mode
In the contextual menu:
- s elect " Telephone mode " to
transfer the call to the telephone
(for example, to leave the vehicle
while continuing a conversation).
-
d
eselect " Telephone mode " to
transfer the call to the vehicle.
Confirm with OK.
If the contact has been cut off, when you
reconnect on returning to the vehicle,
the Bluetooth connection will be restored
automatically and sound returned to the
system (depending on the compatibility of the
telephone).
In some cases, the Telephone mode must be
activated from the telephone.
Interactive voice response
From the contextual menu, select
" DTMF tones " and confirm to use
the digital keypad to navigate in the
interactive voice response menu.
Confirm with OK.
Consultation call
From the contextual menu, select
" Switch " and validate to return to a
call left on hold.
Confirm with OK.
Directory
To access the directory, press and
hold SRC/TEL .
Select " Directory " to see the list of
contacts.
Confirm with OK.
.
Bluetooth® audio system
Page 257 of 324
5
Applications
Viewing photos
Insert a USB memory stick in the USB socket.To protect the system, do not use a USB
hub.
The system can read folders and image files in
the formats:
.tiff ; .gif ; .jpg/jpeg ; .bmp ; .png.
Press Applications to display the
primary page.
Press " Photos ".
Select a folder.
Select an image to view.
Press this button to display the
details of the photo.
Press the back arrow to go back a
level.
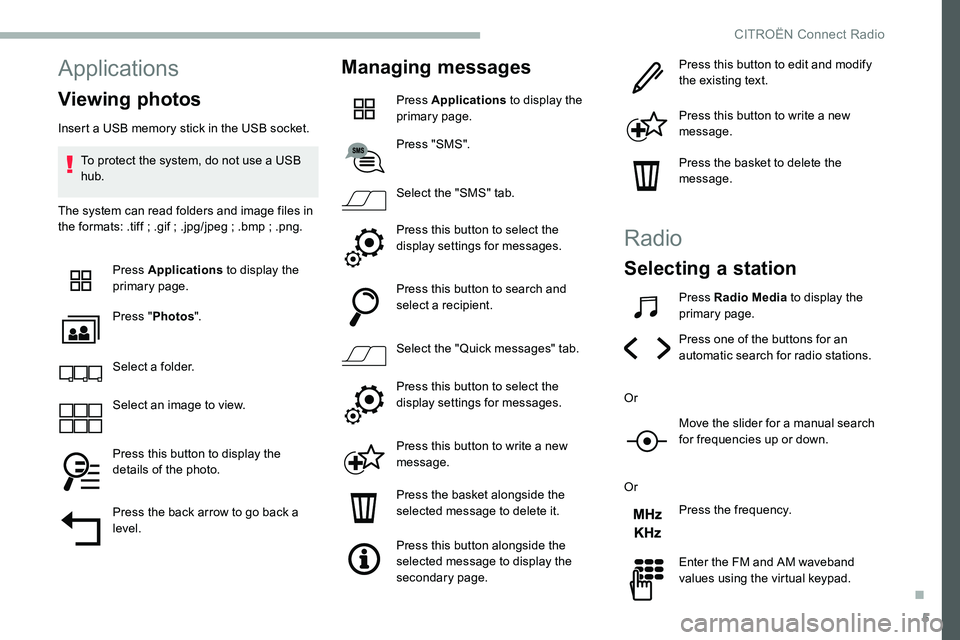
Managing messages
Press Applications to display the
primary page.
Press "SMS".
Select the "SMS" tab.
Press this button to select the
display settings for messages.
Press this button to search and
select a recipient.
Select the "Quick messages" tab.
Press this button to select the
display settings for messages.
Press this button to write a new
message.
Press the basket alongside the
selected message to delete it.
Press this button alongside the
selected message to display the
secondary page. Press this button to edit and modify
the existing text.
Press this button to write a new
message.
Press the basket to delete the
message.
Radio
Selecting a station
Press Radio Media
to display the
primary page.
Press one of the buttons for an
automatic search for radio stations.
Or Move the slider for a manual search
for frequencies up or down.
Or Press the frequency.
Enter the FM and AM waveband
values using the virtual keypad.
.
CITROËN Connect Radio
Page 265 of 324
13
The system offers to connect the telephone
with 3 profiles:
- "Telephone " (hands-free kit, telephone
only),
-
"Audio streaming " (streaming: wireless
playing of the audio files on the telephone),
-
"Internet data ".
Select one or more profiles.
Press " OK" to confirm.
The ability of the system to connect to just
one profile depends on the telephone.
All three profiles may connect by default.
The services available depend on
the network, the SIM card and the
compatibility of the Bluetooth devices
used. Check the user guide for the
telephone and with the service provider
for the available services.
The profiles compatible with the system
are: HFP, OPP, PBAP, A 2DP, AVRCP,
MAP and PAN.
Go to the Brand's website for more information
(compatibility, additional help, etc.).Managing paired telephones
This function allows the connection or
disconnection of a device as well as the
deletion of a pairing.
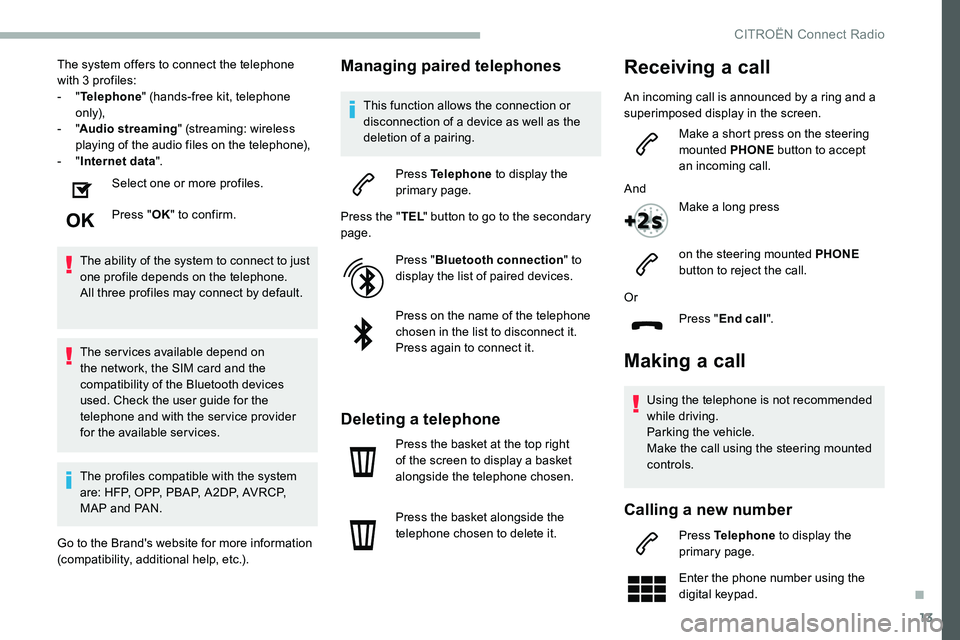
Press Telephone to display the
primary page.
Press the " TEL" button to go to the secondary
page.
Press "Bluetooth connection " to
display the list of paired devices.
Press on the name of the telephone
chosen in the list to disconnect it.
Press again to connect it.
Deleting a telephone
Press the basket at the top right
of the screen to display a basket
alongside the telephone chosen.
Press the basket alongside the
telephone chosen to delete it.
Making a call
Using the telephone is not recommended
while driving.
Parking the vehicle.
Make the call using the steering mounted
controls.
Calling a new number
Press Telephone to display the
primary page.
Enter the phone number using the
digital keypad.
Or
Press "End call".
Receiving a call
An incoming call is announced by a ring and a
superimposed display in the screen.
Make a short press on the steering
mounted PHONE button to accept
an incoming call.
And Make a long press
on the steering mounted PHONE
button to reject the call.
.
CITROËN Connect Radio