key Citroen DS3 2014 1.G Owner's Guide
[x] Cancel search | Manufacturer: CITROEN, Model Year: 2014, Model line: DS3, Model: Citroen DS3 2014 1.GPages: 376, PDF Size: 12.55 MB
Page 169 of 376
167
DS3_en_Chap08_securite_ed01-2014
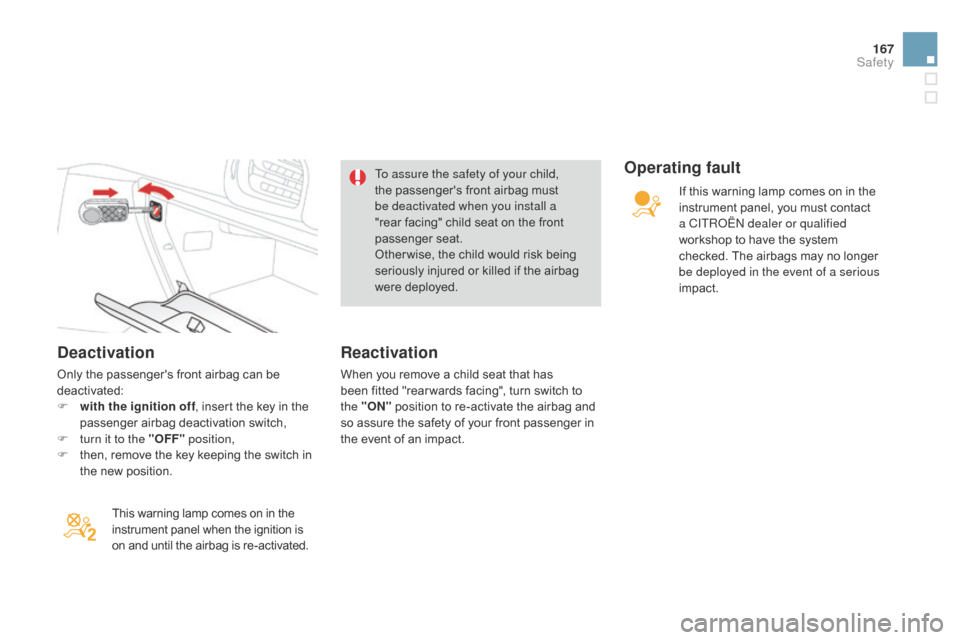
deactivation
Only the passenger's front airbag can be deactivated:
F
w
ith the ignition off ,
insert the key in the
p
assenger airbag deactivation switch,
F
t
urn it to the "OFF" position,
F
t
hen, remove the key keeping the switch in
t
he new position.
This
warning lamp comes on in the
i
nstrument panel when the ignition is
o
n and until the airbag is re-activated.To assure the safety of your child,
the
passenger's front airbag must
b
e deactivated when you install a
"rear facing" child seat on the front
p
assenger
sea
t.
Other wise, the child would risk being
s
eriously injured or killed if the airbag
w
ere deployed.
Reactivation
When you remove a child seat that has b
een fitted "rear wards facing", turn switch to
t
he "ON"
position to re-activate the airbag and
s
o assure the safety of your front passenger in
t
he event of an impact.
Operating fault
If this warning lamp comes on in the instrument panel, you must contact
a C
ITR
oË
N dealer or qualified
workshop
to have the system
c
hecked. The airbags may no longer
b
e deployed in the event of a serious
impact.
Safety
Page 192 of 376
DS3_en_Chap10_info-pratiques_ed01-2014
Fuel tankFuel tank capacity: approximately 50 litres (petrol) or 46 litres (diesel) or 33 litres (LPG); (de pending on version: approximately 30 litres
(petrol or d iesel)).
Low fuel level
Filling
A label affixed to the inside of the flap reminds you of the type of fuel to be used depending on
y
our
eng
ine.
Additions
of fuel must be of at least 7 litres, in
o
rder to be registered by the fuel gauge.The
key cannot be removed from the
l
ock until the cap is refitted.
Opening
the filler cap may create a
n
oise caused by an inrush of air. This
v
acuum is entirely normal, resulting
f
rom the sealing of the fuel system.
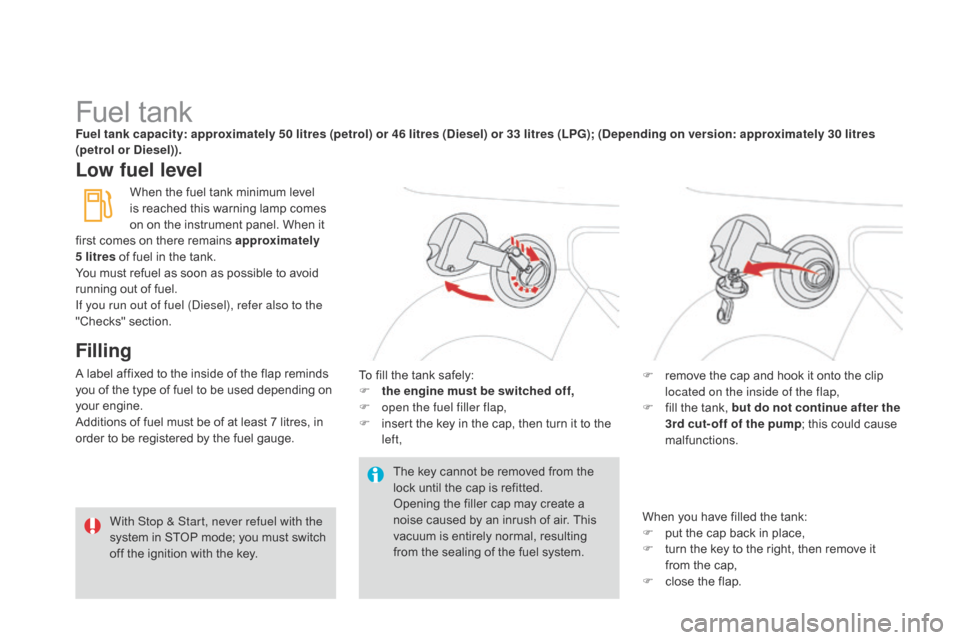
To
fill the tank safely:
F
t
he engine must be switched off,
F
o
pen the fuel filler flap,
F
i
nsert the key in the cap, then turn it to the
l
eft,F
r emove the cap and hook it onto the clip
l
ocated on the inside of the flap,
F
f
ill the tank, but do not continue after the
3rd cut- off of the pump ;
this could cause
m
alfunctions.
When
you have filled the tank:
F
p
ut the cap back in place,
F
t
urn the key to the right, then remove it
f
rom the cap,
F
c
lose the flap.
When
the fuel tank minimum level
i
s reached this warning lamp comes
o
n on the instrument panel. When it
f
irst comes on there remains approximately
5 litres of fuel in the tank.
You must refuel as soon as possible to avoid
r
unning out of fuel.
If you run out of fuel (Diesel), refer also to the
"Checks"
s
ection.
With Stop & Start, never refuel with the
system in STOP mode; you must switch
o
ff the ignition with the key.
Page 202 of 376
DS3_en_Chap10_info-pratiques_ed01-2014
Never store bottles of adblue® in
your vehicle.
a
d
blu
e
® freezes at about -11°C and d
eteriorates above 25°C. It is recommended
t
hat bottles be stored in a cool area and
protected
from direct sunlight.
Under these conditions, the additive can be
kept
for
at least a year.
If the additive has frozen, can be used once it
has
completely thawed out.
Recommendations on storage
Before topping-up, ensure that the vehicle is parked on a flat and level sur face.
In wintry conditions, ensure that the
temperature
of the vehicle is above -11°C.
O
ther wise, by freezing, the AdBlue
® cannot
be
poured
into
its
tank.
Park
your
vehicle in a
w
armer
area
for
a
few
hours
to
allow the top-up
t
o
be
carried
out.
Procedure
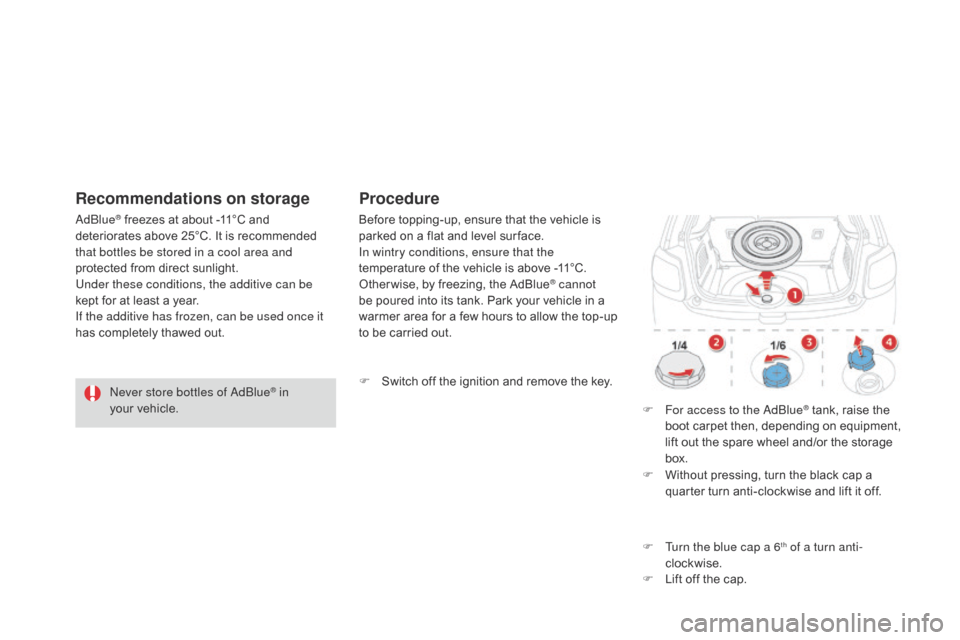
F Switch off the ignition and remove the key.
F
F
or access to the a
dbl
ue
® tank, raise the b
oot
carpet
then,
depending on equipment,
l
ift
out
the
spare
wheel
and/or the storage
b
ox.
F
W
ithout
pressing,
turn
the
black cap a
q
uarter
turn
anti-clockwise and lift it off.
F
T
urn the blue cap a 6
th of a turn anti-
clockwise.
F
L
ift
off
the
cap.
Page 203 of 376
201
DS3_en_Chap10_info-pratiques_ed01-2014
Important: if your vehicle's a
dblu e® tank is completely empty - w
hich
is
confirmed by the alert
m
essages and the impossibility of
s
tarting
the engine, you must add at
l
east
3.8 litres (so two 1.89 litre bottles).If any additive is split or splashed, wash
immediately
with cold water or wipe
w
ith a damp cloth.
If the additive has crystallised, clean it
off using a sponge and hot water.Important:
i
n the event of a top-up after
a breakdown because of a lack of
additive , signalled by the message "Top
u
p emissions additive: Starting prevented",
y
ou must wait around 5 minutes before
s
witching
o
n
t
he
i
gnition,
w
ithout opening
the driver's door, locking the vehicle
or introducing the key into the ignition
switch .
Switch on the ignition, then, after
1
0 seconds, start the engine.
F
o
b
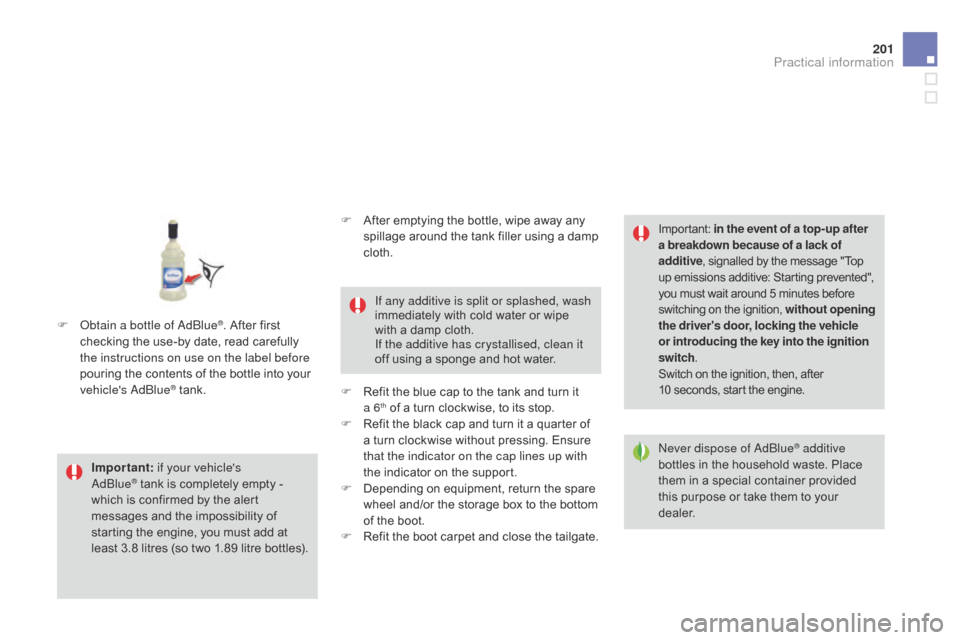
tain a bottle of a
dbl
ue
®. After first c
hecking
the
use-by
date,
read carefully
t
he instructions on use on the label before
pouring
the
contents
of
the bottle into your
v
ehicle's
a
d
blu
e
® tank. N ever dispose of a
dbl
ue
® additive
bottles
in
the
household
waste. Place
t
hem
in
a
special
container provided
t
his
purpose
or
take
them
to your
d
ealer.
F
A
fter
emptying
the
bottle,
wipe
away
any
s
pillage
around
the
tank
filler
using
a
damp
c
loth.
F
R
efit
the
blue
cap
to
the
tank
and
turn
it
a
6
th of a turn clockwise, to its stop.
F
R
efit the black cap and turn it a quarter of
a
turn clockwise without pressing. Ensure
t
hat the indicator on the cap lines up with
the
indicator on the support.
F
D
epending on equipment, return the spare
w
heel and/or the storage box to the bottom
o
f
the boot.
F
R
efit the boot carpet and close the tailgate.
Practical information
Page 239 of 376
237
DS3_en_Chap10_info-pratiques_ed01-2014
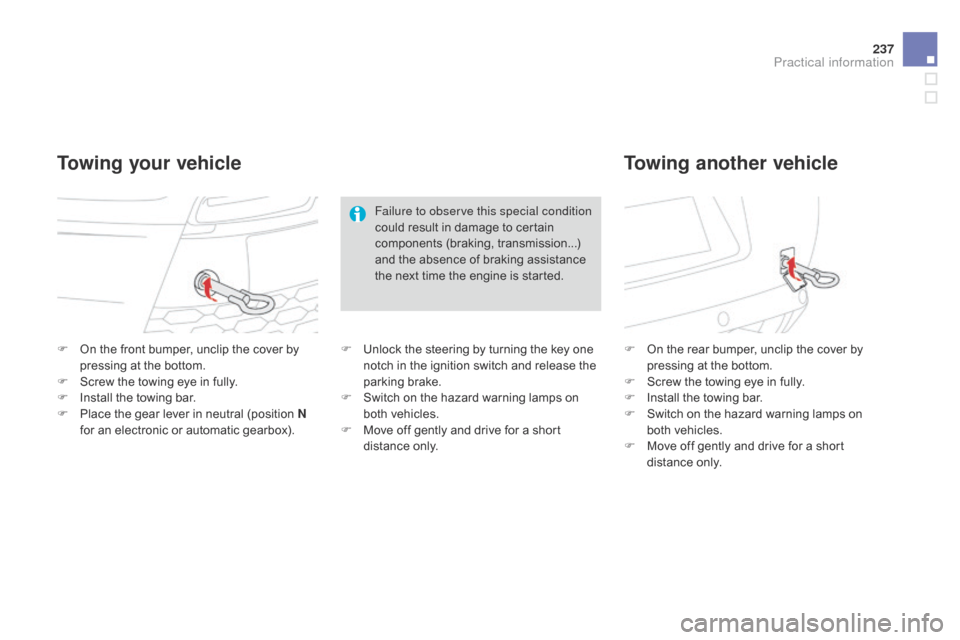
F On the front bumper, unclip the cover by p
ressing at the bottom.
F
S
crew the towing eye in fully.
F
I
nstall the towing bar.
F
P
lace the gear lever in neutral (position N
for
an electronic or automatic gearbox). F
O n the rear bumper, unclip the cover by p
ressing at the bottom.
F
S
crew the towing eye in fully.
F
I
nstall the towing bar.
F
S
witch on the hazard warning lamps on
b
oth vehicles.
F
M
ove off gently and drive for a short
d
istance
o
nly.
Towing your vehicleTowing another vehicle
Failure to observe this special condition
could
result in damage to certain
c
omponents (braking, transmission...)
a
nd the absence of braking assistance
t
he next time the engine is started.
F
U
nlock the steering by turning the key one
n
otch in the ignition switch and release the
par
king
b
rake.
F
S
witch on the hazard warning lamps on
b
oth vehicles.
F
M
ove off gently and drive for a short
d
istance
o
nly.
Practical information
Page 310 of 376
06
DS3_en_Chap13b_RT6-2-8_ed01-2014
USING THE TELEPHONE
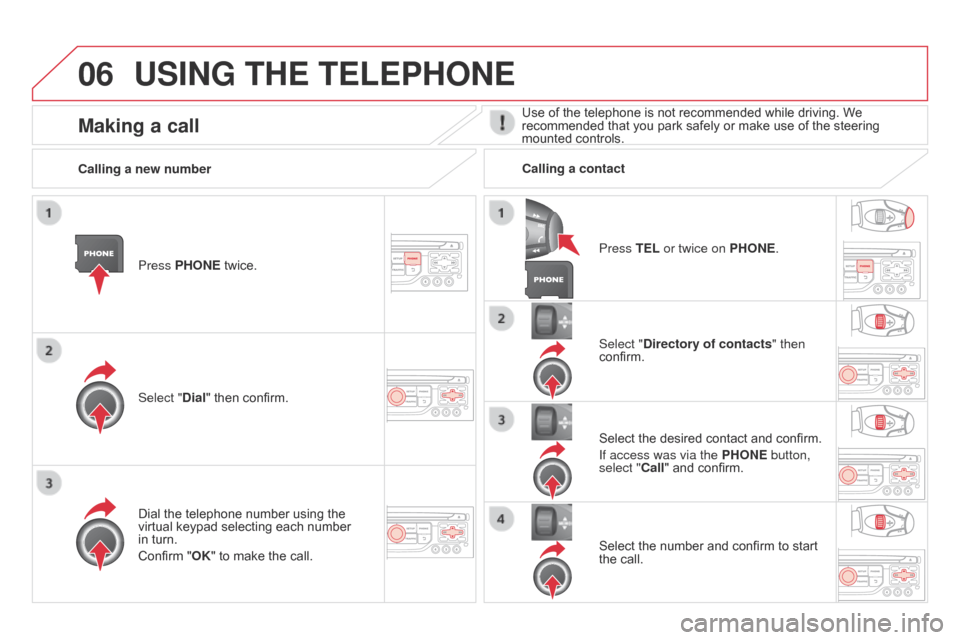
Press PHONE twice.
Select " d ial" then confirm. Select "
d irectory of contacts" then
confirm.
Dial
the telephone number using the
virtual
keypad selecting each number
in
turn.
Confirm
"OK" to make the call. Press TEL or twice on PHONE.
c
alling a new number
c
alling a contact
Select the desired contact and confirm.
If access was via the PHONE button,
select "
c all" and confirm.
Select
the number and confirm to start
the
call.
Making a callUse of the telephone is not recommended while driving. We recommended that you park safely or make use of the steering
mounted
controls.
Page 313 of 376
06
3 11
DS3_en_Chap13b_RT6-2-8_ed01-2014
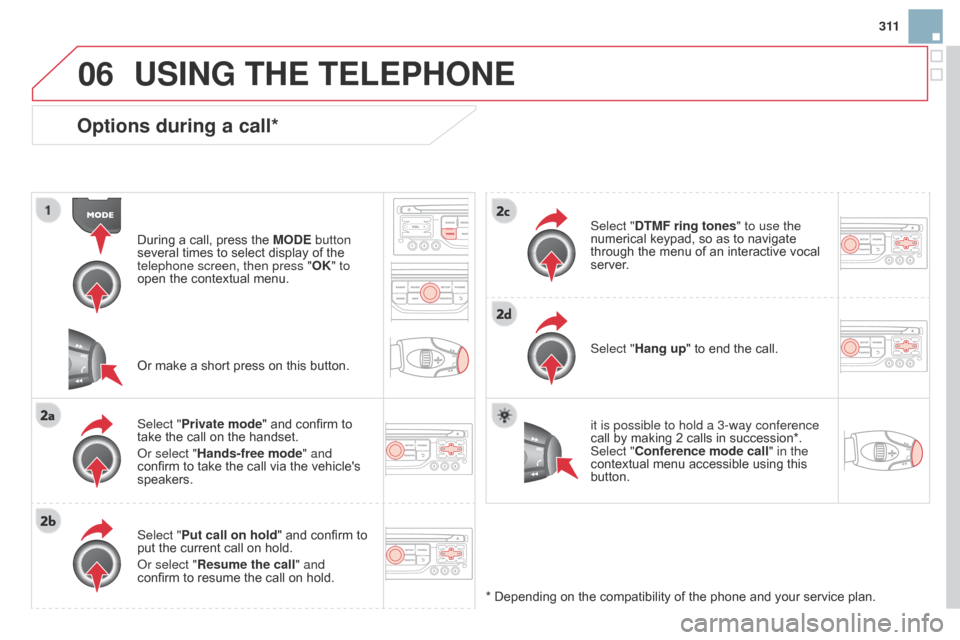
Options during a call*
During a call, press the MOd E button
several times to select display of the
telephone screen, then press "OK
" to
open
the contextual menu.
Select "Private mode"
and confirm to
take
the call on the handset.
o
r select "Hands-free mode" and
confirm
to take the call via the vehicle's
speakers.
Select "
Put call on hold "
and confirm to
put
the current call on hold.
o
r select "Resume the call" and
confirm
to resume the call on hold. Select "
d TMF ring tones
" to use the
numerical keypad, so as to navigate through
the menu of an interactive vocal
server
.
Select "Hang up"
to end the call.
*
Depending on the compatibility of the phone and your service plan.
it is possible to hold a 3-way conference
call
by making 2 calls in succession*.
Select "
c onference mode call" in the
contextual
menu accessible using this
button.
Or
make a short press on this button.
USING THE TELEPHONE
Page 317 of 376
07
315
DS3_en_Chap13b_RT6-2-8_ed01-2014
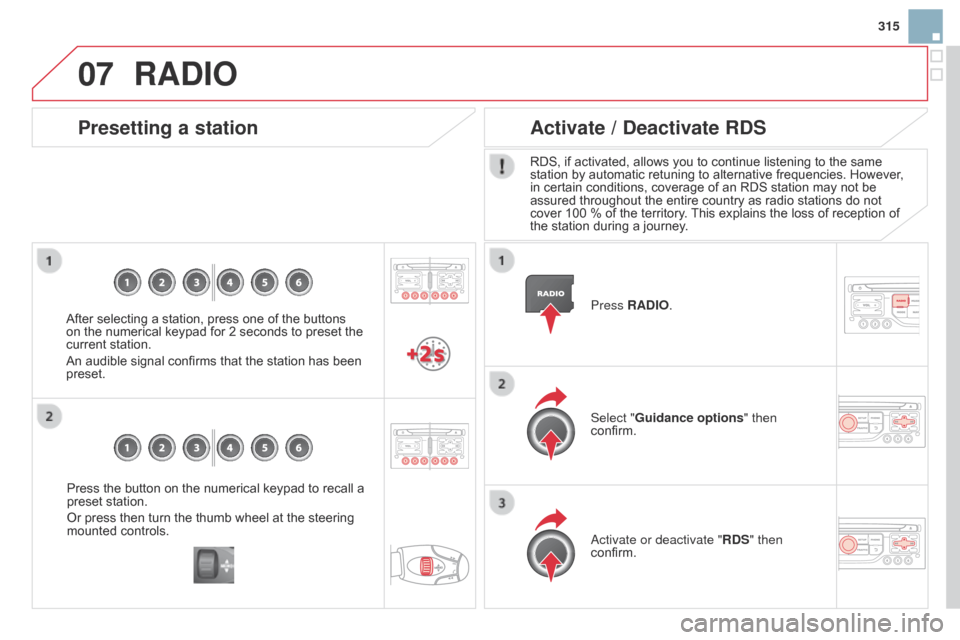
Press the button on the numerical keypad to recall a preset station.
Or
press then turn the thumb wheel at the steering
mounted
controls.
Presetting a station
After selecting a station, press one of the buttons on the numerical keypad for 2 seconds to preset the
current
station.
An
audible signal confirms that the station has been
preset. Press
RA d IO.
Activate / d
eactivate R d S
RDS, if activated, allows you to continue listening to the same station
by automatic retuning to alternative frequencies. However,
in
certain conditions, coverage of an RDS station may not be
assured
throughout the entire country as radio stations do not
cover
100 % of the territory.
This
explains the loss of reception of
the
station during a journey.
Select "Guidance options " then
confirm.
a
ctivate or deactivate "R d S" then
confirm.
RAdIO
Page 319 of 376
08
317
DS3_en_Chap13b_RT6-2-8_ed01-2014
cd, MP3 cd / USB player
The audio equipment will only play audio files with ".wma, .aac, .flac, .ogg and .mp3" file extensions and with a bit rate of between 32 Kbps
and
320 Kbps.
It
also supports VBR (Variable Bit Rate) mode.
No
other type of file (.mp4, .m3u...) can be played.
WMA
files must be of the standard wma 9 type.
The
sampling rates supported are greater than 32 KHz.
It
is advisable to restrict file names to 20 characters, without using of
special
characters (e.g.: " " ? ; ù) to avoid any playing and displaying
problems.
In
order to be able to play a recorded CDR or CDRW, when recording
it
is preferable to select the ISO 9660 level 1, 2 or Joliet standard.
If
the disc is recorded in another format (udf, ...), it may not be played
correctly
.
It
is recommended that the same recording standard is always used
for
an individual disc, with as low a speed as possible (4x maximum)
for
optimum sound quality.
In
the particular case of a multi-session CD, the Joliet standard is
recommended.Information and advice
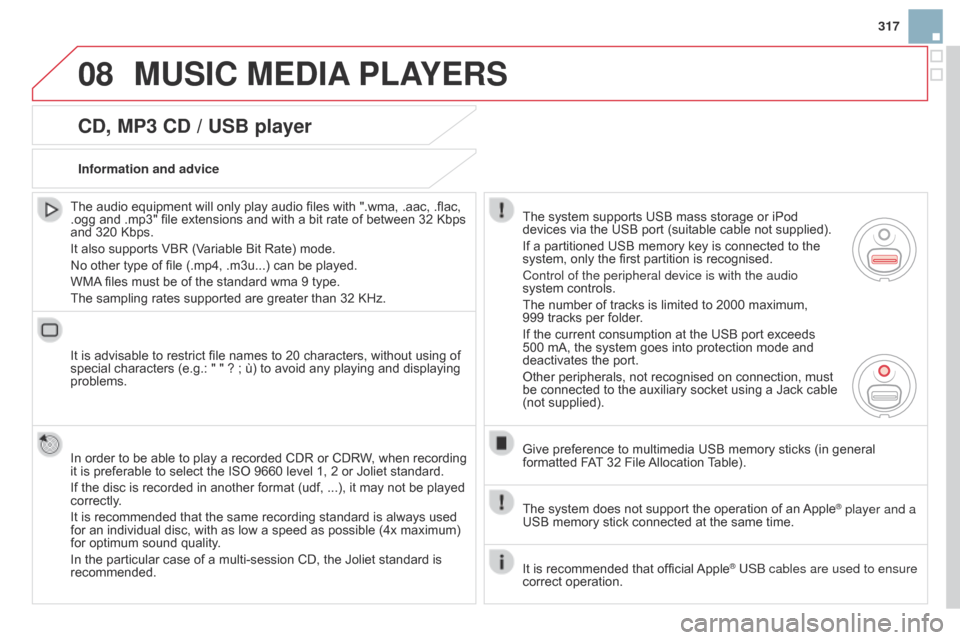
The
system supports USB mass storage or iPod
devices
via the USB port (suitable cable not supplied).
If
a partitioned USB memory key is connected to the
system,
only the first partition is recognised.
Control of the peripheral device is with the audio
system
controls.
The
number of tracks is limited to 2000 maximum,
999
tracks per folder.
If
the current consumption at the USB port exceeds
500
mA, the system goes into protection mode and
deactivates
the port.
Other
peripherals, not recognised on connection, must
be
connected to the auxiliary socket using a Jack cable
(not
supplied).
Give
preference to multimedia USB memory sticks (in general
formatted
FAT
32 File
Allocation
T
able).
The
system does not support the operation of an
Apple® player and a
USB
memory
stick
connected
at
the
same
time.
It
is
recommended
that
official
Apple® USb cables are used to ensure
correct
operation.
MUSIc MEdIA PLAYERS
Page 347 of 376
06
345
DS3_en_Chap13c_RD45_ed01-2014
BLUETOOTH FUNcTIONS
For safety reasons and because they require prolonged attention on the part of the driver, the operations for pairing of the Bluetooth
mobile
telephone with the Bluetooth hands-free system of your
audio
equipment must be carried out with the vehicle stationary
and
the ignition on.
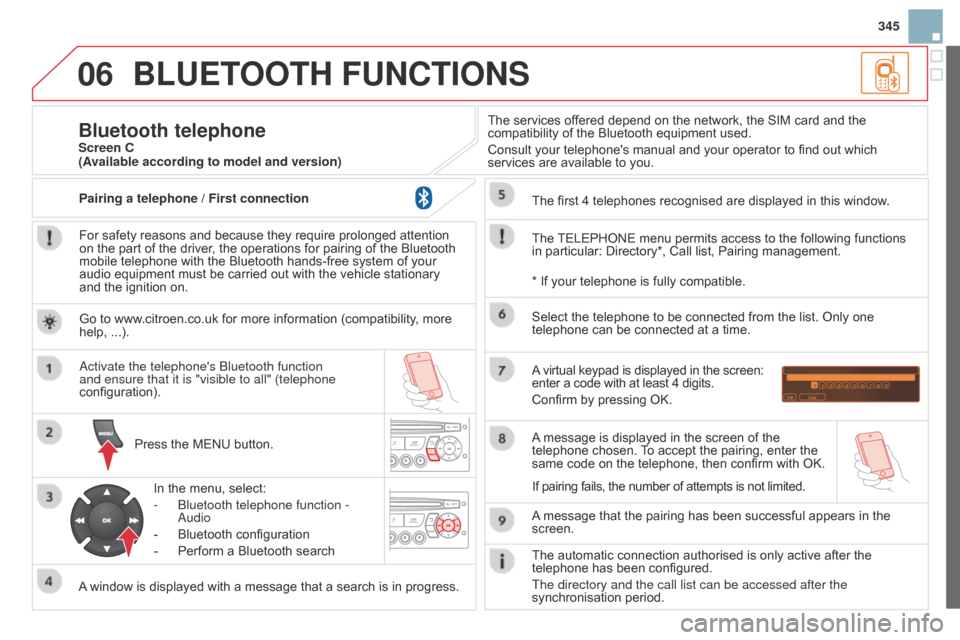
Press
the MENU button.
A
window is displayed with a message that a search is in progress.
a
ctivate the telephone's b luetooth function
and ensure that it is "visible to all" (telephone
configuration).
In
the menu, select:
-
b luetooth telephone function -
a
udio
-
Bluetooth
configuration
-
Perform
a Bluetooth searchThe
services offered depend on the network, the SIM card and the
compatibility
of the Bluetooth equipment used.
Consult your telephone's manual and your operator to find out which
services
are available to you.
Bluetooth telephoneScreen c
The
TELEPHONE
menu permits access to the following functions
in
particular: Directory*, Call list, Pairing management.
The
first 4 telephones recognised are displayed in this window.
A
virtual keypad is displayed in the screen:
enter
a code with at least 4 digits.
Confirm
by pressing OK.
A
message that the pairing has been successful appears in the
screen. Select
the telephone to be connected from the list. Only one
telephone
can be connected at a time.
A
message is displayed in the screen of the
telephone
chosen.
T
o accept the pairing, enter the
same
code on the telephone, then confirm with OK.
The
automatic connection authorised is only active after the
telephone
has been configured.
The directory and the call list can be accessed after the
synchronisation
period.
(Available according to model and version)
*
If your telephone is fully compatible.
If
pairing fails, the number of attempts is not limited.
Go
to www.citroen.co.uk for more information (compatibility, more
help,
...).
Pairing a telephone / First connection