inflation pressure CITROEN DS3 2018 Handbook (in English)
[x] Cancel search | Manufacturer: CITROEN, Model Year: 2018, Model line: DS3, Model: CITROEN DS3 2018Pages: 248, PDF Size: 8.79 MB
Page 20 of 248
18
Warning/indicator lampStateCause Action/Observations
Power steering Fixed. The power steering has a
fault. Drive carefully at reduced speed.Have it checked in the dealer network or by
a
qualified workshop.
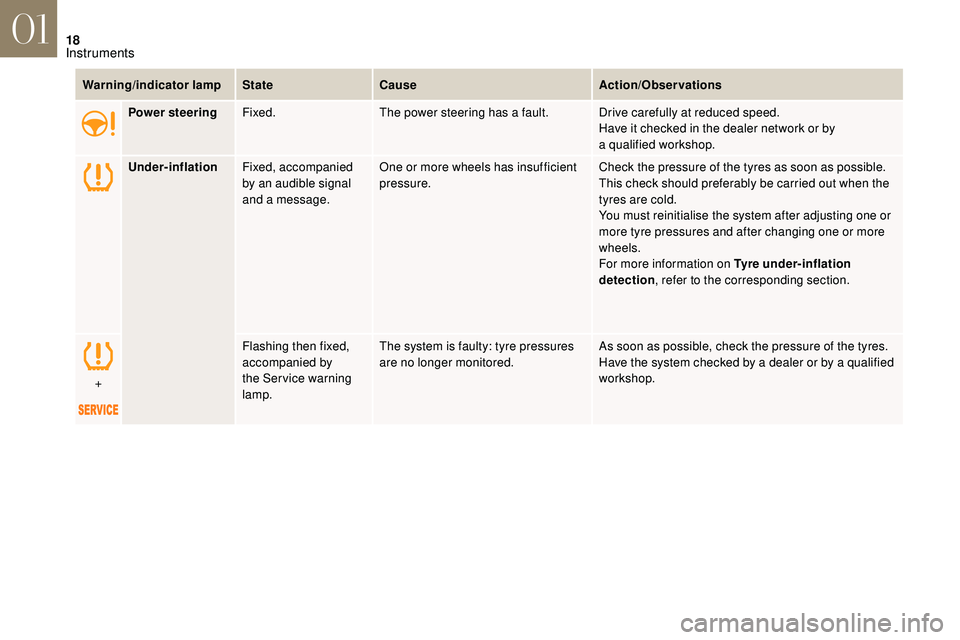
Under-inflation Fixed, accompanied
by an audible signal
and a
message.One or more wheels has insufficient
pressure.
Check the pressure of the tyres as soon as possible.
This check should preferably be carried out when the
tyres are cold.
You must reinitialise the system after adjusting one or
more tyre pressures and after changing one or more
wheels.
For more information on Tyre under-inflation
detection
, refer to the corresponding section.
+ Flashing then fixed,
accompanied by
the Ser vice warning
lamp.The system is faulty: tyre pressures
are no longer monitored.
As soon as possible, check the pressure of the tyres.
Have the system checked by a
dealer or by a qualified
workshop.
01
Instruments
Page 38 of 248
36
ButtonCorresponding function Comments
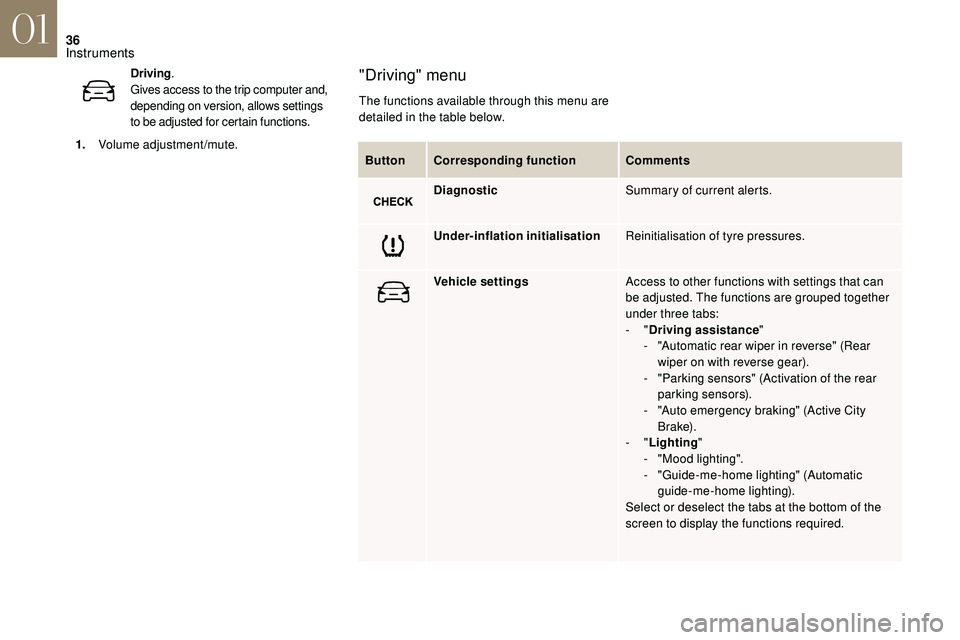
Diagnostic Summary of current alerts.
Under-inflation initialisation Reinitialisation of tyre pressures.
Vehicle settings Access to other functions with settings that can
be adjusted. The functions are grouped together
under three tabs:
-
"Driving assistance "
-
"
Automatic rear wiper in reverse" (Rear
wiper on with reverse gear).
-
"
Parking sensors" (Activation of the rear
parking sensors).
-
"
Auto emergency braking" (Active City
B r a ke).
-
"Lighting "
-
"
Mood lighting".
-
"
Guide-me-home lighting" (Automatic
guide-me-home lighting).
Select or deselect the tabs at the bottom of the
screen to display the functions required.
"Driving" menu
The functions available through this menu are
detailed in the table below.
Driving
.
Gives access to the trip computer and,
depending on version, allows settings
to be adjusted for certain functions.
1. Volume adjustment/mute.
01
Instruments
Page 136 of 248
134
If the engine is in STOP mode, it restarts
immediately.
The Stop & Start system is reactivated
automatically every time the ignition is switched
on.
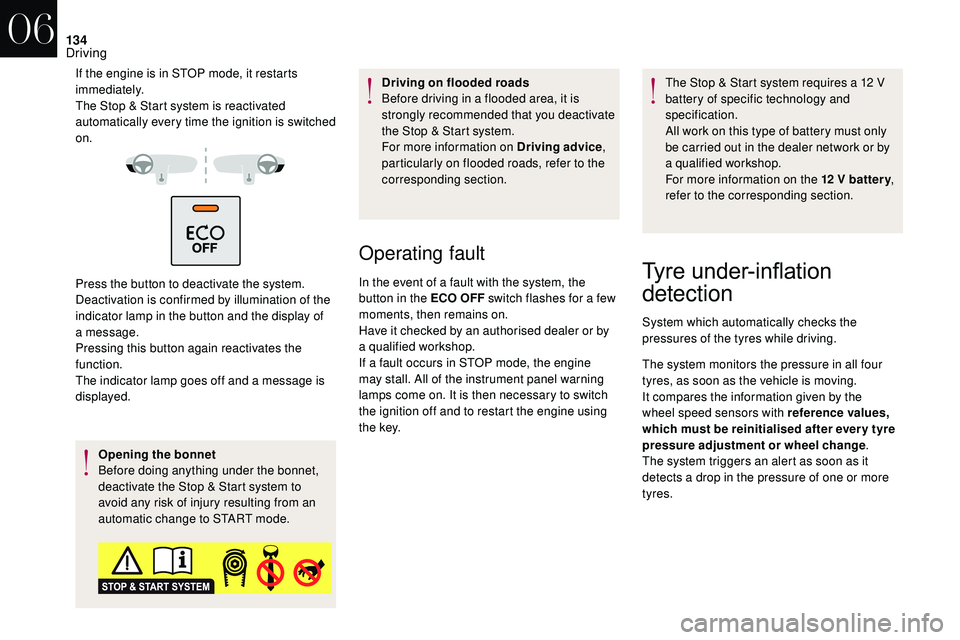
Press the button to deactivate the system.
Deactivation is confirmed by illumination of the
indicator lamp in the button and the display of
a
message.
Pressing this button again reactivates the
function.
The indicator lamp goes off and a
message is
displayed.
Opening the bonnet
Before doing anything under the bonnet,
deactivate the Stop & Start system to
avoid any risk of injury resulting from an
automatic change to START mode. Driving on flooded roads
Before driving in a
flooded area, it is
strongly recommended that you deactivate
the Stop & Start system.
For more information on Driving advice ,
particularly on flooded roads, refer to the
corresponding section.
Operating fault
In the event of a fault with the system, the
b utton in the ECO OFF switch flashes for a few
moments, then remains on.
Have it checked by an authorised dealer or by
a
qualified workshop.
If a
fault occurs in STOP mode, the engine
may stall. All of the instrument panel warning
lamps come on. It is then necessary to switch
the ignition off and to restart the engine using
t h e key. The Stop & Start system requires a
12 V
battery of specific technology and
specification.
All work on this type of battery must only
be carried out in the dealer network or by
a
qualified workshop.
For more information on the 12 V batter y
,
refer to the corresponding section.Tyre under-inflation
d
etection
System which automatically checks the
pressures of the tyres while driving.
The system monitors the pressure in all four
tyres, as soon as the vehicle is moving.
It compares the information given by the
wheel speed sensors with reference values,
which must be reinitialised after ever y tyre
pressure adjustment or wheel change .
The system triggers an alert as soon as it
detects a
drop in the pressure of one or more
tyres.
06
Driving
Page 137 of 248
135
The tyre under-inflation detection system
does not replace the need for vigilance on
the part of the driver.
This system still requires you to check the
tyre inflation pressure (including the spare
wheel) every month as well as before
a
long journey.
Driving with under-inflated tyres impairs
handling, extends braking distances and
causes premature tyre wear, particularly
in adverse conditions (heavy loads, high
speeds, long journeys).
Driving with under-inflated tyres
increases fuel consumption.
The tyre pressure specifications for your
vehicle can be found on the tyre pressure
label.
For more information on the
Identification markings , refer to the
corresponding section. Tyre pressures should be checked when
the tyres are "cold" (vehicle stopped for
1
hour or after a journey of less than
6
miles (10 km) at moderate speeds).
Other wise (when hot), add 0.3
bar to the
pressures shown on the label.
Under-inflation alert
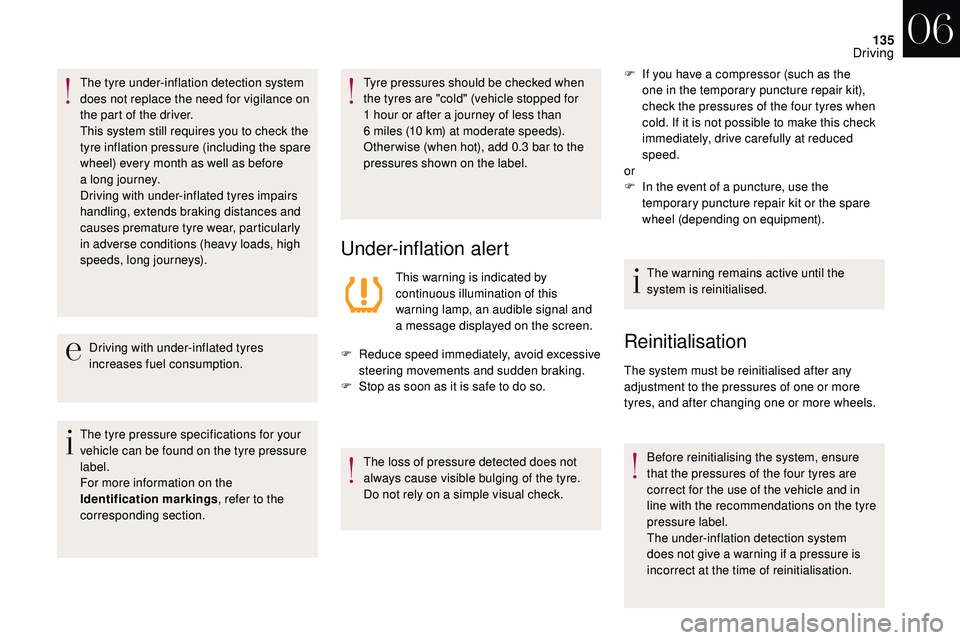
This warning is indicated by
continuous illumination of this
warning lamp, an audible signal and
a
message displayed on the screen.
F
R
educe speed immediately, avoid excessive
steering movements and sudden braking.
F
S
top as soon as it is safe to do so.
The loss of pressure detected does not
always cause visible bulging of the tyre.
Do not rely on a
simple visual check. F
I
f you have a compressor (such as the
one in the temporary puncture repair kit),
check the pressures of the four tyres when
cold. If it is not possible to make this check
immediately, drive carefully at reduced
speed.
or
F In the event of a puncture, use the
temporary puncture repair kit or the spare
wheel (depending on equipment).
The warning remains active until the
system is reinitialised.
Reinitialisation
The system must be reinitialised after any
adjustment to the pressures of one or more
tyres, and after changing one or more wheels.
Before reinitialising the system, ensure
that the pressures of the four tyres are
correct for the use of the vehicle and in
line with the recommendations on the tyre
pressure label.
The under-inflation detection system
does not give a
warning if a pressure is
incorrect at the time of reinitialisation.
06
Driving
Page 138 of 248
136
Snow chains
The system does not have to be
reinitialised after fitting or removing snow
chains.
The system must be reinitialised with the
ignition on and the vehicle stationary, via the
vehicle's configuration menu.
Monochrome screen A
F Press the MENU button to access the main
menu.
F
P
ress the " 5" or " 6" button to select
the Vehic config menu, then confirm by
pressing the OK button.
F
P
ress the " 5" or " 6" button to select the
" Tyre inflation " menu, then confirm by
pressing the OK button.
A message is displayed to confirm the request.
F
C
onfirm by pressing the OK button.
Monochrome screen C
F Press the "5" or " 6" button to select the
" Define the vehicle parameters " menu,
then confirm by pressing the OK button.
F
P
ress the " 5" or " 6" button to select
the " Tyre pressures " menu, then the
" Reinitialisation " menu, then confirm
by pressing the OK button. A message
confirms the reinitialisation.
Touch screen tablet
F Press the MENU button.
F Sel ect the " Driving" menu.
F
I
n the secondary page, select "
Under-
inflation initialisation ".
A message is displayed to confirm the
reinitialisation request.
F
Sel
ect "Ye s" or " No", then confirm.
A message confirms the reinitialisation.
The new pressure parameters registered are
considered reference values by the system.
The under-inflation alert can only be relied
on if the reinitialisation of the system has
been done with the pressures in the four
tyres correctly adjusted.
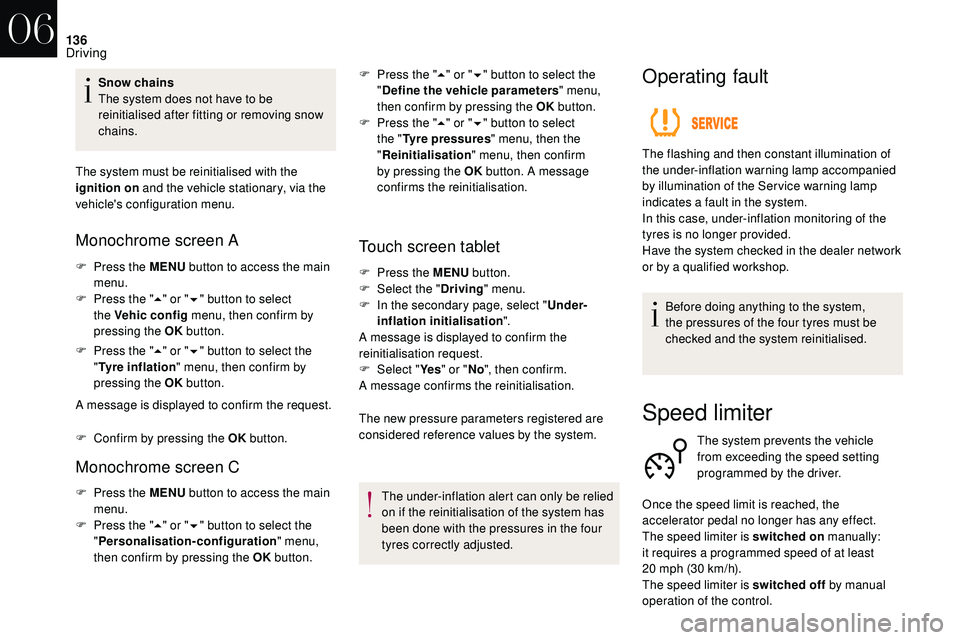
Operating fault
Before doing anything to the system,
the pressures of the four tyres must be
checked and the system reinitialised.
F
P
ress the MENU button to access the main
menu.
F
P
ress the " 5" or " 6" button to select the
" Personalisation-configuration " menu,
then confirm by pressing the OK button. The flashing and then constant illumination of
the under-inflation warning lamp accompanied
by illumination of the Ser vice warning lamp
indicates a
fault in the system.
In this case, under-inflation monitoring of the
tyres is no longer provided.
Have the system checked in the dealer network
or by a qualified workshop.
Speed limiter
The system prevents the vehicle
from exceeding the speed setting
programmed by the driver.
Once the speed limit is reached, the
accelerator pedal no longer has any effect.
The speed limiter is switched on manually:
it requires a
programmed speed of at least
20
mph (30 km/h).
The speed limiter is switched off by manual
operation of the control.
06
Driving
Page 169 of 248
167
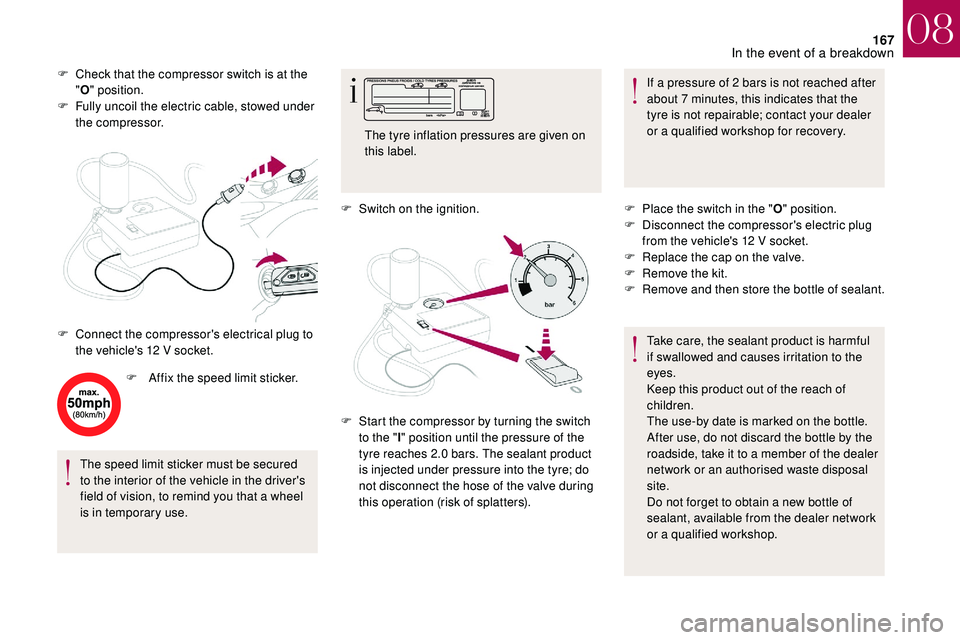
F Check that the compressor switch is at the "O " position.
F
F
ully uncoil the electric cable, stowed under
the compressor.
F
A
ffix the speed limit sticker.
The speed limit sticker must be secured
to the interior of the vehicle in the driver's
field of vision, to remind you that a
wheel
is in temporary use. F
S
witch on the ignition.If a
pressure of 2 bars is not reached after
about 7
minutes, this indicates that the
tyre is not repairable; contact your dealer
or a
qualified workshop for recovery.
F
C
onnect the compressor's electrical plug to
the vehicle's 12
V socket. The tyre inflation pressures are given on
this label.
F
S
tart the compressor by turning the switch
to the " l" position until the pressure of the
tyre reaches 2.0
bars. The sealant product
is injected under pressure into the tyre; do
not disconnect the hose of the valve during
this operation (risk of splatters). F
P
lace the switch in the "O" position.
F
D
isconnect the compressor's electric plug
from the vehicle's 12
V socket.
F
R
eplace the cap on the valve.
F
R
emove the kit.
F
R
emove and then store the bottle of sealant.
Take care, the sealant product is harmful
if swallowed and causes irritation to the
eyes.
Keep this product out of the reach of
children.
The use-by date is marked on the bottle.
After use, do not discard the bottle by the
roadside, take it to a
member of the dealer
network or an authorised waste disposal
site.
Do not forget to obtain a
new bottle of
sealant, available from the dealer network
or a
qualified workshop.
08
In the event of a breakdown
Page 170 of 248
168
Do not exceed the speed of 50 mph
( 80 km/h) when driving with a tyre repaired
using this type of kit.
Checking/adjusting tyre
pressures
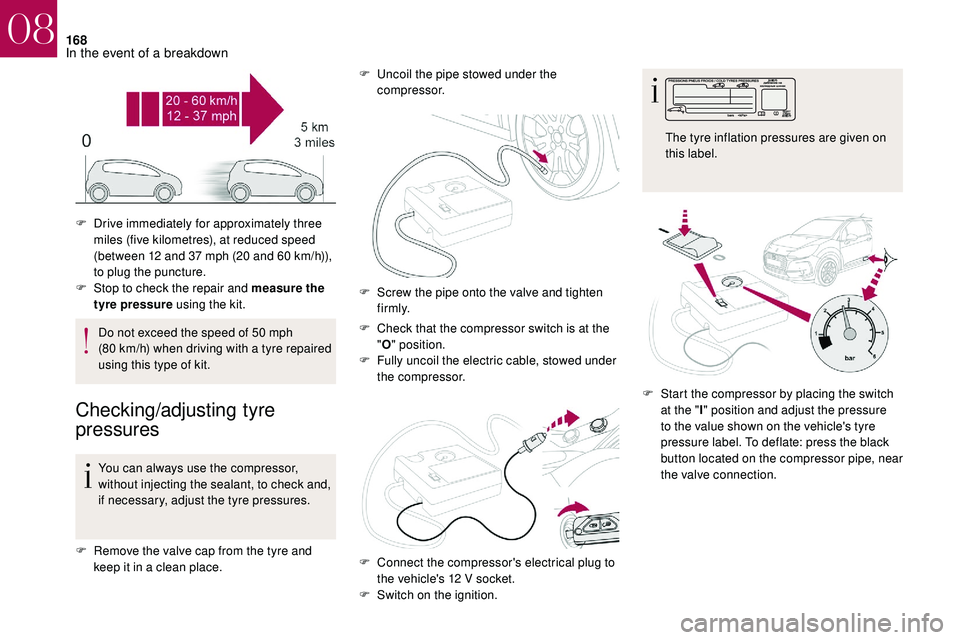
You can always use the compressor,
without injecting the sealant, to check and,
if necessary, adjust the tyre pressures.
F
R
emove the valve cap from the tyre and
keep it in a
clean place. F
C
heck that the compressor switch is at the
" O " position.
F
F
ully uncoil the electric cable, stowed under
the compressor.
F
D
rive immediately for approximately three
miles (five kilometres), at reduced speed
(between 12 and 37 mph (20 and 60 km/h)),
to plug the puncture.
F
S
top to check the repair and measure the
tyre pressure using the kit. F
U
ncoil the pipe stowed under the
compressor.
F
S
crew the pipe onto the valve and tighten
f i r m l y.
F
C
onnect the compressor's electrical plug to
the vehicle's 12
V socket.
F
S
witch on the ignition.F
S
tart the compressor by placing the switch
at the " I" position and adjust the pressure
to the value shown on the vehicle's tyre
pressure label. To deflate: press the black
button located on the compressor pipe, near
the valve connection. The tyre inflation pressures are given on
this label.
08
In the event of a breakdown
Page 171 of 248
169
If a pressure of 2 bars is not reached after
7 minutes, this indicates that the tyre is
not repairable; contact your dealer or
a
qualified workshop for recovery.
F
O
nce the correct pressure is reached, put
the switch to the " O" position.
F
R
emove the kit then stow it.
Do not drive more than 120
miles (200 km)
with a
temporarily repaired tyre; see your
dealer or a
qualified workshop to change
the tyre.
Should the pressure of one or more tyres
be adjusted, it is necessary to reinitialise
the under-inflation detection system.
For more information on Under-inflation
detection , refer to the corresponding
section.
Spare wheel
Scan the QR code on page 3 to view
e xplanatory videos.
Procedure for changing a
damaged wheel with
the spare wheel using the tools provided with
the vehicle.
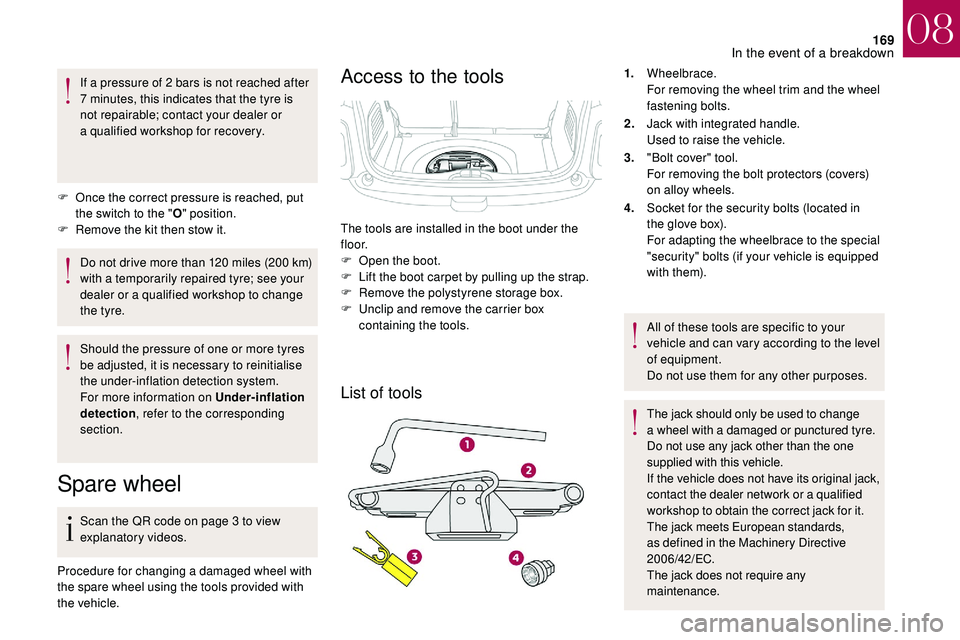
Access to the tools
List of tools
1. Wheelbrace.
For removing the wheel trim and the wheel
fastening bolts.
2. Jack with integrated handle.
Used to raise the vehicle.
3. "Bolt cover" tool.
For removing the bolt protectors (covers)
on alloy wheels.
4. Socket for the security bolts (located in
the glove box).
For adapting the wheelbrace to the special
"security" bolts (if your vehicle is equipped
with them).
All of these tools are specific to your
vehicle and can vary according to the level
of equipment.
Do not use them for any other purposes.
The jack should only be used to change
a
wheel with a damaged or punctured tyre.
Do not use any jack other than the one
supplied with this vehicle.
If the vehicle does not have its original jack,
contact the dealer network or a
qualified
workshop to obtain the correct jack for it.
The jack meets European standards,
as defined in the Machinery Directive
2006/42/EC.
The jack does not require any
maintenance.
The tools are installed in the boot under the
f l o o r.
F
O
pen the boot.
F
L
ift the boot carpet by pulling up the strap.
F
R
emove the polystyrene storage box.
F
U
nclip and remove the carrier box
containing the tools.
08
In the event of a breakdown
Page 203 of 248
201
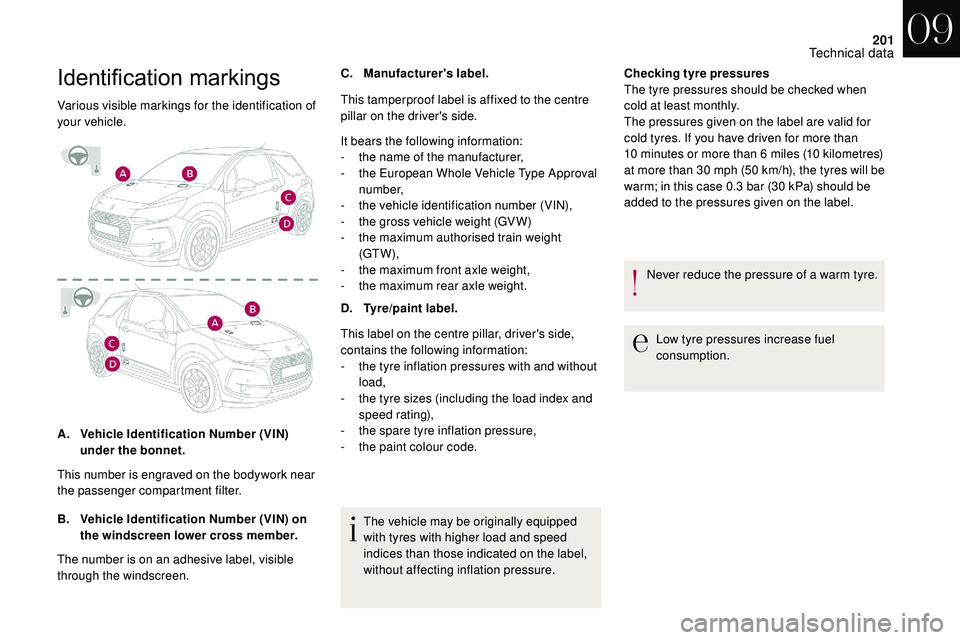
Identification markings
Various visible markings for the identification of
your vehicle.
A.Vehicle Identification Number (VIN)
under the bonnet.
B. Vehicle Identification Number (VIN) on
the windscreen lower cross member. C.
Manufacturer's label.
It bears the following information:
-
t
he name of the manufacturer,
-
t
he European Whole Vehicle Type Approval
number,
-
t
he vehicle identification number (VIN),
-
t
he gross vehicle weight (GV W)
-
t
he maximum authorised train weight
(GT W),
-
t
he maximum front axle weight,
-
t
he maximum rear axle weight.
D. Tyre/paint label.
This label on the centre pillar, driver's side,
contains the following information:
-
t
he tyre inflation pressures with and without
load,
-
t
he tyre sizes (including the load index and
speed rating),
-
t
he spare tyre inflation pressure,
-
t
he paint colour code.The vehicle may be originally equipped
with tyres with higher load and speed
indices than those indicated on the label,
without affecting inflation pressure.
This number is engraved on the bodywork near
the passenger compartment filter.
The number is on an adhesive label, visible
through the windscreen. This tamperproof label is affixed to the centre
pillar on the driver's side.
Checking tyre pressures
The tyre pressures should be checked when
cold at least monthly.
The pressures given on the label are valid for
cold tyres. If you have driven for more than
10
minutes or more than 6 miles (10 kilometres)
at more than 30
mph (50 km/h), the tyres will be
warm; in this case 0.3
bar (30 kPa) should be
added to the pressures given on the label.
Never reduce the pressure of a
warm tyre.
Low tyre pressures increase fuel
consumption.
09
Technical data