air condition CITROEN DS3 CABRIO 2018 Handbook (in English)
[x] Cancel search | Manufacturer: CITROEN, Model Year: 2018, Model line: DS3 CABRIO, Model: CITROEN DS3 CABRIO 2018Pages: 248, PDF Size: 8.79 MB
Page 75 of 248
73
For your convenience, the settings are
stored between two starts of the vehicle.
When the engine is cold, the air flow will
only reach its optimum level gradually
to prevent too much cold air being
distributed.
Temperature adjustment
The value shown on the display is a level of
c omfort, not a temperature in degrees Celsius
or Fahrenheit.
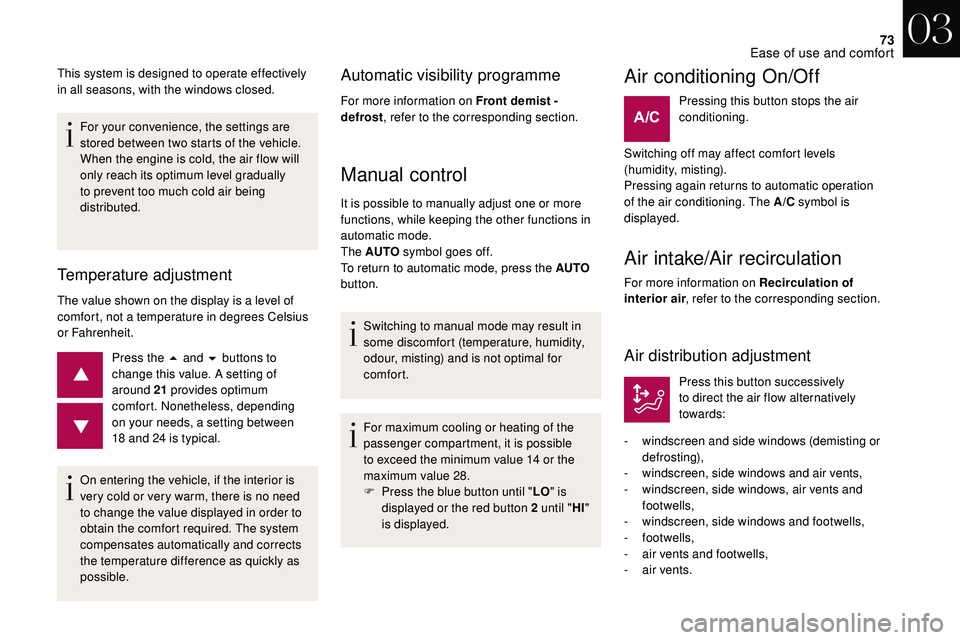
Press the 5
and 6 buttons to
change this value. A setting of
around 21
provides optimum
comfort. Nonetheless, depending
on your needs, a setting between
18
and 24 is typical.
This system is designed to operate effectively
in all seasons, with the windows closed.
On entering the vehicle, if the interior is
very cold or very warm, there is no need
to change the value displayed in order to
obtain the comfort required. The system
compensates automatically and corrects
the temperature difference as quickly as
possible.
Automatic visibility programme
For more information on Front demist -
defrost , refer to the corresponding section.
Manual control
It is possible to manually adjust one or more
functions, while keeping the other functions in
automatic mode.
The AUTO symbol goes off.
To return to automatic mode, press the AUTO
button.
Switching to manual mode may result in
some discomfort (temperature, humidity,
odour, misting) and is not optimal for
comfort.
For maximum cooling or heating of the
passenger compartment, it is possible
to exceed the minimum value 14
or the
maximum value 28.
F
P
ress the blue button until " LO" is
displayed or the red button 2 until " HI"
is displayed.
Air conditioning On/Off
Pressing this button stops the air
conditioning.
Switching off may affect comfort levels
(humidity, misting).
Pressing again returns to automatic operation
of the air conditioning. The A/C symbol is
displayed.
Air intake/Air recirculation
For more information on Recirculation of
interior air , refer to the corresponding section.
Air distribution adjustment
Press this button successively
to direct the air flow alternatively
towards:
-
w
indscreen and side windows (demisting or
def r o st ing),
-
w
indscreen, side windows and air vents,
-
w
indscreen, side windows, air vents and
footwells,
-
w
indscreen, side windows and footwells,
-
footwells,
-
a
ir vents and footwells,
-
a
ir vents.
03
Ease of use and comfort
Page 76 of 248
74
Deactivating the system
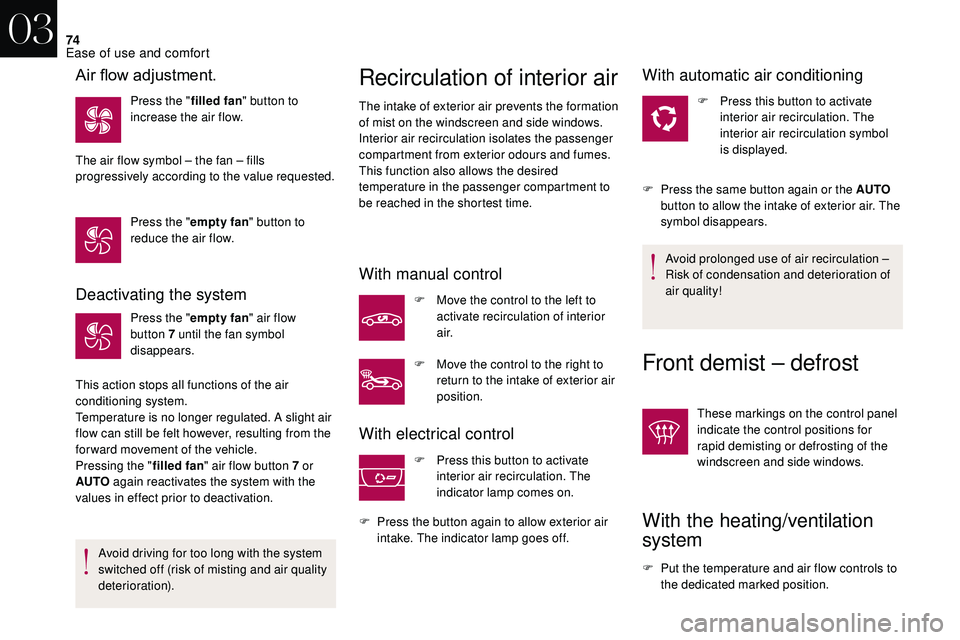
Press the "empty fan" air flow
button 7 until the fan symbol
disappears.
This action stops all functions of the air
conditioning system.
Temperature is no longer regulated. A slight air
flow can still be felt however, resulting from the
for ward movement of the vehicle.
Pressing the " filled fan" air flow button 7
or
AUTO again reactivates the system with the
values in effect prior to deactivation.
Avoid driving for too long with the system
switched off (risk of misting and air quality
deterioration).
Recirculation of interior air
The intake of exterior air prevents the formation
of mist on the windscreen and side windows.
Interior air recirculation isolates the passenger
compartment from exterior odours and fumes.
This function also allows the desired
temperature in the passenger compartment to
be reached in the shortest time.
With manual control
F Move the control to the left to activate recirculation of interior
a i r.
F
M
ove the control to the right to
return to the intake of exterior air
position.
With electrical control
F Press this button to activate interior air recirculation. The
indicator lamp comes on.
F
P
ress the button again to allow exterior air
intake. The indicator lamp goes off.
With automatic air conditioning
F Press this button to activate interior air recirculation. The
interior air recirculation symbol
is displayed.
F
P
ress the same button again or the AUTO
button to allow the intake of exterior air. The
symbol disappears.
Avoid prolonged use of air recirculation –
Risk of condensation and deterioration of
air quality!
Front demist – defrost
These markings on the control panel
indicate the control positions for
rapid demisting or defrosting of the
windscreen and side windows.
With the heating/ventilation
system
F Put the temperature and air flow controls to the dedicated marked position.
Air flow adjustment.
Press the " filled fan" button to
increase the air flow.
The air flow symbol – the fan – fills
progressively according to the value requested.
Press the " empty fan" button to
reduce the air flow.
03
Ease of use and comfort
Page 77 of 248
75
With the manual air
conditioning system
F Put the temperature and air flow controls to the dedicated marked position.
F
P
ut the air intake control to the "Exterior air
intake" position
(manual control moved to the right or
electrical control with indicator lamp off).
F
P
ut the air distribution control to the
"Windscreen" position.
F
S
witch on the air conditioning by pressing
the A /C button; the green indicator lamp in
the button comes on.
With Stop & Start, when the demisting/
defrosting, air conditioning and air flow
functions are activated, STOP mode is not
available.
With automatic air
conditioning
Automatic visibility programme
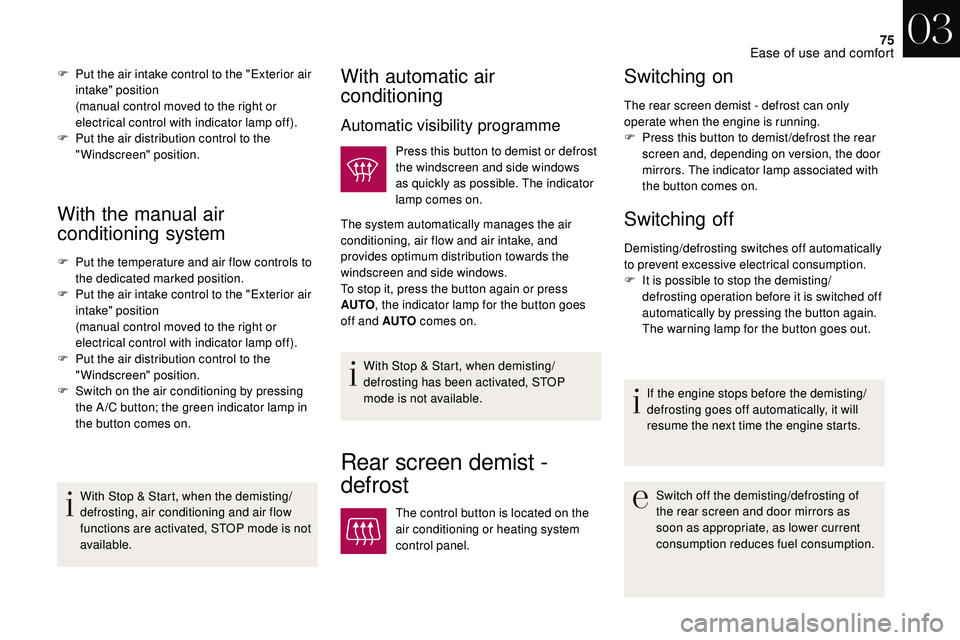
Press this button to demist or defrost
the windscreen and side windows
as quickly as possible. The indicator
lamp comes on.
The system automatically manages the air
conditioning, air flow and air intake, and
provides optimum distribution towards the
windscreen and side windows.
To stop it, press the button again or press
AUTO , the indicator lamp for the button goes
off and AUTO comes on.
With Stop & Start, when demisting/
defrosting has been activated, STOP
mode is not available.
F
P
ut the air intake control to the "Exterior air
intake" position
(manual control moved to the right or
electrical control with indicator lamp off).
F
P
ut the air distribution control to the
"Windscreen" position.
Rear screen demist -
defrost
The control button is located on the
air conditioning or heating system
control panel.
Switching on
The rear screen demist - defrost can only
operate when the engine is running.
F
P
ress this button to demist /defrost the rear
screen and, depending on version, the door
mirrors. The indicator lamp associated with
the button comes on.
Switching off
Demisting/defrosting switches off automatically
to prevent excessive electrical consumption.
F
I
t is possible to stop the demisting/
defrosting operation before it is switched off
automatically by pressing the button again.
The warning lamp for the button goes out.
If the engine stops before the demisting/
defrosting goes off automatically, it will
resume the next time the engine starts.
Switch off the demisting/defrosting of
the rear screen and door mirrors as
soon as appropriate, as lower current
consumption reduces fuel consumption.
03
Ease of use and comfort
Page 78 of 248

76
Fragrance diffuser
Diffuses a fragrance in the passenger
c ompartment from the central air vents.
Operating wheel
The wheel on the dashboard adjusts the
intensity of diffusion of the fragrance.
F
T
urn the wheel to the right to diffuse
fragrance.
F
T
urn the wheel to the left to stop diffusing
fragrance.
The central vents must be open.
The intensity of the fragrance diffusion
may depend on the ventilation or air
conditioning settings.
Fragrance cartridge
This cartridge can be removed easily. On first
use, replace the plug with a real cartridge.
You can change it at any time, thanks to the
sealed cover that allows you to keep it enclosed
when it has already been opened.
You can obtain different fragrance cartridges
from your dealer or a
qualified workshop.
Do not discard the original cartridge,
which ser ves as a
blanking plug if no
fragrance diffuser is used.
To extend the ser vice life of the cartridge,
turn the knob to the left when you no
longer want fragrance to be diffused in the
passenger compartment.
For safety reasons, do not per form any
operations on the cartridge while driving.
Never remove the cartridges.
Do not try to refill the diffuser or
cartridges.
Avoid contact with the skin or eyes.
Keep cartridges out of the reach of
children or pets.
Removing the cartridge
Installing the cartridge
F Remove the sealed cover from the cartridge.
F
I
nstall the cartridge (flower to the top left).
F
P
ress the knob and turn it a quarter turn in
the clockwise direction.
F
P
ress the knob and turn it a quarter turn in
the anti-clockwise direction.
F
R
emove the cartridge.
F
R
efit the sealed cover.
03
Ease of use and comfort
Page 96 of 248

94
* In accordance with the general conditions of use for the ser vice available from dealers
and subject to technological and technical
limitations.
**
A
s per the geographic coverage of
"Localised Emergency Call", "Localised
Assistance Call" and the official national
language chosen by the owner of the
vehicle.
T
he list of countries covered and telematic
ser vices is available from dealers or on the
website for your country.
Operation of the system
When the ignition is switched on,
the green indicator lamp comes
on for 3
seconds indicating that
the system is operating correctly.
If the orange indicator lamp
flashes then goes off: the system
has a
fault. In both cases, the emergency and assistance
calls ser vice may not work.
Contact a
qualified repairer as soon as
possible.
The fault with the system does not prevent
the vehicle being driven.
Localised Assistance Call
Press this button for more than
2 seconds to request assistance
if the vehicle breaks down.
A voice message confirms that the call has
been made**. Pressing this button again
immediately cancels the request.
**
A
s per the geographic coverage of
"Localised Emergency Call", "Localised
Assistance Call" and the official national
language chosen by the owner of the
vehicle.
T
he list of countries covered and telematic
ser vices is available from dealers or on the
website for your country.
The cancellation is confirmed by a
voice
message.
Geolocation
You can deactivate geolocation by
simultaneously pressing the "Localised
Emergency Call" and "Localised Assistance
Call" buttons, followed by a
press on "Localised
Assistance Call" to confirm.
To reactivate geolocation, simultaneously press
the "Localised Emergency Call" and "Localised
Assistance Call" buttons again, followed by
a
press on "Localised Assistance Call" to
confirm.
If the orange indicator lamp is permanently on:
the back-up battery should be replaced. If you purchased your vehicle outside
the dealer network, we invite you to have
a
dealer check and, if desired, modify the
configuration of these ser vices to suit your
wishes.
In a
multi-lingual country, configuration is
possible in the official national language
of your choice.
If you benefit from the DS
Connect BOX
offer with the SOS and assistance pack
included, you have available additional
ser vices in your personal space, via the
website in your country.
05
Safety
Page 97 of 248
95
For technical reasons and in particular to
improve the quality of telematic ser vices to
customers, the manufacturer reserves the
right to carry out updates to the vehicle's
on-board telematic system.
Emergency or assistance
call (type 2)
Localised Emergency Call
** As per the geographic coverage of "Localised Emergency Call", "Localised
Assistance Call" and the official national
language chosen by the owner of the
vehicle.
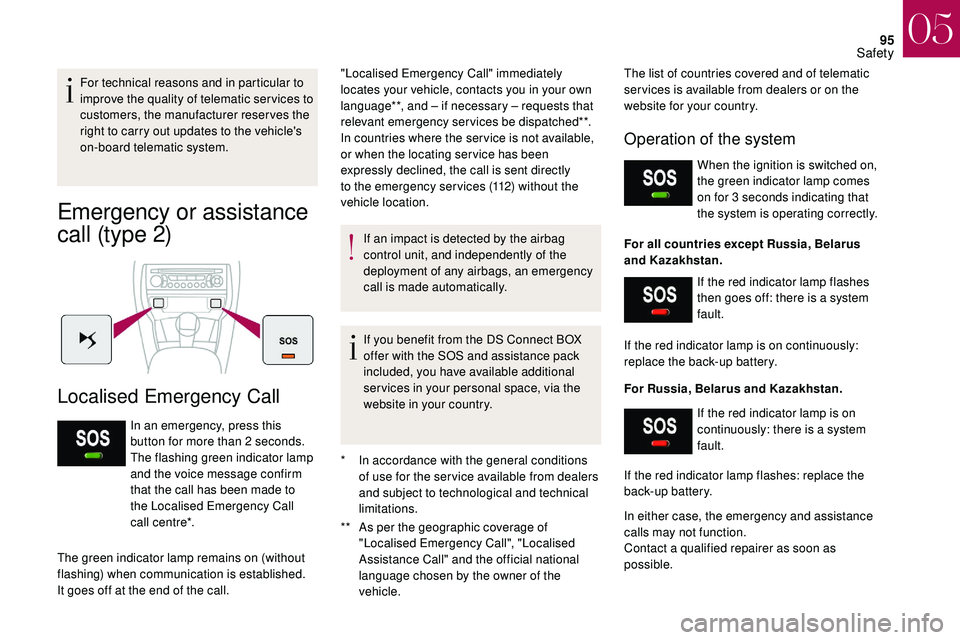
In an emergency, press this
button for more than 2
seconds.
The flashing green indicator lamp
and the voice message confirm
that the call has been made to
the Localised Emergency Call
call centre*.
The green indicator lamp remains on (without
flashing) when communication is established.
It goes off at the end of the call. "Localised Emergency Call" immediately
locates your vehicle, contacts you in your own
language**, and – if necessary – requests that
relevant emergency services be dispatched**.
In countries where the ser vice is not available,
or when the locating ser vice has been
expressly declined, the call is sent directly
to the emergency services (112) without the
vehicle location.
If an impact is detected by the airbag
control unit, and independently of the
deployment of any airbags, an emergency
call is made automatically.
If you benefit from the DS Connect BOX
offer with the SOS and assistance pack
included, you have available additional
ser vices in your personal space, via the
website in your country.
Operation of the system
When the ignition is switched on,
the green indicator lamp comes
on for 3
seconds indicating that
the system is operating correctly.
*
I
n accordance with the general conditions
of use for the ser vice available from dealers
and subject to technological and technical
limitations. The list of countries covered and of telematic
ser vices is available from dealers or on the
website for your country.
For all countries except Russia, Belarus
and Kazakhstan.
For Russia, Belarus and Kazakhstan.
In either case, the emergency and assistance
calls may not function.
Contact a
qualified repairer as soon as
possible. If the red indicator lamp flashes
then goes off: there is a
system
fault.
If the red indicator lamp is on continuously:
replace the back-up battery.
If the red indicator lamp is on
continuously: there is a
system
fault.
If the red indicator lamp flashes: replace the
back-up battery.
05
Safety
Page 100 of 248

98
F Press this button.
If the indicator lamp in the button comes on,
this indicates that the systems are deactivated.
Reactivation
These systems are reactivated automatically
every time the ignition is switched off, or
from 30 mph (50 km/h), except for the 1.6 l
petrol and (THP 165, THP 155, THP 150) and
PERFORMANCE engines.
F
P
ress this button again to reactivate them
manually.
Operating fault
Illumination of this warning lamp
and the indicator lamp in the button,
accompanied by an audible signal
and a
message, indicate a fault with
these systems.
Have them checked by an
authorised dealer or by a
qualified
workshop. ASR/DSC
These systems offer increased safety
in normal driving, but they should not
encourage the driver to take extra risks or
drive at high speed.
It is in conditions of reduced grip (rain,
snow, ice) that the risk of loss of grip
increases. It is therefore important for your
safety to keep these systems activated in
all conditions, and particularly in difficult
conditions.
The correct operation of these systems
depends on observation of the
manufacturer's recommendations, not
only about the wheels (tyres and rims),
braking and electronic components but
also the assembly and repair procedures
used in the dealer network.
To benefit in full from the effectiveness
of these systems in wintry conditions,
the vehicle must be fitted with four snow
tyres, allowing the vehicle to retain neutral
behaviour on the road.
Seat belts
Front seat belts
The front seat belts are fitted with
a
pretensioning and force limiting system.
This system improves safety in the front
seats in the event of a
front or side impact.
Depending on the severity of the impact, the
pretensioning system instantly tightens the seat
belts against the body of the occupants.
The pretensioning seat belts are active when
the ignition is on.
The force limiter reduces the pressure of
the seat belt on the passenger's chest, thus
improving their protection.
Fastening
F Pull the strap then insert the tongue in the buckle.
05
Safety
Page 103 of 248
101
Airbags
General information
This system contributes towards improving the
safety of passengers (with the exception of the
rear centre passenger) in the event of violent
collisions. The airbags supplement the action
of the seat belts fitted with force limiters (all
except the centre rear passenger belt).
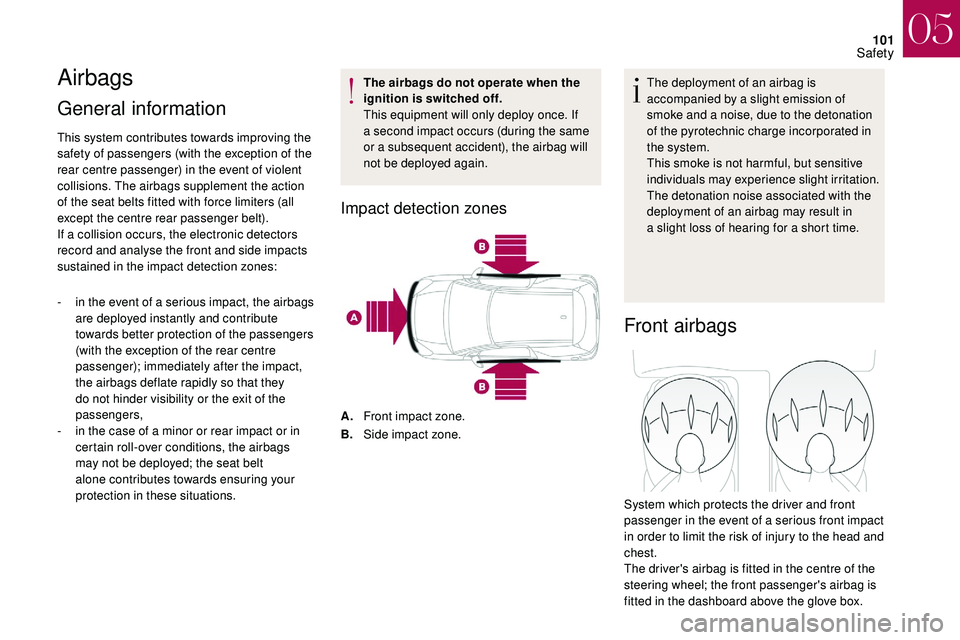
If a collision occurs, the electronic detectors
record and analyse the front and side impacts
sustained in the impact detection zones:
-
i
n the event of a serious impact, the airbags
are deployed instantly and contribute
towards better protection of the passengers
(with the exception of the rear centre
passenger); immediately after the impact,
the airbags deflate rapidly so that they
do not hinder visibility or the exit of the
passengers,
-
i
n the case of a minor or rear impact or in
certain roll-over conditions, the airbags
may not be deployed; the seat belt
alone contributes towards ensuring your
protection in these situations. The airbags do not operate when the
ignition is switched off.
This equipment will only deploy once. If
a
second impact occurs (during the same
or a subsequent accident), the airbag will
not be deployed again.
Impact detection zones
A. Front impact zone.
B. Side impact zone. The deployment of an airbag is
accompanied by a
slight emission of
smoke and a noise, due to the detonation
of the pyrotechnic charge incorporated in
the system.
This smoke is not harmful, but sensitive
individuals may experience slight irritation.
The detonation noise associated with the
deployment of an airbag may result in
a slight loss of hearing for a short time.
Front airbags
System which protects the driver and front
passenger in the event of a
serious front impact
in order to limit the risk of injury to the head and
chest.
The driver's airbag is fitted in the centre of the
steering wheel; the front passenger's airbag is
fitted in the dashboard above the glove box.
05
Safety
Page 135 of 248
133
For your convenience during parking
manoeuvres, STOP mode is not available
for a few seconds after coming out of
reverse gear.
The Stop & Start system does not affect
the functionality of the vehicle, such as for
example, braking, power steering, etc.
Never refuel with the engine in STOP
mode; you must switch off the ignition
using the key.
Special cases: STOP mode not
available
STOP mode is not invoked when:
- t he driver's door is open,
-
t
he driver's seat belt is not fastened,
-
t
he vehicle has not exceeded 6 mph
(10
km/h) since the last engine start using
t h e key,
-
t
he engine is needed to maintain
a
comfortable temperature in the passenger
compartment,
-
d
emisting is active,
-
s
ome special conditions (battery charge,
engine temperature, braking assistance,
exterior temperature, etc.) are present
where the engine is needed to control the
system. The ECO warning lamp flashes for
a
few seconds, then goes off.
This operation is perfectly normal.
Invoking engine START mode
The " ECO" warning lamp goes off
and the engine starts:
-
w
ith a
manual gearbox , when you depress
the clutch pedal,
-
w
ith an electronic or automatic gearbox :
•
g
ear selector in position A/D or M, when
you release the brake pedal,
•
o
r gear selector in position N and the
brake pedal released, when you move the
gear selector to position A/D or M,
•
o
r when you engage reverse.
With a
manual gearbox in STOP mode, if
a
gear is engaged without fully depressing
the clutch pedal, a warning lamp comes
on or an alert message is displayed asking
you to depress the clutch pedal to restart
the engine.
Special cases: START mode
invoked automatically
As a safety measure or to maintain comfort
l evels in the vehicle, START mode is invoked
automatically when:
-
y
ou open the driver's door,
-
y
ou unfasten the driver's seat belt,
-
t
he speed of the vehicle exceeds 7 mph
(11
km/h) with an electronic gearbox,
-
s
ome special conditions (battery charge,
engine temperature, braking assistance, air
conditioning setting, etc.) are present where
the engine is needed for control of the
system or vehicle.
The ECO warning lamp flashes for
a
few seconds, then goes off.
This operation is perfectly normal.
Manual deactivation/
reactivation
In certain circumstances, such as the need
to maintain the temperature in the passenger
compartment, it may be useful to deactivate the
Stop & Start system.
The system can be deactivated at any time,
once the ignition is switched on.
06
Driving
Page 137 of 248
135
The tyre under-inflation detection system
does not replace the need for vigilance on
the part of the driver.
This system still requires you to check the
tyre inflation pressure (including the spare
wheel) every month as well as before
a
long journey.
Driving with under-inflated tyres impairs
handling, extends braking distances and
causes premature tyre wear, particularly
in adverse conditions (heavy loads, high
speeds, long journeys).
Driving with under-inflated tyres
increases fuel consumption.
The tyre pressure specifications for your
vehicle can be found on the tyre pressure
label.
For more information on the
Identification markings , refer to the
corresponding section. Tyre pressures should be checked when
the tyres are "cold" (vehicle stopped for
1
hour or after a journey of less than
6
miles (10 km) at moderate speeds).
Other wise (when hot), add 0.3
bar to the
pressures shown on the label.
Under-inflation alert
This warning is indicated by
continuous illumination of this
warning lamp, an audible signal and
a
message displayed on the screen.
F
R
educe speed immediately, avoid excessive
steering movements and sudden braking.
F
S
top as soon as it is safe to do so.
The loss of pressure detected does not
always cause visible bulging of the tyre.
Do not rely on a
simple visual check. F
I
f you have a compressor (such as the
one in the temporary puncture repair kit),
check the pressures of the four tyres when
cold. If it is not possible to make this check
immediately, drive carefully at reduced
speed.
or
F In the event of a puncture, use the
temporary puncture repair kit or the spare
wheel (depending on equipment).
The warning remains active until the
system is reinitialised.
Reinitialisation
The system must be reinitialised after any
adjustment to the pressures of one or more
tyres, and after changing one or more wheels.
Before reinitialising the system, ensure
that the pressures of the four tyres are
correct for the use of the vehicle and in
line with the recommendations on the tyre
pressure label.
The under-inflation detection system
does not give a
warning if a pressure is
incorrect at the time of reinitialisation.
06
Driving