language CITROEN DS3 CROSSBACK 2020 Owners Manual
[x] Cancel search | Manufacturer: CITROEN, Model Year: 2020, Model line: DS3 CROSSBACK, Model: CITROEN DS3 CROSSBACK 2020Pages: 244, PDF Size: 7.7 MB
Page 2 of 244
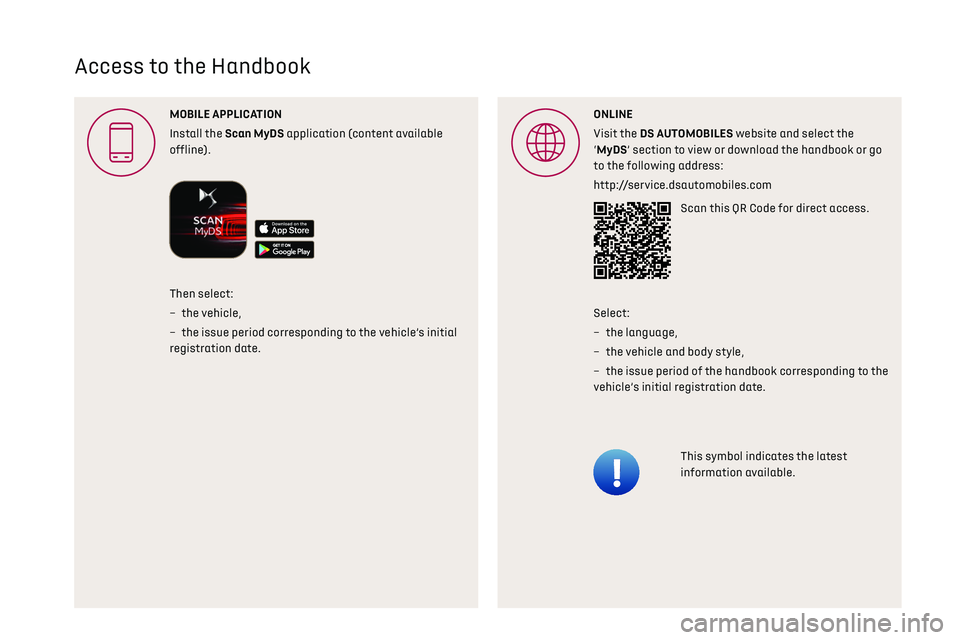
Access to the Handbook
MOBILE APPLICA
Install the Scan MyDS application (content available
offline).ONLINE
Visit the DS A website and select the
‘MyDS’ section to view or download the handbook or go
to the following address:
http://service.dsautomobiles.com
Scan this QR Code for direct access.
This symbol indicates the latest
information available.
Then select:
–
the vehicle
,
–
the issue period c
orresponding to the vehicle’s initial
registration date. Select:
–
the language,
–
the vehicle and body style
,
–
the issue period o
f the handbook corresponding to the
vehicle’s initial registration date.
Page 11 of 244
9Instruments01
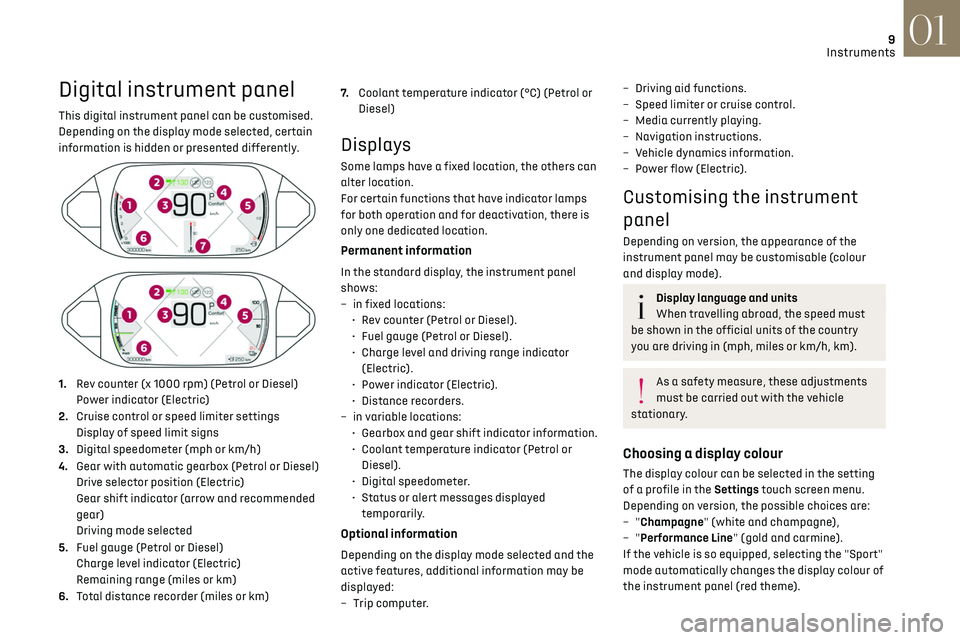
Digital instrument panel
This digital instrument panel can be customised.
Depending on the display mode selected, certain
information is hidden or presented differently.
1. Rev counter (x 1000 rpm) (Petrol or Diesel)
Power indicator (Electric)
2. Cruise control or speed limiter settings
Display of speed limit signs
3. Digital speedometer (mph or km/h)
4. Gear with automatic gearbox (Petrol or Diesel)
Drive selector position (Electric)
Gear shift indicator (arrow and recommended
gear)
Driving mode selected
5. Fuel gauge (Petrol or Diesel)
Charge level indicator (Electric)
Remaining range (miles or km)
6. Total distance recorder (miles or km) 7.
Coolant temperature indicator (°C) (Petrol or
Diesel)
Displays
Some lamps have a fixed location, the others can
alter location.
For certain functions that have indicator lamps
for both operation and for deactivation, there is
only one dedicated location.
Permanent information
In the standard display, the instrument panel
shows:
–
in fix
ed locations:
•
R
ev counter (Petrol or Diesel).
•
Fuel gauge (Petrol or Die
sel).
•
C
harge level and driving range indicator
(Electric).
•
Po
wer indicator (Electric).
•
Dist
ance recorders.
–
in v
ariable locations:
•
Gearbo
x and gear shift indicator information.
•
Coolan
t temperature indicator (Petrol or
Diesel).
•
Digit
al speedometer.
•
St
atus or alert messages displayed
temporarily.
Optional information
Depending on the display mode selected and the
active features, additional information may be
displayed:
–
Trip c
omputer.
– Driving aid functions.
– Speed limit er or cruise control.
–
Media c
urrently playing.
–
Na
vigation instructions.
–
V
ehicle dynamics information.
–
Po
wer flow (Electric).
Customising the instrument
panel
Depending on version, the appearance of the
instrument panel may be customisable (colour
and display mode).
Display language and units
When travelling abroad, the speed must
be shown in the official units of the country
you are driving in (mph, miles or km/h, km).
As a safety measure, these adjustments
must be carried out with the vehicle
stationary.
Choosing a display colour
The display colour can be selected in the setting
of a profile in the Settings touch screen menu.
Depending on version, the possible choices are:
–
"Champagne" (white and champagne),
–
"Performance Line" (gold and carmine).
If the vehicle is so equipped, selecting the "Sport"
mode automatically changes the display colour of
the instrument panel (red theme).
Page 27 of 244
25
Instruments01
– Access to the Settings of the touch screen and
digital instrument panel (date/time, languages,
units, etc.).
Side banners of the DS CONNECT NAV
– Exterior temperature (a blue warning lamp
appears when there is a risk of ice).
–
Ac
cess to the Settings of the touch screen and
digital instrument panel (date/time, languages,
units, etc.).
–
Notifications.
–
R
eminder of the air conditioning information,
and direct access to the corresponding menu.
–
Ac
cess to the heated seat settings.
–
Time.
Electric / Energy menu
Depending on version, this is accessible either:– directly, by pressing the button near the
touch screen.
– via the Applications menu.
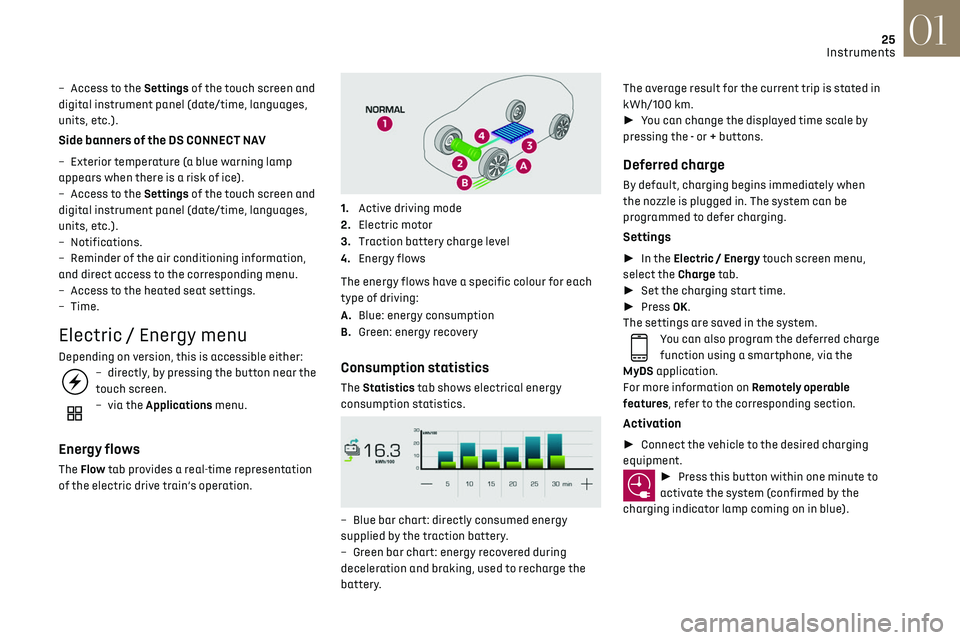
Energy flows
The Flow tab provides a real-time representation
of the electric drive train’s operation.
1.Active driving mode
2. Electric motor
3. Traction battery charge level
4. Energy flows
The energy flows have a specific colour for each
type of driving:
A. Blue: energy consumption
B. Green: energy recovery
Consumption statistics
The Statistics tab shows electrical energy
consumption statistics.
– Blue bar chart: directly c onsumed energy
supplied by the traction battery.
–
G
reen bar chart: energy recovered during
deceleration and braking, used to recharge the
battery. The average result for the current trip is stated in
kWh/100 km.
►
You can change the displayed time scale by
pressing the - or + buttons.
Deferred charge
By default, charging begins immediately when
the nozzle is plugged in. The system can be
programmed to defer charging.
Settings
► In the Electric / Energy touch screen menu,
select the Charge tab.
► Set the charging start time.
► Press OK.
The settings are saved in the system.
You can also program the deferred charge
function using a smartphone, via the
MyDS application.
For more information on Remotely operable
features, refer to the corresponding section.
Activation
► Connect the vehicle to the desired charging
equipment.
► Press this button within one minute to
activate the system (confirmed by the
charging indicator lamp coming on in blue).
Page 67 of 244
65Safety05
protection of personal information established
by Regulation 2016/679 (GDPR) and Directive
2002/58/EC of the European Parliament and
the Council, and in particular, seeks to protect
the vital interests of the data subject, in
accordance with Article 6.1, paragraph d) of
Regulation 2016/679.
Personal information processing is strictly
limited to the management of the "Localised
Emergency Call" system used with the “112”
European single emergency call number.
The "Localised Emergency Call" system is
able to collect and process only the following
data relating to the vehicle: chassis number,
type (passenger vehicle or light commercial
vehicle), fuel type or power source, most
recent three locations and direction of travel,
and a timestamped log file recording the
automatic activation of the system.
The recipients of the processed data are the
emergency call handling centres designated
by the relevant national authorities in the
territory in which they are located, enabling
priority reception and handling of calls to the
“112” emergency number.
Data storage
Data contained in the system’s memory is
not accessible from outside the system until a
* According to the geographic coverage of ‘Localised Emergency Call’, ‘Localised Assistance Call’ and the official national language chosen by the owner of
the vehicle.
The list of countries covered and telematic services provided is available from dealers or on the website for your country.
call is made. The system is not traceable and
is not continuously monitored in its normal
operating mode.
The data in the system's internal memory is
automatically and continuously erased. Only
the vehicle’s three most recent locations are
stored.
When an emergency call is triggered, the data
log is stored for no more than 13 hours.
Access to data
You have the right to access the data and,
if necessary, submit a request to rectify, erase
or restrict the processing of any personal
information not processed in accordance
with the provisions of Regulation 2016/679
(GDPR). Third parties to which data has
been communicated shall be notified of any
rectification, erasure or restriction carried
out in accordance with the aforementioned
Directive, unless doing so would be impossible
or require a disproportionate effort.
You also have the right to lodge a complaint
with the relevant data protection authority.
Localised Assistance Call
► If the vehicle breaks down, press button 2
for more than 2 seconds to request assistance
(confirmed by a voice message*).
► Pressing again immediately cancels the
request.
Privacy mode allows you to manage the
level of sharing (data and/or position)
between your vehicle and the DS
AUTOMOBILES brand.
It can be configured in the Settings menu on
the touch screen.
By default, depending on equipment,
deactivate/reactivate geolocation by
simultaneously pressing the 2 buttons, then
press the "Localised Assistance Call" button
to confirm.
If you purchased your vehicle outside the
dealer network, we invite you to have a
dealer check the configuration of these
services and, if desired, modify it to suit your
wishes. In a multilingual country, configuration
is possible in the official national language of
your choice.
Page 177 of 244
175
Touch screen BLUETOOTH audio system10
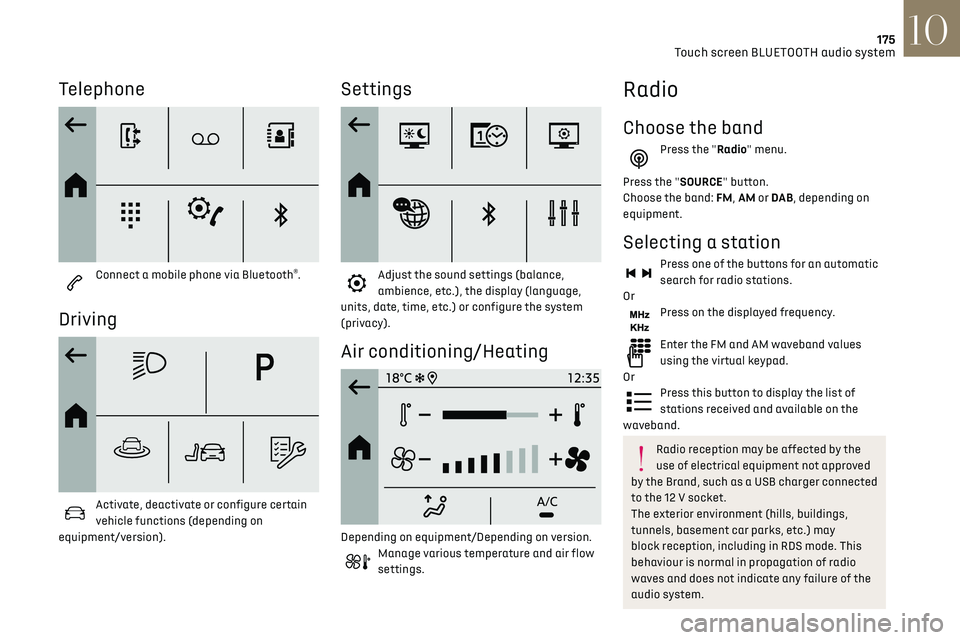
Telephone
Connect a mobile phone via Bluetooth®.
Driving
Activate, deactivate or configure certain
vehicle functions (depending on
equipment/version).
Settings
Adjust the sound settings (balance,
ambience, etc.), the display (language,
units, date, time, etc.) or configure the system
(privacy).
Air conditioning/Heating
Depending on equipment/Depending on version.Manage various temperature and air flow
settings.
Radio
Choose the band
Press the "Radio" menu.
Press the "SOURCE" button.
Choose the band: FM, AM or DAB , depending on
equipment.
Selecting a station
Press one of the buttons for an automatic
search for radio stations.
Or
Press on the displayed frequency.
Enter the FM and AM waveband values
using the virtual keypad.
Or
Press this button to display the list of
stations received and available on the
waveband.
Radio reception may be affected by the
use of electrical equipment not approved
by the Brand, such as a USB charger connected
to the 12 V socket.
The exterior environment (hills, buildings,
tunnels, basement car parks, etc.) may
block reception, including in RDS mode. This
behaviour is normal in propagation of radio
waves and does not indicate any failure of the
audio system.
Page 182 of 244
180Touch screen BLUETOOTH audio system10
► Press the "Radio Settings" button then select
"Update list". The radio reception is cut off while
searching for available stations (approximately
30 seconds).
Media
Playback of my USB memory stick starts only
after a very long wait (around 2 to 3 minutes).
Some files supplied with the memory stick may
greatly slow down access to reading the memory
stick (multiplication by 10 of the cataloguing
time).
► Delete the files supplied with the memory
stick and limit the number of sub-folders in the
file structure on the memory stick.
Some characters in information about the
currently playing media are not displayed
correctly.
The audio system is unable to process certain
types of character.
► Use standard characters to name tracks and
folders.
Playback of streaming files does not start.
The connected device does not automatically
launch playback.
► Start playback from the device.
Track names and playing times are not displayed
on the audio streaming screen.
The Bluetooth profile does not allow the transfer
of this information.
Telephone
I cannot connect my Bluetooth telephone.
Press the buttons to adjust the
brightness of the screen and/or of
the instrument panel (depending on version).
Modifying system settings
Press "Settings".
Press "System".
Press "Privacy" to access the privacy
settings.
Select "Units" to change the units of
distance, fuel consumption and
temperature.
Press "Factory settings" to return to the
initial settings.
Press "System Info" to check the system
version.
Privacy settings
Three data privacy options are available:"No data sharing (data, vehicle position)"
"Only data sharing"
“Data and vehicle position sharing"
When data and vehicle position sharing
are enabled, this symbol is displayed in the
upper bar of the touch screen.
Selecting the language
Press "Settings".
Select "Languages" to change the
language.
Set date and time
Press "Settings".
Press "Date/Time".
Setting the date:
Press the arrows to set the day, month and
year.
Setting the time:
Press these buttons to set hours and
minutes.
Select or deselect the 24h format.
In 12h format, choose "AM" or "PM".
The system does not automatically
manage the change between winter and
summer time.
Date format:
Select the display format of the date.
Frequently asked
questions
The following information groups together the
answers to the most frequently asked questions
concerning the system.
Radio
The reception quality of the tuned radio station
gradually deteriorates or the station presets are
not working (no sound, 87.5 MHz is displayed,
etc.).
The vehicle is too far from the selected station’s
transmitter, or no transmitter is present in the
geographical area.
► Activate the "RDS" function in the upper bar
to enable the system to check whether there is
a more powerful transmitter in the geographical
area.
The environment (hills, buildings, tunnels,
basement car parks, etc.) is blocking reception,
including in RDS mode.
This is a perfectly normal phenomenon, and is not
indicative of an audio system malfunction.
The aerial is missing or has been damaged
(for example while entering a car wash or
underground car park).
► Have the aerial checked by a dealer.
I cannot find some radio stations in the list of
received stations.
The name of the radio station changes.
The station is no longer received or its name has
changed in the list.
Some radio stations send other information in
place of their name (the title of the song for
example).
The system interprets these details as the station
name.
Page 186 of 244
184
DS CONNECT RADIO11
Menus
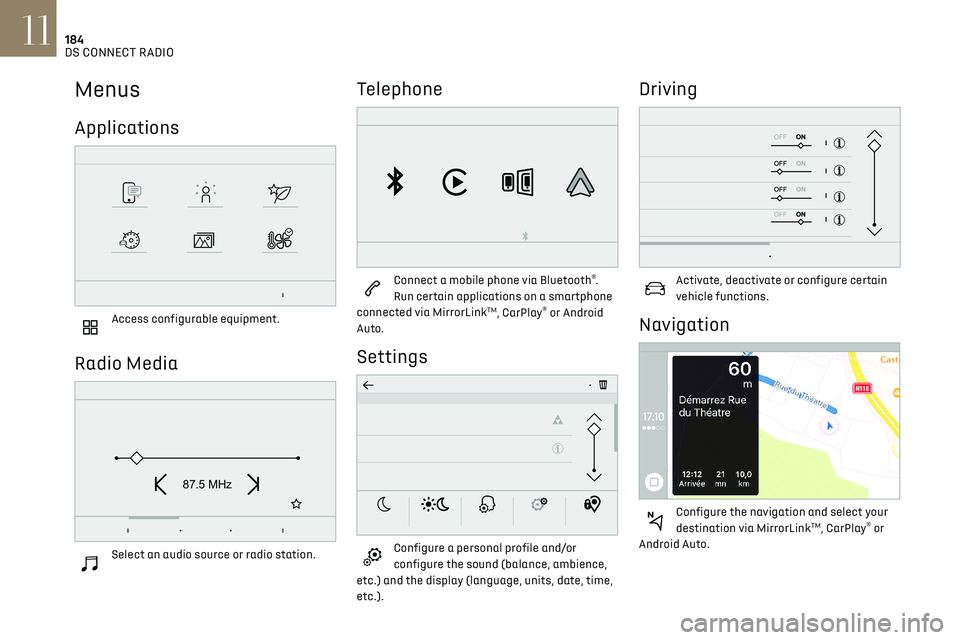
Applications
Access configurable equipment.
Radio Media
87.5 MHz
Select an audio source or radio station.
Telephone
Connect a mobile phone via Bluetooth®.
Run certain applications on a smartphone
connected via MirrorLink
TM, CarPlay® or Android
Auto.
Settings
Configure a personal profile and/or
configure the sound (balance, ambience,
etc.) and the display (language, units, date, time,
etc.).
Driving
Activate, deactivate or configure certain
vehicle functions.
Navigation
Configure the navigation and select your
destination via MirrorLinkTM, CarPlay® or
Android Auto.
Air conditioning
21,518,5
Manage various temperature and air flow
settings.
Applications
Viewing photos
Insert a USB memory stick in the USB port.
To protect the system, do not use a USB
hub.
The system can read folders and image files in the
formats: .tiff; .gif; .jpg/jpeg; .bmp and .png.
Press Applications to display the main
page.
Press "Photos".
Select a folder.
Select an image to view.
Page 194 of 244
192
DS CONNECT RADIO11
Press "Ring volume" to display the volume
bar.
Press the arrows or move the slider to set
the ring volume.
Settings
Configuring profiles
Press Settings to display the main page.
Press "Profiles".
Select "Profile 1", "Profile 2", "Profile 3” or
"Common profile".
Press this button to enter a name for the
profile using the virtual keypad.
Press "OK" to save.
Press the back arrow to confirm.
Press this button to activate the profile.
Press the back arrow again to confirm.
Press this button to reset the selected
profile.
Adjusting the brightness
Press Settings to display the main page.
Press Brightness.
Move the slider to adjust the brightness of
the screen and/or the instrument panel
(depending on version).
Press in the shaded area to confirm.
Modifying system settings
Press Settings to display the main page.
Press "Configuration" to access the
secondary page.
Press "System configuration".
Press the "Units" tab to change the units of
distance, fuel consumption and temperature.
Press the "Factory settings" tab to restore the
initial settings.
Returning the system to factory settings
activates the English language by default
(depending on version).
Press the "System info" tab to display the
versions of the various modules installed in the
system.
Press the "Privacy" tab,
or
Press Settings to display the main page.
Press "Privacy" to activate or deactivate
the private data mode.
Activate or deactivate:
–
"No sharing (data, vehicle position)". –
"Only data sharing”
– "Data and vehicle position sharing"
Press the back arrow to confirm.
Press Settings to display the main page.
Press "Configuration" to access the
secondary page.
Press "Screen configuration".
Press "Brightness".
Move the slider to adjust the brightness of
the screen and/or the instrument panel
(depending on version).
Press the back arrow to confirm.
Press "Animation".
Activate or deactivate: “Automatic
scrolling”.
Select "Animated transitions".
Press the back arrow to confirm.
Selecting the language
Press Settings to display the main page.
Press "Configuration" to access the
secondary page.
Select "Language" to change the
language.
Press the back arrow to confirm.
Setting the time
Press Settings to display the main page.
Press "Configuration" to access the
secondary page.
Press "Date and time".
Select "Time".
Press this button to set the time using the
virtual keypad.
Press "OK" to save the time.
Press this button to set the time zone.
Select the display format for the time
(12h/24h).
Activate or deactivate summer time (+1
hour).
Activate or deactivate GPS synchronisation
(UTC).
Press the back arrow to save the settings.
The system may not automatically
manage the change between winter and
summer time (depending on the country of
sale).
Setting the date
Press Settings to display the main page.
Page 199 of 244
197
DS CONNECT NAV12
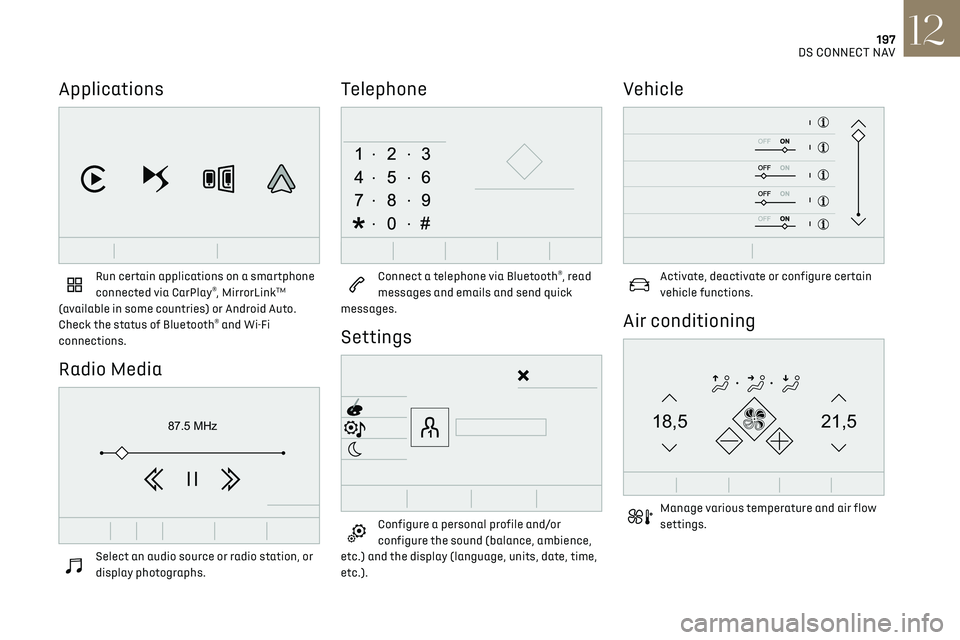
Applications
Run certain applications on a smartphone
connected via CarPlay®, MirrorLinkTM
(available in some countries) or Android Auto.
Check the status of Bluetooth
® and Wi-Fi
connections.
Radio Media
87.5 MHz
Select an audio source or radio station, or
display photographs.
Telephone
Connect a telephone via Bluetooth®, read
messages and emails and send quick
messages.
Settings
Configure a personal profile and/or
configure the sound (balance, ambience,
etc.) and the display (language, units, date, time,
etc.).
Vehicle
Activate, deactivate or configure certain
vehicle functions.
Air conditioning
21,518,5
Manage various temperature and air flow
settings.
Page 200 of 244
198
DS CONNECT NAV12
There's more information available in "novice"
mode. You can set the dialogue mode to "expert"
when you feel comfortable.
Global voice commands
Voice commands
Set dialogue mode as novice - expert
Select user 1 / Select profile John
Increase temperature
Decrease temperature
Help messages
There are lots of topics I can help you with.
You can say: "help with phone", "help with
navigation", "help with media" or "help with
radio". For an overview on how to use voice
controls, you can say "help with voice controls".
Say "yes" if I got that right. Otherwise, say "no"
and we'll start that again.
"Navigation" voice commands
Voice commands
Navigate home
Navigate to work
Navigate to preferred address, Tennis club
Navigate to contact, John Miller
Navigate to address 11 regent street, London
Help messages
To plan a route, say "navigate to" followed by the
address, the contact name or an intersection.
Voice commands
Steering wheel-mounted
controls
Voice commands:
Voice commands can be issued from any
screen page after a short press on the "Voice
commands" button located on the steering
wheel or at the end of the lighting control stalk
(depending on equipment), as long as there is no
telephone call in progress.
To ensure that voice commands are
always recognised by the system, please
follow these recommendations:
–
use natural language in a normal tone
without breaking up w
ords or raising your
voice.
–
alw
ays wait for the "beep" (audible signal)
before speaking.
–
for be
st results, closing the windows and
sunroof is recommended, to avoid extraneous
interference (depending on version).
–
before is
suing a voice command, ask any
other passengers to refrain from speaking.
First steps
Example of a "voice command" for
navigation:
"Navigate to address 11 regent street, London"
Example of a "voice command" for the radio and
media:
"Play artist Madonna"
Example of a "voice command" for the telephone:
"Call David Miller"
The voice commands, with a choice of 17
languages (Arabic, Brazilian, Czech,
Danish, Dutch, English, Farsi, French, German,
Italian, Norwegian, Polish, Portuguese,
Russian, Spanish, Swedish, Turkish), are made
using the language previously chosen and set
in the system.
For some voice commands, there are
alternative synonyms.
Example: Guide to / Navigate to / Go to / ...
The voice commands in Arabic for: "Navigate
to address" and "Display POI in the city", are
not available.
Information - Using the system
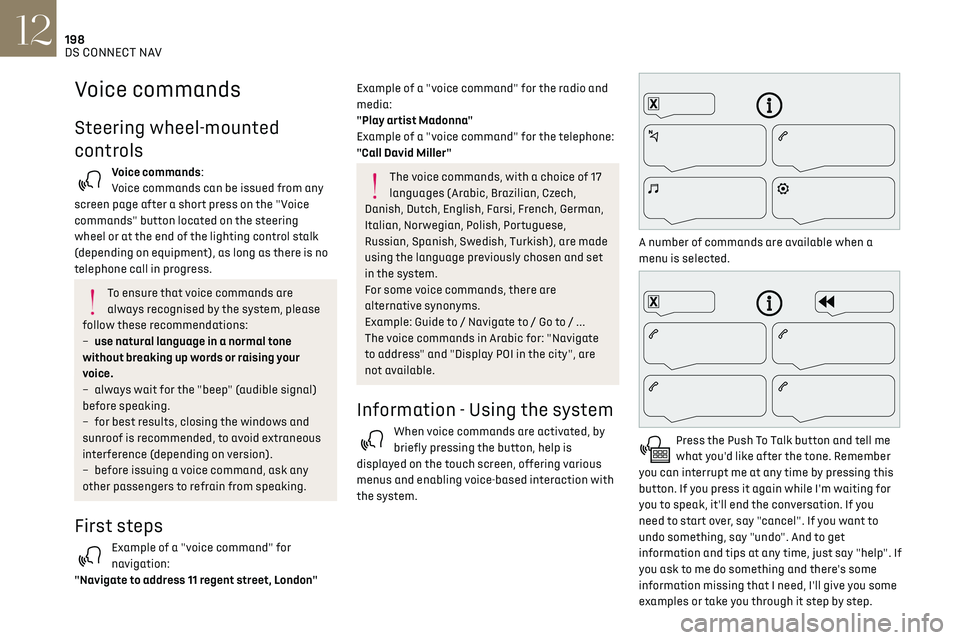
When voice commands are activated, by
briefly pressing the button, help is
displayed on the touch screen, offering various
menus and enabling voice-based interaction with
the system.
A number of commands are available when a
menu is selected.
Press the Push To Talk button and tell me
what you'd like after the tone. Remember
you can interrupt me at any time by pressing this
button. If you press it again while I'm waiting for
you to speak, it'll end the conversation. If you
need to start over, say "cancel". If you want to
undo something, say "undo". And to get
information and tips at any time, just say "help". If
you ask to me do something and there's some
information missing that I need, I'll give you some
examples or take you through it step by step.