ESP CITROEN DS3 CROSSBACK 2023 Owner's Guide
[x] Cancel search | Manufacturer: CITROEN, Model Year: 2023, Model line: DS3 CROSSBACK, Model: CITROEN DS3 CROSSBACK 2023Pages: 244, PDF Size: 7.7 MB
Page 69 of 244

67Safety05
Deactivation / Reactivation
In exceptional conditions (starting a vehicle stuck
in mud, immobilised in snow, on soft ground, etc.),
it may be useful to deactivate the ASR system to
freely spin the wheels and regain traction.
Reactivate the system as soon as the level of grip
permits.
It is set via the Driving / Vehicle touch
screen menu.
Deactivation is confirmed by the
illumination of this indicator lamp in the
instrument panel and the display of a message.
The ASR system is reactivated automatically
every time the ignition is switched back on or
from 31 mph (50 km/h).
Reactivation is manual below 31 mph (50 km/h).
Malfunction
In the event of a system malfunction, this
warning lamp comes on, accompanied by
an onscreen message and audible signal.
Contact a dealer or a qualified workshop to have
the systems checked.
ASR / DSC
These systems enhance safety during
normal driving, but should not encourage the
driver to take extra risks or drive at high speed.
It is in conditions of reduced grip (rain, snow,
ice) that the risk of loss of grip increases. It
is therefore important for your safety to keep
these systems activated in all conditions, and
particularly in difficult conditions.
Correct operation of these systems depends
on compliance with the manufacturer's
recommendations relating to the wheels (tyres
and rims), braking and electronic components,
as well as the assembly and repair procedures
used by dealers.
The use of snow tyres is recommended, to
ensure that these systems remain effective
in winter conditions. All four wheels must be
fitted with tyres approved for the vehicle.
Advanced Traction Control
This special patented traction control system
improves grip on snow, mud and sand.
For optimum grip on snow, it is
recommended to fit the vehicle with
winter tyres.
Activation/Deactivation
► Press the DRIVE MODE button to choose one of
the three driving modes; the different modes are
displayed in the instrument panel.
► Depending on the circumstances, select
"Snow", "Mud" or "Sand".
The chosen mode continues to be displayed in the
instrument panel.
► To deactivate, select "Normal" mode or any
other driving mode.
The system is automatically deactivated when
the ignition is switched off.
Operating modes
Snow
This mode adapts its strategy to the conditions of
grip encountered for each of the two front wheels
on moving off.
(mode active up to 50 mph (80 km/h))
Mud
This mode, when moving off, allows considerable
spin on the wheel with the least grip to optimise
clearing of the mud and to regain grip. At the
same time, the wheel with the most grip is
controlled in such a way as to transmit as much
torque as possible.
When moving, the system optimises wheel spin
to respond to the driver's requirements as fully as
possible.
(mode active up to 31 mph (50 km/h))
Page 70 of 244
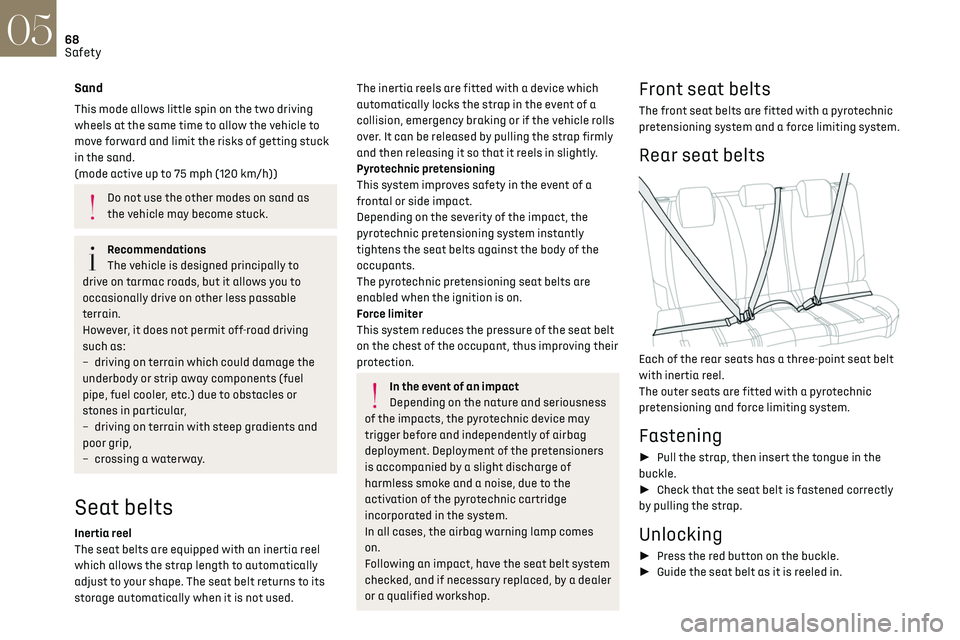
68Safety05
Seat belt not fastened/
unfastened alerts
1. Front left seat belt warning lamp
2. Front right seat belt warning lamp
3. Rear left seat belt warning lamp
4. Rear centre seat belt warning lamp
5. Rear right seat belt warning lamp
If the corresponding seat belt is not fastened
or is unfastened, when the ignition is switched
on, the seat belts warning lamp comes on in the
instrument panel and the corresponding warning
lamp (1 to 5) comes on in red in the seat belt and
front passenger airbag warning lamps display.
If a rear seat belt is not fastened, the
corresponding warning lamp (3 to 5)
comes on for around 30 seconds.
From about 12 mph (20 km/h) and for 2 minutes,
each warning lamp corresponding to an occupied
seat whose seat belt is unfastened flashes,
accompanied by an audible signal. After these 2
minutes, the corresponding seat warning lamp
Sand
This mode allows little spin on the two driving
wheels at the same time to allow the vehicle to
move forward and limit the risks of getting stuck
in the sand.
(mode active up to 75 mph (120 km/h))
Do not use the other modes on sand as
the vehicle may become stuck.
Recommendations
The vehicle is designed principally to
drive on tarmac roads, but it allows you to
occasionally drive on other less passable
terrain.
However, it does not permit off-road driving
such as:
–
driving on t
errain which could damage the
underbody or strip away components (fuel
pipe, fuel cooler, etc.) due to obstacles or
stones in particular,
–
driving on t
errain with steep gradients and
poor grip,
–
cro
ssing a waterway.
Seat belts
Inertia reel
The seat belts are equipped with an inertia reel
which allows the strap length to automatically
adjust to your shape. The seat belt returns to its
storage automatically when it is not used.
The inertia reels are fitted with a device which
automatically locks the strap in the event of a
collision, emergency braking or if the vehicle rolls
over. It can be released by pulling the strap firmly
and then releasing it so that it reels in slightly.
Pyrotechnic pretensioning
This system improves safety in the event of a
frontal or side impact.
Depending on the severity of the impact, the
pyrotechnic pretensioning system instantly
tightens the seat belts against the body of the
occupants.
The pyrotechnic pretensioning seat belts are
enabled when the ignition is on.
Force limiter
This system reduces the pressure of the seat belt
on the chest of the occupant, thus improving their
protection.
In the event of an impact
Depending on the nature and seriousness
of the impacts, the pyrotechnic device may
trigger before and independently of airbag
deployment. Deployment of the pretensioners
is accompanied by a slight discharge of
harmless smoke and a noise, due to the
activation of the pyrotechnic cartridge
incorporated in the system.
In all cases, the airbag warning lamp comes
on.
Following an impact, have the seat belt system
checked, and if necessary replaced, by a dealer
or a qualified workshop.
Front seat belts
The front seat belts are fitted with a pyrotechnic
pretensioning system and a force limiting system.
Rear seat belts
Each of the rear seats has a three-point seat belt
with inertia reel.
The outer seats are fitted with a pyrotechnic
pretensioning and force limiting system.
Fastening
► Pull the strap, then insert the tongue in the
buckle.
► Check that the seat belt is fastened correctly
by pulling the strap.
Unlocking
► Press the red button on the buckle.
► Guide the seat belt as it is reeled in.
Page 71 of 244

69Safety05
Seat belt not fastened/
unfastened alerts
1. Front left seat belt warning lamp
2. Front right seat belt warning lamp
3. Rear left seat belt warning lamp
4. Rear centre seat belt warning lamp
5. Rear right seat belt warning lamp
If the corresponding seat belt is not fastened
or is unfastened, when the ignition is switched
on, the seat belts warning lamp comes on in the
instrument panel and the corresponding warning
lamp (1 to 5) comes on in red in the seat belt and
front passenger airbag warning lamps display.
If a rear seat belt is not fastened, the
corresponding warning lamp (3 to 5)
comes on for around 30 seconds.
From about 12 mph (20 km/h) and for 2 minutes,
each warning lamp corresponding to an occupied
seat whose seat belt is unfastened flashes,
accompanied by an audible signal. After these 2
minutes, the corresponding seat warning lamp
remains on until the driver or the front/rear
passenger fasten their seat belt.
Front seat belt warning lamp(s)
On switching on the ignition, the warning lamp
comes on in the instrument panel and the
corresponding warning lamp(s) come(s) on in
red in the seat belt and front passenger airbag
warning lamp display if the driver's seat belt and/
or the passenger(s) seat belt is/are not fastened
or is/are unfastened.
Rear seat belt warning lamp(s)
The corresponding warning lamp comes on in
red in the seat belt and front passenger airbag
warning lamp display screen if one or more rear
passengers unfasten their seat belts.
Advice
The driver must ensure that passengers
use the seat belts correctly and that they
are all fastened before setting off.
Wherever seated in the vehicle, you must
always fasten the seat belt, even for short
journeys.
Do not interchange the seat belt buckles, as
they will not fulfil their role fully.
Before and after use, ensure that the seat belt
is reeled in correctly.
After folding or moving a seat or rear bench
seat, ensure that the seat belt is positioned
and reeled in correctly.
Installation
The lower part of the strap must be
positioned as low as possible on the pelvis.
The upper part must be positioned in the
hollow of the shoulder.
In order to be effective, a seat belt:
–
must be tigh
tened as close to the body as
possible;
–
must be pulled in fron
t of you with a smooth
movement, ensuring that it is not twisted;
–
must only be used t
o secure one person;
–
must no
t show signs of tearing or fraying;
–
must no
t be changed or modified, in order to
avoid affecting its performance.
Recommendations for children
Use a suitable child seat if the passenger
is less than 12 years old or shorter than one
and a half metres.
Never use the same seat belt to secure more
than one child.
Never carry a child on your lap.
For more information on Child seats, refer to
the corresponding section.
Maintenance
In accordance with current safety
regulations, for all repairs on your vehicle's
seat belts, go to a qualified workshop with the
skills and equipment needed, which a dealer is
able to provide.
Page 72 of 244
70Safety05
Lateral airbags
In the event of a serious side impact, this system
protects the driver and front passenger to
mitigate the risk of injury to the chest between
the hip and the shoulder.
At the front, each lateral airbag is fitted in the
seat backrest frame, door side. At the rear, each
lateral airbag is fitted in the rear pillar.
Deployment
The lateral airbags are deployed on one side in
the event of a serious side impact applied to all or
part of the side impact zone B.
The lateral airbag inflates between the hip
and shoulder of the vehicle's occupant and the
corresponding door panel.
Curtain airbags
System contributing towards greater protection
for the driver and passengers (with the exception
Have your seat belts checked regularly by a
dealer or a qualified workshop, particularly if
the straps show signs of damage.
Clean the seat belt straps with soapy water or
a textile cleaning product, sold by dealers.
Airbags
General information
System designed to help improve the safety of the
occupants sitting in the front seats and the rear
outer seats, in the event of a violent collision. The
airbags supplement the action of the seat belts
equipped with a force limiting system.
Electronic detectors record and analyse the
front and side impacts sustained in the impact
detection zones:
–
In the e
vent of violent impact, the airbags
deploy instantly and help better protect the
occupants of the vehicle; immediately after the
impact, the airbags deflate rapidly in order not
to hinder the visibility or the possible exit of the
occupants.
–
In the e
vent of a slight impact, a rear impact
and under certain rollover conditions, the airbags
may not deploy; only the seat belt helps to protect
you in these situations.
* For more in formation on Deactivating the front passenger airbag, refer to the corresponding section.
The seriousness of the impact depends on the
nature of the obstacle and the speed of the
vehicle at the moment of collision.
The airbags do not operate when the
ignition is switched off.
This equipment will only deploy once. If a
second impact occurs (during the same or a
subsequent accident), the airbag will not be
deployed again.
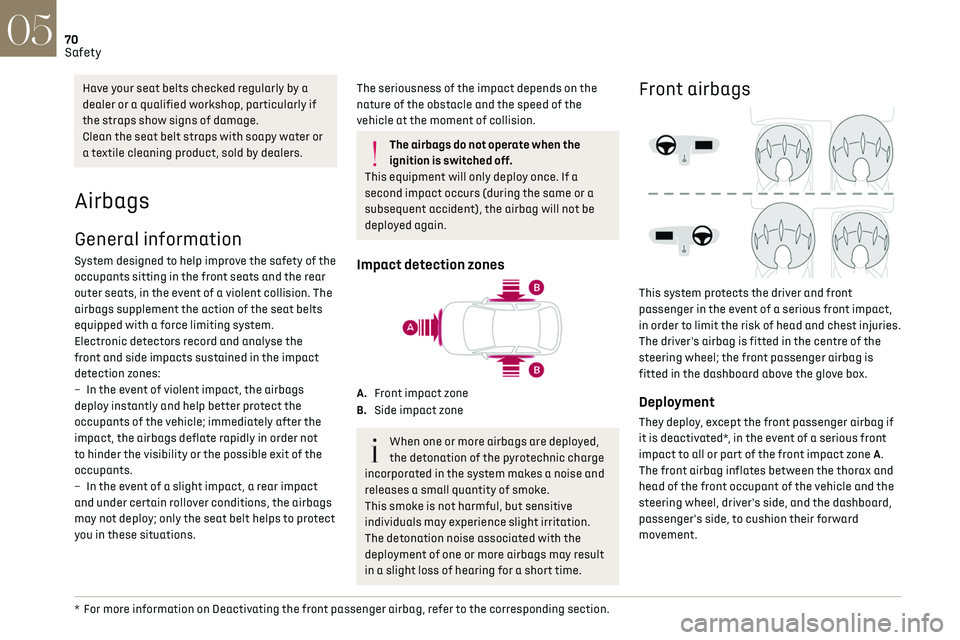
Impact detection zones
A. Front impact zone
B. Side impact zone
When one or more airbags are deployed,
the detonation of the pyrotechnic charge
incorporated in the system makes a noise and
releases a small quantity of smoke.
This smoke is not harmful, but sensitive
individuals may experience slight irritation.
The detonation noise associated with the
deployment of one or more airbags may result
in a slight loss of hearing for a short time.
Front airbags
This system protects the driver and front
passenger in the event of a serious front impact,
in order to limit the risk of head and chest injuries.
The driver's airbag is fitted in the centre of the
steering wheel; the front passenger airbag is
fitted in the dashboard above the glove box.
Deployment
They deploy, except the front passenger airbag if
it is deactivated*, in the event of a serious front
impact to all or part of the front impact zone A.
The front airbag inflates between the thorax and
head of the front occupant of the vehicle and the
steering wheel, driver's side, and the dashboard,
passenger's side, to cushion their forward
movement.
Page 73 of 244

71Safety05
Lateral airbags
In the event of a serious side impact, this system
protects the driver and front passenger to
mitigate the risk of injury to the chest between
the hip and the shoulder.
At the front, each lateral airbag is fitted in the
seat backrest frame, door side. At the rear, each
lateral airbag is fitted in the rear pillar.
Deployment
The lateral airbags are deployed on one side in
the event of a serious side impact applied to all or
part of the side impact zone B.
The lateral airbag inflates between the hip
and shoulder of the vehicle's occupant and the
corresponding door panel.
Curtain airbags
System contributing towards greater protection
for the driver and passengers (with the exception
of the rear centre passenger) in the event of a
serious side impact in order to limit the risk of
injury to the side of the head.
Each curtain airbag is built into the pillars and the
upper passenger compartment area.
Deployment
It deploys simultaneously with the corresponding
lateral airbag in the event of a serious side impact
applied to all or part of the side impact zone B.
The curtain airbag inflates between the front
and rear occupants of the vehicle and the
corresponding windows.
Malfunction
If this warning lamp comes on in the
instrument panel, you must contact a
dealer or a qualified workshop to have the system
checked.
The airbags may not be deployed in the event of a
serious impact.
In the event of a minor impact or bump at
the side of the vehicle or if the vehicle
rolls over, the airbags may not be deployed.
In the event of a rear or front collision, none of
the lateral airbags are deployed.
Advice
For the airbags to be fully effective,
observe the safety recommendations
below.
Adopt a normal upright sitting position.
Fasten the seat belt ensuring it is correctly
positioned and adjusted.
Do not leave anything between the occupants
and the airbags (a child, pet, object, etc.), nor
fix or attach anything close to or in the way of
the airbag release trajectory; this could cause
injuries during their deployment.
Never modify the original definition of your
vehicle, particularly in the area directly around
the airbags.
After an accident or if the vehicle has been
stolen, have the airbag systems checked.
All work on the airbag systems must only be
carried out by a dealer or a qualified workshop.
Even if all of the precautions mentioned are
observed, a risk of injury or of minor burns to
the head, chest or arms cannot be ruled out
when an airbag is deployed. The airbag inflates
almost instantly (within a few milliseconds)
then deflates within the same time
discharging the hot gas via openings provided
for this purpose.
Front airbags
Do not drive holding the steering wheel by
its spokes or resting your hands on the centre
part of the wheel.
Page 78 of 244

76Safety05
Installing ISOFIX and i-Size
universal child seats
In compliance with European regulations, this
table indicates the possibilities of installing child
Rear seats
This system prevents the child seat from tipping
forward in the event of a front impact.
This ISOFIX mounting system provides fast,
reliable and safe fitting of the child seat in the
vehicle.
To secure the child seat to the TOP TETHER:
► Remove and stow the head restraint before
installing the child seat on this seat (refit it once
the child seat has been removed).
► Pass the upper strap of the child seat behind
the seat backrest, between the head restraint
rods.
► Secure the upper strap hook to ring B.
► Tighten the upper strap.
When fitting an ISOFIX child seat to the
left-hand rear seat of the bench seat,
before fitting the seat, first move the centre
rear seat belt towards the middle of the
vehicle, so as to avoid the seat interfering with
the operation of the seat belt.
An incorrectly installed child seat
compromises the child's safety in the
event of an accident.
Strictly observe the fitting instructions
provided in the user guide supplied with the
child seat.
For information about the installation
possibilities for ISOFIX child seats in your
vehicle, refer to the summary table.
Recommended ISOFIX child seats
Also consult the user guide from the child
seat’s manufacturer to find out how to
install and remove the seat.
"RÖMER Baby-Safe Plus and its ISOFIX base" (size category: E)
Group 0+: from birth to 13 kg
Installed "rearward facing" using an ISOFIX base which is attached to rings A.
The base has a support leg, height-adjustable, which rests on the vehicle's floor.
This child seat can also be secured with a seat belt. In this case, only the shell is used and
attached to the vehicle seat using the three- point seat belt.
"RÖMER Duo Plus ISOFIX"(size category: B1)
Group 1: from 9 to 18 kg
"RÖMER Duo Plus ISOFIX" (size category: B1)
Group 1: from 9 to 18 kg
Suitable for forward-facing installation only.
Attached to rings A and ring B, referred to as TOP TETHER, using an upper strap.
Three seat body angles: sitting, reclining, lying down.
This child seat can also be used in seat
positions not equipped with ISOFIX mountings. In this case, it must be secured to the vehicle's seat by the three-point seat belt. Adjust the
front seat of the vehicle so that the child's feet do not touch the backrest.
i-Size child seats
i-Size child seats have two latches that engage on
the two rings A.
These i-Size child seats also have:
–
either an upper strap tha
t is attached to ring B,
–
or a support leg tha
t rests on the vehicle floor,
compatible with the approved i-Size seat position,
the role of which is to prevent the child seat from
tipping forward in the event of a collision.
For more information on the ISOFIX mountings,
refer to the corresponding section.
Page 82 of 244
80Driving06
Driving recommendations
► Observe the driving regulations and remain
vigilant whatever the traffic conditions.
► Monitor your environment and keep your
hands on the wheel to be able to react to anything
that may happen any time.
► Drive smoothly, anticipate the need for braking
and maintain a longer safety distance, especially
in bad weather.
► Stop the vehicle to carry out operations that
require close attention (such as adjustments).
► During long trips, take a break every two
hours.
Important!
Never leave the engine running in a closed
space without sufficient ventilation.
Internal combustion engines emit toxic
exhaust gases such as carbon monoxide.
Danger of poisoning and death!
In severe wintry conditions (temperature
below -23°C), let the engine run for 4
minutes before moving off, to ensure the
correct operation and durability of the
mechanical components of your vehicle
(engine and gearbox).
Never drive with the parking brake
applied. Risk of overheating and damage
to the braking system!
Do not park the vehicle or leave the engine
running on a flammable surface (dry
grass, dead leaves, etc.). The exhaust system
of your vehicle is very hot, even several
minutes after the engine stops. Risk of fire!
Never leave a vehicle unattended with the
engine running. If you have to leave your
vehicle with the engine running, apply the
parking brake and put the gearbox into neutral
or position N or P (depending on the type of
gearbox).
Never leave children inside the vehicle
unsupervised.
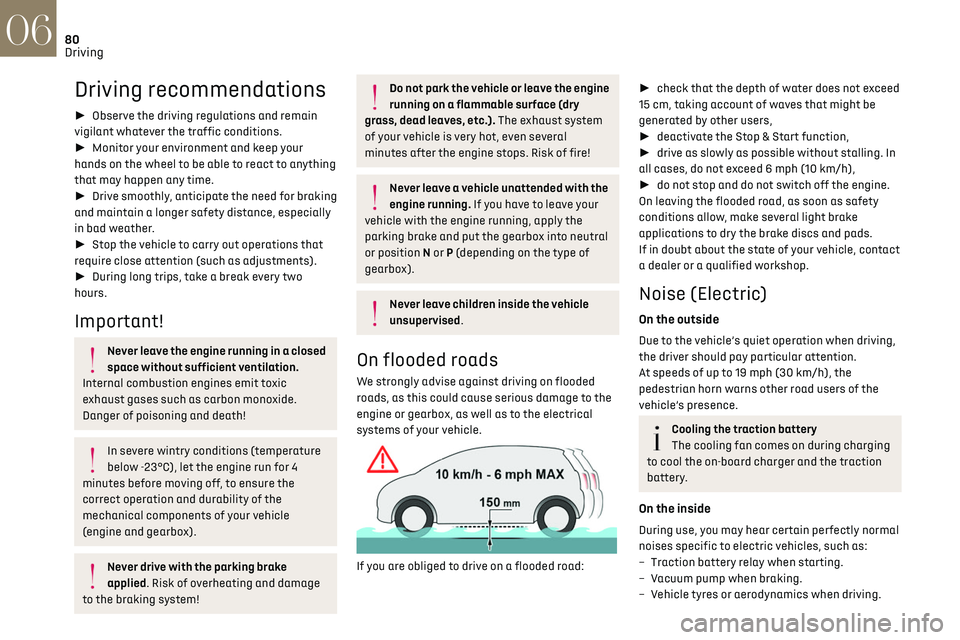
On flooded roads
We strongly advise against driving on flooded
roads, as this could cause serious damage to the
engine or gearbox, as well as to the electrical
systems of your vehicle.
If you are obliged to drive on a flooded road:
► check that the depth of water does not exceed
15 cm, taking account of waves that might be
generated by other users,
► deactivate the Stop & Start function,
► drive as slowly as possible without stalling. In
all cases, do not exceed 6 mph (10 km/h),
► do not stop and do not switch off the engine.
On leaving the flooded road, as soon as safety
conditions allow, make several light brake
applications to dry the brake discs and pads.
If in doubt about the state of your vehicle, contact
a dealer or a qualified workshop.
Noise (Electric)
On the outside
Due to the vehicle’s quiet operation when driving,
the driver should pay particular attention.
At speeds of up to 19 mph (30 km/h), the
pedestrian horn warns other road users of the
vehicle’s presence.
Cooling the traction battery
The cooling fan comes on during charging
to cool the on-board charger and the traction
battery.
On the inside
During use, you may hear certain perfectly normal
noises specific to electric vehicles, such as:
–
Traction ba
ttery relay when starting.
–
V
acuum pump when braking.
–
V
ehicle tyres or aerodynamics when driving.
– Jolting and knocking noise during hill starts.
Towing
Driving with a trailer places greater
demands on the towing vehicle and
particular care must be taken.
Do not exceed the maximum towable
weights.
At altitude: reduce the maximum load by 10%
per 1,000 metres of altitude; the lower air
density at high altitudes decreases engine
performance.
New vehicle: do not tow a trailer until the
vehicle has driven at least 620 miles
(1,000 kilometres).
If the outside temperature is high, let the
engine idle for 1 to 2 minutes after the
vehicle comes to a stop, to help it to cool.
Before setting off
Nose weight
► Distribute the load in the trailer so that the
heaviest items are as close as possible to the axle
and the nose weight (at the point where it joins
your vehicle) approaches the maximum permitted
without exceeding it.
Page 85 of 244
83Driving06
Switching on the ignition
without starting the engine
With the electronic key in the passenger
compartment, pressing the “START/STOP” button,
without pressing any of the pedals, allows the
ignition to be switched on without starting the
engine.
► Press this button again to switch off the
ignition and allow the vehicle to be locked.
Key not detected
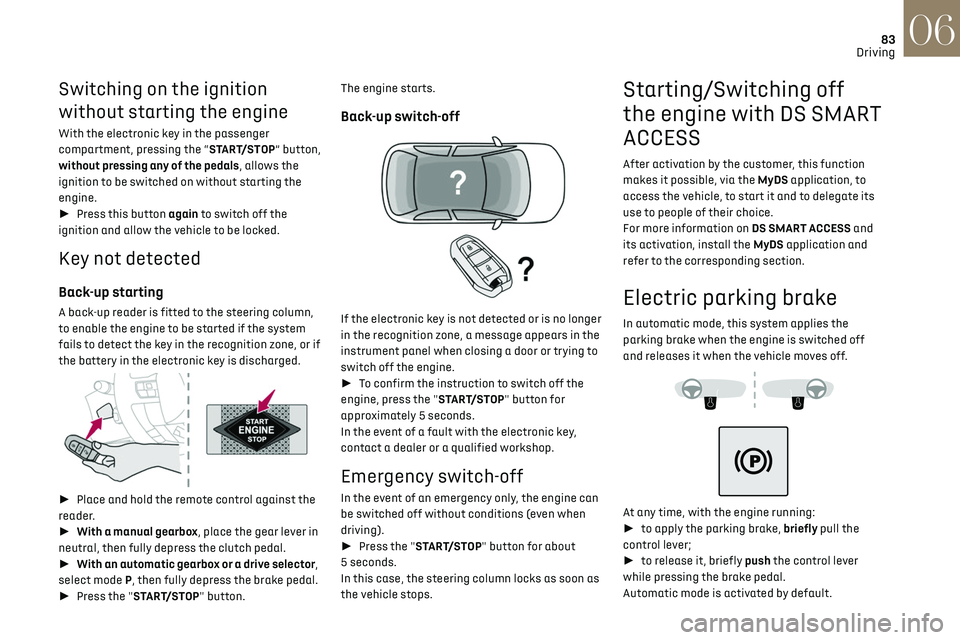
Back-up starting
A back-up reader is fitted to the steering column,
to enable the engine to be started if the system
fails to detect the key in the recognition zone, or if
the battery in the electronic key is discharged.
► Place and hold the remote control against the
reader.
► With a manual gearbox, place the gear lever in
neutral, then fully depress the clutch pedal.
► With an automatic gearbox or a drive selector,
select mode P, then fully depress the brake pedal.
► Press the "START/STOP" button. The engine starts.
Back-up switch-off
If the electronic key is not detected or is no longer
in the recognition zone, a message appears in the
instrument panel when closing a door or trying to
switch off the engine.
►
To confirm the instruction to switch off the
engine, press the "START/STOP" button for
approximately 5 seconds.
In the event of a fault with the electronic key,
contact a dealer or a qualified workshop.
Emergency switch-off
In the event of an emergency only, the engine can
be switched off without conditions (even when
driving).
► Press the "START/STOP" button for about
5 seconds.
In this case, the steering column locks as soon as
the vehicle stops.
Starting/Switching off
the engine with DS SMART
ACCESS
After activation by the customer, this function
makes it possible, via the MyDS application, to
access the vehicle, to start it and to delegate its
use to people of their choice.
For more information on DS SMART ACCESS and
its activation, install the MyDS application and
refer to the corresponding section.
Electric parking brake
In automatic mode, this system applies the
parking brake when the engine is switched off
and releases it when the vehicle moves off.
At any time, with the engine running:
► to apply the parking brake, briefly pull the
control lever;
► to release it, briefly push the control lever
while pressing the brake pedal.
Automatic mode is activated by default.
Page 86 of 244
84Driving06
Indicator lamp
This indicator lamp comes on on the
instrument panel and on the control lever
to confirm the application of the parking brake,
accompanied by the display of the message
"Parking brake applied".
The indicator lamp goes out to confirm the release
of the parking brake, accompanied by the display
of the message "Parking brake released".
The indicator lamp flashes in response to a
manual request to apply or release the brake.
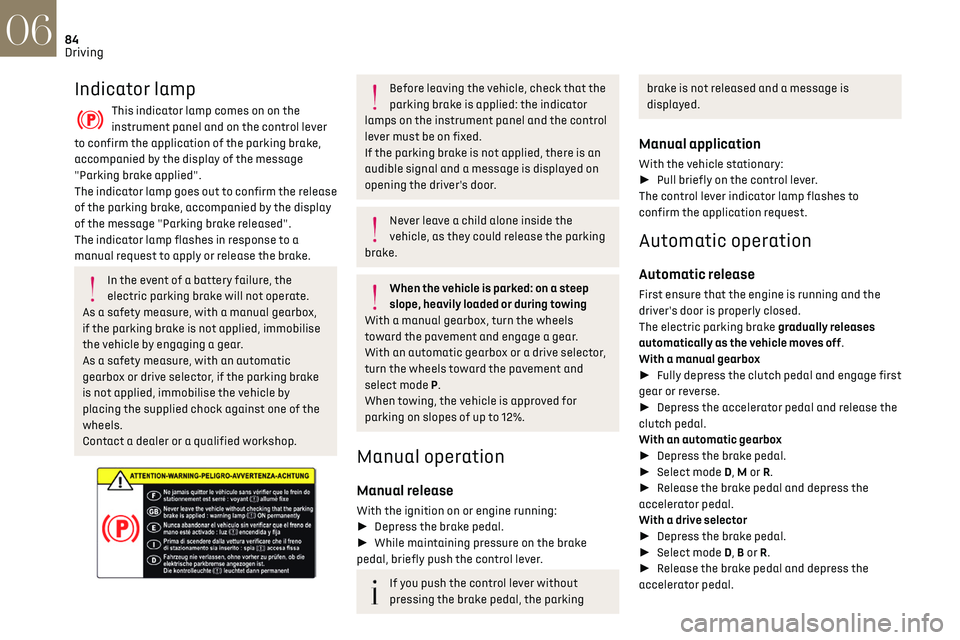
In the event of a battery failure, the
electric parking brake will not operate.
As a safety measure, with a manual gearbox,
if the parking brake is not applied, immobilise
the vehicle by engaging a gear.
As a safety measure, with an automatic
gearbox or drive selector, if the parking brake
is not applied, immobilise the vehicle by
placing the supplied chock against one of the
wheels.
Contact a dealer or a qualified workshop.
Before leaving the vehicle, check that the
parking brake is applied: the indicator
lamps on the instrument panel and the control
lever must be on fixed.
If the parking brake is not applied, there is an
audible signal and a message is displayed on
opening the driver's door.
Never leave a child alone inside the
vehicle, as they could release the parking
brake.
When the vehicle is parked: on a steep
slope, heavily loaded or during towing
With a manual gearbox, turn the wheels
toward the pavement and engage a gear.
With an automatic gearbox or a drive selector,
turn the wheels toward the pavement and
select mode P.
When towing, the vehicle is approved for
parking on slopes of up to 12%.
Manual operation
Manual release
With the ignition on or engine running:
► Depress the brake pedal.
► While maintaining pressure on the brake
pedal, briefly push the control lever.
If you push the control lever without
pressing the brake pedal, the parking
brake is not released and a message is
displayed.
Manual application
With the vehicle stationary:
► Pull briefly on the control lever.
The control lever indicator lamp flashes to
confirm the application request.
Automatic operation
Automatic release
First ensure that the engine is running and the
driver's door is properly closed.
The electric parking brake gradually releases
automatically as the vehicle moves off.
With a manual gearbox
► Fully depress the clutch pedal and engage first
gear or reverse.
► Depress the accelerator pedal and release the
clutch pedal.
With an automatic gearbox
► Depress the brake pedal.
► Select mode D, M or R.
► Release the brake pedal and depress the
accelerator pedal.
With a drive selector
► Depress the brake pedal.
► Select mode D, B or R.
► Release the brake pedal and depress the
accelerator pedal.
With an automatic gearbox or drive
selector, if the brake does not release
automatically, check that the front doors are
correctly closed.
When stationary with the engine running,
do not depress the accelerator pedal
unnecessarily. Risk of parking brake release.
Automatic application
With the vehicle stationary, the parking brake
is automatically applied when the engine is
switched off.
It is not applied automatically if the
engine stalls or enters STOP mode of Stop
& Start.
With automatic operation, it is also
possible to manually apply or release the
parking brake using the control lever.
Special cases
Immobilising the vehicle with the engine
running
To immobilise the vehicle with the engine running,
briefly pull the control lever.
Page 87 of 244
85
Driving06
With an automatic gearbox or drive
selector, if the brake does not release
automatically, check that the front doors are
correctly closed.
When stationary with the engine running,
do not depress the accelerator pedal
unnecessarily. Risk of parking brake release.
Automatic application
With the vehicle stationary, the parking brake
is automatically applied when the engine is
switched off.
It is not applied automatically if the
engine stalls or enters STOP mode of Stop
& Start.
With automatic operation, it is also
possible to manually apply or release the
parking brake using the control lever.
Special cases
Immobilising the vehicle with the engine
running
To immobilise the vehicle with the engine running,
briefly pull the control lever.
Parking the vehicle with the brake
released
In very cold conditions (ice), applying the
parking brake is not recommended.
To immobilise the vehicle, engage a gear or
place the chocks against one of the wheels.
Immobilising the vehicle with the parking brake
released
► Switch off the engine.
► Switch on the ignition again, without starting
the engine.
► Release the parking brake manually by
pushing the control lever while keeping your foot
on the brake pedal.
► Switch off the ignition.
With an automatic gearbox or drive
selector, mode P is automatically selected
when the ignition is switched off. The wheels
are blocked.
For more information on Changing to free-
wheeling, refer to the corresponding section.
With an automatic gearbox or drive
selector, while mode N is selected,
opening the driver’s door triggers an audible
signal. It stops when the driver's door closes
again.
Deactivating automatic
operation
In some situations, for example when it is
extremely cold or when towing (e.g. caravan,
breakdown), it may be necessary to deactivate
automatic operation of the system.
► Start the engine.
► Use the control lever to apply the parking
brake, if it is released.
► Take your foot fully off the brake pedal.
► Hold the control lever pressed in the release
direction for between 10 and a maximum of 15
seconds.
► Release the control lever.
► Depress and hold the brake pedal.
► Pull the control lever in the “Application”
direction for 2 seconds.
This indicator lamp on the instrument
panel comes on to confirm deactivation of
the automatic functions.
► Release the control lever and the brake pedal.
From now on, the parking brake can only be
applied and released manually using the control
lever.
Repeat this procedure to reactivate automatic
operation (confirmed by the indicator lamp on the
instrument panel going off).
Emergency braking
In the event of a fault with the brake pedal or
in an exceptional situation (e.g. driver taken ill,
driver under instruction), a continuous pull on the