wiring CITROEN DS3 CROSSBACK 2023 Owners Manual
[x] Cancel search | Manufacturer: CITROEN, Model Year: 2023, Model line: DS3 CROSSBACK, Model: CITROEN DS3 CROSSBACK 2023Pages: 244, PDF Size: 7.7 MB
Page 36 of 244

34
Access02
System which protects and provides a deterrent
against theft and break-ins.
Exterior perimeter monitoring
The system checks for opening of the vehicle.
The alarm is triggered if anyone tries to open a
door, the boot or the bonnet, for example.
Interior volumetric monitoring
The system checks for any variation in volume in
the passenger compartment.
The alarm is triggered if anyone breaks a window,
enters the passenger compartment or moves
inside the vehicle.
Self-protection function
The system checks for the putting out of service
of its components.
The alarm is triggered if the battery, the central
control or the siren wiring is put out of service or
damaged.For all work on the alarm system, contact
a dealer or a qualified workshop.
Locking the vehicle with full
alarm system
Activation
► Switch off the ignition and exit the vehicle.
► Lock or deadlock the vehicle using the remote
control or by pressing on one of the front door
handles.
Too frequent presses on the handle up to
the point of resistance may damage its
mechanism.
In case of frost, press the handle to
release it.
From inside the vehicle, it is possible to unfold the
handles:
–
b
y opening a door,
–
b
y pressing the central locking button once
when the vehicle is locked or twice when
unlocked.
When driving, the handles automatically retract
once the vehicle speed exceeds 2 mph (3 km/h).
Opening
From outside
► Unlock your vehicle to unfold the door handles.
► Pull the handle.
When selective unlocking is activated,
only the driver door's handle will unfold
and only the driver's door can be opened.
From inside
► Pull the interior door opening lever; the exterior
door handles unfold automatically.
Opening one of the doors from inside unlocks the
rest of the vehicle.
With selective unlocking activated:
– O pening the driver's door unlocks the
driver's door only (if the vehicle has not already
been completely unlocked).
–
O
pening one of the passenger doors unlocks
the rest of the vehicle.
–
O
pening a door from inside causes the
unfolding of all the exterior handles.
Boot
Opening
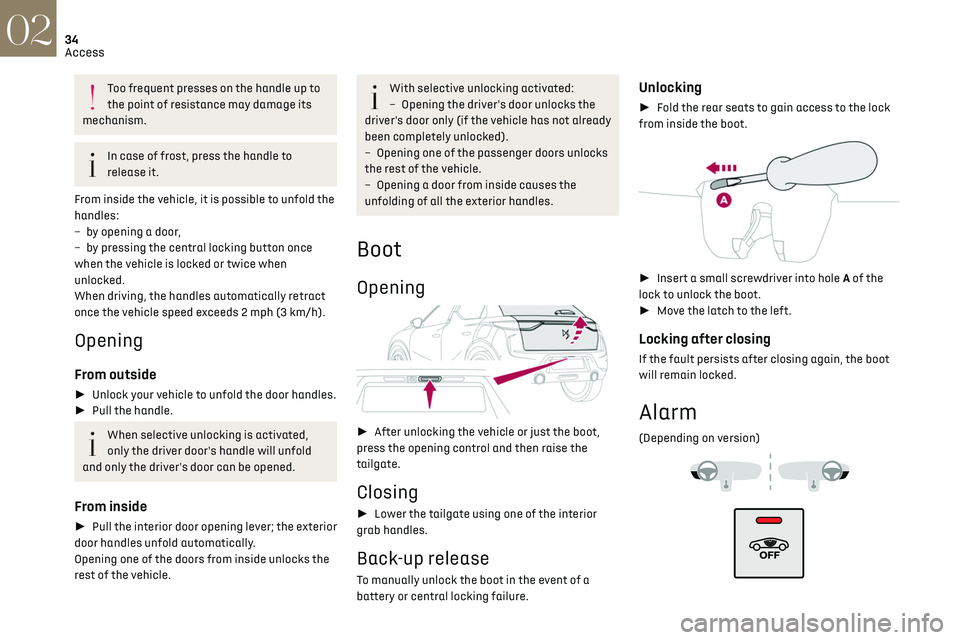
► After unlocking the vehicle or just the boot,
press the opening control and then raise the
tailgate.
Closing
► Lower the tailgate using one of the interior
grab handles.
Back-up release
To manually unlock the boot in the event of a
battery or central locking failure.
Unlocking
► Fold the rear seats to gain access to the lock
from inside the boot.
► Insert a small screwdriver into hole A of the
lock to unlock the boot.
► Move the latch to the left.
Locking after closing
If the fault persists after closing again, the boot
will remain locked.
Alarm
(Depending on version)
Page 37 of 244

35
Access02
System which protects and provides a deterrent
against theft and break-ins.
Exterior perimeter monitoring
The system checks for opening of the vehicle.
The alarm is triggered if anyone tries to open a
door, the boot or the bonnet, for example.
Interior volumetric monitoring
The system checks for any variation in volume in
the passenger compartment.
The alarm is triggered if anyone breaks a window,
enters the passenger compartment or moves
inside the vehicle.
Self-protection function
The system checks for the putting out of service
of its components.
The alarm is triggered if the battery, the central
control or the siren wiring is put out of service or
damaged.
For all work on the alarm system, contact
a dealer or a qualified workshop.
Locking the vehicle with full
alarm system
Activation
► Switch off the ignition and exit the vehicle.
► Lock or deadlock the vehicle using the remote
control or by pressing on one of the front door
handles.
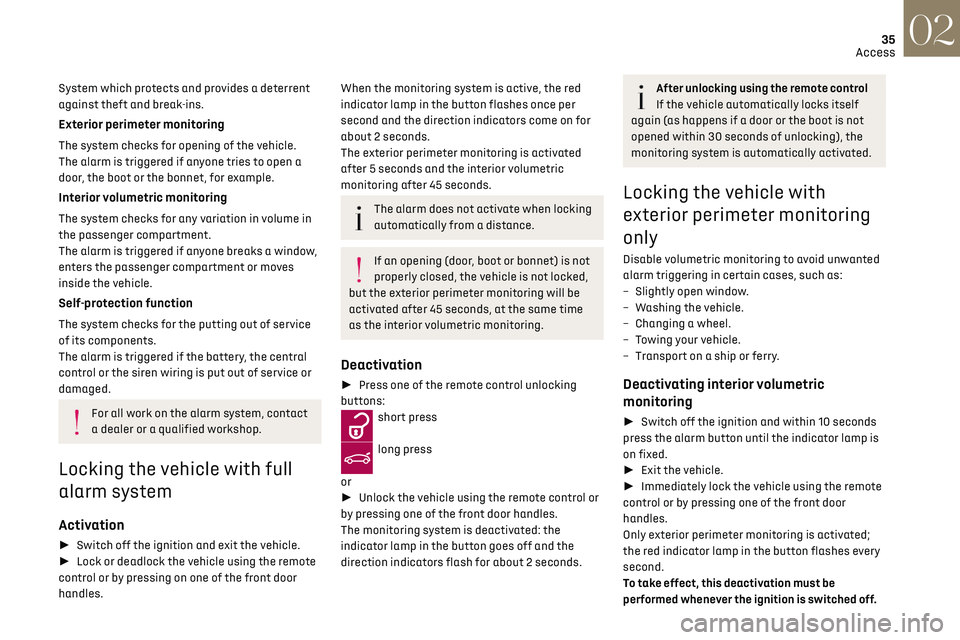
When the monitoring system is active, the red
indicator lamp in the button flashes once per
second and the direction indicators come on for
about 2 seconds.
The exterior perimeter monitoring is activated
after 5 seconds and the interior volumetric
monitoring after 45 seconds.
The alarm does not activate when locking
automatically from a distance.
If an opening (door, boot or bonnet) is not
properly closed, the vehicle is not locked,
but the exterior perimeter monitoring will be
activated after 45 seconds, at the same time
as the interior volumetric monitoring.
Deactivation
► Press one of the remote control unlocking
buttons:
short press
long press
or
► Unlock the vehicle using the remote control or
by pressing one of the front door handles.
The monitoring system is deactivated: the
indicator lamp in the button goes off and the
direction indicators flash for about 2 seconds.
After unlocking using the remote control
If the vehicle automatically locks itself
again (as happens if a door or the boot is not
opened within 30 seconds of unlocking), the
monitoring system is automatically activated.
Locking the vehicle with
exterior perimeter monitoring
only
Disable volumetric monitoring to avoid unwanted
alarm triggering in certain cases, such as:
–
Sligh
tly open window.
–
W
ashing the vehicle.
–
C
hanging a wheel.
–
T
owing your vehicle.
–
Transport on a ship or ferry
.
Deactivating interior volumetric
monitoring
► Switch off the ignition and within 10 seconds
press the alarm button until the indicator lamp is
on fixed.
► Exit the vehicle.
► Immediately lock the vehicle using the remote
control or by pressing one of the front door
handles.
Only exterior perimeter monitoring is activated;
the red indicator lamp in the button flashes every
second.
To take effect, this deactivation must be
performed whenever the ignition is switched off.
Page 138 of 244

136
Practical information07
The red indicator lamp in the flap comes on to
indicate that the nozzle is locked.
If charging has finished but the cable is
still connected, opening the driver's door
restarts charging for around 20 seconds.
Accelerated charging
► Follow the instructions for use of the
accelerated charging unit (Wallbox).
► Remove the protective cover from the
charging nozzle.
► Insert the nozzle into the charging connector.
The start of charging is confirmed when the
charging indicator lamp in the flap flashes green.
If this is not the case, charging has not started;
restart the procedure, ensuring that the nozzle is
inserted correctly.
The red indicator lamp in the flap comes on to
indicate that the nozzle is locked.
Fast charging
► Depending on version, remove the protective
cover from the base.
► Connect the charging cable to the vehicle
connector, following the instructions for use of
the fast public charger.
The start of charging is confirmed when the
charging indicator lamp in the flap flashes green.
If this is not the case, charging has not started;
restart the procedure, ensuring that the
connection is correct.
The red indicator lamp in the flap comes on to
indicate that the nozzle is locked.
Disconnection
Before disconnecting the nozzle from the
charging connector:
► If the vehicle is unlocked, lock it and then
unlock it.
► If the vehicle is locked, unlock it. The red indicator lamp in the flap goes out to
confirm that the charging nozzle is unlocked.
►
Within 30 seconds, remove the charging
nozzle.
Domestic charging
When charging is complete, the green CHARGE
indicator lamp on the control unit comes on fixed.
► Replace the protective cover on the charging
nozzle and close the charging flap.
► Disconnect the control unit end of the
charging cable from the domestic socket.
Accelerated charging
The end of charging is indicated by the charging
control unit and by the fixed lighting of the green
indicator lamp in the flap.
► Hang up the nozzle on the charging unit and
close the charging flap.
Fast charging
The end of charging is indicated by the charger
and by the fixed lighting of the green indicator
lamp in the flap.
► Hang up the nozzle on the charging station.
► Depending on version, replace the protective
cover on the base and close the charging flap.
Towing device
Load distribution
► Distribute the load in the trailer so that
the heaviest items are as close as possible to
the axle, and the nose weight approaches the
maximum permitted without exceeding it.
Air density decreases with altitude, thus reducing
engine performance. The maximum load which
can be towed must be reduced by 10% per
1,000 metres of altitude.
Use towing devices and their genuine
wiring harnesses approved by the
Manufacturer. It is recommended that the
Page 139 of 244

137
Practical information07
Accelerated charging
The end of charging is indicated by the charging
control unit and by the fixed lighting of the green
indicator lamp in the flap.
► Hang up the nozzle on the charging unit and
close the charging flap.
Fast charging
The end of charging is indicated by the charger
and by the fixed lighting of the green indicator
lamp in the flap.
► Hang up the nozzle on the charging station.
► Depending on version, replace the protective
cover on the base and close the charging flap.
Towing device
Load distribution
► Distribute the load in the trailer so that
the heaviest items are as close as possible to
the axle, and the nose weight approaches the
maximum permitted without exceeding it.
Air density decreases with altitude, thus reducing
engine performance. The maximum load which
can be towed must be reduced by 10% per
1,000 metres of altitude.
Use towing devices and their genuine
wiring harnesses approved by the
Manufacturer. It is recommended that the
fitting be performed by a dealer or a qualified
workshop.
If not fitted by a dealer, it must still be fitted
in accordance with the Manufacturer's
instructions.
Certain driving or manoeuvring aid functions
are automatically deactivated if an approved
towing system is used.
Observe the maximum authorised towable
weight, indicated on the vehicle's
registration certificate, the manufacturer's
label as well as in the Technical data section of
this guide.
Complying with the maximum authorised
nose weight (towball) also includes the use of
accessories (bicycle carriers, tow boxes, etc.).
Observe the legislation in force in the
country where you are driving.
Electric motor
Electric vehicles must never be equipped
with towing devices.
It is therefore not possible to tow a trailer or
caravan.
Roof bars
As a safety measure and to avoid
damaging the roof, it is essential to use
the transverse bars approved for the vehicle.
Observe the instructions on fitting and use
contained in the guide supplied with the roof
bars.
To install the roof bars, you must secure them
only to the four fixing points on the roof frame.
These points are concealed by the vehicle's doors
when they are closed.
The roof bar fixings include a lug to be fitted into
the hole at each fixing point.
Maximum load distributed over the roof
bars, for a loading height not exceeding
40 cm: 75 kg.
As this value may change, please verify the
maximum load set out in the manual supplied
with the roof bars.