warning Citroen DS3 RHD 2015 1.G Owner's Guide
[x] Cancel search | Manufacturer: CITROEN, Model Year: 2015, Model line: DS3 RHD, Model: Citroen DS3 RHD 2015 1.GPages: 387, PDF Size: 12.26 MB
Page 39 of 387
37
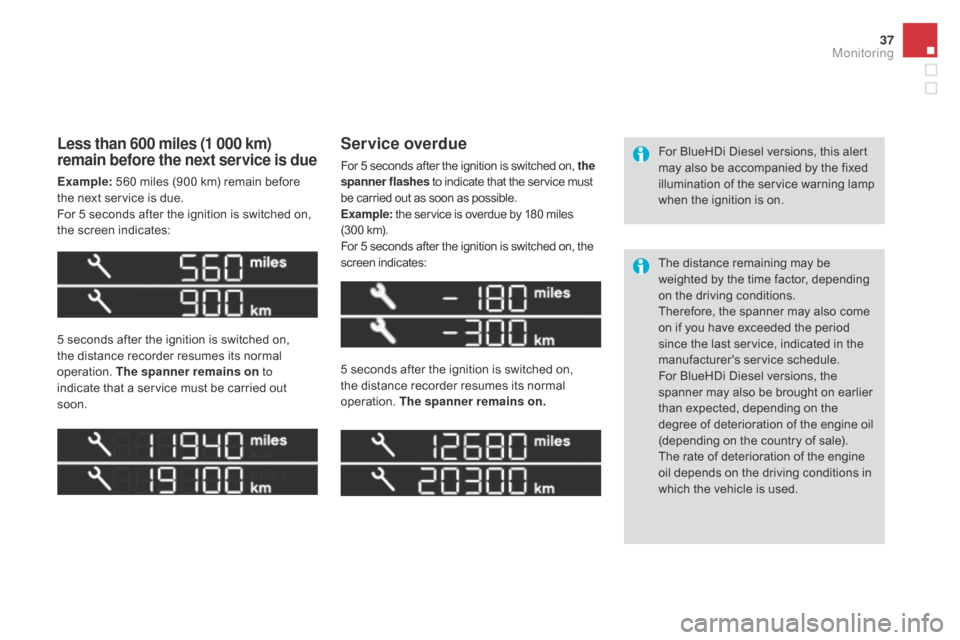
Less than 600 miles (1 000 km)
remain before the next service is due
Example: 560 miles (900 km) remain before t
he next service is due.
For
5 seconds after the ignition is switched on,
t
he screen indicates:
5
seconds after the ignition is switched on,
t
he distance recorder resumes its normal
ope
ration.
T
he spanner remains on to
indicate
that a service must be carried out
s
oon. 5
seconds after the ignition is switched on,
t
he distance recorder resumes its normal
ope
ration.
T
he spanner remains on.
Service overdue
For 5 seconds after the ignition is switched on, the
s panner flashes to indicate that the service must b
e carried out as soon as possible.
Example:
the service is overdue by 180 miles
(
300 km).
For
5 seconds after the ignition is switched on, the
s
creen indicates: For
BlueHDi Diesel versions, this alert m
ay also be accompanied by the fixed
i
llumination of the service warning lamp
w
hen the ignition is on.
The
distance remaining may be
w
eighted by the time factor, depending
o
n the driving conditions.
Therefore,
the spanner may also come
o
n if you have exceeded the period
s
ince the last service, indicated in the
ma
nufacturer's
ser
vice
s
chedule.
For
BlueHDi Diesel versions, the
s
panner may also be brought on earlier
t
han expected, depending on the
d
egree of deterioration of the engine oil
(
depending on the country of sale).
The
rate of deterioration of the engine
o
il depends on the driving conditions in
w
hich the vehicle is used.
Monitoring
Page 43 of 387
41
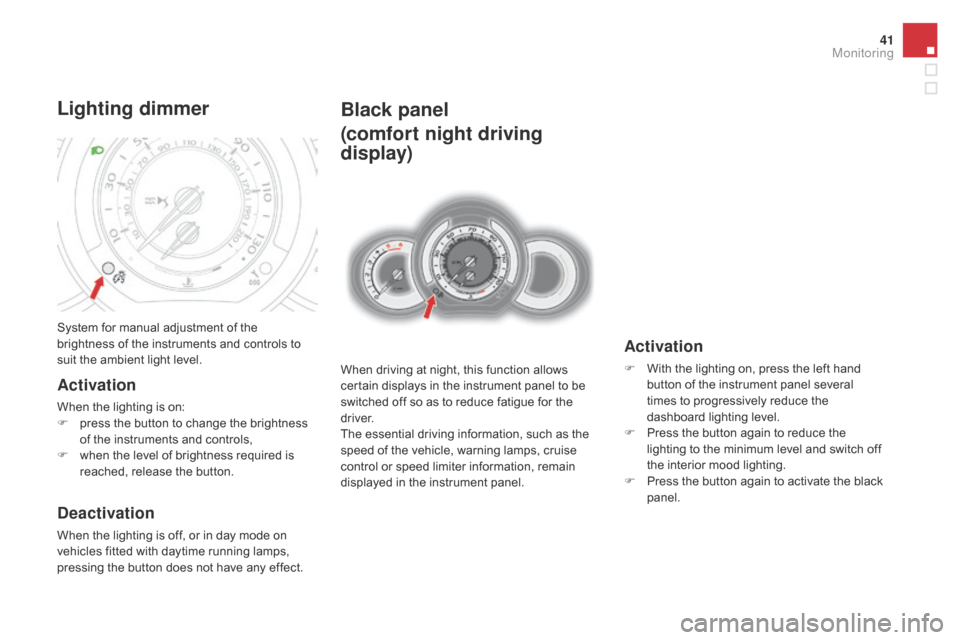
Black panel
(comfort night driving
display)
When driving at night, this function allows certain displays in the instrument panel to be
s
witched off so as to reduce fatigue for the
d
river.
The
essential driving information, such as the
s
peed of the vehicle, warning lamps, cruise
c
ontrol or speed limiter information, remain
d
isplayed in the instrument panel.
Activation
F With the lighting on, press the left hand b
utton of the instrument panel several
t
imes to progressively reduce the
d
ashboard lighting level.
F
P
ress the button again to reduce the
l
ighting to the minimum level and switch off
t
he interior mood lighting.
F
P
ress the button again to activate the black
pan
el.
System
for
manual
adjustment
of
the
b
rightness
of
the
instruments
and
controls
to
s
uit
the
ambient
light
level.
Lighting dimmer
Activation
When the lighting is on:
F p ress the button to change the brightness
o
f the instruments and controls,
F
w
hen the level of brightness required is
r
eached, release the button.
deactivation
When the lighting is off, or in day mode on vehicles fitted with daytime running lamps,
p
ressing the button does not have any effect.
Monitoring
Page 48 of 387
With the Audio system switched on, once this menu has been selected you can activate or
d
eactivate the functions associated with use
o
f the radio (RDS, REG, RadioText), the CD
(
introscan, shuffle, CD repeat) or the MP3
p
layer (USB port / auxiliary socket).
For
more information on the "Audio functions"
a
pplication
,
r
efer
t
o
t
he
"
Audio
s
ystem"
s
ection.
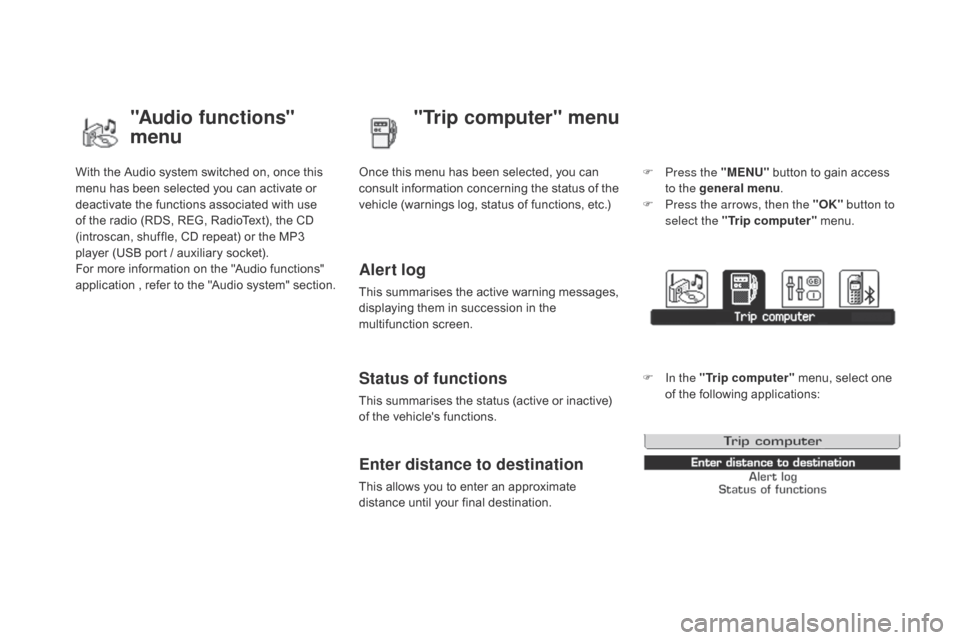
"Audio functions"
menu"Trip computer" menu
Once this menu has been selected, you can c
onsult information concerning the status of the
v
ehicle (warnings log, status of functions, etc.)
Alert log
This summarises the active warning messages, displaying them in succession in the
m
ultifunction
s
creen.
Status of functions
This summarises the status (active or inactive) of the vehicle's functions.
Enter distance to destination
This allows you to enter an approximate distance until your final destination. F
P
ress the "ME
n
U"
button to gain access
t
o the general menu
.
F
P
ress the arrows, then the "OK"
button to
select the " Trip computer " menu.
F
I
n the "
Trip computer " menu, select one
o
f the following applications:
Page 64 of 387
Following disconnection of the vehicle battery, replacement of the remote control battery or
i
n the event of a remote control malfunction,
y
ou can no longer unlock, lock or locate your
v
ehicle.
F
F
irst of all, use the key in the lock to unlock
o
r lock your vehicle.
F
T
hen, reinitialise the remote control.
If
the problem persists, contact a CITROËN
d
ealer as soon as possible.
Remote control problem
Reinitialisation
F Switch off the ignition.
F T urn the key to position 2 (Ignition).
F
P
ress the closed padlock immediately for a
f
ew seconds.
F
S
witch off the ignition and remove the key
f
rom the ignition switch.
The
remote control is fully operational again.
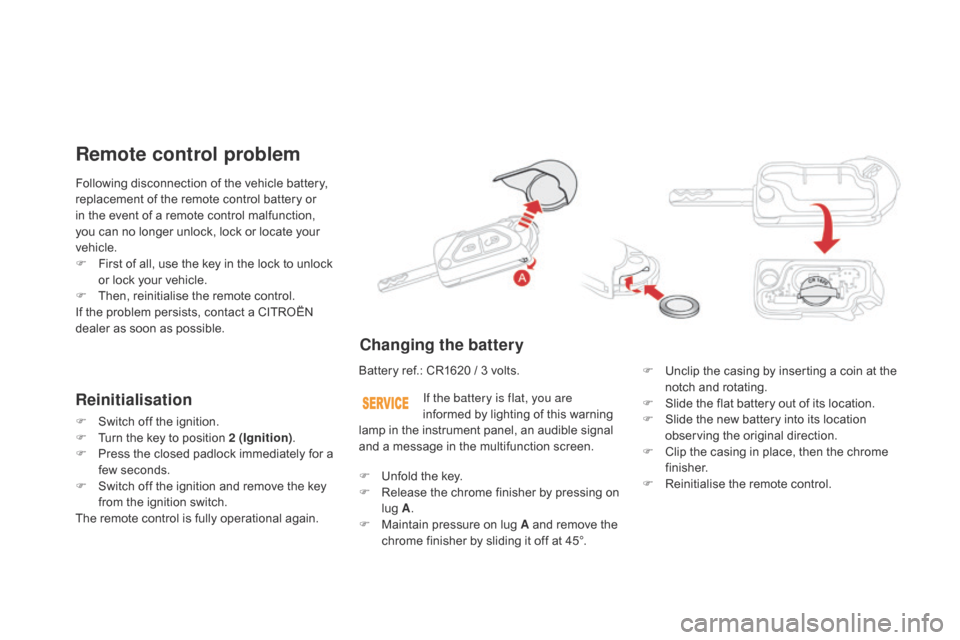
Changing the battery
Battery ref.: CR1620 / 3 volts.F U nclip the casing by inserting a coin at the
n
otch and rotating.
F
S
lide the flat battery out of its location.
F
S
lide the new battery into its location
o
bserving the original direction.
F
C
lip the casing in place, then the chrome
f
inisher.
F
R
einitialise the remote control.
If the battery is flat, you are
informed
by lighting of this warning
l
amp in the instrument panel, an audible signal
a
nd a message in the multifunction screen.
F
U
nfold the key.
F
R
elease the chrome finisher by pressing on
l
ug A.
F
M
aintain pressure on lug A and remove the
c
hrome finisher by sliding it off at 45°.
Page 72 of 387
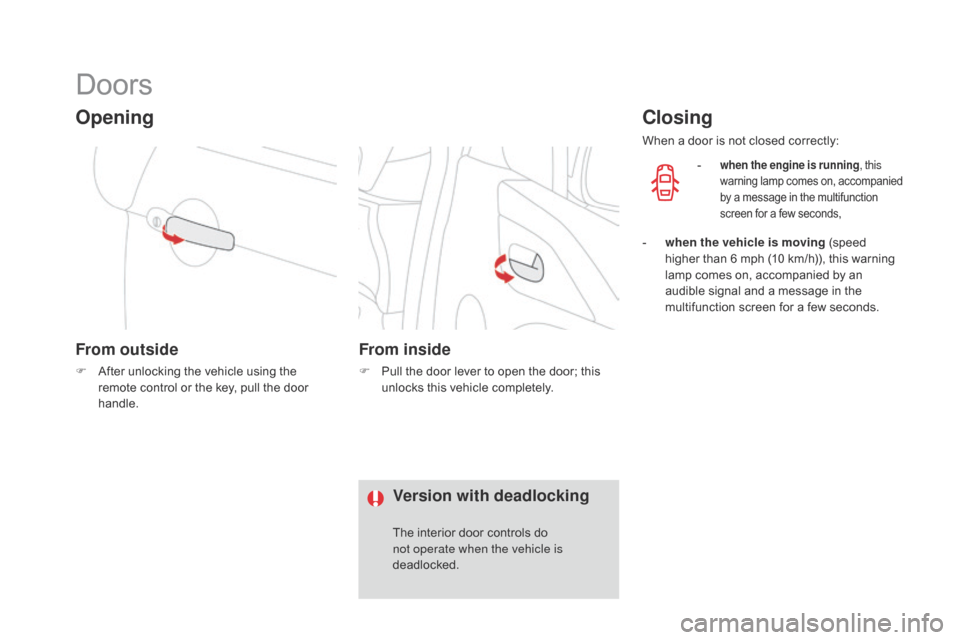
Doors
Opening
From outside
F After unlocking the vehicle using the r
emote control or the key, pull the door
han
dle.
From inside
F Pull the door lever to open the door; this u
nlocks this vehicle completely.
Closing
When a door is not closed correctly:
-
when the engine is running , this
warning lam p c omes o n, a ccompanied b
y a message in the multifunction
s
creen for a few seconds,
- when the vehicle is moving (speed h
igher than 6 mph (10 km/h)), this warning
l
amp comes on, accompanied by an
a
udible signal and a message in the
m
ultifunction screen for a few seconds.
Version with deadlocking
The interior door controls do not operate when the vehicle is
deadlocked.
Page 75 of 387

73
Boot
Opening
F After unlocking the vehicle, press the o
pening control and raise the tailgate.
Closing
F Lower the tailgate using the interior grab han
dle.
If
the tailgate is not closed correctly:
-
w
hen the engine is running ,
this
warning lamp comes on,
a
ccompanied by a message in
t
he multifunction screen for a few
se
conds,
-
w
hen the vehicle is moving (speed above
6
mph (10 km/h)), this warning lamp comes
o
n, accompanied by an audible signal and
a
message in the multifunction screen for a
f
ew seconds. System
for mechanical unlocking of the boot
i
n the event of a battery or central locking
m
alfunction.
Tailgate release
Unlocking
F Fold back the rear benchseat to gain a
ccess to the lock from inside the boot.
F
I
nsert a small screwdriver into hole A of the
lock
to unlock the tailgate.
Access
Page 103 of 387

101
To remove the shelf:
F u nhook the two cords,
F
r
aise the shelf slightly, then unclip it on
e
ach side.
Rear parcel shelf
F Raise the boot carpet by pulling the strap u
pwards to gain access to the storage box.
Storage box
F Refit the boot floor carpet by folding it s
lightly in the middle.
This
has
areas
for
storing
a
temporary
puncture
r
epair
kit,
a
box
of
spare
bulbs,
a
first
aid
kit,
t
wo
warning
triangles,
...
Comfort
Page 108 of 387
F Apply the parking brake.
F W ith a manual gearbox: place the lever in
n
eutral and fully depress the clutch pedal.
F
W
ith an electronic gearbox: place the lever
a
t position n and press the brake pedal
f
i r m l y.
F
W
ith an automatic gearbox: place the lever
a
t position P and press the brake pedal
f
i r m l y.
F
I
nsert the key in the ignition switch; the
s
ystem recognises the code.
F
U
nlock the steering column by
s
imultaneously turning the steering and the
k
ey.
Starting the engine
In some circumstances, you may have to apply some force to turn the steering
w
heel (wheels on lock for example).In
wintry conditions, the warning lamp
w
ill stay on longer. When the engine is
h
ot, it does not come on.In temperate conditions, do not
w
arm the engine up with the vehicle
s
tationary, but move off straight away
a
nd drive at moderate engine speeds.
If the engine does not start straight a
way, switch the ignition off. Wait a
f
ew moments before trying again. If
t
he engine does not start after a few
a
ttempts, do not keep trying: you risk
d
amaging the starter motor and the
e
ngine. Call on a CITROËN dealer or a
q
ualified
w
orkshop.Never
leave the engine running in
a
n enclosed area without adequate
v
entilation:
in
ternal
c
ombustion
e
ngines emit toxic exhaust gases,
s
uch as carbon monoxide. Danger of
i
ntoxication and death. In very severe
w
inter conditions (temperatures b
elow -23°C), it is necessary to allow t
he engine to run for 4 minutes before
s
etting off, in order to ensure the
c
orrect operation and durability of
t
he mechanical components of your
v
ehicle, the engine and gearbox.
F
W
ith a petrol engine, operate the starter
m
otor by turning the key to position 3 until
the
engine starts, without pressing the
a
ccelerator pedal. Once the engine starts,
r
elease the key.
F
W
ith a Diesel engine, turn the key to
p
osition 2 ,
ignition on, to operate the
eng
ine
p
reheating
s
ystem. Wait
until this warning lamp goes off
i
n the instrument panel, then operate
t
he starter motor by turning the key to
p
osition
3
until the engine starts, without
p
ressing the accelerator pedal. Once
t
he engine starts, release the key.
Page 113 of 387
111
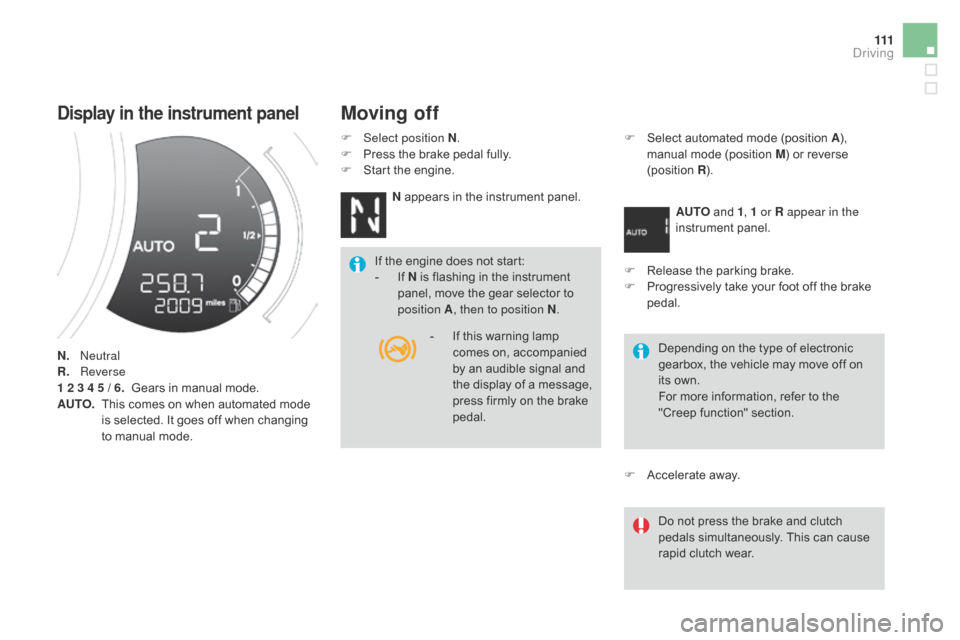
display in the instrument panel
n. Neutral
R. R everse
1 2 3 4 5 / 6.
Gears in manual mode.
AUTO.
T
his comes on when automated mode
i
s selected. It goes off when changing
t
o manual mode.
Moving off
F Select position n.
F P ress the brake pedal fully.
F
S
tart the engine.
n
appears in the instrument panel.
If
the engine does not start:
-
I
f n is flashing in the instrument
p
anel, move the gear selector to
p
osition A, then to position
n
.F
S elect automated mode (position A
), m
anual mode (position M) or reverse
(
position
R).
AU
TO
and 1, 1 or R appear in the
instrument
pan
el.
F
R
elease the parking brake.
F
P
rogressively take your foot off the brake
ped
al.
Depending
on the type of electronic
g
earbox, the vehicle may move off on
i
ts own.
For
more information, refer to the
"
Creep function" section.
Do
not press the brake and clutch
p
edals simultaneously. This can cause
r
apid clutch wear.
F
A
ccelerate away.
-
I
f this warning lamp
c
omes on, accompanied
b
y an audible signal and
t
he
d
isplay
o
f
a
m
essage,
p
ress firmly on the brake
ped
al.
driving
Page 115 of 387
11 3
The gear change requests are only carried out if the engine speed permits.
It is not necessary to release the accelerator
pedal
during gear changes.
When
braking or slowing down, the gearbox
c
hanges down automatically so that the vehicle
p
icks up in the right gear.
Under
full acceleration, the change up will not
t
ake place unless the driver operates the gear
s
elector or steering mounted control paddle
(
unless the engine is close to its maximum
s
peed).
Reverse
To engage reverse, the vehicle must be immobilised with your foot on the brake.
F
Sel
ect position R .
Stopping the vehicle
Before switching off the engine:
- c hange to position n to be in neutral,
or
-
l
eave the vehicle in gear; in this case the
v
ehicle cannot be moved.
Manual mode
F Select position M.
The gears engaged appear in
s
uccession in the instrument panel.
You
can change mode at any time by
m
oving the gear selector from A to M or
the
other way round.
Never
select neutral (position n
)
when
m
oving. There
is an audible signal on
enga
gement
o
f
r
everse.For
all parking situations, you must
apply the parking brake
to immobilise
t
he vehicle.
When
immobilising the vehicle with the
e
ngine running, you must put the gear
s
elector into the neutral (position n
).
B
efore doing anything under the
b
onnet, ensure that the gear selector
i
s in neutral (position n
)
and that the
p
arking brake is applied.
At
low speed, if reverse gear is requested,
t
he n warning lamp flashes and the gearbox
g
oes into neutral automatically.
To
engage reverse, put the gear selector into
p
osition n
, t
hen to position R.
driving