AUX Citroen DS3 RHD 2016 1.G Owner's Manual
[x] Cancel search | Manufacturer: CITROEN, Model Year: 2016, Model line: DS3 RHD, Model: Citroen DS3 RHD 2016 1.GPages: 380, PDF Size: 10.11 MB
Page 12 of 380

Interior
Interior mood lighting
Thisô subduedô passengerô compartmentô lightingô improves ô visibility ô inside ô the ô vehicle ô in ô low ô
l
ighting ô conditions. ô It ô comprises ô several ô
l
amps, ô located ô in ô the ô footwells ô and ô in ô the ô lower ô
d
ashboard
ô s
torage
ô c
ompartment.
Gear efficiency indicator
Dependingô ofô theô drivingô conditionsô andô your ô style ô of ô driving, ô this ô system ô may ô
s
uggest ô changing ô up ô to ô reduce ô your ô fuel ô fuel ô
c
onsumption.
Scented air freshener
Theô scentedô airô freshenerô diffusesô theô selected ô fragrance ô throughout ô the ô passenger ô
c
ompartment ô from ô its ô location ô in ô the ô ventilation ô
s
ystem.
digital air conditioning
Afterô settingô theô desiredô levelô ofô comfort,ô theô system ô then ô automatically ô controls ô this ô level ô
a
ccording ô to ô the ô ambient ô conditions.
149 123
94
90
345 277
Audio and communication
systems
Theseô systemsô benefitô fromô theô latestô t echnology: ô MP3 ô compatible ô Audio ô system, ô
U
SB ô player, ô Bluetooth ô system, ô touch ô screen ô
t
ablet, ô auxiliary ô inputs, ô Hi-Fi ô audio ô system.
Touch screen tablet
Audio system
Page 14 of 380
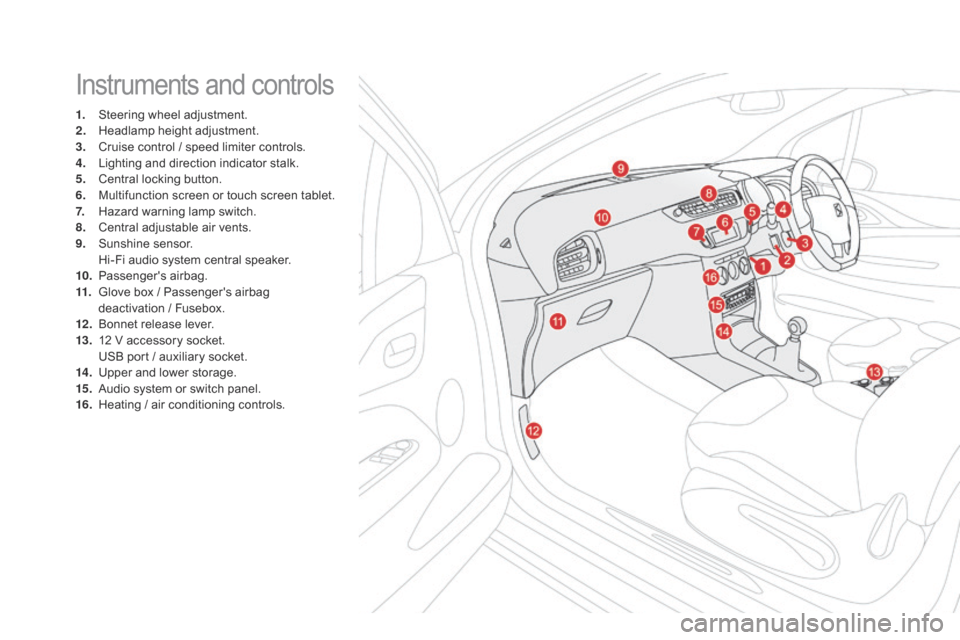
Instrumentsô andô controls
1.ô Steeringô wheel ô adjustment.
2.ô H eadlamp ô height ô adjustment.
3.
ô C
ruise ô control ô / ô speed ô limiter ô controls.
4.
ô L
ighting ô and ô direction ô indicator ô stalk.
5.
ô C
entral ô locking ô button.
6.
ô M
ultifunction ô screen ô or ô touch ô screen ô tablet.
7.
ô H
azard ô warning ô lamp ô switch.
8.
ô C
entral ô adjustable ô air ô vents.
9.
ô S
unshine
ô s
ensor.
ô H
i-Fi ô audio ô system ô central ô speaker.
10.
ô P
assenger's
ô ai
rbag.
11.
ô G
love ô box ô / ô Passenger's ô airbag ô
d
eactivation ô / ô Fusebox.
12 .
ô B
onnet ô release ô lever.
13.
ô 1
2 ô V ô accessory ô socket.
ô U
SB ô port ô / ô auxiliary ô socket.
14 .
ô U
pper ô and ô lower ô storage.
15.
ô A
udio ô system ô or ô switch ô panel.
16.
ô H
eating ô / ô air ô conditioning ô controls.
Page 48 of 380
Withô theô Audioô systemô switchedô on,ô onceô thisô menu ô has ô been ô selected ô you ô can ô activate ô or ô
d
eactivate ô the ô functions ô associated ô with ô use ô
o
f ô the ô radio ô (RDS, ô REG, ô RadioText), ô the ô CD ô
(
introscan, ô shuffle, ô CD ô repeat) ô or ô the ô MP3 ô
p
layer ô (USB ô port ô / ô auxiliary ô socket).
For
ô more ô information ô on ô the ô "Audio ô functions" ô
a
pplication, ô refer ô to ô the ô "Audio ô system" ô section.
"Audio functions"
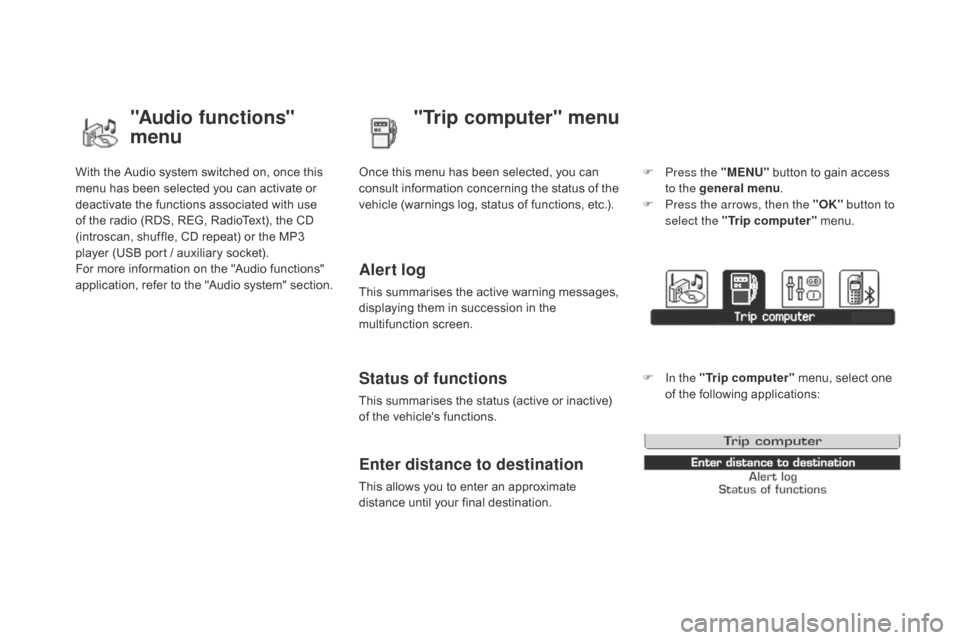
menu"Trip computer" menu
Onceô thisô menuô hasô beenô selected,ô youô canô c
onsult ô information ô concerning ô the ô status ô of ô the ô
v
ehicle ô (warnings ô log, ô status ô of ô functions, ô etc.).
Alert log
Thisô summarisesô theô activeô warningô messages,ô displaying ô them ô in ô succession ô in ô the ô
m
ultifunction
ô s
creen.
Status of functions
Thisô summarisesô theô statusô (activeô orô inactive)ô of ô the ô vehicle's ô functions.
Enter distance to destination
Thisô allowsô youô toô enterô anô approximateô distance ô until ô your ô final ô destination. F
P
ress the "ME
n
U"
ô
button ô to ô gain ô access ô
t
o the general menu
.
F
P
ress the arrows, then the "OK"
button to
select the " Trip computer " ô menu.
F
I
n the "
Trip computer " ô menu, ô select ô one ô
o
f ô the ô following ô applications:
Page 98 of 380

Interiorô fittings
1. Sun visor ô (
see ô details ô on ô the ô following ô page)
2.
gl
ove box
ô (
see ô details ô on ô the ô following ô page)
3.
O
ddments storage
4.
d
oor pocket
5.
U
pper storage compartment
6.
L
ower storage compartment with
non-slip mat
7.
U
SB por t / auxiliar y socket
ô (
see ô details ô on ô the ô following ô pages)
8.
1
2 V accessory socket
ô (
see ô details ô on ô following ô pages)
9.
C
entre armrest with storage
ô (
see ô details ô on ô the ô following ô page)
or
C
up / bottle holder
Page 99 of 380
97
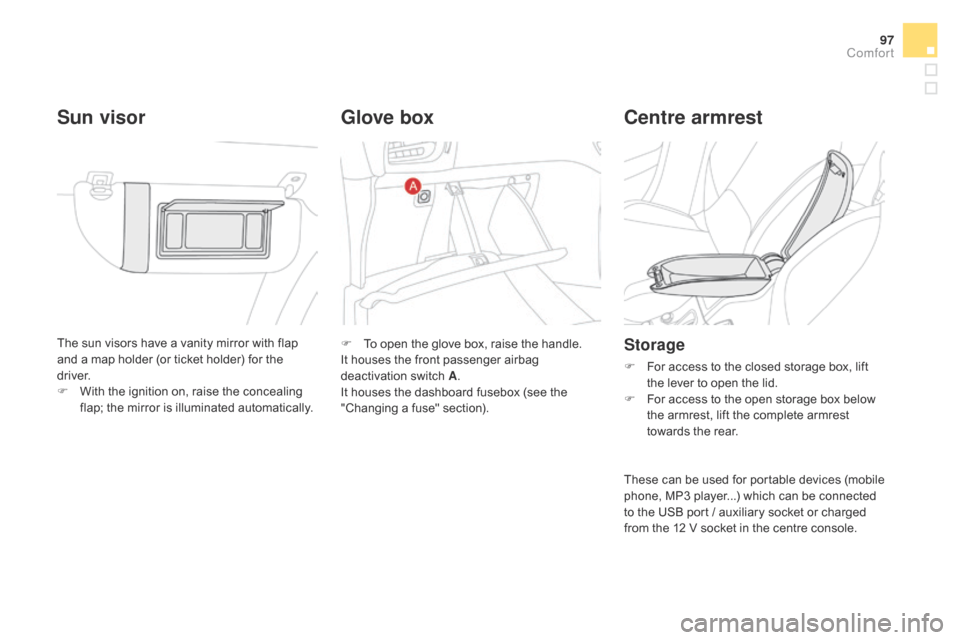
Theô sunô visorsô haveô aô vanityô mirrorô withô flapô and ô a ô map ô holder ô (or ô ticket ô holder) ô for ô the ô
d
river.
F
ô
W
ith ô the ô ignition ô on, ô raise ô the ô concealing ô
f
lap; ô the ô mirror ô is ô illuminated ô automatically.
Sun visorgl ove boxCentre armrest
Storage
Fô Forô access ô to ô the ô closed ô storage ô box, ô lift ô t
he ô lever ô to ô open ô the ô lid.
F
ô
F
or ô access ô to ô the ô open ô storage ô box ô below ô
t
he ô armrest, ô lift ô the ô complete ô armrest ô
t
owards ô the ô rear.
F
ô
T
o
ô
open
ô
the
ô
glove
ô
box,
ô
raise
ô
the
ô
handle.
It
ô
houses
ô
the
ô
front
ô
passenger
ô
airbag
ô d
eactivationô s
witchô A .
I
t
ô
houses
ô
the
ô
dashboard
ô
fusebox
ô
(see
ô
the
ô
"
Changing
ô
a
ô
fuse"
ô
section).
These
ô can ô be ô used ô for ô portable ô devices ô (mobile ô
p
hone, ô MP3 ô player...) ô which ô can ô be ô connected ô
t
o ô the ô USB ô port ô / ô auxiliary ô socket ô or ô charged ô
f
rom ô the ô 12 ô V ô socket ô in ô the ô centre ô console.
Comfort
Page 100 of 380
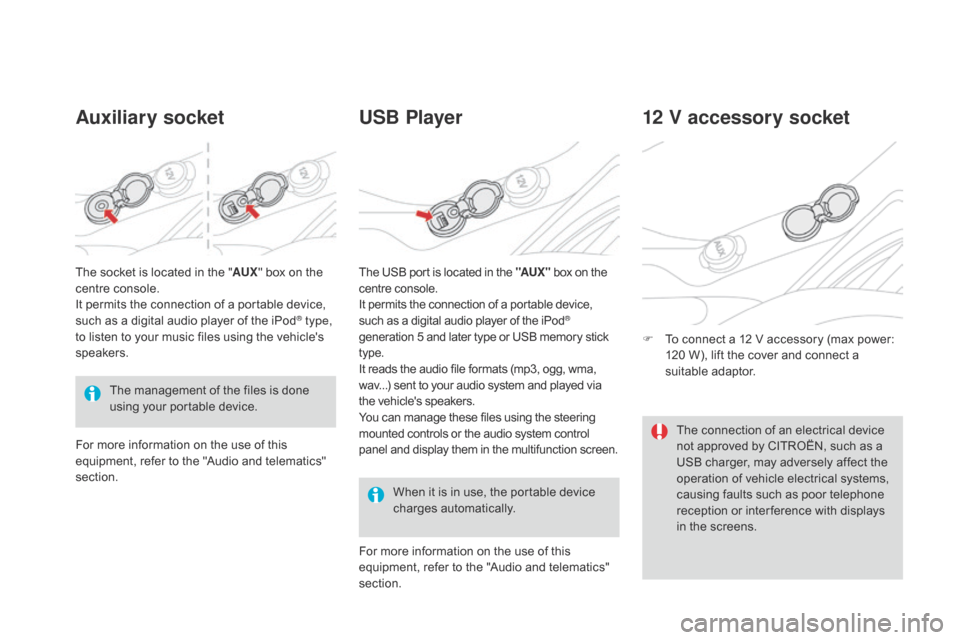
Auxiliary socketUSB Player
Whenô itô isô inô use,ô theô portableô deviceô c
hargesô a utomatically.
12 V accessory socket
Fô Toô connect ô a ô 12 ô V ô accessory ô (max ô power: ô 1
20 ô W), ô lift ô the ô cover ô and ô connect ô a ô
s
uitable
ô a
daptor.
The
ô
management
ô
of
ô
the
ô
files
ô
is
ô
done
ô
u
sing
ô
your
ô
portable
ô
device.
The
ô
socket
ô
is
ô
located
ô
in
ô
the
ô
"
AUX "
ô
box
ô
on
ô
the
ô
c
entre
ô
console.
It
ô
permits
ô
the
ô
connection
ô
of
ô
a
ô
portable
ô
device,
ô
s
uch
ô
as
ô
a
ô
digital
ô
audio
ô
player
ô
of
ô
the
ô
iPod
ôÛ type,
to
ô
listen
ô
to
ô
your
ô
music
ô
files
ô
using
ô
the
ô
vehicle's ô
s
peakers.
For
ô
more
ô
information
ô
on
ô
the
ô
use
ô
of
ô
this
ô
e
quipment,
ô
refer
ô
to
ô
the
ô
"Audio
ô
and
ô
telematics" ô
s
ection. For
ô more ô information ô on ô the ô use ô of ô this ô
e
quipment, ô refer ô to ô the ô "Audio ô and ô telematics" ô
s
ection.
The
ô USB ô port ô is ô located ô in ô the ô "AUX "
ô
box ô on ô the
ô c
entre ô console.
It ô permits ô the ô connection ô of ô a ô portable ô device,
ô s
uch ô as ô a ô digital ô audio ô player ô of ô the ô iPodôÛ
generation
ô
5
ô
and
ô
later
ô
type
ô
or
ô
USB
ô
memory ô stickô t
ype.
It
ô
reads
ô
the
ô
audio
ô
file
ô
formats
ô
(mp3,
ô
ogg,
ô
wma,
ô w
av...)
ô
sent
ô
to
ô
your
ô
audio
ô
system
ô
and
ô
played ô via
ô t
he
ô
vehicle's
ô
speakers.
You
ô
can
ô
manage
ô
these
ô
files
ô
using
ô
the
ô
steering
ô m
ounted
ô
controls
ô
or
ô
the
ô
audio
ô
system
ô
control
ô p
anel
ô
and
ô
display
ô
them
ô
in
ô
the
ô
multifunction ô screen. The
ô connection ô of ô an ô electrical ô device ô
n
ot ô approved ô by ô CITROûN, ô such ô as ô a ô
U
SB ô charger, ô may ô adversely ô affect ô the ô
o
peration ô of ô vehicle ô electrical ô systems, ô
c
ausing ô faults ô such ô as ô poor ô telephone ô
r
eception ô or ô inter ference ô with ô displays ô
i
n ô the ô screens.
Page 281 of 380
279
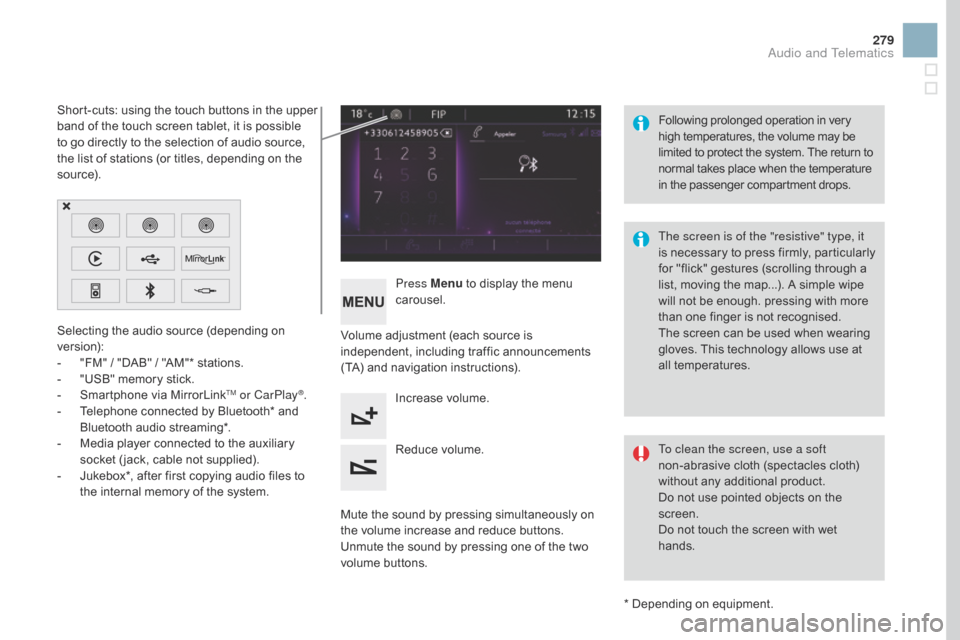
Selectingô theô audioô sourceô (dependingô onô version):
-
ô
"
FM" ô / ô "DAB" ô / ô "AM"* ô stations.
-
ô
"
USB" ô memory ô stick.
-
ô
S
martphone ô via ô MirrorLink
TM or CarPlayôÛ.
-
ô T
elephone
ô
connected
ô
by
ô
Bluetooth*
ô
and
ô
B
luetooth
ô
audio
ô
streaming*.
-
ô
M
edia
ô
player
ô
connected
ô
to
ô
the
ô
auxiliary
ô
s
ocket
ô
( jack,
ô
cable
ô
not
ô
supplied).
-
ô
J
ukebox*,
ô
after
ô
first
ô
copying
ô
audio
ô
files
ô
to ô
t
he
ô
internal
ô
memory
ô
of
ô
the
ô
system.
*
ô Depending ô on ô equipment.
Short-cuts:
ô
using
ô
the
ô
touch
ô
buttons
ô
in
ô
the
ô
upper ô
b
and
ô
of
ô
the
ô
touch
ô
screen
ô
tablet,
ô
it
ô
is
ô
possible
ô
t
o
ô
go
ô
directly
ô
to
ô
the
ô
selection
ô
of
ô
audio
ô
source, ô
t
he
ô
list
ô
of
ô
stations
ô
(or
ô
titles,
ô
depending
ô
on
ô
the
ô
s
o u r c e).
The screen is of the "resistive" type, it
isô
n
ecessary ô
t
o ô
p
ress ô
f
irmly, ô
p
articularly ô
f
or ô "flick" ô gestures ô (scrolling ô through ô a ô
l
ist, ô moving ô the ô map...). ô A ô simple ô wipe ô
w
ill ô not ô be ô enough. ô pressing ô with ô more ô
t
han ô one ô finger ô is ô not ô recognised.
The ô screen ô can ô be ô used ô when ô wearing ô
g
loves. ô This ô technology ô allows ô use ô at ô
a
ll
ô t
emperatures.
Following
ô p
rolonged
ô ope
ration
ô i
n
ô v
ery
ô h
igh ô temperatures, ô the ô volume ô may ô be
ô l
imited ô to ô protect ô the ô system. ô The ô return ô to
ô n
ormal ô takes ô place ô when ô the ô temperature
ô i
n ô the ô passenger ô compartment ô drops.
To clean the screen, use a soft
non-abrasive ô cloth ô (spectacles ô cloth) ô
w
ithout ô any ô additional ô product.
Do
ô not ô use ô pointed ô objects ô on ô the ô
sc
reen.
Do
ô not ô touch ô the ô screen ô with ô wet ô
han
ds.
Volume
ô adjustment ô (each ô source ô is ô
i
ndependent,
ô i
ncluding
ô t
raffic
ô a
nnouncements
ô (
TA) ô and ô navigation ô instructions).
Press Menu
ô
to ô display ô the ô menu ô
c
arousel.
Increase ô volume.
Reduce
ô volume.
Mute
ô the ô sound ô by ô pressing ô simultaneously ô on ô
t
he ô volume ô increase ô and ô reduce ô buttons.
Unmute
ô the ô sound ô by ô pressing ô one ô of ô the ô two ô
v
olume
ô b
uttons.
Audio and Telematics
Page 299 of 380
3
2
297
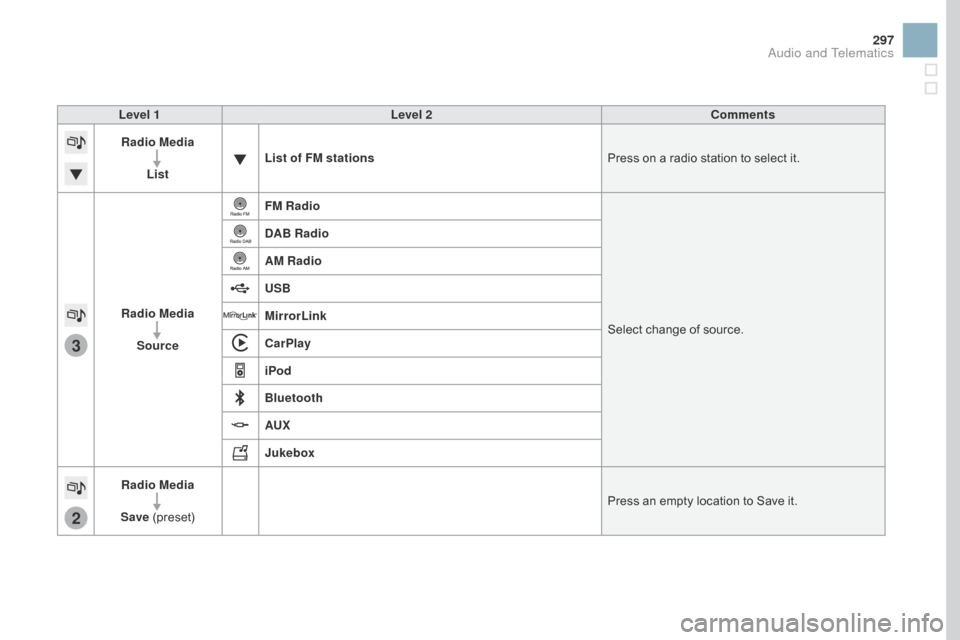
Level 1Level 2 Comments
Radio Media
List List of FM stations
Press
ô on ô a ô radio ô station ô to ô select ô it.
Radio Media Source FM Radio
Select
ô change ô of ô source.
d
AB Radio
AM Radio
USB
MirrorLink
CarPlay
iPod
Bluetooth
AUX
Jukebox
Radio Media
Save
ô (
preset) Press
ô an ô empty ô location ô to ô Save ô it.
Audio and Telematics
Page 303 of 380

1
1
21
20
19
301
Level 1Level 2 Level 3 Comments
Radio Media
Secondary page Media list Presentation
ô of ô the ô last ô media ô used.
Radio Media
Secondary page Settings Media
Settings Shuffle
ô (all ô tracks)Choose
ô the ô play ô settings.
Shuffle
ô (current ô album)
Repeat
Aux.
ô a
mplification
Radio
Settings RDS
ô optionsActivate
ô or ô deactivate ô the ô settings.
DAB/FM
ô station ô tracking
Display
ô Radio ô Text
Digital
ô radio ô slideshow ô
d
isplay
Announcements Settings
Trafficô announcementsô (TA)
Activateô orô deactivateô theô settings.
N
ews
ô
-
ô
Weather
Sport
ô
-
ô
Programm
ô
info
Flash
ô
-
ô
Unforeseen
ô
ev
ents
Confirm Save
ô the ô settings.
Audio and Telematics
Page 308 of 380
3
Media
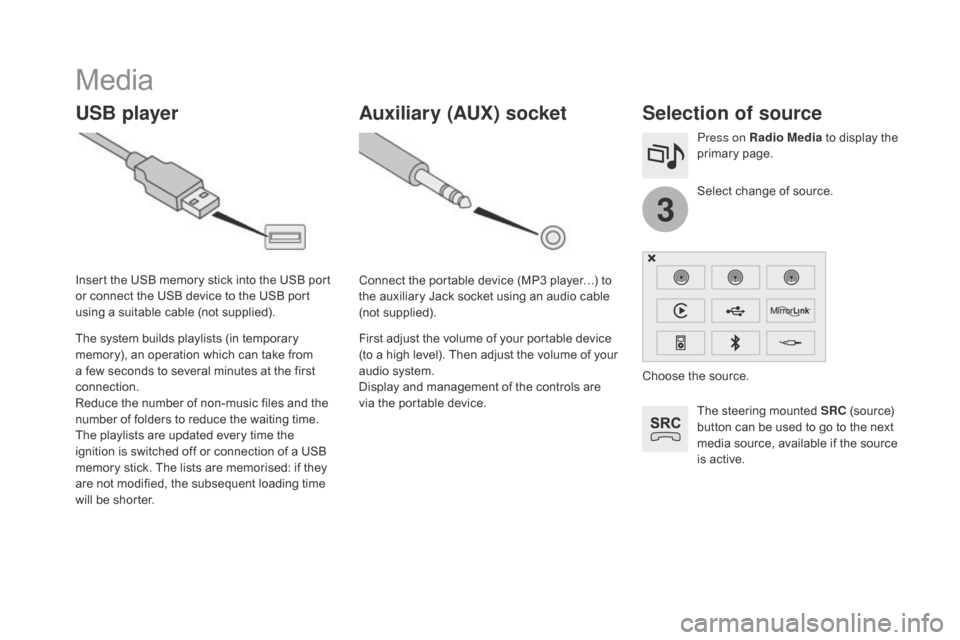
USB playerSelection of source
Theô steeringô mountedô SRCô (source) ô b
utton ô can ô be ô used ô to ô go ô to ô the ô next ô
m
edia ô source, ô available ô if ô the ô source ô
i
s ô active.
Select
ô change ô of ô source.
Press on Radio Media
ô
to ô display ô the ô
p
rimary
ô pag
e.
The
ô
system
ô
builds
ô
playlists
ô
(in
ô
temporary
ô
m
emory),
ô
an
ô
operation
ô
which
ô
can
ô
take
ô
from
ô
a
ô
few
ô
seconds
ô
to
ô
several
ô
minutes
ô
at
ô
the
ô
first
ô
c
onnection.
Reduce
ô
the
ô
number
ô
of
ô
non-music
ô
files
ô
and
ô
the
ô n
umber
ô
of
ô
folders
ô
to
ô
reduce
ô
the
ô
waiting
ô
time.
The
ô
playlists
ô
are
ô
updated
ô
every
ô
time
ô
the
ô
i
gnition
ô
is
ô
switched
ô
off
ô
or
ô
connection
ô
of
ô
a
ô
USB
ô
m
emory
ô
stick.
ô
The
ô
lists
ô
are
ô
memorised:
ô
if
ô
they
ô
a
re
ô
not
ô
modified,
ô
the
ô
subsequent
ô
loading
ô
time
ô
w
ill
ô
be
ô
shorter.
Insert
ô
the
ô
USB
ô
memory
ô
stick
ô
into
ô
the
ô
USB
ô
port
ô
o
r
ô
connect
ô
the
ô
USB
ô
device
ô
to
ô
the
ô
USB
ô
port
ô
u
sing
ô
a
ô
suitable
ô
cable
ô
(not
ô
supplied).
Auxiliary (AUX) socket
Connectô theô portableô deviceô (MP3ô playerãÎ)ô toô t
he ô auxiliary ô Jack ô socket ô using ô an ô audio ô cable ô
(
not
ô sup
plied).
First
ô adjust ô the ô volume ô of ô your ô portable ô device ô
(
to ô a ô high ô level). ô Then ô adjust ô the ô volume ô of ô your ô
a
udio ô system.
Display
ô and ô management ô of ô the ô controls ô are ô
v
ia ô the ô portable ô device. Choose
ô the ô source.