fuel Citroen DS3 RHD 2016 1.G Owner's Manual
[x] Cancel search | Manufacturer: CITROEN, Model Year: 2016, Model line: DS3 RHD, Model: Citroen DS3 RHD 2016 1.GPages: 380, PDF Size: 10.11 MB
Page 6 of 380

SAFETYPR ACTICAL
InF
ORMATIOnCHILd S AFETY
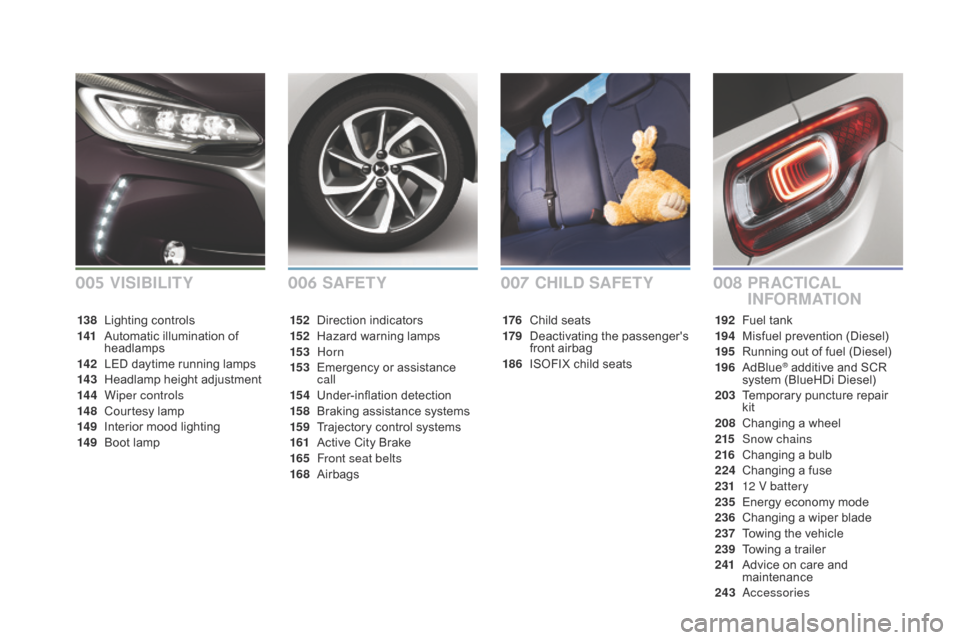
176 Child seats
179 D eactivating t he p assenger's f
ront airbag
186
I
SOFIX child seats
152 D
irection i
ndicators
152 H
azard w
arning lam
ps
153
Horn
153
E
mergency
or
assistance
c
all
15 4
U
nder-inflation
d
etection
15 8
B
raking
assistance
systems
15 9
T
rajectory
control
systems
161
A
ctive
City
Brake
165
F
ront seat belts
168
A
irbags 192 F
uel tank
194 M isfuel prevention (Diesel)
195
R
unning out of fuel (Diesel)
196
Ad
Blue
® additive and SCR s
ystem
(BlueHDi Diesel)
203
T
emporary puncture repair
k
it
208
C
hanging a wheel
215
S
now chains
216
C
hanging
a bu
lb
224
C
hanging
a f
use
231
1
2 V battery
235
E
nergy
economy mode
236
C
hanging a wiper blade
237
T
owing
the vehicle
239
T
owing
a trailer
241
A
dvice
on care and
m
aintenance
243
Accessories
138
L
ighting
c
ontrols
141
A
utomatic
illumination
of
h
eadlamps
142 L
ED
daytime
running
lamps
14 3 H
eadlamp
height
adjustment
14 4
W
iper controls
14 8
C
ourtesy
lamp
14 9
I
nterior
m
ood
l
ighting
14 9
B
oot
lamp
008
006 007VISIBILITY005
Page 10 of 380

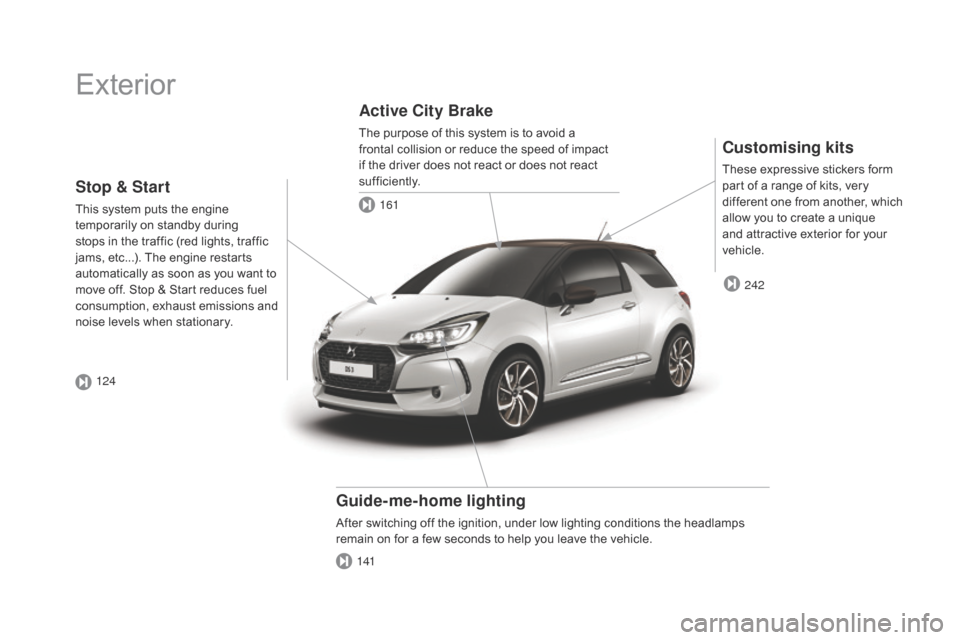
Exterior
Customising kits
These expressive stickers form part of a range of kits, very
d
ifferent one from another, which
a
llow you to create a unique
a
nd attractive exterior for your
v
ehicle.
guide-me-home lighting
After switching off the ignition, under low lighting conditions the headlamps remain on for a few seconds to help you leave the vehicle.
Active City Brake
The purpose of this system is to avoid a frontal collision or reduce the speed of impact
i
f the driver does not react or does not react
s
ufficiently.
242
141 161
Stop & Start
This system puts the engine t
emporarily on standby during
s
tops in the traffic (red lights, traffic
j
ams, etc...). The engine restarts
a
utomatically as soon as you want to
m
ove off. Stop & Start reduces fuel
c
onsumption, exhaust emissions and
n
oise levels when stationary.
124
Page 12 of 380

Interior
Interior mood lighting
This subdued passenger compartment lighting improves visibility inside the vehicle in low
l
ighting conditions. It comprises several
l
amps, located in the footwells and in the lower
d
ashboard
s
torage
c
ompartment.
Gear efficiency indicator
Depending of the driving conditions and your style of driving, this system may
s
uggest changing up to reduce your fuel fuel
c
onsumption.
Scented air freshener
The scented air freshener diffuses the selected fragrance throughout the passenger
c
ompartment from its location in the ventilation
s
ystem.
digital air conditioning
After setting the desired level of comfort, the system then automatically controls this level
a
ccording to the ambient conditions.
149 123
94
90
345 277
Audio and communication
systems
These systems benefit from the latest t echnology: MP3 compatible Audio system,
U
SB player, Bluetooth system, touch screen
t
ablet, auxiliary inputs, Hi-Fi audio system.
Touch screen tablet
Audio system
Page 16 of 380

Before moving off, if the passenger compartment is too warm, ventilate it by opening the windows and air vents before using the air conditioning.
Above
30 mph (50 km/h), close the windows and leave the air vents
ope
n.
Remember
to make use of equipment that can help keep the
t
emperature in the passenger compartment down (sunroof and window
b
linds...).
Switch
off the air conditioning, unless it has automatic regulation,
a
s soon as the desired temperature is attained.
Switch
off the demisting and defrosting controls, if not automatic.
Switch
off the heated seat as soon as possible.
Switch
off the headlamps and front foglamps when the level of light
d
oes not require their use.
Avoid
running the engine before moving off, particularly in winter; your
v
ehicle will warm up much faster while driving.
Eco-driving
Eco-driving is a range of everyday practices that allow the motorist to optimise their fuel consumption and CO2 emissions.
Optimise the use of your gearbox
With a manual gearbox, move off gently and change up without waiting. During acceleration change up early.
With
an automatic or electronic gearbox, give preference to automatic
m
ode and avoid pressing the accelerator pedal heavily or suddenly.
The
gear shift indicator invites you engage the most suitable gear: as
s
oon as the indication is displayed in the instrument panel, follow it
s
traight away.
For
vehicles fitted with an electronic or automatic gearbox, this
i
ndicator appears only in manual mode.
drive smoothly
Maintain a safe distance between vehicles, use engine braking rather than the brake pedal, and press the accelerator progressively. These
p
ractices contribute towards a reduction in fuel consumption and CO
2
emissions
and
also
helps
reduce
the
background
traffic
noise.
Control the use of your electrical
equipment
If your vehicle has cruise control, make use of the system at speeds a bove 25 mph (40 km/h) when the traffic is flowing well.As
a passenger, if you avoid connecting your multimedia devices
(
film, music, video game...), you will contribute towards limiting the c
onsumption of electrical energy, and so of fuel.
Disconnect your portable devices before leaving the vehicle.
Page 17 of 380

15
Limit the causes of excess consumption
Spread loads throughout the vehicle; place the heaviest items in the bottom of the boot, as close as possible to the rear seats.
Limit
the loads carried in the vehicle and reduce wind resistance (roof
b
ars, roof rack, bicycle carrier, trailer...). Use a roof box in preference.
Remove
roof bars and roof racks after use.
At
the end of winter, remove snow tyres and refit your summer tyres.
Observe the recommendations on
maintenance
Check the tyre pressures regularly, when cold, referring to the label in the door aperture, driver's side.
Carry
out this check in particular:
-
b
efore a long journey,
-
a
t each change of season,
-
a
fter a long period out of use.
Don't
forget the spare wheel and the tyres on any trailer or caravan.
Have
your vehicle serviced regularly (engine oil, oil filter, air filter,
p
assenger compartment filter...) and observe the schedule of
o
perations recommended in the manufacturer's service schedule.
With
a BlueHDi Diesel engine, if the SCR system is faulty your vehicle
b
ecomes polluting; go to a CITROËN dealer or a qualified workshop
w
ithout delay to have the emissions of nitrous oxides brought back to
t
he legal level.
When
refuelling, do not continue after the third cut-off of the nozzle to
a
void any over flow.
At
the wheel of your new vehicle, it is only after the first 1 800 miles
(3
000 kilometres) that you will see the fuel consumption settle down to
a
consistent average.
Eco-driving
Page 20 of 380

Petrol - Diesel instrument panels, manual, electronic (ETG)
o r automatic gearbox
Provided with permanent back-lighting, the instrument panel groups together the vehicle's dials and indicator and warning lamps.
1.
R
ev counter.
I
ndicates the speed of rotation of the
e
ngine (x 1 000 rpm).
2.
V
ehicle speed.
I
ndicates the current speed of the moving
v
ehicle (mph or km/h).
3.
E
ngine coolant temperature.
I
ndicates the temperature of the engine
c
oolant
li
quid.
dials
7. Lighting dimmer button. A
djusts the level of the instrument and
c
ontrols illumination and the interior mood
l
ighting.
4.
di
splay screen.
5. F
uel level.
I
ndicates
the
quantity
of
fuel
remaining
in
t
he
tank.
6.
di
splay management button.
A
lternates
display
between
range
and
trip
mil
eage
re
corder.
S
ervicing
in
formation.
R
esets
the
selected
function
to
zero
(trip
d
istance
recorder
or
service
indicator). For
more information, refer to the
p
aragraph relating to the button or
f
unction and its associated display.
Page 22 of 380

GT RACING petrol instrument panel, manual gearbox
1. Rev counter. I
ndicates the speed of rotation of the
e
ngine (x 1 000 rpm).
2.
V
ehicle speed.
I
ndicates the current speed of the moving
v
ehicle (mph or km/h).
3.
E
ngine coolant temperature.
I
ndicates the temperature of the engine
c
oolant
li
quid.
dials
7. Lighting dimmer button. A
djusts the level of the instrument and
c
ontrols illumination and the interior mood
l
ighting.
4.
di
splay screen.
5. F
uel level.
I
ndicates
the
quantity
of
fuel
remaining
in
t
he
tank.
6.
di
splay management button.
A
lternates
display
between
range
and
trip
mil
eage
re
corder.
S
ervicing
in
formation.
R
esets
the
selected
function
to
zero
(trip
d
istance
recorder
or
service
indicator). For
more information, refer to the
p
aragraph relating to the button or
f
unction and its associated display.
Provided
with
permanent
back-lighting,
the
instrument
panel
groups
together
the
vehicle's
dials
and
indicator and warning lamps.
Page 31 of 380

29
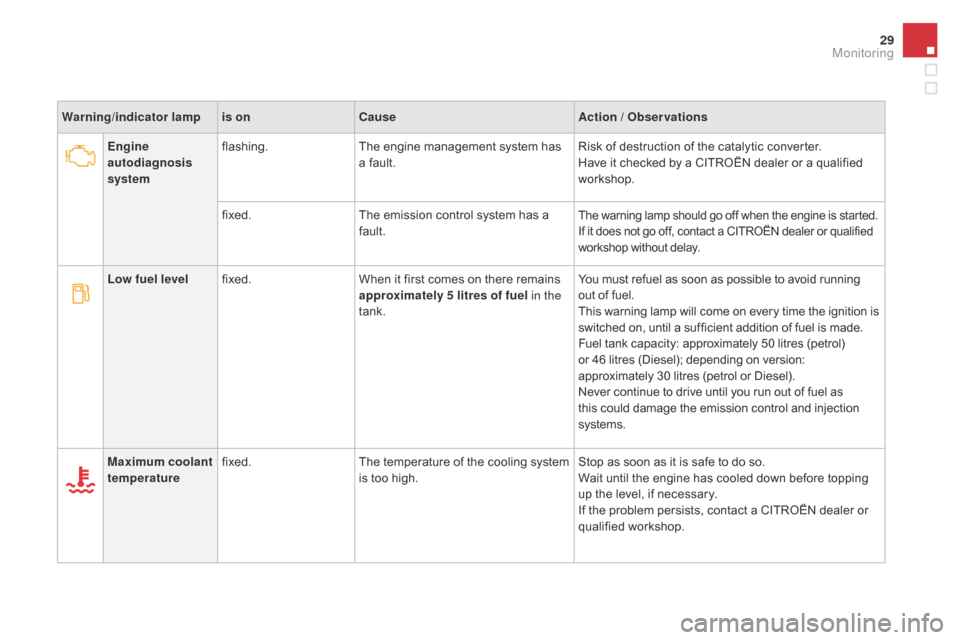
Warning/indicator lampis on Cause Action / Observations
Engine
autodiagnosis
system flashing.
The
engine management system has
a
fault.Risk
of destruction of the catalytic converter.
Have
it checked by a CITROËN dealer or a qualified
w
orkshop.
fixed. The
emission control system has a
f
ault.
The warning lamp should go off when the engine is started.
I f it does not go off, contact a CITROËN dealer or qualified w
orkshop without delay.
Low fuel level fixed. When it first comes on there remains a
pproximately 5 litres of fuel in the
tank. You
must refuel as soon as possible to avoid running o
ut of fuel.
This
warning lamp will come on every time the ignition is
s
witched on, until a sufficient addition of fuel is made.
Fuel
tank capacity: approximately 50 litres (petrol)
o
r 46 litres (Diesel); depending on version:
a
pproximately 30 litres (petrol or Diesel).
Never
continue to drive until you run out of fuel as
t
his could damage the emission control and injection
s
ystems.
Maximum coolant
temperature fixed.
The
t
emperature
o
f
t
he
c
ooling
s
ystem
i
s too high.Stop
as soon as it is safe to do so.
Wait
until the engine has cooled down before topping
u
p the level, if necessary.
If
the problem persists, contact a CITROËN dealer or
q
ualified
w
orkshop.
Monitoring
Page 46 of 380

Languages
Once the "Languages" menu has been selected, you can change the language used by the s
creen by choosing one from a defined list.
Units
Once the "Units" menu has been selected, you can change the units of the following
par
ameters:
-
t
emperature (°C or °F),
-
f
uel consumption (l/100 km, mpg or km/l).
Once
the fuel consumption units have
b
een set to mpg, the information in the
i
nstrument panel screen on speed and
d
istance will also be in mph and miles.
As
a safety measure, configuration by
t
he driver of the multifunction screen
s
hould only be done when stationary.
display settings
Once the "Display settings" menu has been selected, you can gain access to the following settings:
- year,
- m onth,
-
d
ay,
-
h
o u r,
-
m
inutes,
-
1
2 or 24 hour mode.
F
O
nce you have selected a setting, press
t
he "7" or " 8"
buttons to change its value.
F
P
ress the " 5" or " 6" buttons to switch
respectively
to the previous or next setting.
F
P
ress the "OK"
button to save the change
a
nd return to the normal display or press
t
he "Back"
button to cancel. Setting the date and time
F
P
ress the ME
n
U
button.
F
S
elect "Display settings" using the "5 "
or
"6 "
button.
F
Press "OK"
to confirm the selection.
F
S
elect the "Year" function using the "5 "
or
"6 "
button.
F
Press "OK"
to confirm the selection.
F
C
hoose the desired value, using the "7 "
or
"8 "
button.
F
Press "OK"
to confirm the selection.
F
R
epeat the procedure to set the "Month",
"
Day", "Hours", and "Minutes".
Page 50 of 380

Display configuration
Once this menu has been selected, you can gain access to the following settings:
-
b
rightness-video
s
etting,
-
d
ate and time setting,
-
s
election of units.
Once
the fuel consumption units have
b
een changed to mpg, the information
i
n the screen relating to speed and
d
istance also changes to mph and
mil
es
re
spectively. As
a safety measure, configuration by
t
he driver of the multifunction screen
s
hould only be done when stationary.
Choice of language
Once this menu has been selected, you can change the language used by the screen by
c
hoosing one from a defined list.With
Audio system on, once this menu is s
elected you can configure your Bluetooth h
ands-free system (pairing), view the various
t
elephone directories (list of calls, services...)
a
nd manage your calls (call, hang up, second
c
all, secret mode...).
For
more information on the "Telephone"
f
unction, refer to the "Audio system" section.
"Telephone" Menu
Setting the date and time
F Sel ect the " Set date and time" function
using
the "5 " or " 6"
button.
F
Press "OK"
to confirm the selection.
F
A
djust the settings one by one using
t
he "7 " or " 8"
button then confirm
w
ith "OK".
F
T
hen select the "OK"
box in the screen
a
nd confirm.