Citroen DS4 2014 1.G Owner's Manual
DS4 2014 1.G
Citroen
Citroen
https://www.carmanualsonline.info/img/9/4388/w960_4388-0.png
Citroen DS4 2014 1.G Owner's Manual
Trending: brake fluid, sunroof, engine oil capacity, Wifi, ignition, park assist, tailgate
Page 121 of 444
11 9
Panoramic windscreen
A tinted panoramic windscreen that increases brightness and vision in the cabin. Fitted on each side with a blind to improve temperature control and a
sun visor to avoid dazzle.F
T
o open the blind, pull it by its central grip
to the desired position.
F
T
o close or stow the blind, pull it for ward by
its central grip then guide it to the desired
position.
The sun visor must be in the folded position
before moving the blind.
Blind
Fitted with a vanity mirror and ticket holder.
F L ower the sun visor to avoid dazzle from
the front.
F
D
isengage the sun visor from its central
fixing and turn it towards the door glass to
avoid dazzle from the side.
Sun visor
Do not attach or hang heavy objects on
the blinds or their slide rails.
Fittings
Page 122 of 444
Opening
F Lower the rear armrest.
F P ull the flap handle downwards.
F
L
ower the flap.
F
L
oad the objects from inside the boot.
Ski flap
Arrangement for storing and transporting long
objects.
F
L
ower the rear armrest for a more
comfortable position.
This also gives access to the ski flap.
Rear armrest
Comfort system for the rear passengers.
12 V accessory socket
F To connect a 12 V accessory (max power: 120 W), lift the cover and
connect a suitable adaptor.
Rear fittings
Page 123 of 444
121
1. Rear parcel shelf (see details on a following page)
2.
Hoo
ks
(
see details on a following page)
3.
1
2 V accessory socket
(
see details on a following page)
4.
T
o r c h
(
see details on following pages)
5.
L
ashing rings
6.
Sto
rage box
(
see details on following pages)
7.
R
etaining strap
8.
Sto
rage net
Boot fittings
Fittings
Page 124 of 444
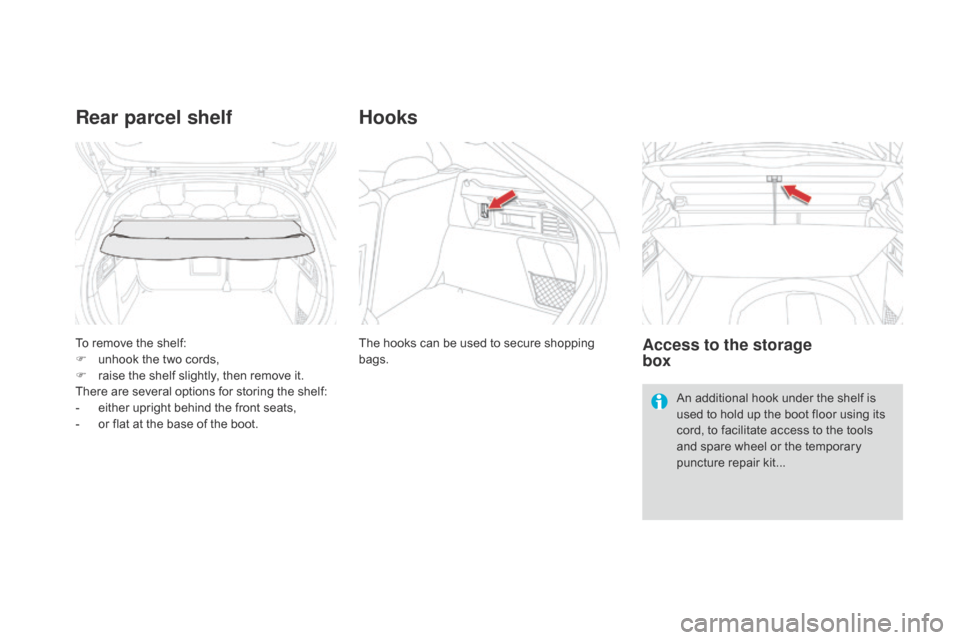
To remove the shelf:
F u nhook the two cords,
F
r
aise the shelf slightly, then remove it.
There are several options for storing the shelf:
-
e
ither upright behind the front seats,
-
o
r flat at the base of the boot.
Rear parcel shelf
The hooks can be used to secure shopping
bags.
Hooks
Access to the storage
box
An additional hook under the shelf is
used to hold up the boot floor using its
cord, to facilitate access to the tools
and spare wheel or the temporary
puncture repair kit...
Page 125 of 444
123
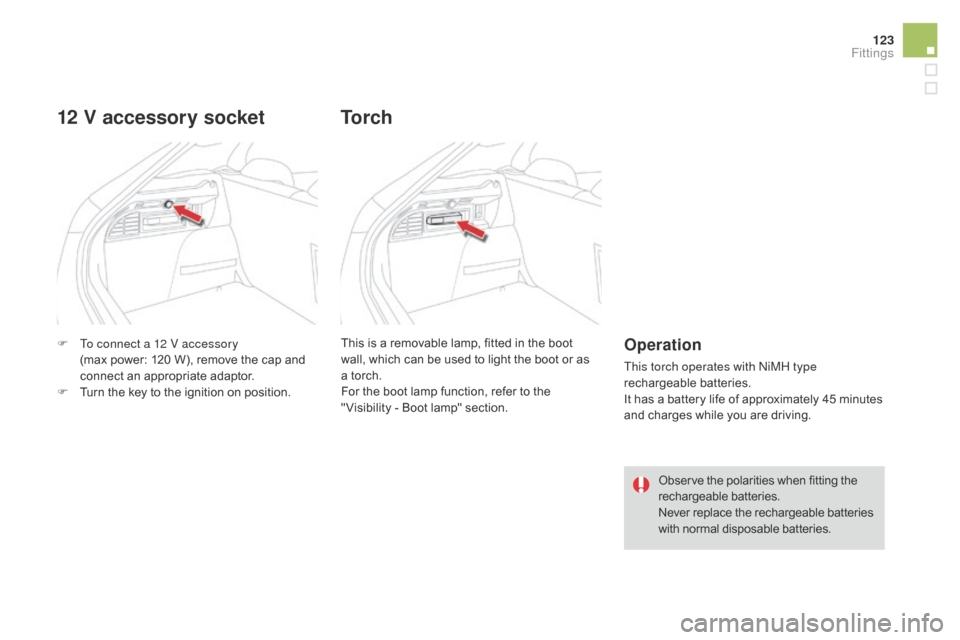
F To connect a 12 V accessory (max power: 120 W), remove the cap and
connect an appropriate adaptor.
F
T
urn the key to the ignition on position.
12 V accessory socket
This is a removable lamp, fitted in the boot
wall, which can be used to light the boot or as
a torch.
For the boot lamp function, refer to the
" Visibility - Boot lamp" section.
To r c h
Operation
This torch operates with NiMH type
rechargeable batteries.
It has a battery life of approximately 45 minutes
and charges while you are driving.
Observe the polarities when fitting the
rechargeable batteries.
Never replace the rechargeable batteries
with normal disposable batteries.
Fittings
Page 126 of 444
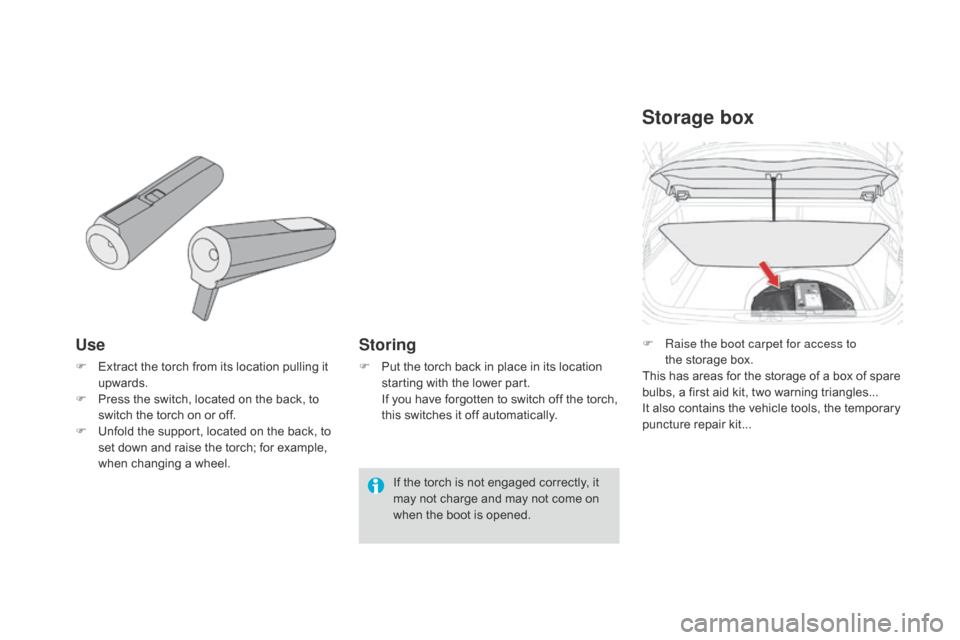
Use
F Extract the torch from its location pulling it upwards.
F
P
ress the switch, located on the back, to
switch the torch on or off.
F
U
nfold the support, located on the back, to
set down and raise the torch; for example,
when changing a wheel.
Storing
F Put the torch back in place in its location starting with the lower part.
I
f you have forgotten to switch off the torch,
this switches it off automatically.
Storage box
F Raise the boot carpet for access to the storage box.
This has areas for the storage of a box of spare
bulbs, a first aid kit, two warning triangles...
It also contains the vehicle tools, the temporary
puncture repair kit...
If the torch is not engaged correctly, it
may not charge and may not come on
when the boot is opened.
Page 127 of 444
Page 128 of 444
Page 129 of 444
Page 130 of 444

Lighting controlsSystem for selection and control of the various front and rear lamps providing the vehicle's lighting.
The various front and rear lamps of the vehicle
are designed to adapt the driver's visibility
progressively according to the climatic
conditions:
-
s
idelamps, to be seen,
-
d
ipped beam headlamps to see without
dazzling other drivers,
-
m
ain beam headlamps to see clearly when
the road is clear.
Main lighting
Other lamps are provided to meet the
requirements of particular driving conditions:
-
r
ear foglamps,
-
f
ront foglamps with cornering lighting,
-
d
irectional headlamps for improved
visibility when cornering,
-
d
aytime running lamps to be more visible
during the day,
-
g
uide-me-home and welcome lighting to
facilitate access to the vehicle,
-
p
arking lamps as vehicle position markers.
Additional lighting
The setting of some functions can be adjusted:
- a utomatic illumination of headlamps,
-
g
uide-me-home lighting,
-
w
elcome lighting,
-
d
irectional lighting.
Programming
In some weather conditions (e.g. low
temperature or humidity), the presence
of misting on the internal sur face of the
glass of the headlamps and rear lamps
is normal; it disappears after the lamps
have been on for a few minutes.
Trending: roof rack, instrument panel, change wheel, catalytic converter, trip computer, glove box, jump start


