glove box Citroen DS4 2014 1.G Owner's Manual
[x] Cancel search | Manufacturer: CITROEN, Model Year: 2014, Model line: DS4, Model: Citroen DS4 2014 1.GPages: 444, PDF Size: 12.68 MB
Page 11 of 444
9
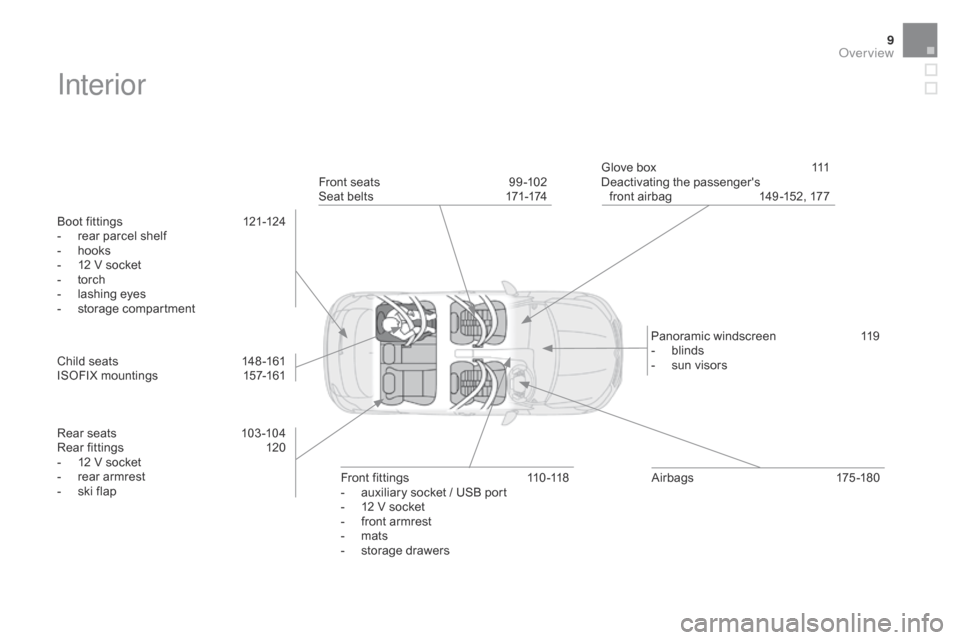
Interior
Boot fittings 121-124
- r ear parcel shelf
-
h
ooks
-
1
2 V socket
-
t
orch
-
l
ashing eyes
-
s
torage compartment
Child seats
1
48 -161
ISOFIX mountings
1
57-161
Rear seats
1
03 -104
Rear fittings
1
20
-
1
2 V socket
-
r
ear armrest
-
s
ki flap Front seats
9
9 -102
Seat belts
1
71-174Glove box
1
11
Deactivating the passenger's
front airbag
1
49 -152, 177
Airbags
1
75-180
Front fittings
1
10 -118
-
a
uxiliary socket / USB port
-
1
2 V socket
-
f
ront armrest
-
m
ats
-
s
torage drawersPanoramic windscreen
1
19
-
b
linds
-
s
un visors
Over view
Page 35 of 444
33
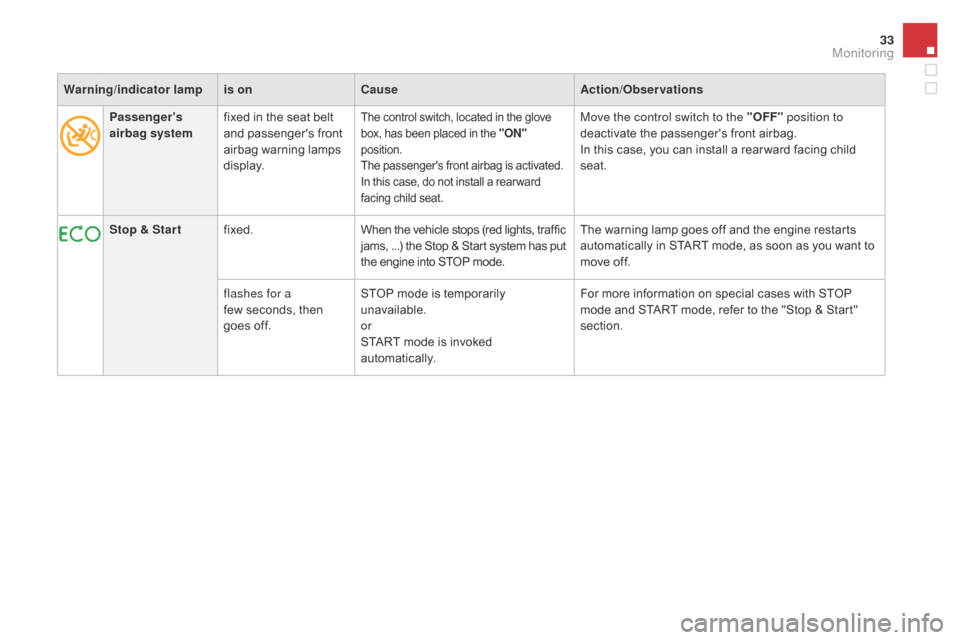
Passenger's
airbag systemfixed in the seat belt
and passenger's front
airbag warning lamps
display.The control switch, located in the glove
box, has been placed in the "ON"
position.
The passenger's front airbag is activated.
In this case, do not install a rear ward
facing child seat.Move the control switch to the "OFF" position to
deactivate the passenger's front airbag.
In this case, you can install a rear ward facing child
seat.
Stop & Star t fixed. When the vehicle stops (red lights, traffic
jams,
...) the Stop & Start system has put
the engine into STOP mode. The warning lamp goes off and the engine restarts
automatically in START mode, as soon as you want to
move off.
flashes for a
few
seconds, then
goes off. STOP mode is temporarily
unavailable.
or
START mode is invoked
automatically. For more information on special cases with STOP
mode and START mode, refer to the "Stop & Start"
section.
Warning
/indicator lampis on Cause Action/Observations
Monitoring
Page 36 of 444
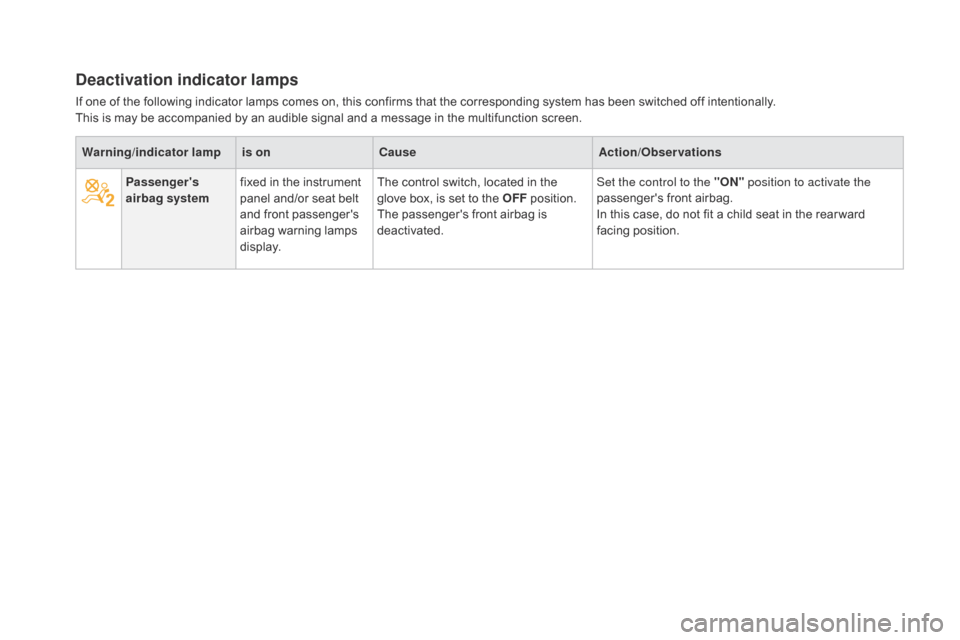
Passenger's
airbag systemfixed in the instrument
panel and/or seat belt
and front passenger's
airbag warning lamps
display. The control switch, located in the
glove box, is set to the OFF
position.
The passenger's front airbag is
deactivated. Set the control to the "ON"
position to activate the
passenger's front airbag.
In this case, do not fit a child seat in the rear ward
facing position.
Warning
/indicator lampis on Cause Action/Observations
deactivation indicator lamps
If one of the following indicator lamps comes on, this confirms that the corresponding system has been switched off intentionally.
This is may be accompanied by an audible signal and a message in the multifunction screen.
Page 112 of 444
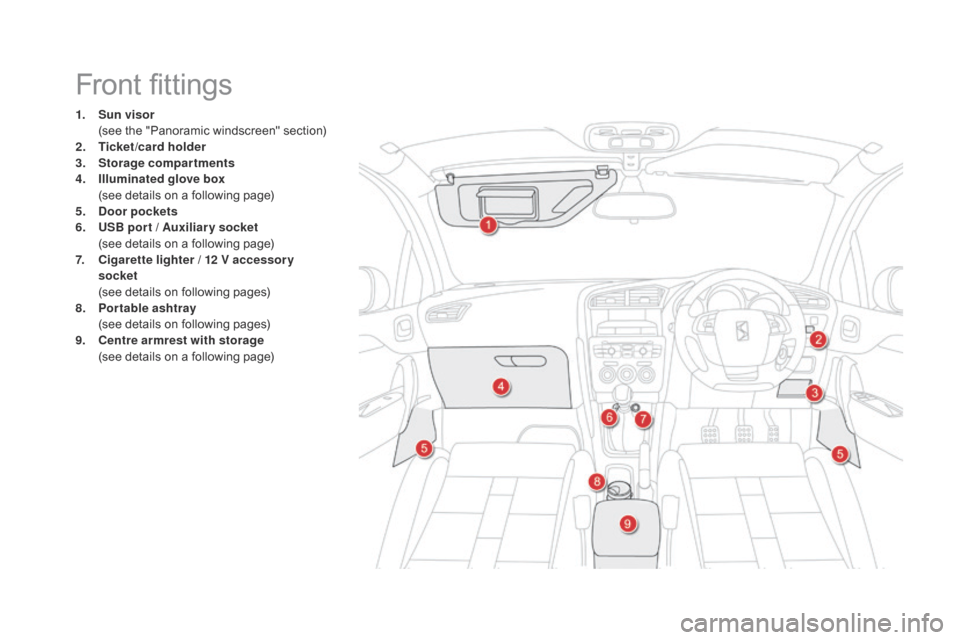
Front fittings
1. Sun visor (
see the "Panoramic windscreen" section)
2.
T
icket/card holder
3.
S
torage compartments
4.
I
lluminated glove box
(
see details on a following page)
5.
d
oor pocket s
6.
U
SB por t / Auxiliar y socket
(
see details on a following page)
7.
C
igarette lighter / 12 V accessor y
socket
(
see details on following pages)
8.
P
ortable ashtray
(
see details on following pages)
9.
C
entre armrest with storage
(
see details on a following page)
Page 113 of 444

111
Illuminated glove boxPortable ashtray
F Pull the cover to open the ashtray.
F
T o empty it, remove the ashtray by pulling it
upwards.
To avoid any problem of inter ference
or risk of overturning, do not place the
ashtray near the gear lever.
Its lid has locations for storing a pen, a pair of
glasses, tokens...
F
T
o open the glove box, raise the handle.
The glove box is illuminated when the lid is
opened.
It gives access to the passenger's front airbag
deactivation switch A.
It contains a ventilation nozzle B that can be
closed, distributing the same cooled air as the
vents in the passenger compartment.
It also gives access to the dashboard fusebox
(see the "Practical information - Changing a
fuse" section).
Fittings
Page 178 of 444
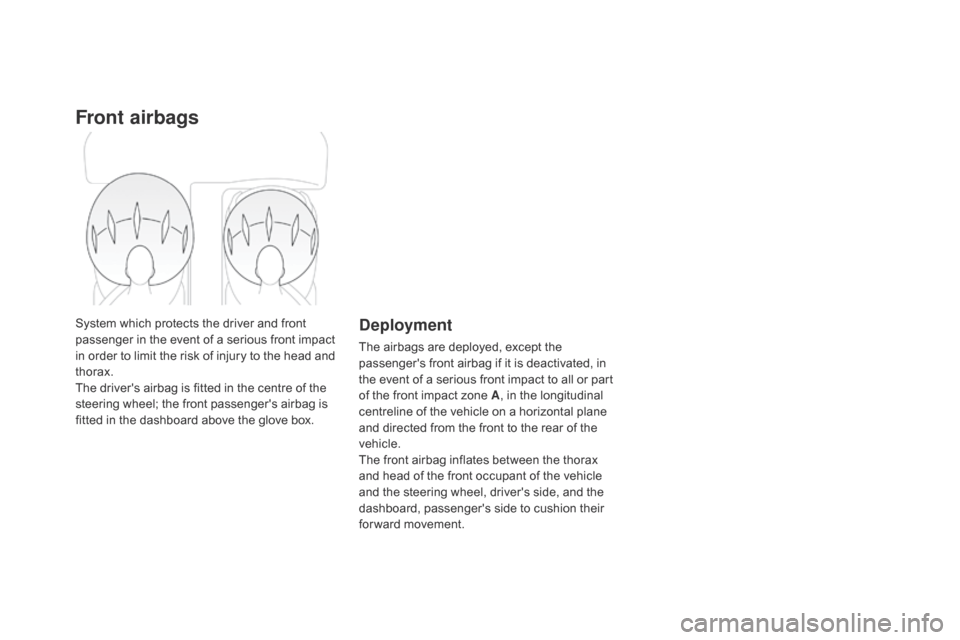
Front airbags
System which protects the driver and front
passenger in the event of a serious front impact
in order to limit the risk of injury to the head and
thorax.
The driver's airbag is fitted in the centre of the
steering wheel; the front passenger's airbag is
fitted in the dashboard above the glove box.deployment
The airbags are deployed, except the
passenger's front airbag if it is deactivated, in
the event of a serious front impact to all or part
of the front impact zone A, in the longitudinal
centreline of the vehicle on a horizontal plane
and directed from the front to the rear of the
vehicle.
The front airbag inflates between the thorax
and head of the front occupant of the vehicle
and the steering wheel, driver's side, and the
dashboard, passenger's side to cushion their
for ward movement.
Page 267 of 444
265
Changing a wheelProcedure for changing a faulty wheel for the spare wheel using the tools provided with the vehicle.
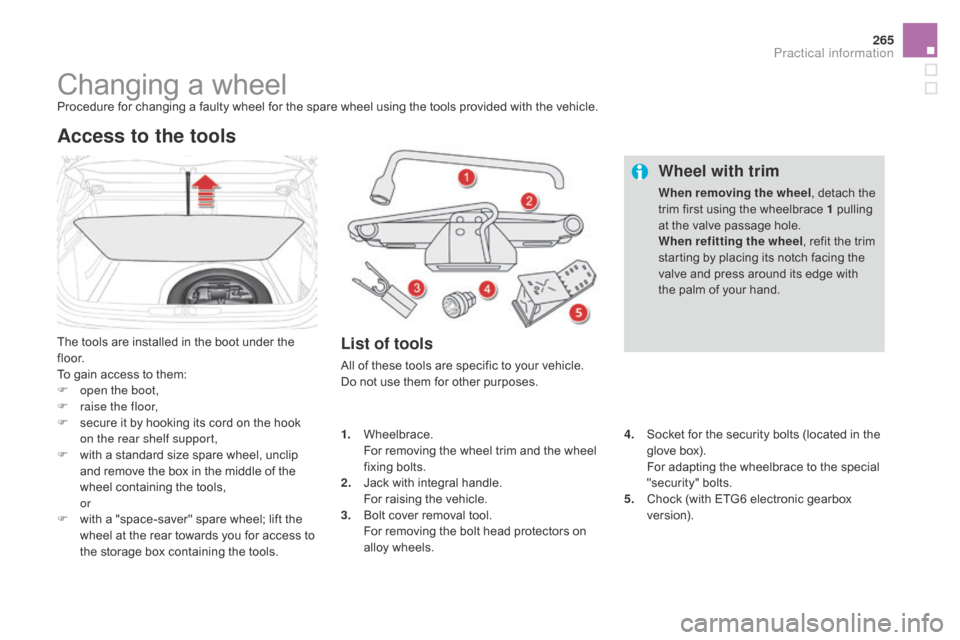
The tools are installed in the boot under the
f l o o r.
To gain access to them:
F
o
pen the boot,
F
r
aise the floor,
F
s
ecure it by hooking its cord on the hook
on the rear shelf support,
F
w
ith a standard size spare wheel, unclip
and remove the box in the middle of the
wheel containing the tools,
or
F
w
ith a "space-saver" spare wheel; lift the
wheel at the rear towards you for access to
the storage box containing the tools.
Access to the tools
List of tools
All of these tools are specific to your vehicle.
Do not use them for other purposes.
Wheel with trim
When removing the wheel , detach the
trim first using the wheelbrace 1 pulling
at the valve passage hole.
When refitting the wheel , refit the trim
starting by placing its notch facing the
valve and press around its edge with
the palm of your hand.
4.
S
ocket for the security bolts (located in the
glove box).
F
or adapting the wheelbrace to the special
"security" bolts.
5.
C
hock (with ETG6 electronic gearbox
ve r s i o n).
1.
W
heelbrace.
F
or removing the wheel trim and the wheel
fixing bolts.
2.
J
ack with integral handle.
F
or raising the vehicle.
3.
B
olt cover removal tool.
F
or removing the bolt head protectors on
alloy wheels.
Practical information
Page 284 of 444

Changing a fuse
The extraction tweezer is fitted to a carrier
clipped to the dashboard fusebox cover.
For access to it:
F
o
pen the glove box lid,
F
u
nclip the carrier on the fusebox cover by
pulling on the right,
F
r
emove the tweezer,
Access to the tools
F open the fusebox cover by pulling at top right,
F
f
old down completely the fusebox cover.
Page 287 of 444

285
Fusebox 1Fuse N° Rating Functions
F8 3 AAlarm siren, alarm ECU.
F13 10 ACigarette lighter.
F14 10 A12 V socket in boot.
F16 3 ALighting for the large multifunctional storage unit, rear map
reading lamps, glove box illumination.
F17 3 ASun visor illumination, front map reading lamps.
F28 15 AAudio system, radio (after-market).
F30 20 ARear wiper.
F32 10 AHi-Fi amplifier.
Fusebox 2 Fuse N° Rating Functions
F36 15 ARear 12 V socket.
F37 -Not used.
F38 -Not used.
F39 -Not used.
F40 -Not used.Fuse tables
Practical information
Page 329 of 444
327
With the engine running, press to
mute the sound.
With the ignition off, press to switch
the system on.
Volume adjustment (each source
is independent, including traffic
announcements (TA) and navigation
instructions).
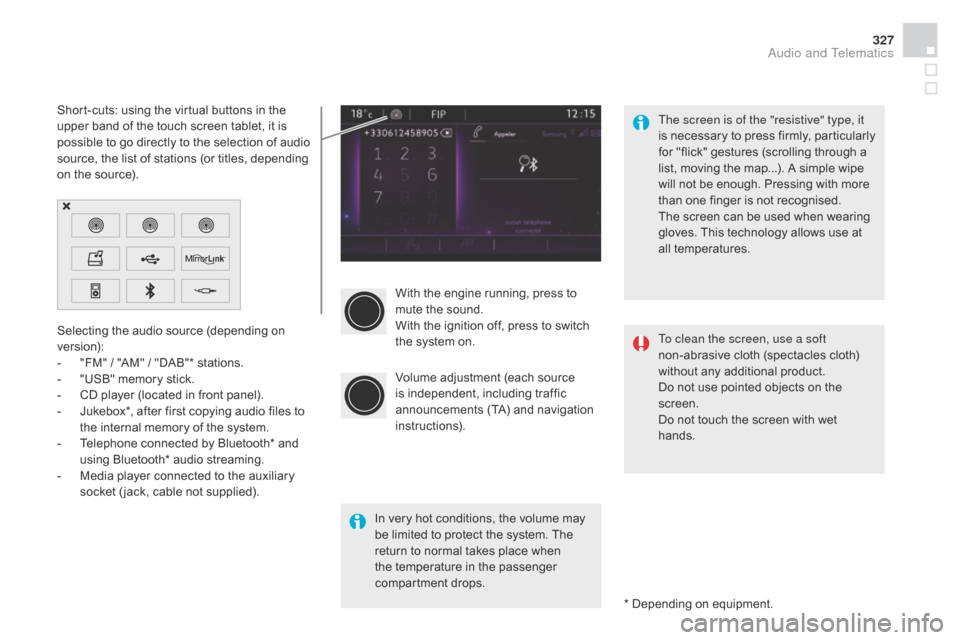
Selecting the audio source (depending on
version):
-
"
FM" / "AM" / "DAB"* stations.
-
"
USB" memory stick.
-
C
D player (located in front panel).
-
J
ukebox*, after first copying audio files to
the internal memory of the system.
-
T
elephone connected by Bluetooth* and
using Bluetooth* audio streaming.
-
M
edia player connected to the auxiliary
socket ( jack, cable not supplied).
* Depending on equipment.
Short-cuts: using the virtual buttons in the
upper band of the touch screen tablet, it is
possible to go directly to the selection of audio
source, the list of stations (or titles, depending
on the source).
The screen is of the "resistive" type, it
is necessary to press firmly, particularly
for "flick" gestures (scrolling through a
list, moving the map...). A simple wipe
will not be enough. Pressing with more
than one finger is not recognised.
The screen can be used when wearing
gloves. This technology allows use at
all temperatures.
In very hot conditions, the volume may
be limited to protect the system. The
return to normal takes place when
the temperature in the passenger
compartment drops. To clean the screen, use a soft
non-abrasive cloth (spectacles cloth)
without any additional product.
Do not use pointed objects on the
screen.
Do not touch the screen with wet
hands.
Audio and Telematics