Gate Citroen DS4 2016 1.G Owner's Manual
[x] Cancel search | Manufacturer: CITROEN, Model Year: 2016, Model line: DS4, Model: Citroen DS4 2016 1.GPages: 436, PDF Size: 10.28 MB
Page 68 of 436
DS4_en_Chap02_ouvertures_ed03-2015
"Keyless Entry and Starting"
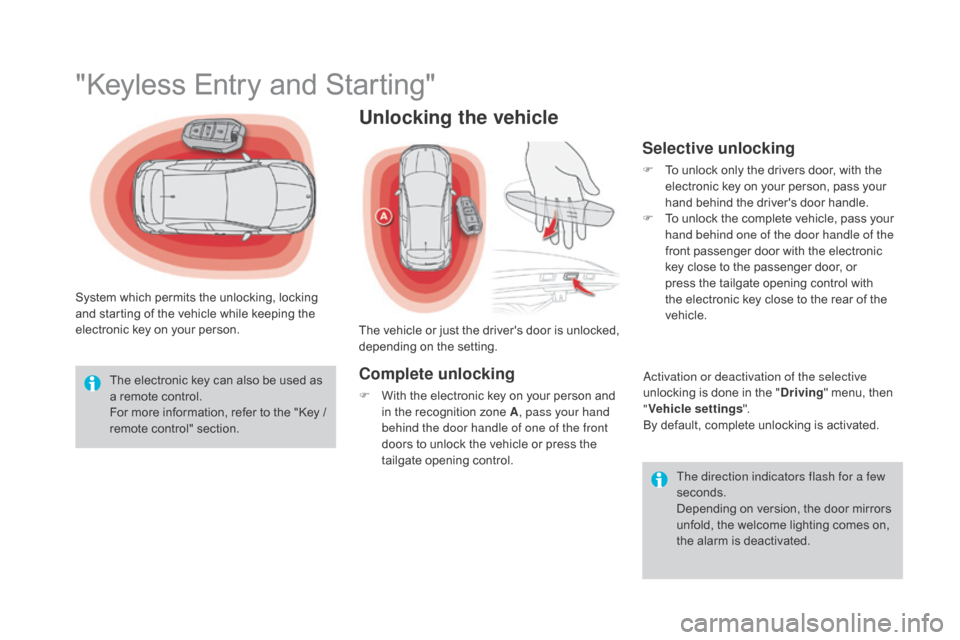
System which permits the unlocking, locking
and starting of the vehicle while keeping the
electronic key on your person.The electronic key can also be used as
a remote control.
For more information, refer to the "Key /
remote control" section. The direction indicators flash for a few
seconds.
Depending on version, the door mirrors
unfold, the welcome lighting comes on,
the alarm is deactivated.
Unlocking the vehicle
The vehicle or just the driver's door is unlocked,
depending on the setting.
Complete unlocking
F With the electronic key on your person and in the recognition zone A , pass your hand
behind the door handle of one of the front
doors to unlock the vehicle or press the
tailgate opening control.
Selective unlocking
F To unlock only the drivers door, with the electronic key on your person, pass your
hand behind the driver's door handle.
F
T
o unlock the complete vehicle, pass your
hand behind one of the door handle of the
front passenger door with the electronic
key close to the passenger door, or
press the tailgate opening control with
the electronic key close to the rear of the
vehicle.
Activation or deactivation of the selective
unlocking is done in the "
dr
iving" menu, then
" Vehicle settings ".
By default, complete unlocking is activated.
Page 84 of 436
DS4_en_Chap02_ouvertures_ed03-2015
Boot
The vehicle or just the boot is unlocked,
depending on the setting.Selective unlocking
By default, complete unlocking is activated.
This setting is done in the "driving" menu,
then "Vehicle settings" and "Vehicle
access" .
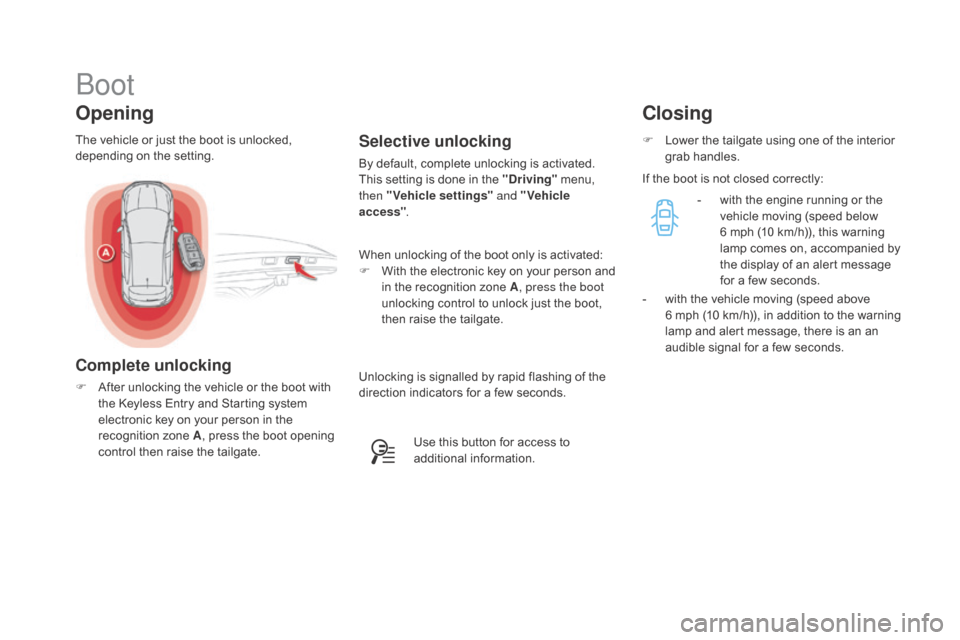
When unlocking of the boot only is activated:
F
W
ith the electronic key on your person and
in the recognition zone A , press the boot
unlocking control to unlock just the boot,
then raise the tailgate.
Use this button for access to
additional information. F
L
ower the tailgate using one of the interior
grab handles.
Closing
Opening
Complete unlocking
F After unlocking the vehicle or the boot with
the Keyless Entry and Starting system
electronic key on your person in the
recognition zone A , press the boot opening
control then raise the tailgate. If the boot is not closed correctly:
-
w
ith the engine running or the
vehicle moving (speed below
6 mph (10 km/h)), this warning
lamp comes on, accompanied by
the display of an alert message
for a few seconds.
-
w
ith the vehicle moving (speed above
6 mph (10 km/h)), in addition to the warning
lamp and alert message, there is an an
audible signal for a few seconds.
Unlocking is signalled by rapid flashing of the
direction indicators for a few seconds.
Page 85 of 436
83
DS4_en_Chap02_ouvertures_ed03-2015
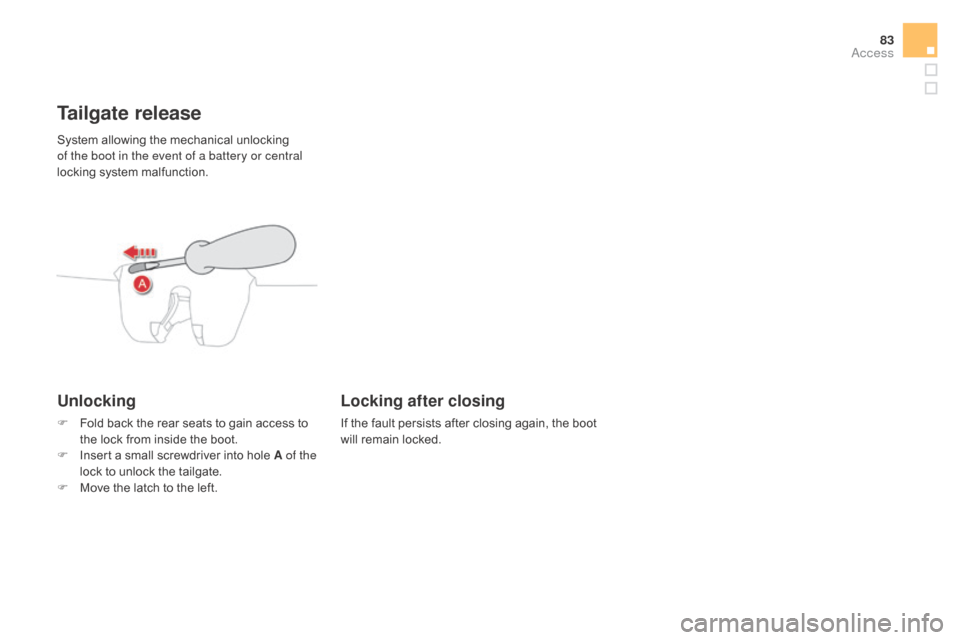
System allowing the mechanical unlocking
of the boot in the event of a battery or central
locking system malfunction.
Tailgate release
Unlocking
F Fold back the rear seats to gain access to the lock from inside the boot.
F
I
nsert a small screwdriver into hole A of the
lock to unlock the tailgate.
F
M
ove the latch to the left.
Locking after closing
If the fault persists after closing again, the boot
will remain locked.
Access
Page 143 of 436
141
DS4_en_Chap05_visibilite_ed03-2015
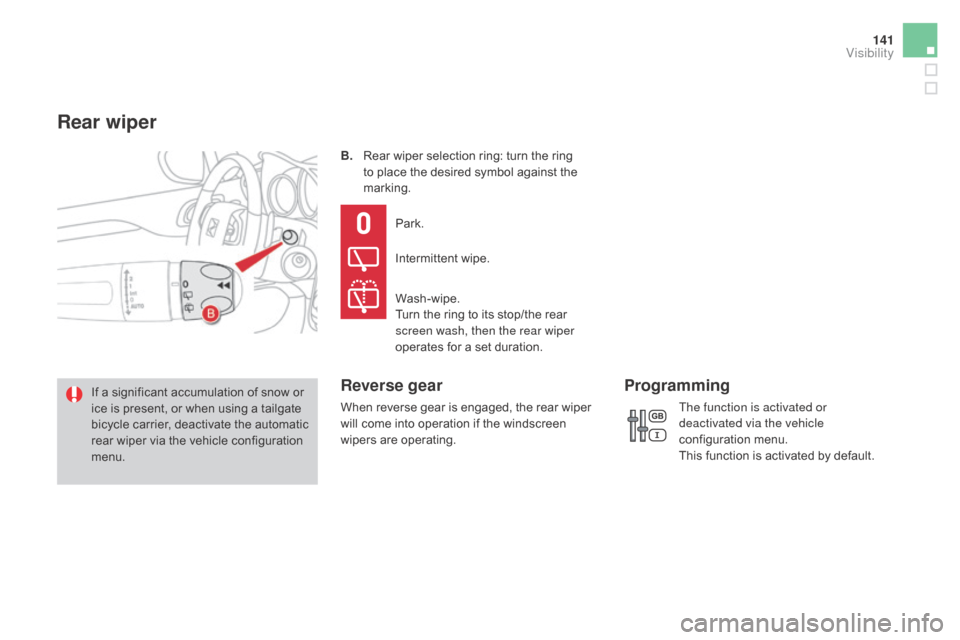
B. Rear wiper selection ring: turn the ring to place the desired symbol against the
marking.
If a significant accumulation of snow or
ice is present, or when using a tailgate
bicycle carrier, deactivate the automatic
rear wiper via the vehicle configuration
menu. Park.
Intermittent wipe.
Wash-wipe.
Turn the ring to its stop/the rear
screen wash, then the rear wiper
operates for a set duration.
Reverse gear
When reverse gear is engaged, the rear wiper
will come into operation if the windscreen
wipers are operating.
Programming
Rear wiper
The function is activated or
deactivated via the vehicle
configuration menu.
This function is activated by default.
Visibility
Page 202 of 436

DS4_en_Chap08_conduite_ed03-2015
Automatic gearbox
Gear selection gate
Six speed automatic gearbox which offers a
choice between the comfort of fully automatic
operation, enhanced by sport and snow
programmes, and the pleasure of manual gear
changing.
Two driving modes are offered:
-
a
utomatic operation for electronic
management of the gears by the gearbox,
with a sport programme for a more
dynamic style of driving and a snow
programme to improve driving when
traction is poor,
-
m
anual operation for sequential changing
of the gears by the driver.
1.
G
ear selector.
2.
B
utton " T" (snow) .
3.
B
utton " S" (spor t) .
4.
P
osition markings for the gear selector.Gear selector positions
P. Park.
-
I mmobilisation of the vehicle, parking brake
on or off.
-
S
tarting the engine.
R.
R
everse.
-
R
eversing manoeuvres, vehicle stationary,
engine at idle.
N.
N
eutral.
-
I
mmobilisation of the vehicle, parking brake
on.
-
S
tarting the engine.
d
.
A
utomatic operation.
M.+ / -
M
anual operation with sequential
changing of the six gears.
F
P
ush for wards to change up through the
gears.
or
F
P
ull backwards to change down through
the gears.
displays in the instrument panel
When you move the selector in the gate to
select a position, the corresponding indicator
comes on in the instrument panel.
P
P
ark
R
R
everse
N
N
eutral
d
D
rive (automatic driving)
S
Sp
ort programme
T
S
now programme
1 to 6
G
ear engaged during manual operation
-
I
nvalid value during manual operation
Page 226 of 436

DS4_en_Chap08_conduite_ed03-2015
Parking sensors
This system indicates the proximity of an
obstacle (person, vehicle, tree, gate, etc.)
which comes within the field of detection of
sensors located in the bumper.
Certain types of obstacle (stake, roadworks
cone, etc.) detected initially will no longer be
detected at the end of the manoeuvre, if they
are located in blind spots in the sensors' field
of detection.
This system cannot in any circumstances replace
the need for vigilance on the part of the driver.
The system is switched on by engaging reverse
g e a r.
This is confirmed by an audible signal.
The system is switched off when you come out
of reverse gear.
Rear parking sensors
Audible assistance
The proximity information is given by an
intermittent audible signal, the frequency of which
increases as the vehicle approaches the obstacle.
The sound emitted by the speaker (right or left)
indicates the side on which the obstacle is located.
When the distance between the vehicle and
the obstacle becomes less than approximately
thirty centimetres, the audible signal becomes
continuous.
Visual assistance
This supplements the audible signal by
displaying bars in the screen which move
progressively nearer to the vehicle.
When the obstacle is very close, the "Danger"
symbol is displayed in the screen.
Page 252 of 436
DS4_en_Chap09_info-pratiques_ed03-2015
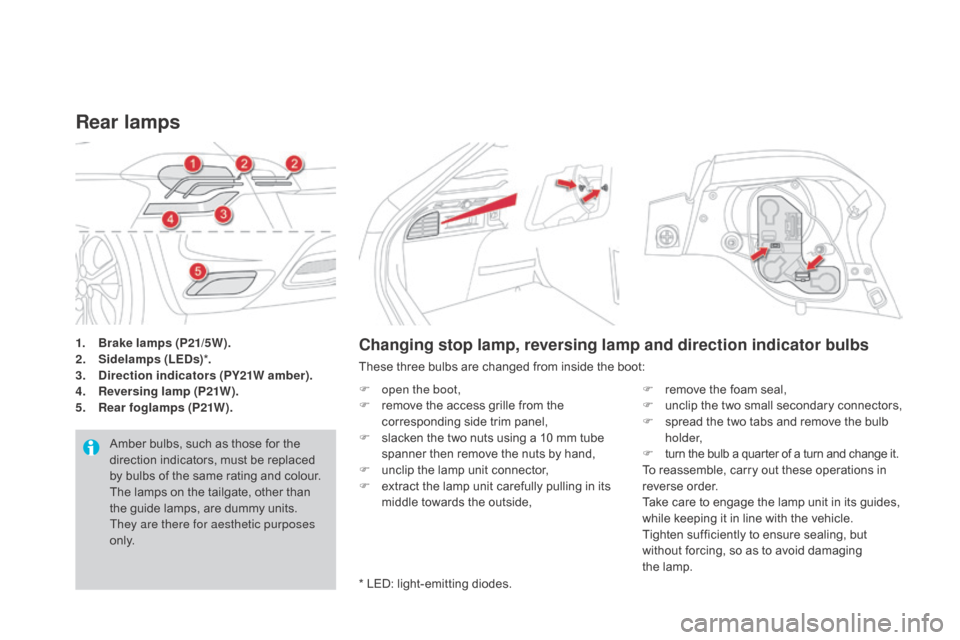
1. Brake lamps (P21/5W).
2. Sidelamps (LE d s)*.
3.
di
rection indicators (PY21W amber).
4.
R
eversing lamp (P21W).
5.
R
ear foglamps (P21W).
Rear lamps
Amber bulbs, such as those for the
direction indicators, must be replaced
by bulbs of the same rating and colour.
The lamps on the tailgate, other than
the guide lamps, are dummy units.
They are there for aesthetic purposes
o n l y.
Changing stop lamp, reversing lamp and direction indicator bulbs
These three bulbs are changed from inside the boot:
F
o
pen the boot,
F
r
emove the access grille from the
corresponding side trim panel,
F
s
lacken the two nuts using a 10 mm tube
spanner then remove the nuts by hand,
F
u
nclip the lamp unit connector,
F
e
xtract the lamp unit carefully pulling in its
middle towards the outside, F
r
emove the foam seal,
F
u
nclip the two small secondary connectors,
F
s
pread the two tabs and remove the bulb
h o l d e r,
F
t
urn the bulb a quarter of a turn and change it.
To reassemble, carry out these operations in
reverse order.
Take care to engage the lamp unit in its guides,
while keeping it in line with the vehicle.
Tighten sufficiently to ensure sealing, but
without forcing, so as to avoid damaging
the
lamp.
* LED: light-emitting diodes.
Page 253 of 436
251
DS4_en_Chap09_info-pratiques_ed03-2015
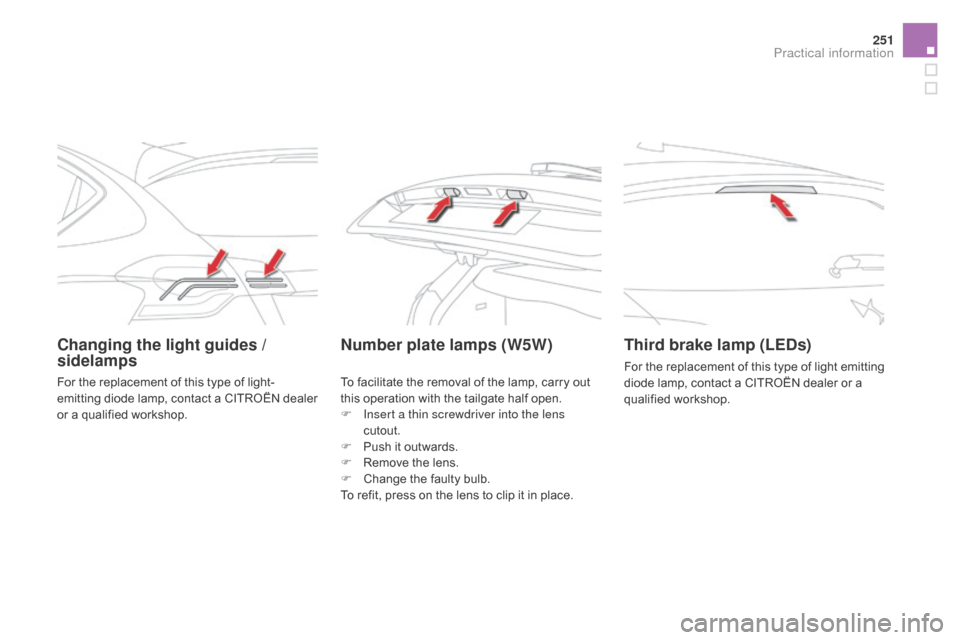
Changing the light guides /
sidelampsNumber plate lamps (W5W)
Third brake lamp (LEds )
For the replacement of this type of light emitting
diode lamp, contact a CITROËN dealer or a
qualified workshop.
For the replacement of this type of light-
emitting diode lamp, contact a CITROËN dealer
or a qualified workshop. To facilitate the removal of the lamp, carry out
this operation with the tailgate half open.
F
I
nsert a thin screwdriver into the lens
cutout.
F
P
ush it outwards.
F
R
emove the lens.
F
C
hange the faulty bulb.
To refit, press on the lens to clip it in place.
Practical information
Page 303 of 436
301
DS4_en_Chap10_verifications_ed03-2015
Topping-up the AdBlue® additive
Precautions in use
Keep AdBlue® out of the reach of
children, in its original bottle.
Never transfer AdBlue
® to another
container: it would lose its purity. Never dilute the additive with water.
Never pour the additive into the Diesel
fuel tank.
Never top-up from an AdBlue®
dispenser reserved for heavy goods
vehicles.
The AdBlue
® additive is an urea-based
solution. This liquid is non-flammable,
colourless and odourless (kept in a cool area).
In the event of contact with the skin, wash
the affected area with soap and water. In the
event of contact with the eyes, wash (irrigate)
the eyes with large amounts of water or with
an eye wash solution for at least 15 minutes.
If a burning sensation or irritation persists, get
medical attention.
If swallowed, immediately wash out the mouth
with clean water and then drink plenty of water.
In certain conditions (high ambient
temperature, for example), the risk of release
of ammonia cannot be excluded: do not inhale
the product. Ammonia vapour has en irritant
effect on mucous membranes (eyes, nose and
throat).
Filling the AdBlue
® tank is an operation
included in every routine service on your
vehicle by a CITROËN dealer or a qualified
workshop.
Nevertheless, given the capacity of the tank,
it may be necessary to top-up the additive
between services, more particularly if an alert
(warning lamps and a message) signals the
requirement.
You can got to a CITROËN dealer or a qualified
workshop.
If you envisage topping-up yourself, please
read the following warnings carefully. Use only AdBlue
® additive that meets the
ISO
22241 standard.
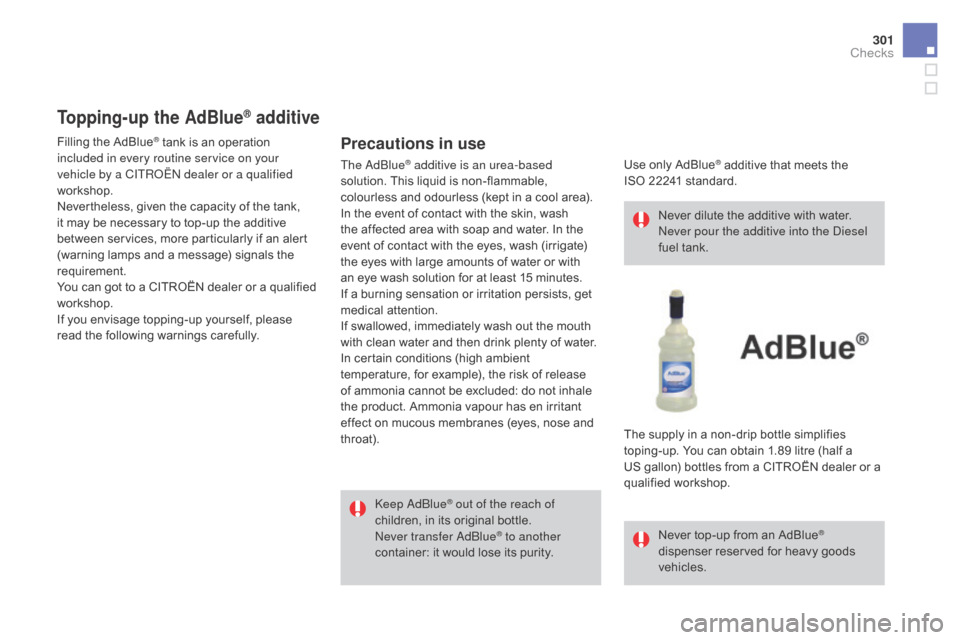
The supply in a non-drip bottle simplifies
toping-up. You can obtain 1.89 litre (half a
US
gallon) bottles from a CITROËN dealer or a
qualified workshop.
Checks
Page 331 of 436
1
7
8
12
9
13
10
14
11
15
2
3
4
5
6
329
DS4_en_Chap12c_SMEGplus_ed03-2015
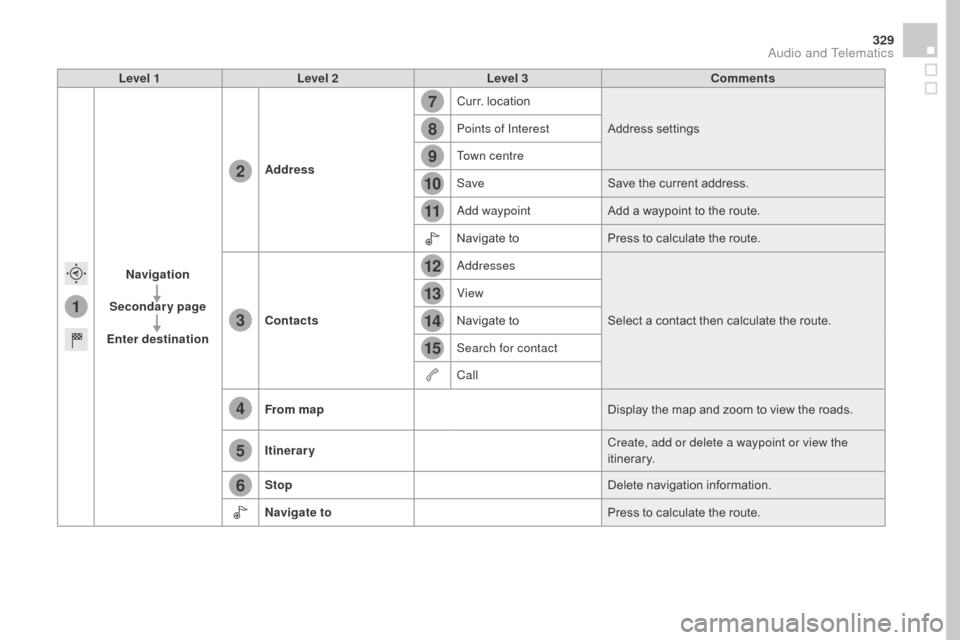
Level 1Level 2 Level 3 Comments
Navigation
Secondary page
Enter destination Address
Curr. location
Address settings
Points of Interest
Town centre
Save Save the current address.
Add waypoint Add a waypoint to the route.
Navigate to Press to calculate the route.
Contacts Addresses
Select a contact then calculate the route.
View
Navigate to
Search for contact
Call
From map Display the map and zoom to view the roads.
Itinerary Create, add or delete a waypoint or view the
itinerary.
Stop Delete navigation information.
Navigate to Press to calculate the route.
Audio and Telematics