tow Citroen DS4 2017 1.G Owner's Guide
[x] Cancel search | Manufacturer: CITROEN, Model Year: 2017, Model line: DS4, Model: Citroen DS4 2017 1.GPages: 421, PDF Size: 8.79 MB
Page 163 of 421
161
DS4_en_Chap05_securite_ed01-2016
DS4_en_Chap05_securite_ed01-2016
Airbags
General information
System designed to contribute towards
improving the safety of the occupants (with
the exception of the rear centre passenger)
in the event of violent collisions. The airbags
supplement the action of the seat belts fitted
with force limiters (all except the centre rear
passenger belt).
If a collision occurs, the electronic detectors
record and analyse the front and side impacts
sustained in the impact detection zones:
-
i
n the case of a serious impact, the airbags
are deployed instantly and contribute
towards better protection of the occupants
of the vehicle (with the exception of the
rear centre passenger); immediately after
the impact, the airbags deflate rapidly so
that they do not hinder visibility or the exit
of the occupants,
-
i
n the case of a minor or rear impact or in
certain roll-over conditions, the airbags
may not be deployed; the seat belt
alone contributes towards ensuring your
protection in these situations. The airbags do not operate when the
ignition is switched off.
This equipment will only deploy once.
If a second impact occurs (during the
same or a subsequent accident), the
airbag will not be deployed again.
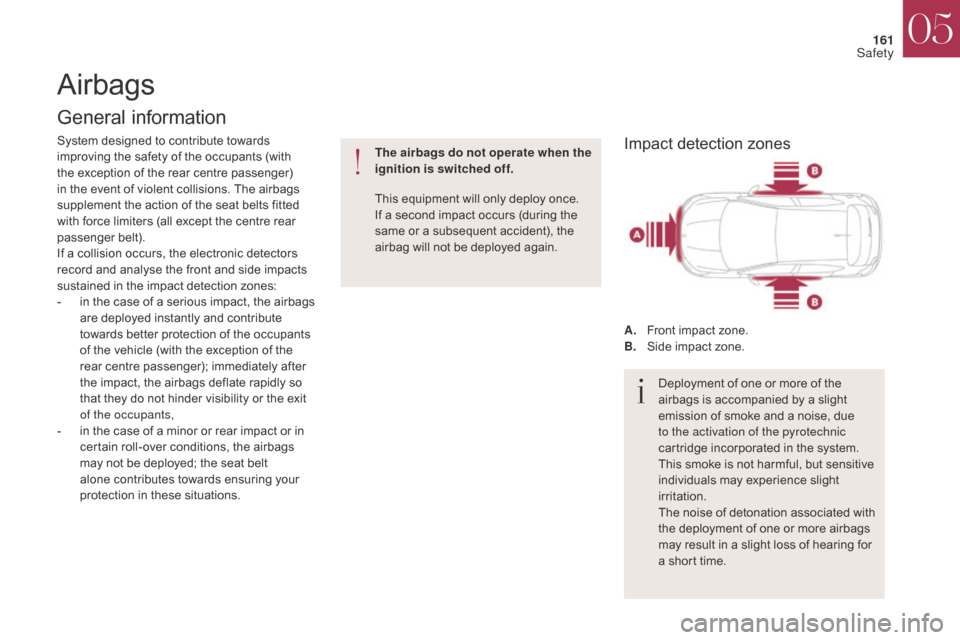
A.
F
ront impact zone.
B.
S
ide impact zone.Deployment of one or more of the
airbags is accompanied by a slight
emission of smoke and a noise, due
to the activation of the pyrotechnic
cartridge incorporated in the system.
This smoke is not harmful, but sensitive
individuals may experience slight
irritation.
The noise of detonation associated with
the deployment of one or more airbags
may result in a slight loss of hearing for
a short time.Impact detection zones
05
Safety
Page 166 of 421

164
Curtain airbags
System which contributes towards improving the
protection of the driver and passengers (with the
exception of the rear centre passenger) in the
event of a serious side impact in order to limit
the risk of injury to the side of the head.
Each curtain airbag is built into the pillars and
the upper passenger compartment area.
Deployment
The curtain airbag is deployed at the same
time as the corresponding lateral airbag in the
event of a serious side impact applied to all or
part of the side impact zone B, perpendicular
to the longitudinal centreline of the vehicle on a
horizontal plane and directed from the outside
towards the inside of the vehicle.
The curtain airbag inflates between the front or
rear occupant of the vehicle and the windows.
Lateral airbags
System which protects the driver and front
passenger in the event of a serious side impact
in order to limit the risk of injury to the chest,
between the hip and the shoulder.
Each lateral airbag is fitted in the seat backrest
frame, door side.
Deployment
A lateral airbag is deployed unilaterally in the
event of a serious side impact applied to all or
part of the side impact zone B, perpendicular
to the longitudinal centreline of the vehicle on a
horizontal plane and directed from the outside
towards the inside of the vehicle.
The lateral airbag inflates between the hip and
shoulder of the front occupant of the vehicle
and the corresponding door trim panel.
A.
F
ront impact zone.
B.
S
ide impact zone.
Impact detection zones
05
Safety
Page 176 of 421
174
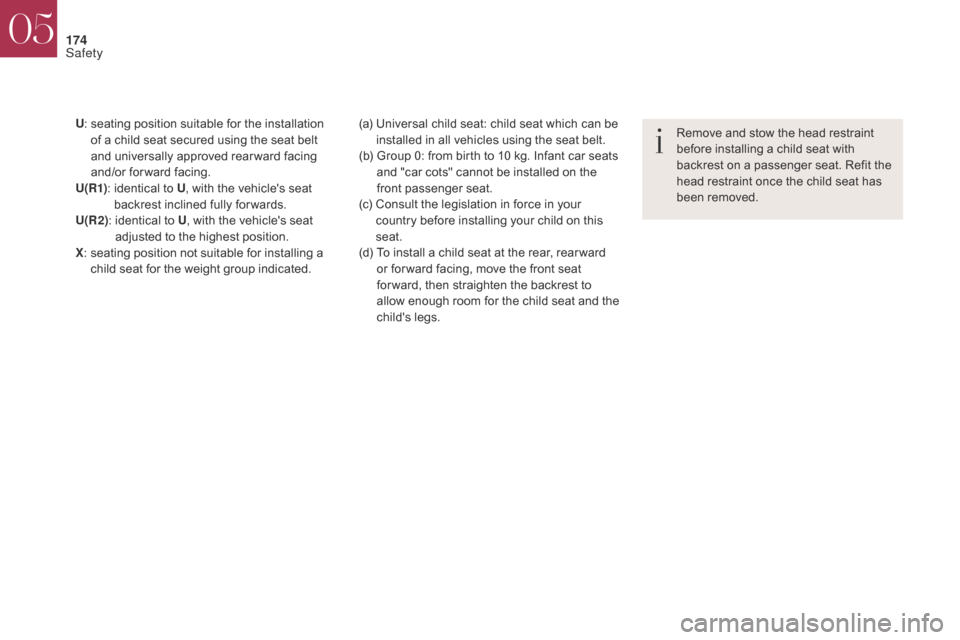
U: seating position suitable for the installation
of a child seat secured using the seat belt
and universally approved rear ward facing
and/or for ward facing.
U(R1) :
i
dentical to U , with the vehicle's seat
backrest inclined fully for wards.
U(R2) :
i
dentical to U , with the vehicle's seat
adjusted to the highest position.
X :
s
eating position not suitable for installing a
child seat for the weight group indicated. Remove and stow the head restraint
before installing a child seat with
backrest on a passenger seat. Refit the
head restraint once the child seat has
been removed.
(a)
U niversal child seat: child seat which can be
installed in all vehicles using the seat belt.
(b)
G
roup 0: from birth to 10 kg. Infant car seats
and "car cots" cannot be installed on the
front passenger seat.
(c)
C
onsult the legislation in force in your
country before installing your child on this
seat.
(d)
T
o install a child seat at the rear, rear ward
or for ward facing, move the front seat
for ward, then straighten the backrest to
allow enough room for the child seat and the
child's legs.
05
Safety
Page 177 of 421
175
DS4_en_Chap05_securite_ed01-2016
DS4_en_Chap05_securite_ed01-2016
Your vehicle has been approved in accordance
with the latest ISOFIX regulation .
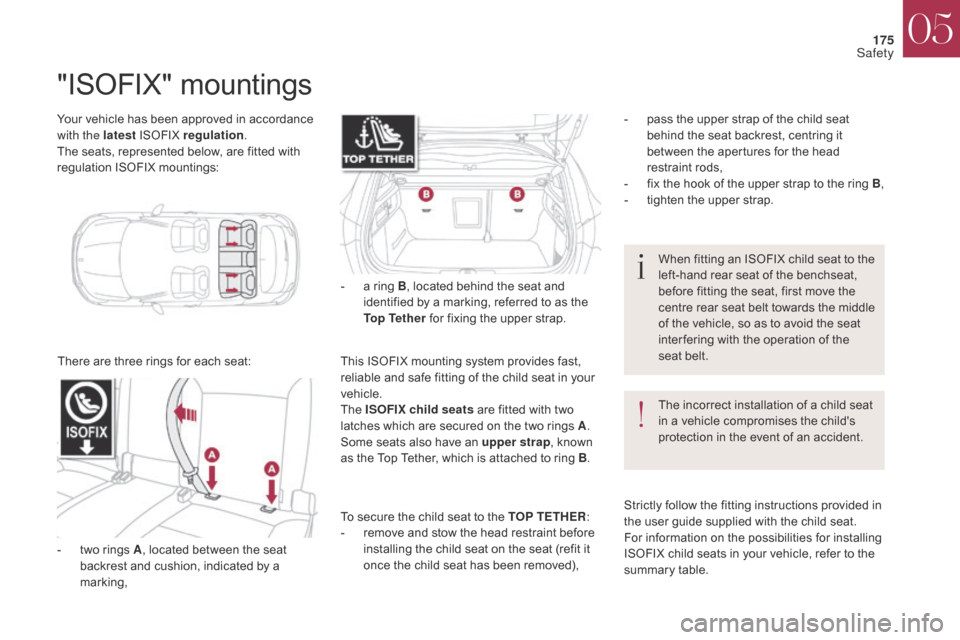
The seats, represented below, are fitted with
regulation ISOFIX mountings:
"ISOFIX" mountings
There are three rings for each seat: -
a r
ing B
, located behind the seat and
identified by a marking, referred to as the
Top Tether for fixing the upper strap.
This ISOFIX mounting system provides fast,
reliable and safe fitting of the child seat in your
vehicle.
The ISOFIX child seats are fitted with two
latches which are secured on the two rings A .
Some seats also have an upper strap , known
as the Top Tether, which is attached to ring B .The incorrect installation of a child seat
in a vehicle compromises the child's
protection in the event of an accident.
Strictly follow the fitting instructions provided in
the user guide supplied with the child seat.
For information on the possibilities for installing
ISOFIX child seats in your vehicle, refer to the
summary table. When fitting an ISOFIX child seat to the
left-hand rear seat of the benchseat,
before fitting the seat, first move the
centre rear seat belt towards the middle
of the vehicle, so as to avoid the seat
inter fering with the operation of the
seat belt.
-
p
ass the upper strap of the child seat
behind the seat backrest, centring it
between the apertures for the head
restraint rods,
-
f
ix the hook of the upper strap to the ring B,
-
t
ighten the upper strap.
To secure the child seat to the TOP TETHER :
-
r
emove and stow the head restraint before
installing the child seat on the seat (refit it
once the child seat has been removed),
-
t
wo rings A , located between the seat
backrest and cushion, indicated by a
marking,
05
Safety
Page 180 of 421
178
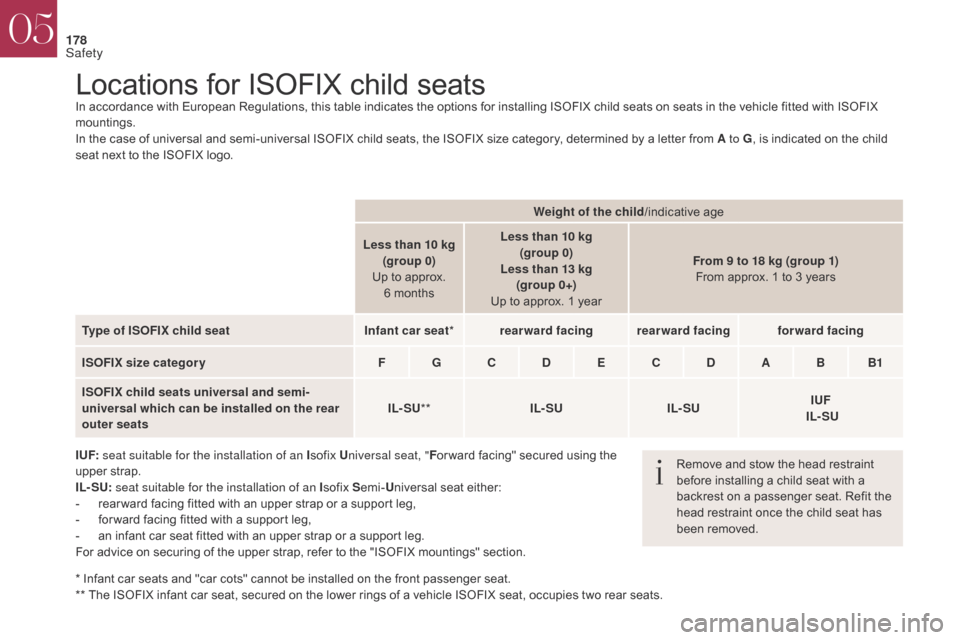
Locations for ISOFIX child seatsIn accordance with European Regulations, this table indicates the options for installing ISOFIX child seats on seats in the vehicle fitted with ISOFIX
mountings.
In the case of universal and semi-universal ISOFIX child seats, the ISOFIX size category, determined by a letter from A to G, is indicated on the child
seat next to the ISOFIX logo.
I UF: seat suitable for the installation of an I sofix Universal seat, " For ward facing" secured using the
upper strap.
IL- SU: seat suitable for the installation of an I sofix Semi-Universal seat either:
-
r
ear ward facing fitted with an upper strap or a support leg,
-
f
or ward facing fitted with a support leg,
-
a
n infant car seat fitted with an upper strap or a support leg.
For advice on securing of the upper strap, refer to the "ISOFIX mountings" section.
* Infant car seats and "car cots" cannot be installed on the front passenger seat.
** The ISOFIX infant car seat, secured on the lower rings of a vehicle ISOFIX seat, occupies two rear seats. Weight of the child
/indicative age
Less than 10 kg (group 0)
Up to approx. 6
monthsLess than 10 kg
(group 0)
Less than 13 kg (group 0+)
Up to approx. 1 year From 9 to 18 kg (group 1)
From approx. 1 to 3 years
Type of ISOFIX child seat Infant car seat*rearward facing rearward facing forward facing
ISOFIX size categor y F G C D E C D A B B1
ISOFIX child seats universal and semi-
universal which can be installed on the rear
outer seats IL- SU
** IL- SU IL- SU IUF
IL- SU
Remove and stow the head restraint
before installing a child seat with a
backrest on a passenger seat. Refit the
head restraint once the child seat has
been removed.
05
Safety
Page 187 of 421
185
DS4_en_Chap06_conduite_ed01-2016
When towing
Distribution of loads
F Distribute the load in the trailer so that the heaviest items are as close as possible to
the axle and the nose weight approaches
the maximum permitted without exceeding
it.
Air density decreases with altitude, thus
reducing engine per formance. Above
1
000 metres, the maximum towed load must
be reduced by 10
% for every 1 000 metres of
altitude.
Side wind
F Take into account the increased sensitivity to side wind.
Cooling
Towing a trailer on a slope increases the
temperature of the coolant.
As the fan is electrically controlled, its cooling
capacity is not dependent on the engine speed.
F
T
o lower the engine speed, reduce your
speed.
The maximum towed load on a long incline
depends on the gradient and the exterior
temperature.
In all cases, keep a check on the coolant
temperature.
F
I
f the warning lamp and the STOP
warning lamp come on, stop the
vehicle and switch off the engine
as soon as possible.
Braking
Towing a trailer increases the braking distance.
To avoid overheating of the brakes, the use of
engine braking is recommended.
Ty r e s
F Check the tyre pressures of the towing vehicle and of the trailer, observing the
recommended pressures.
Lighting
F Check the electrical lighting and signalling on the trailer and the headlamp beam
height of your vehicle.
For more information on Adjusting the
headlamp beam height , refer to the
corresponding section.
For more information on Weights
, refer
to the corresponding section.
The rear parking sensors will be
deactivated automatically to avoid the
audible signal if a genuine CITROËN
towbar is used.
If the exterior temperature is high, it
is recommended that the engine be
allowed to idle for 1 to 2 minutes after
the vehicle comes to a stop, to facilitate
its cooling.
06
Driving
Page 195 of 421
193
DS4_en_Chap06_conduite_ed01-2016
Electric parking brake
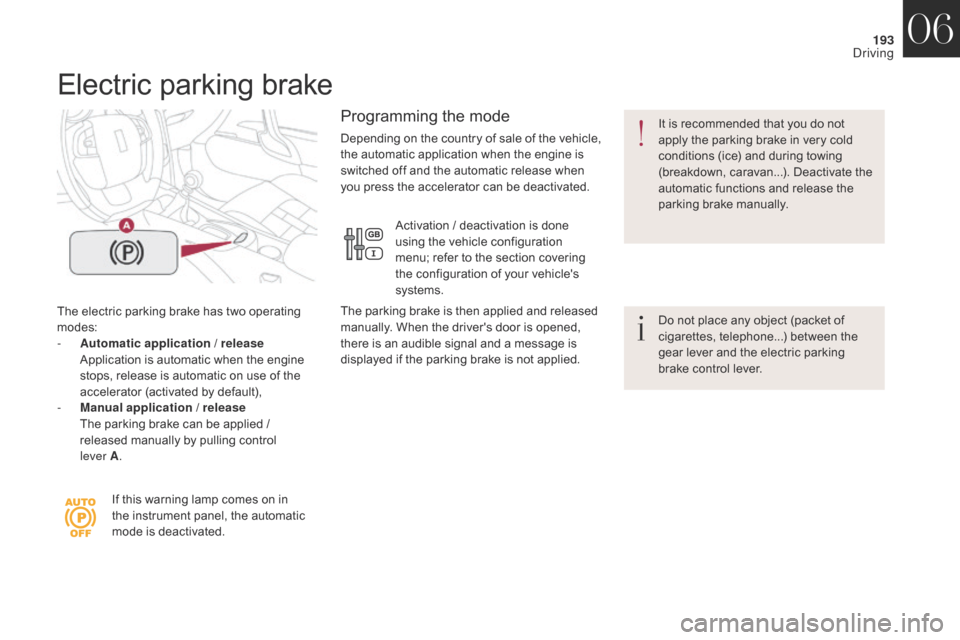
The electric parking brake has two operating
modes:
-
A
utomatic application
/ release
A
pplication is automatic when the engine
stops, release is automatic on use of the
accelerator (activated by default),
-
M
anual application
/ release
T
he parking brake can be applied /
released manually by pulling control
lever
A. Do not place any object (packet of
cigarettes, telephone...) between the
gear lever and the electric parking
brake control lever. It is recommended that you do not
apply the parking brake in very cold
conditions (ice) and during towing
(breakdown, caravan...). Deactivate the
automatic functions and release the
parking brake manually.
If this warning lamp comes on in
the instrument panel, the automatic
mode is deactivated.
Programming the mode
Depending on the country of sale of the vehicle,
the automatic application when the engine is
switched off and the automatic release when
you press the accelerator can be deactivated. Activation
/ deactivation is done
using the vehicle configuration
menu; refer to the section covering
the configuration of your vehicle's
systems.
The parking brake is then applied and released
manually. When the driver's door is opened,
there is an audible signal and a message is
displayed if the parking brake is not applied.
06
Driving
Page 196 of 421
194
DS4_en_Chap06_conduite_ed01-2016
With the ignition on or the engine running, to
release the parking brake, press on the brake
pedal or the accelerator, pull then release
control A .
Manual release
Before leaving the vehicle, ensure
that parking brake warning lamp in the
instrument panel is on fixed, not flashing.
Manual application
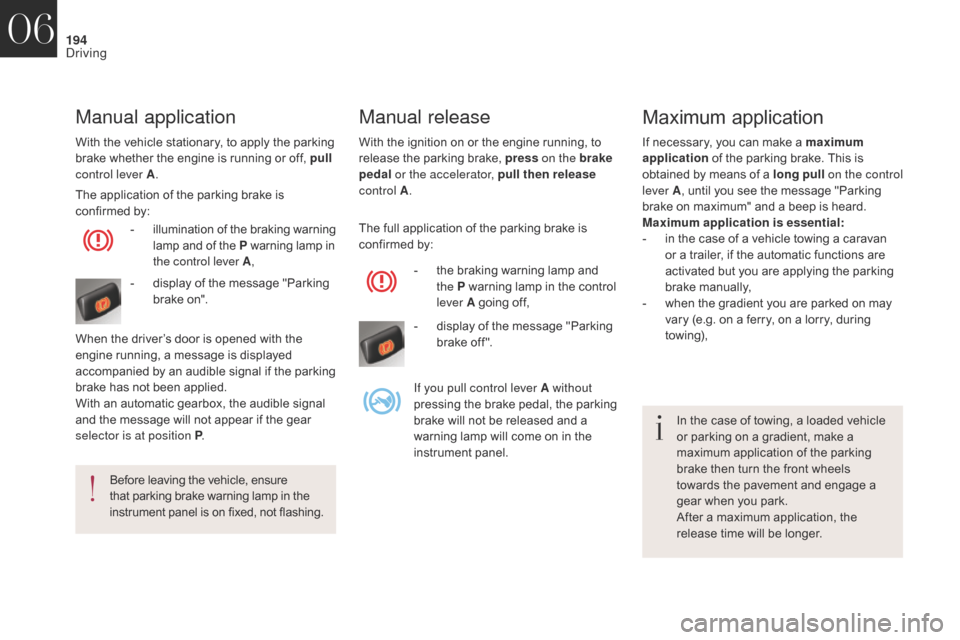
With the vehicle stationary, to apply the parking
brake whether the engine is running or off, pull
control lever A .
The application of the parking brake is
confirmed by: -
i
llumination of the braking warning
lamp and of the P warning lamp in
the control lever A ,
-
d
isplay of the message "Parking
brake on".
When the driver’s door is opened with the
engine running, a message is displayed
accompanied by an audible signal if the parking
brake has not been applied.
With an automatic gearbox, the audible signal
and the message will not appear if the gear
selector is at position P . The full application of the parking brake is
confirmed by:
-
t
he braking warning lamp and
the P warning lamp in the control
lever A going off,
-
d
isplay of the message "Parking
brake off ".
If you pull control lever A without
pressing the brake pedal, the parking
brake will not be released and a
warning lamp will come on in the
instrument panel.
Maximum application
If necessary, you can make a maximum
application of the parking brake. This is
obtained by means of a long pull on the control
lever A , until you see the message "Parking
brake on maximum" and a beep is heard.
Maximum application is essential:
-
i
n the case of a vehicle towing a caravan
or a trailer, if the automatic functions are
activated but you are applying the parking
brake manually,
-
w
hen the gradient you are parked on may
vary (e.g. on a ferry, on a lorry, during
towing),
In the case of towing, a loaded vehicle
or parking on a gradient, make a
maximum application of the parking
brake then turn the front wheels
towards the pavement and engage a
gear when you park.
After a maximum application, the
release time will be longer.
06
Driving
Page 197 of 421
195
DS4_en_Chap06_conduite_ed01-2016
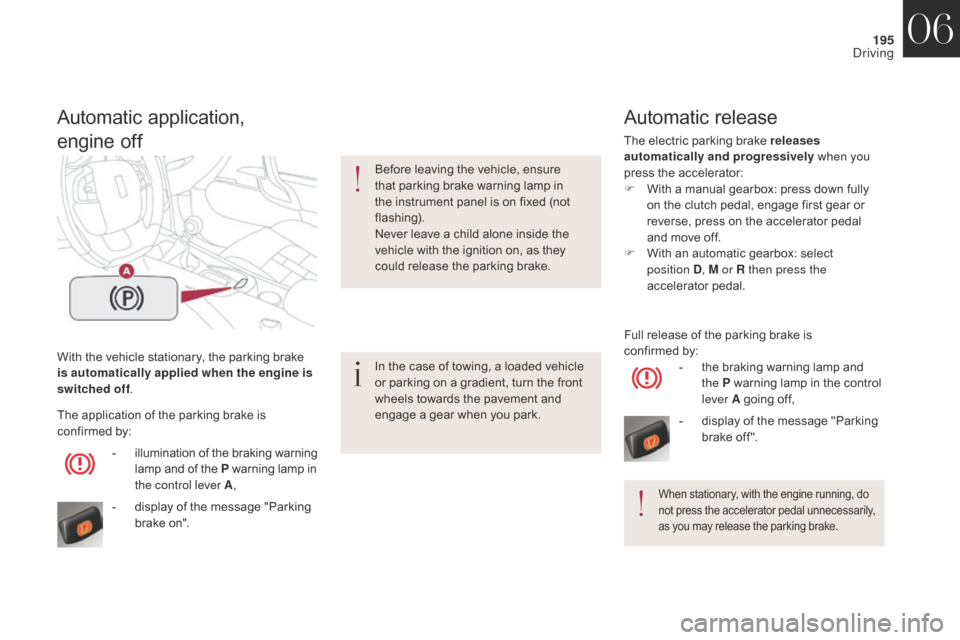
With the vehicle stationary, the parking brake
is automatically applied when the engine is
switched off.
Automatic application,
engine off
In the case of towing, a loaded vehicle
or parking on a gradient, turn the front
wheels towards the pavement and
engage a gear when you park. Before leaving the vehicle, ensure
that parking brake warning lamp in
the instrument panel is on fixed (not
flashing).
Never leave a child alone inside the
vehicle with the ignition on, as they
could release the parking brake.
-
i
llumination of the braking warning
lamp and of the P warning lamp in
the control lever A ,
-
d
isplay of the message "Parking
brake on".
The application of the parking brake is
confirmed by:
Automatic release
The electric parking brake releases
automatically and progressively
when you
press the accelerator:
F
W
ith a manual gearbox: press down fully
on the clutch pedal, engage first gear or
reverse, press on the accelerator pedal
and move off.
F
W
ith an automatic gearbox: select
position
D, M or R then press the
accelerator pedal.
When stationary, with the engine running, do
not press the accelerator pedal unnecessarily,
as you may release the parking brake.
Full release of the parking brake is
confirmed by:
-
t
he braking warning lamp and
the P warning lamp in the control
lever A going off,
-
d
isplay of the message "Parking
brake off ".
06
Driving
Page 202 of 421
200
DS4_en_Chap06_conduite_ed01-2016
Manual operation
F Select position M for sequential changing
of the six gears.
F
P
ush the selector towards the + sign to
change up a gear.
F
P
ull the selector towards the - sign to
change down a gear.
It is only possible to change from one gear to
another if the vehicle speed and engine speed
permit; other wise, the gearbox will operate
temporarily in automatic mode.
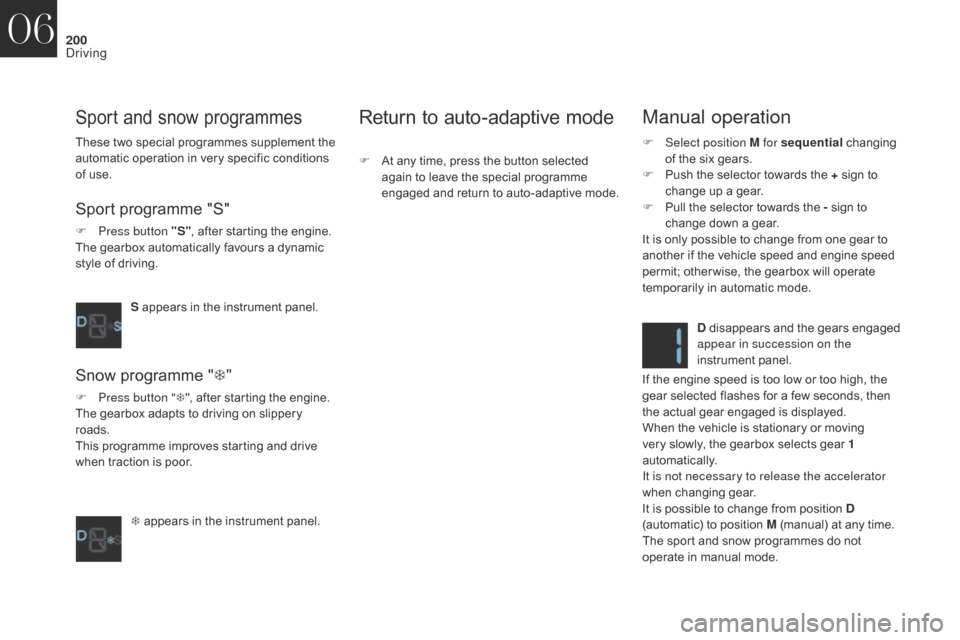
D disappears and the gears engaged
appear in succession on the
instrument panel.
If the engine speed is too low or too high, the
gear selected flashes for a few seconds, then
the actual gear engaged is displayed.
When the vehicle is stationary or moving
very slowly, the gearbox selects gear 1
automatically.
It is not necessary to release the accelerator
when changing gear.
It is possible to change from position D
(automatic) to position M (manual) at any time.
The sport and snow programmes do not
operate in manual mode.
Sport and snow programmes
Sport programme "S"
F Press button "S" , after starting the engine.
The gearbox automatically favours a dynamic
style of driving.
S appears in the instrument panel.
Snow programme " T"
F Press button " T", after starting the engine.
The gearbox adapts to driving on slippery
roads.
This programme improves starting and drive
when traction is poor.
T appears in the instrument panel.
Return to auto-adaptive mode
F At any time, press the button selected again to leave the special programme
engaged and return to auto-adaptive mode.
These two special programmes supplement the
automatic operation in very specific conditions
of use.
06
Driving