Instrument CITROEN DS4 2023 Owner's Guide
[x] Cancel search | Manufacturer: CITROEN, Model Year: 2023, Model line: DS4, Model: CITROEN DS4 2023Pages: 296, PDF Size: 9.91 MB
Page 37 of 296
35
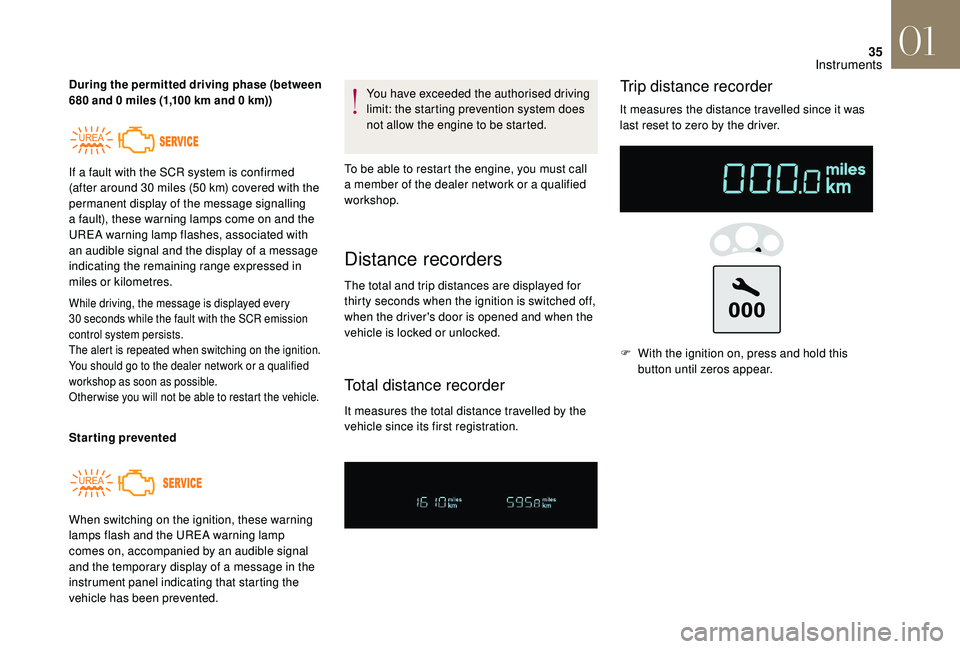
During the permitted driving phase (between
680 and 0 miles (1,100 km and 0 km))
While driving, the message is displayed every
30 seconds while the fault with the SCR emission
control system persists.
The alert is repeated when switching on the ignition.
You should go to the dealer network or a qualified
workshop as soon as possible.
Other wise you will not be able to restart the vehicle.
Starting prevented You have exceeded the authorised driving
limit: the starting prevention system does
not allow the engine to be started.
To be able to restart the engine, you must call
a member of the dealer network or a qualified
workshop.
When switching on the ignition, these warning
lamps flash and the UREA warning lamp
comes on, accompanied by an audible signal
and the temporary display of a message in the
instrument panel indicating that starting the
vehicle has been prevented. If a fault with the SCR system is confirmed
(after around 30 miles (50 km) covered with the
permanent display of the message signalling
a fault), these warning lamps come on and the
UREA warning lamp flashes, associated with
an audible signal and the display of a message
indicating the remaining range expressed in
miles or kilometres.
Distance recorders
The total and trip distances are displayed for
thirty seconds when the ignition is switched off,
when the driver's door is opened and when the
vehicle is locked or unlocked.
Total distance recorder
It measures the total distance travelled by the
vehicle since its first registration.
Trip distance recorder
It measures the distance travelled since it was
last reset to zero by the driver. F
W
ith the ignition on, press and hold this
button until zeros appear.
01
Instruments
Page 38 of 296
36
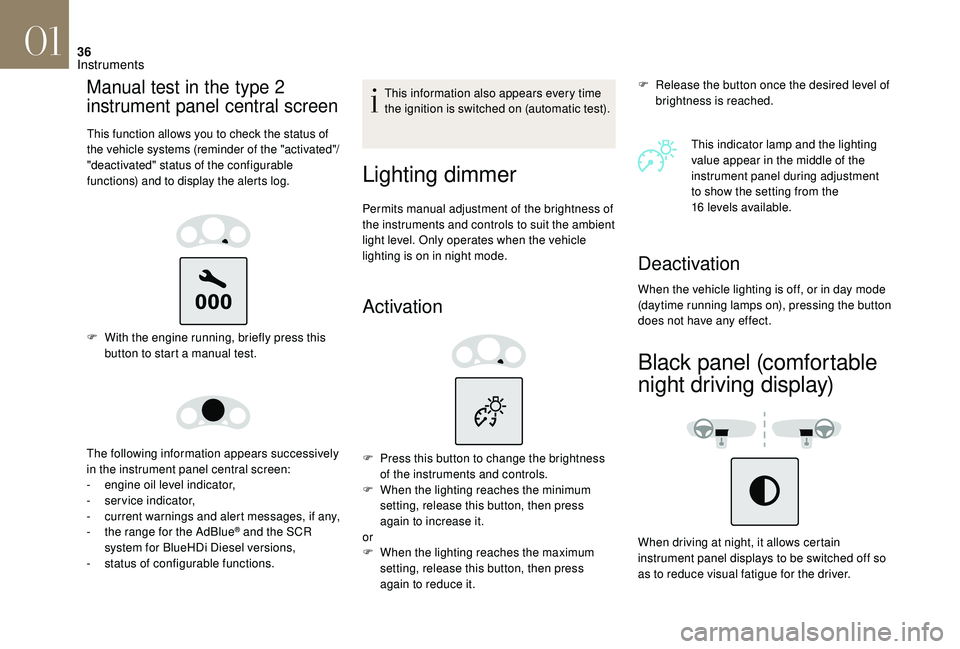
Manual test in the type 2
instrument panel central screen
This function allows you to check the status of
the vehicle systems (reminder of the "activated"/
"deactivated" status of the configurable
functions) and to display the alerts log.
F With the engine running, briefly press this button to start a manual test.
The following information appears successively
in the instrument panel central screen:
-
e
ngine oil level indicator,
-
ser
vice indicator,
-
c
urrent warnings and alert messages, if any,
-
t
he range for the AdBlue
® and the SCR
system for BlueHDi Diesel versions,
-
s
tatus of configurable functions. This information also appears every time
the ignition is switched on (automatic test).
Lighting dimmer
Permits manual adjustment of the brightness of
the instruments and controls to suit the ambient
light level. Only operates when the vehicle
lighting is on in night mode.
Activation
F Release the button once the desired level of
brightness is reached.
This indicator lamp and the lighting
value appear in the middle of the
instrument panel during adjustment
to show the setting from the
16
levels available.
F
P
ress this button to change the brightness
of the instruments and controls.
F
W
hen the lighting reaches the minimum
setting, release this button, then press
again to increase it.
or
F
W
hen the lighting reaches the maximum
setting, release this button, then press
again to reduce it.
Deactivation
When the vehicle lighting is off, or in day mode
(daytime running lamps on), pressing the button
does not have any effect.
Black panel (comfortable
night driving display)
When driving at night, it allows certain
instrument panel displays to be switched off so
as to reduce visual fatigue for the driver.
01
Instruments
Page 39 of 296
37
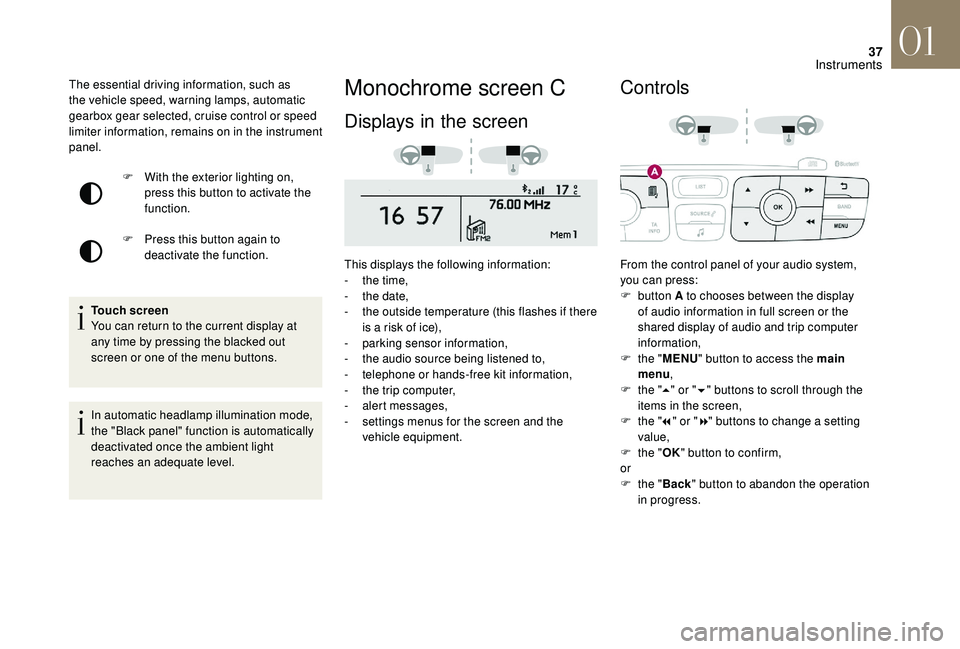
Monochrome screen C
Displays in the screen
This displays the following information:
- t he time,
-
t
he date,
-
t
he outside temperature (this flashes if there
is a risk of ice),
-
par
king sensor information,
-
t
he audio source being listened to,
-
t
elephone or hands-free kit information,
-
t
he trip computer,
-
a
lert messages,
-
s
ettings menus for the screen and the
vehicle equipment.
Controls
From the control panel of your audio system,
you can press:
F
button A to chooses between the display
of audio information in full screen or the
shared display of audio and trip computer
information,
F
t
he "MENU " button to access the main
menu ,
F
t
he "5" or " 6" buttons to scroll through the
items in the screen,
F
t
he "7" or " 8" buttons to change a setting
value,
F
t
he "OK" button to confirm,
or
F
t
he "Back " button to abandon the operation
in progress.
F
W
ith the exterior lighting on,
press this button to activate the
function.
F
P
ress this button again to
deactivate the function.
The essential driving information, such as
the vehicle speed, warning lamps, automatic
gearbox gear selected, cruise control or speed
limiter information, remains on in the instrument
panel.
Touch screen
You can return to the current display at
any time by pressing the blacked out
screen or one of the menu buttons.
In automatic headlamp illumination mode,
the "Black panel" function is automatically
deactivated once the ambient light
reaches an adequate level.
01
Instruments
Page 40 of 296
38
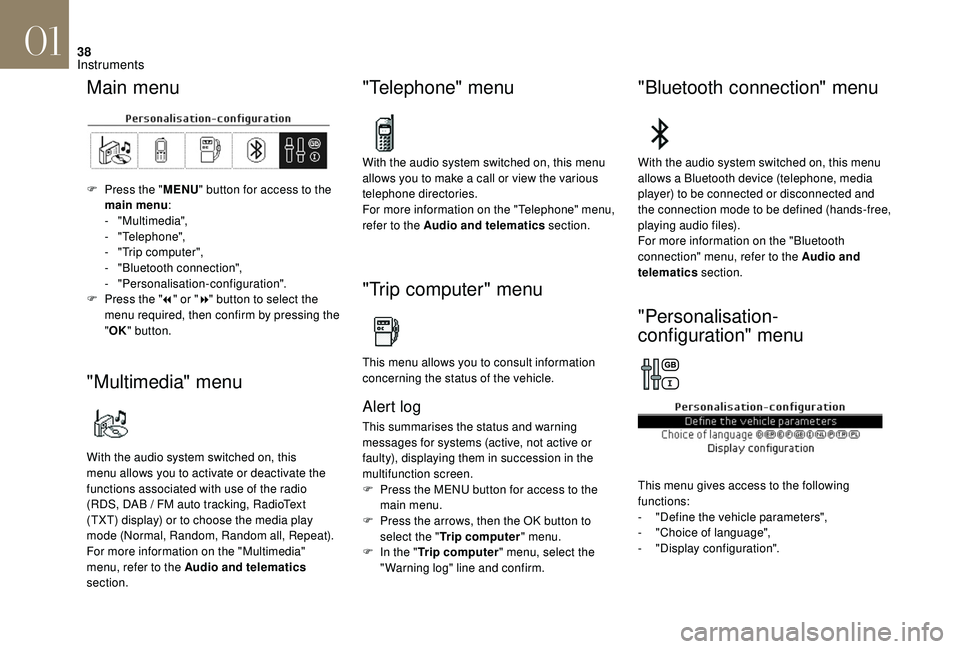
Main menu
F Press the "MENU" button for access to the
main menu :
-
"Multimedia",
-
"Telephone",
-
"
Trip computer",
-
"
Bluetooth connection",
-
"Personalisation-configuration".
F
P
ress the " 7" or " 8" button to select the
menu required, then confirm by pressing the
" OK " button.
"Multimedia" menu
With the audio system switched on, this
menu allows you to activate or deactivate the
functions associated with use of the radio
(RDS, DAB
/ FM auto tracking, RadioText
(TXT) display) or to choose the media play
mode (Normal, Random, Random all, Repeat).
For more information on the "Multimedia"
menu, refer to the Audio and telematics
section.
"Telephone" menu
With the audio system switched on, this menu
allows you to make a call or view the various
telephone directories.
For more information on the "Telephone" menu,
refer to the Audio and telematics section.
"Trip computer" menu
This menu allows you to consult information
concerning the status of the vehicle.
Alert log
This summarises the status and warning
messages for systems (active, not active or
faulty), displaying them in succession in the
multifunction screen.
F
P
ress the MENU button for access to the
main menu.
F
P
ress the arrows, then the OK button to
select the " Trip computer " menu.
F
I
n the " Trip computer " menu, select the
"Warning log" line and confirm.
"Bluetooth connection" menu
With the audio system switched on, this menu
allows a Bluetooth device (telephone, media
player) to be connected or disconnected and
the connection mode to be defined (hands-free,
playing audio files).
For more information on the "Bluetooth
connection" menu, refer to the Audio and
telematics section.
"Personalisation-
configuration" menu
This menu gives access to the following
functions:
-
"
Define the vehicle parameters",
-
"
Choice of language",
-
"
Display configuration".
01
Instruments
Page 41 of 296
39
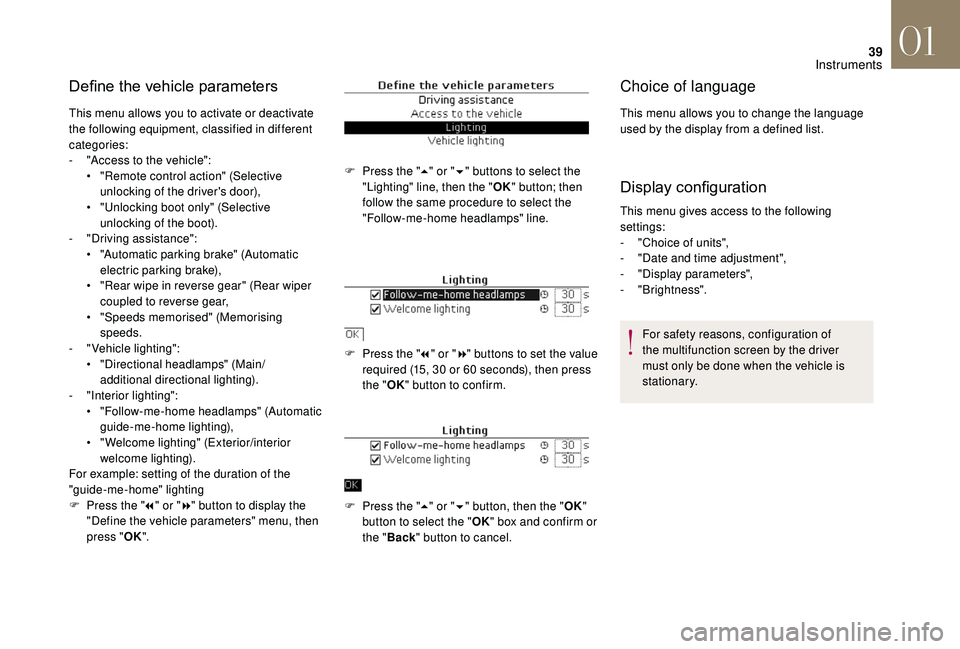
Define the vehicle parameters
This menu allows you to activate or deactivate
the following equipment, classified in different
categories:
-
"
Access to the vehicle":
•
"
Remote control action" (Selective
unlocking of the driver's door),
•
"
Unlocking boot only" (Selective
unlocking of the boot).
-
"
Driving assistance":
•
"
Automatic parking brake" (Automatic
electric parking brake),
•
"
Rear wipe in reverse gear" (Rear wiper
coupled to reverse gear,
•
"
Speeds memorised" (Memorising
speeds.
-
"
Vehicle lighting":
•
"
Directional headlamps" (Main/
additional directional lighting).
-
"
Interior lighting":
•
"
Follow-me-home headlamps" (Automatic
guide-me-home lighting),
•
"
Welcome lighting" (Exterior/interior
welcome lighting).
For example: setting of the duration of the
"guide-me-home" lighting
F
P
ress the " 7" or " 8" button to display the
"Define the vehicle parameters" menu, then
press " OK". F
P
ress the "5" or " 6" buttons to select the
"Lighting" line, then the " OK"
button; then
follow the same procedure to select the
"Follow-me-home headlamps" line.
F
P
ress the "7" or " 8" buttons to set the value
required (15, 30 or 60 seconds), then press
the " OK" button to confirm.
F
P
ress the "5" or " 6" button, then the " OK"
button to select the " OK" box and confirm or
the " Back " button to cancel.
Choice of language
This menu allows you to change the language
used by the display from a defined list.
Display configuration
This menu gives access to the following
settings:
-
"
Choice of units",
-
"
Date and time adjustment",
-
"
Display parameters",
-
"Brightness".For safety reasons, configuration of
the multifunction screen by the driver
must only be done when the vehicle is
stationary.
01
Instruments
Page 42 of 296
40
Touch screen
The touch screen gives access to:
- m enus for adjusting settings for vehicle
functions and systems,
-
a
udio system and telephone controls and
the display of associated information,
-
t
he display of the exterior temperature
(a
blue snowflake appears if there is a risk
of i c e),
-
t
he display of the trip computer.
and, depending on equipment, allows:
-
t
he display of visual parking sensors
information,
-
a
ccess to the internet ser vices and
navigation system controls and the display
of associated information.
As a safety measure, the driver must
only carry out operations that require
close attention with the vehicle
stationary.
Some functions are not accessible when
driving.
General operation
Recommendations
This screen is of the capacitive type.
Use is possible in all temperatures.
Do not use pointed objects on the touch
screen.
Do not touch the touch screen with wet hands.
Use a soft clean cloth to clean the touch
screen.
Principles
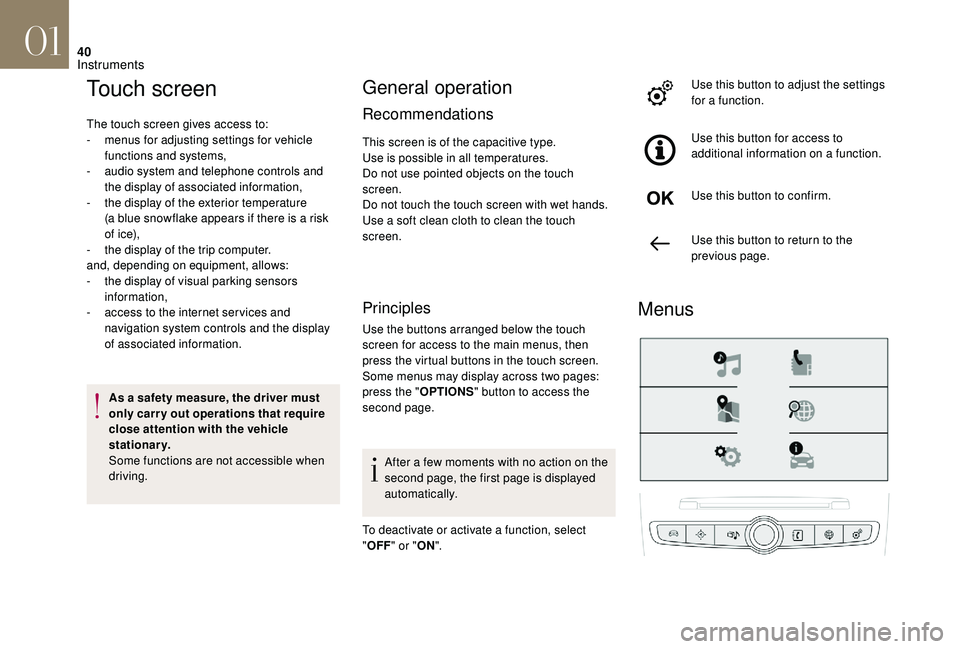
Use the buttons arranged below the touch
screen for access to the main menus, then
press the virtual buttons in the touch screen.
Some menus may display across two pages:
press the " OPTIONS" button to access the
second page.
After a few moments with no action on the
second page, the first page is displayed
automatically.
To deactivate or activate a function, select
" OFF " or " ON". Use this button to adjust the settings
for a function.
Use this button for access to
additional information on a function.
Use this button to confirm.
Use this button to return to the
previous page.
Menus
01
Instruments
Page 43 of 296
41
Radio Media.
Mirror Screen or Connected
navigation.*
*
D
epending on equipment. Telephone.
Applications.
Allows the display of the
connected services available.
Settings
.
Allows configuration of the
display and the system.
Vehicle.
Allows the activation,
deactivation and adjustment of
settings for certain functions.
The functions accessible from this menu are
arranged under two tabs: " Vehicle settings"
and " Driving functions ".
Volume control/mute. Press with three fingers on the touch
screen to display the menu carousel.
Upper bar
Certain information is always present in the
upper bar of the touch screen:
-
D
isplay of the outside temperature.
-
R
eminder of information from the Radio
and Telephone menus and navigation
instructions.
-
Notifications. -
A
ccess to the Settings of the
touch screen.
-
T
ime display.
Trip computer
System that gives you information about the
current journey (range, fuel consumption…).
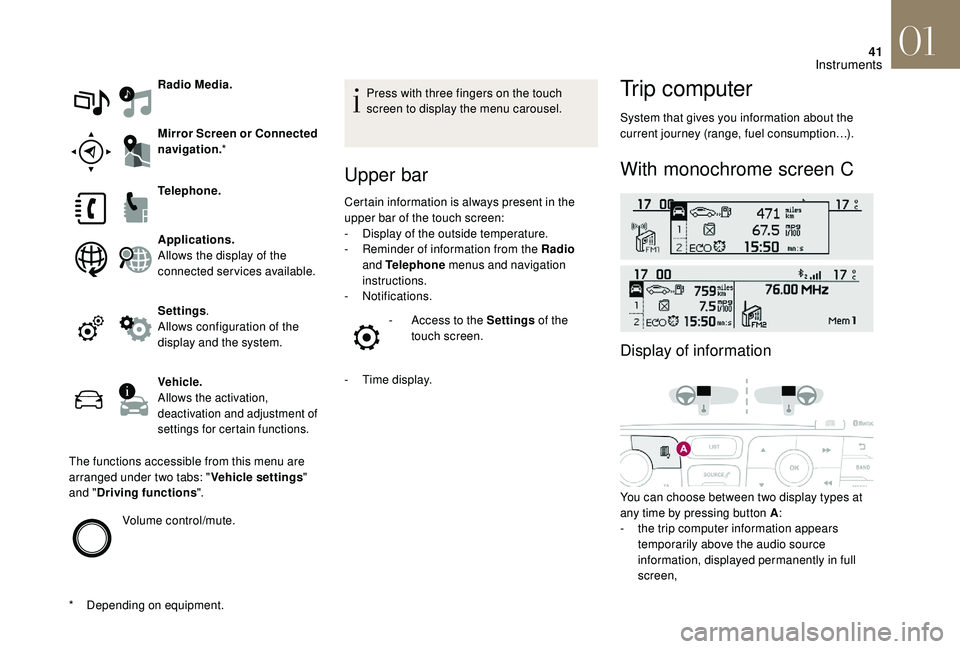
With monochrome screen C
Display of information
You can choose between two display types at
any time by pressing button A :
-
t
he trip computer information appears
temporarily above the audio source
information, displayed permanently in full
screen,
01
Instruments
Page 44 of 296
42
or
-
t he trip computer and audio source
information both appear permanently in a
shared screen.
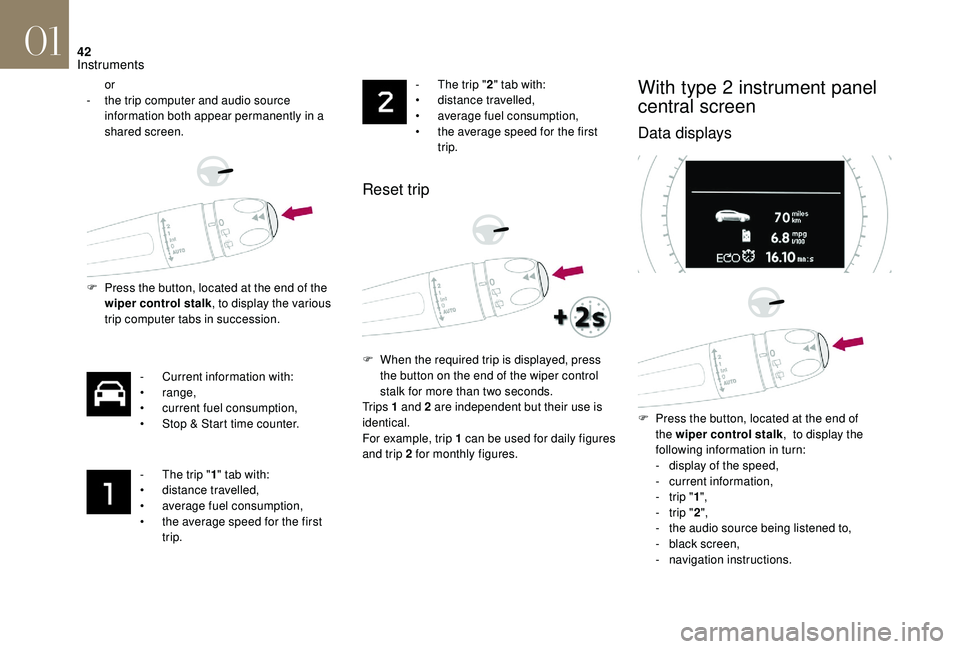
F
P
ress the button, located at the end of the
wiper control stalk , to display the various
trip computer tabs in succession.
-
C
urrent information with:
•
range,
•
c
urrent fuel consumption,
•
S
top & Start time counter.
-
T
he trip "1" tab with:
•
d
istance travelled,
•
a
verage fuel consumption,
•
t
he average speed for the first
trip. -
T he trip "
2" tab with:
• d istance travelled,
•
a
verage fuel consumption,
•
t
he average speed for the first
trip.
Reset trip
F When the required trip is displayed, press the button on the end of the wiper control
stalk for more than two seconds.
Tr i p s 1 and 2 are independent but their use is
identical.
For example, trip 1 can be used for daily figures
and trip 2 for monthly figures.
With type 2 instrument panel
central screen
Data displays
F Press the button, located at the end of the wiper control stalk , to display the
following information in turn:
-
d
isplay of the speed,
-
c
urrent information,
-
t
rip "1",
-
t
rip "2",
-
t
he audio source being listened to,
-
b
lack screen,
-
n
avigation instructions.
01
Instruments
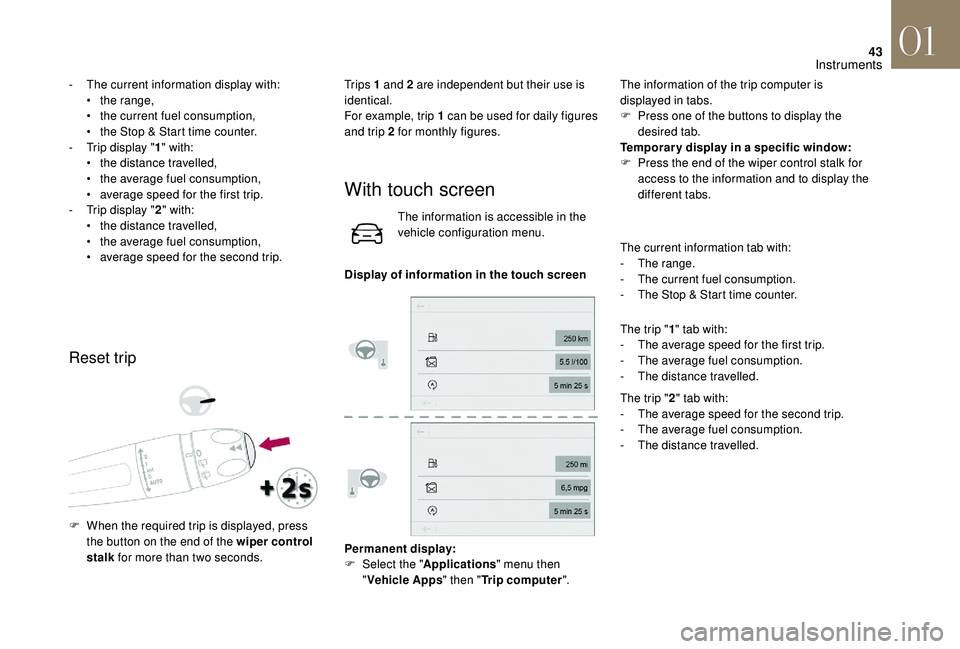
Page 45 of 296
43
- The current information display with:• t he range,
•
t
he current fuel consumption,
•
t
he Stop & Start time counter.
-
T
rip display " 1" with:
•
t
he distance travelled,
•
t
he average fuel consumption,
•
a
verage speed for the first trip.
-
T
rip display " 2" with:
•
t
he distance travelled,
•
t
he average fuel consumption,
•
a
verage speed for the second trip.
Reset trip
Tr i p s 1 and 2 are independent but their use is
identical.
For example, trip 1 can be used for daily figures
and trip 2 for monthly figures.
F
W
hen the required trip is displayed, press
the button on the end of the wiper control
stalk for more than two seconds.
With touch screen
The information is accessible in the
vehicle configuration menu.
Display of information in the touch screen
Permanent display:
F
Sel
ect the " Applications " menu then
" Vehicle Apps " then "Trip computer ".The information of the trip computer is
displayed in tabs.
F
P
ress one of the buttons to display the
desired tab.
Temporar y display in a specific window:
F
P
ress the end of the wiper control stalk for
access to the information and to display the
different tabs.
The current information tab with:
- T he range.
-
T
he current fuel consumption.
-
T
he Stop & Start time counter.
The trip " 1" tab with:
- T he average speed for the first trip.
-
T
he average fuel consumption.
-
T
he distance travelled.
The trip " 2" tab with:
-
T
he average speed for the second trip.
-
T
he average fuel consumption.
-
T
he distance travelled.
01
Instruments
Page 46 of 296

44
Tr i p r e s e t
F When the desired trip is displayed, press the reset button or the end of the wiper
control stalk.
Tr i p s 1 and 2 are independent but their use is
identical. For example, trip 1 can be used for daily figures
and trip 2 for monthly figures.
A few definitions…
Range
(miles or km)
The distance which can still be
travelled with the fuel remaining
in the tank (related to the average
fuel consumption over the last few
miles (kilometres) travelled).
This value may fluctuate if a change
of driving style or terrain results in a
significant change in the current fuel
consumption.
Dashes are displayed when the range falls
below around 20 miles (30km).
After filling with at least 5 litres of fuel, the
range is recalculated and is displayed if it
exceeds around 60 miles (100 km).
If dashes instead of figures continue to be
displayed when driving, contact the dealer
network or a qualified workshop.
Current fuel consumption
(mpg or l/100 km or km/l) Calculated over the last few
seconds.
This function is only displayed above
around 20
mph (30 km/h).
Average fuel consumption
(mpg or l/100 km or km/l)Calculated since the last trip
computer reset.
Average speed
(mph or km/h)Calculated since the last trip
computer reset.
Distance travelled
(miles or km)Calculated since the last trip
computer reset.
01
Instruments