audio CITROEN DS4 2023 Owners Manual
[x] Cancel search | Manufacturer: CITROEN, Model Year: 2023, Model line: DS4, Model: CITROEN DS4 2023Pages: 296, PDF Size: 9.91 MB
Page 5 of 296
3
07
08
0609
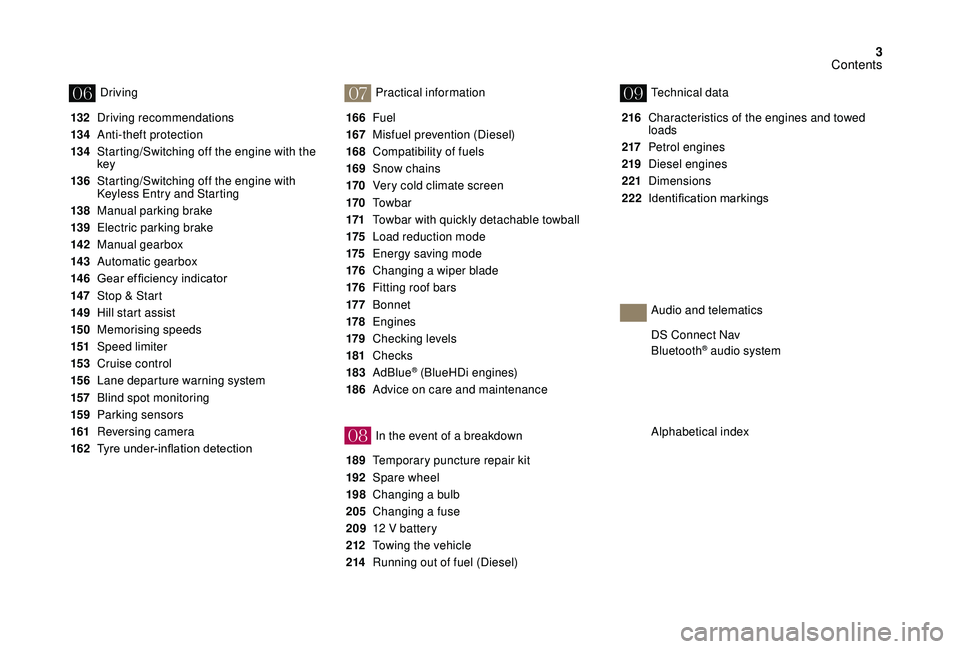
132 Driving recommendations
13 4
A
nti-theft protection
13 4
S
tarting/Switching off the engine with the
key
136
S
tarting/Switching off the engine with
Keyless Entry and Starting
138
M
anual parking brake
139
E
lectric parking brake
142
M
anual gearbox
14 3
Aut
omatic gearbox
14 6 Gear
ef ficiency indicator
14
7
St
op & Start
14 9
H
ill start assist
15 0
M
emorising speeds
151
Spe
ed limiter
15 3
C
ruise control
15 6
L
ane departure warning system
157
B
lind spot monitoring
15 9
P
arking sensors
161
R
eversing camera
162 Tyre
under-inflation detection 166
Fuel
167
M
isfuel prevention (Diesel)
168
C
ompatibility of fuels
169
S
now chains
170
V
ery cold climate screen
170
T
o w b a r
171
T
owbar with quickly detachable towball
175
L
oad reduction mode
175
E
nergy saving mode
176
C
hanging a wiper blade
176
F
itting roof bars
17 7
B
onnet
178
E
ngines
179
Ch
ecking levels
181
Checks
183
AdBlue
® (BlueHDi engines)
186
A
dvice on care and maintenance
189
T
emporary puncture repair kit
192
S
pare wheel
198
C
hanging a bulb
205
C
hanging a fuse
209
1
2 V battery
212
T
owing the vehicle
214
R
unning out of fuel (Diesel) 216
C
haracteristics of the engines and towed
loads
217
Pe
trol engines
219
D
iesel engines
221
Dimensions
222 Identification
ma
rkings
Driving
Practical information
In the event of a breakdownTechnical data
Alphabetical index DS Connect Nav
Bluetooth
® audio system
Audio and telematics
Contents
Page 13 of 296
11
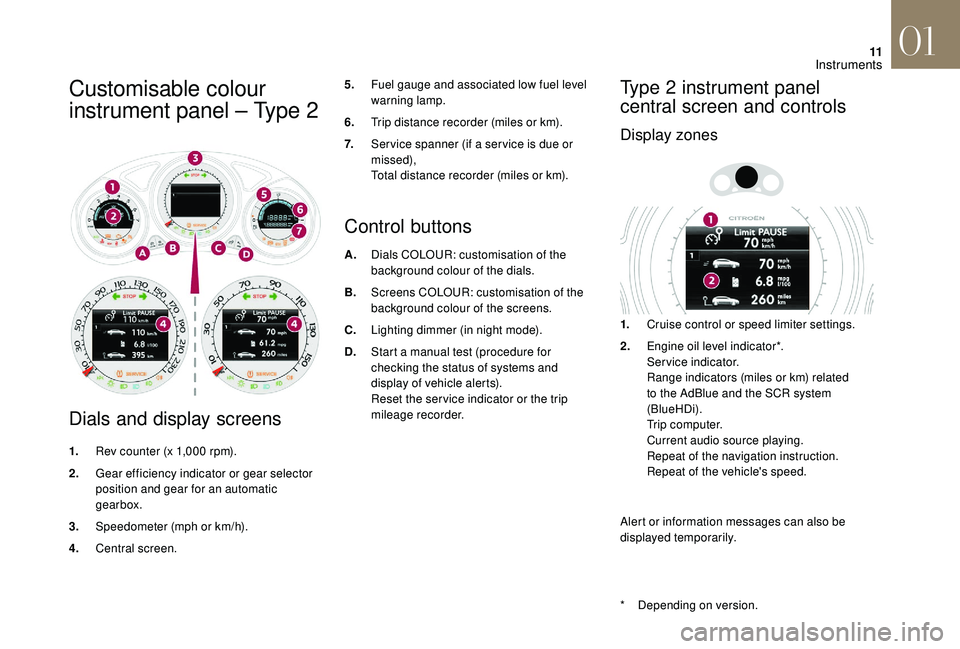
Customisable colour
instrument panel – Type 2
Dials and display screens
1.Rev counter (x 1,000 rpm).
2. Gear efficiency indicator or gear selector
position and gear for an automatic
gearbox.
3. Speedometer (mph or km/h).
4. Central screen.
Control buttons
A.Dials COLOUR: customisation of the
background colour of the dials.
B. Screens COLOUR: customisation of the
background colour of the screens.
C. Lighting dimmer (in night mode).
D. Start a manual test (procedure for
checking the status of systems and
display of vehicle alerts).
Reset the ser vice indicator or the trip
mileage recorder.
Type 2 instrument panel
central screen and controls
Display zones
5.Fuel gauge and associated low fuel level
warning lamp.
6. Trip distance recorder (miles or km).
7. Ser vice spanner (if a ser vice is due or
missed),
Total distance recorder (miles or km).
1.Cruise control or speed limiter settings.
2. Engine oil level indicator*.
Service indicator.
Range indicators (miles or km) related
to the AdBlue and the SCR system
(BlueHDi).
Trip computer.
Current audio source playing.
Repeat of the navigation instruction.
Repeat of the vehicle's speed.
Alert or information messages can also be
displayed temporarily.
*
D
epending on version.
01
Instruments
Page 14 of 296
12
Control
Press the button on the end of the wiper control
stalk to cycle through the different active
functions available (trip computer, current audio
source, navigation...).
Rev counter
When approaching the maximum engine
speed, the bars flash to indicate the need to
shift up a gear.When switching the ignition on or off, the
speedometer needle and the bars of the
rev counter and fuel gauge carry out a full
sweep and then return to 0.
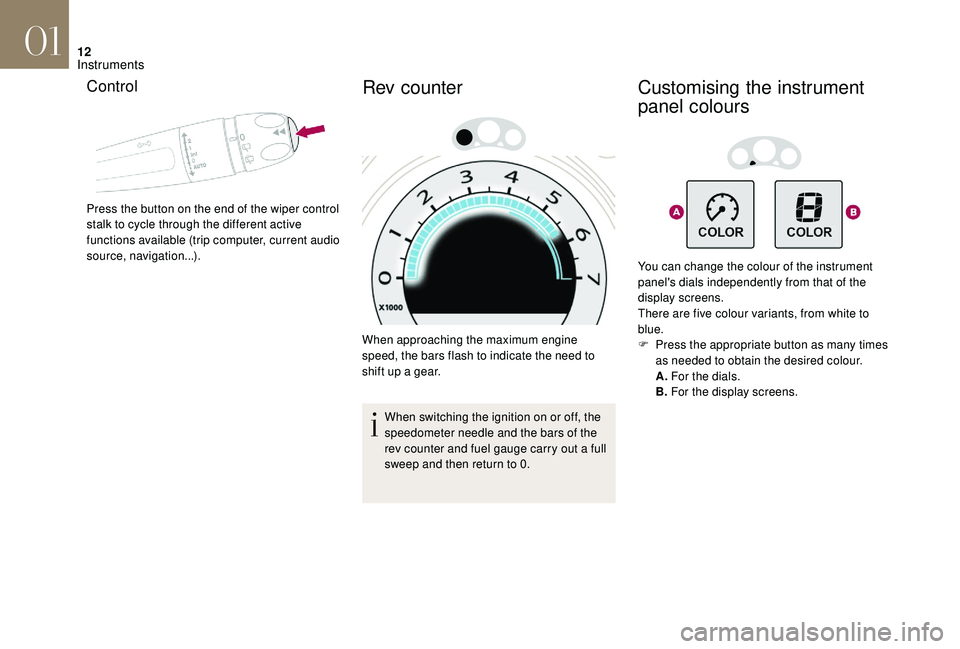
Customising the instrument
panel colours
You can change the colour of the instrument
panel's dials independently from that of the
display screens.
There are five colour variants, from white to
blue.
F
P
ress the appropriate button as many times
as needed to obtain the desired colour.
A. For the dials.
B. For the display screens.
01
Instruments
Page 39 of 296
37
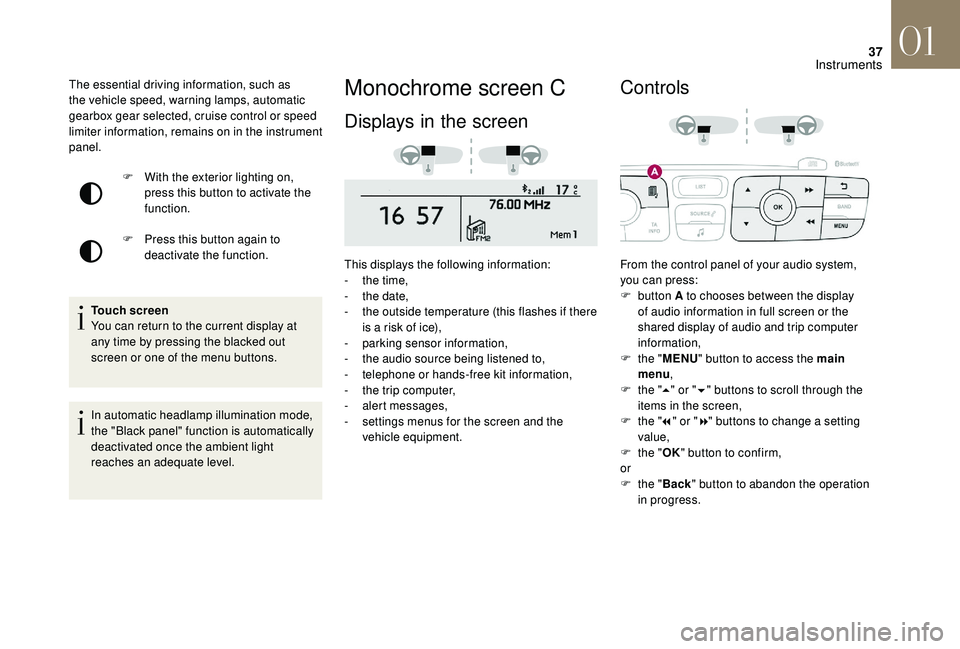
Monochrome screen C
Displays in the screen
This displays the following information:
- t he time,
-
t
he date,
-
t
he outside temperature (this flashes if there
is a risk of ice),
-
par
king sensor information,
-
t
he audio source being listened to,
-
t
elephone or hands-free kit information,
-
t
he trip computer,
-
a
lert messages,
-
s
ettings menus for the screen and the
vehicle equipment.
Controls
From the control panel of your audio system,
you can press:
F
button A to chooses between the display
of audio information in full screen or the
shared display of audio and trip computer
information,
F
t
he "MENU " button to access the main
menu ,
F
t
he "5" or " 6" buttons to scroll through the
items in the screen,
F
t
he "7" or " 8" buttons to change a setting
value,
F
t
he "OK" button to confirm,
or
F
t
he "Back " button to abandon the operation
in progress.
F
W
ith the exterior lighting on,
press this button to activate the
function.
F
P
ress this button again to
deactivate the function.
The essential driving information, such as
the vehicle speed, warning lamps, automatic
gearbox gear selected, cruise control or speed
limiter information, remains on in the instrument
panel.
Touch screen
You can return to the current display at
any time by pressing the blacked out
screen or one of the menu buttons.
In automatic headlamp illumination mode,
the "Black panel" function is automatically
deactivated once the ambient light
reaches an adequate level.
01
Instruments
Page 40 of 296
38
Main menu
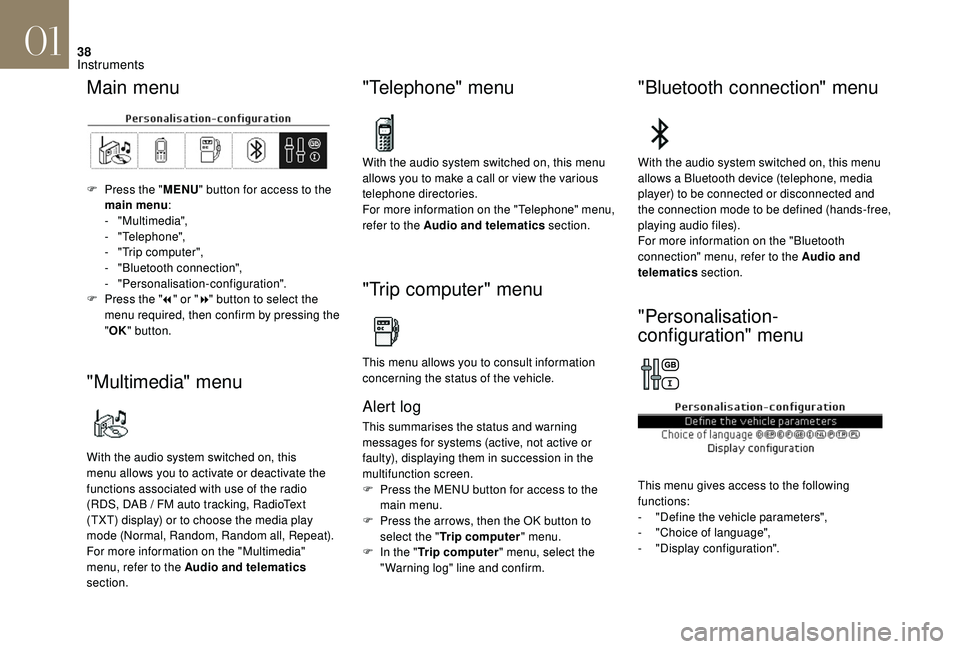
F Press the "MENU" button for access to the
main menu :
-
"Multimedia",
-
"Telephone",
-
"
Trip computer",
-
"
Bluetooth connection",
-
"Personalisation-configuration".
F
P
ress the " 7" or " 8" button to select the
menu required, then confirm by pressing the
" OK " button.
"Multimedia" menu
With the audio system switched on, this
menu allows you to activate or deactivate the
functions associated with use of the radio
(RDS, DAB
/ FM auto tracking, RadioText
(TXT) display) or to choose the media play
mode (Normal, Random, Random all, Repeat).
For more information on the "Multimedia"
menu, refer to the Audio and telematics
section.
"Telephone" menu
With the audio system switched on, this menu
allows you to make a call or view the various
telephone directories.
For more information on the "Telephone" menu,
refer to the Audio and telematics section.
"Trip computer" menu
This menu allows you to consult information
concerning the status of the vehicle.
Alert log
This summarises the status and warning
messages for systems (active, not active or
faulty), displaying them in succession in the
multifunction screen.
F
P
ress the MENU button for access to the
main menu.
F
P
ress the arrows, then the OK button to
select the " Trip computer " menu.
F
I
n the " Trip computer " menu, select the
"Warning log" line and confirm.
"Bluetooth connection" menu
With the audio system switched on, this menu
allows a Bluetooth device (telephone, media
player) to be connected or disconnected and
the connection mode to be defined (hands-free,
playing audio files).
For more information on the "Bluetooth
connection" menu, refer to the Audio and
telematics section.
"Personalisation-
configuration" menu
This menu gives access to the following
functions:
-
"
Define the vehicle parameters",
-
"
Choice of language",
-
"
Display configuration".
01
Instruments
Page 43 of 296
41
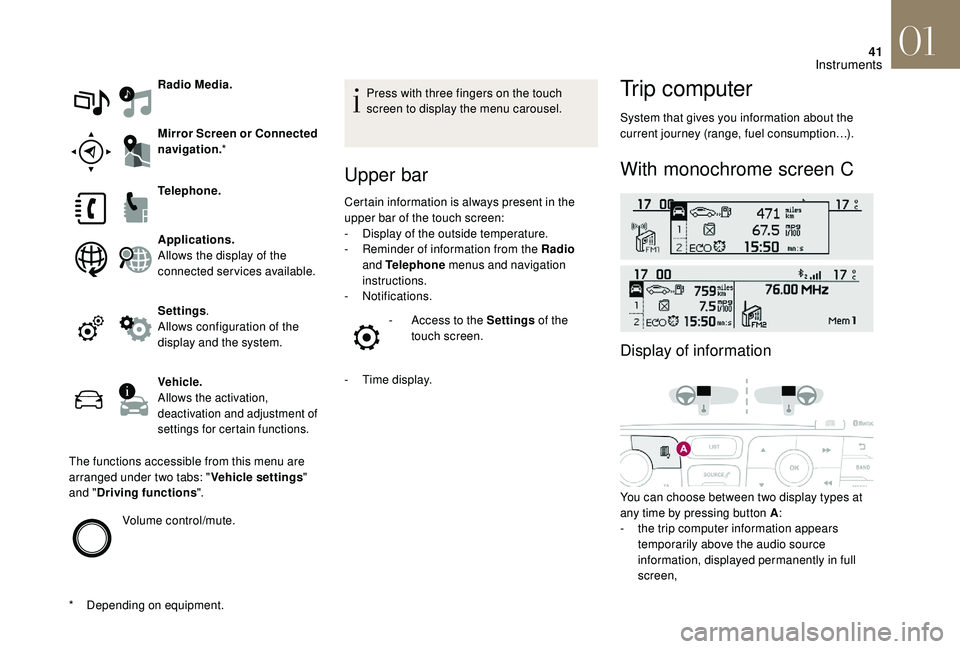
Radio Media.
Mirror Screen or Connected
navigation.*
*
D
epending on equipment. Telephone.
Applications.
Allows the display of the
connected services available.
Settings
.
Allows configuration of the
display and the system.
Vehicle.
Allows the activation,
deactivation and adjustment of
settings for certain functions.
The functions accessible from this menu are
arranged under two tabs: " Vehicle settings"
and " Driving functions ".
Volume control/mute. Press with three fingers on the touch
screen to display the menu carousel.
Upper bar
Certain information is always present in the
upper bar of the touch screen:
-
D
isplay of the outside temperature.
-
R
eminder of information from the Radio
and Telephone menus and navigation
instructions.
-
Notifications. -
A
ccess to the Settings of the
touch screen.
-
T
ime display.
Trip computer
System that gives you information about the
current journey (range, fuel consumption…).
With monochrome screen C
Display of information
You can choose between two display types at
any time by pressing button A :
-
t
he trip computer information appears
temporarily above the audio source
information, displayed permanently in full
screen,
01
Instruments
Page 44 of 296
42
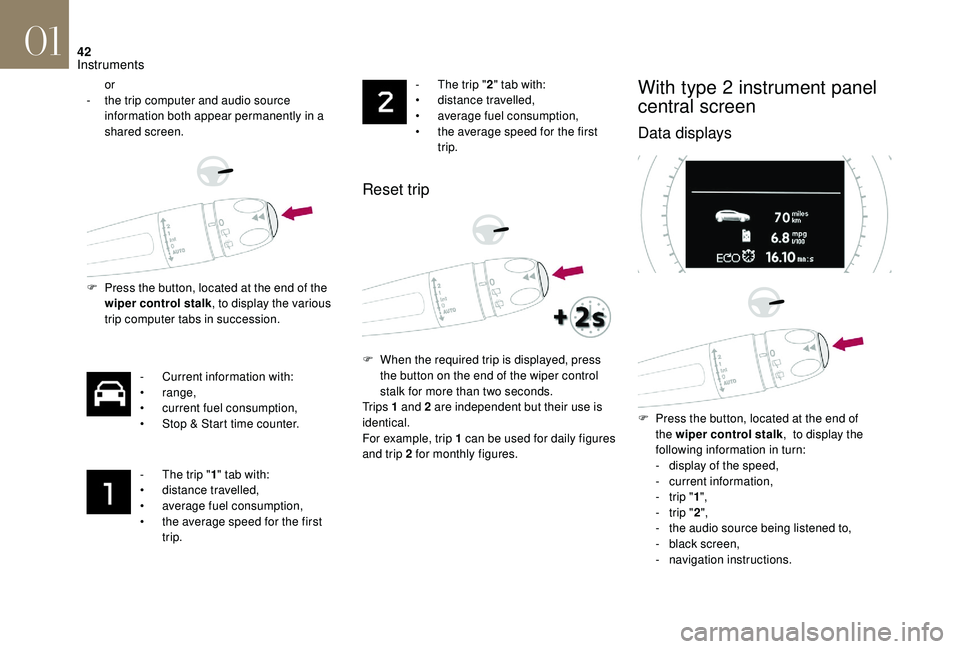
or
-
t he trip computer and audio source
information both appear permanently in a
shared screen.
F
P
ress the button, located at the end of the
wiper control stalk , to display the various
trip computer tabs in succession.
-
C
urrent information with:
•
range,
•
c
urrent fuel consumption,
•
S
top & Start time counter.
-
T
he trip "1" tab with:
•
d
istance travelled,
•
a
verage fuel consumption,
•
t
he average speed for the first
trip. -
T he trip "
2" tab with:
• d istance travelled,
•
a
verage fuel consumption,
•
t
he average speed for the first
trip.
Reset trip
F When the required trip is displayed, press the button on the end of the wiper control
stalk for more than two seconds.
Tr i p s 1 and 2 are independent but their use is
identical.
For example, trip 1 can be used for daily figures
and trip 2 for monthly figures.
With type 2 instrument panel
central screen
Data displays
F Press the button, located at the end of the wiper control stalk , to display the
following information in turn:
-
d
isplay of the speed,
-
c
urrent information,
-
t
rip "1",
-
t
rip "2",
-
t
he audio source being listened to,
-
b
lack screen,
-
n
avigation instructions.
01
Instruments
Page 84 of 296
82
To avoid any risk of jamming of the pedals:
- o nly use mats which are suited to the
fixings already present in the vehicle;
these fixings must be used,
-
n
ever place one mat on top of another.
The use of unapproved mats may inter fere
with access to the pedals and hinder the
operation of the cruise control/speed
limiter.
The approved mats have two fixings
located below the seat.
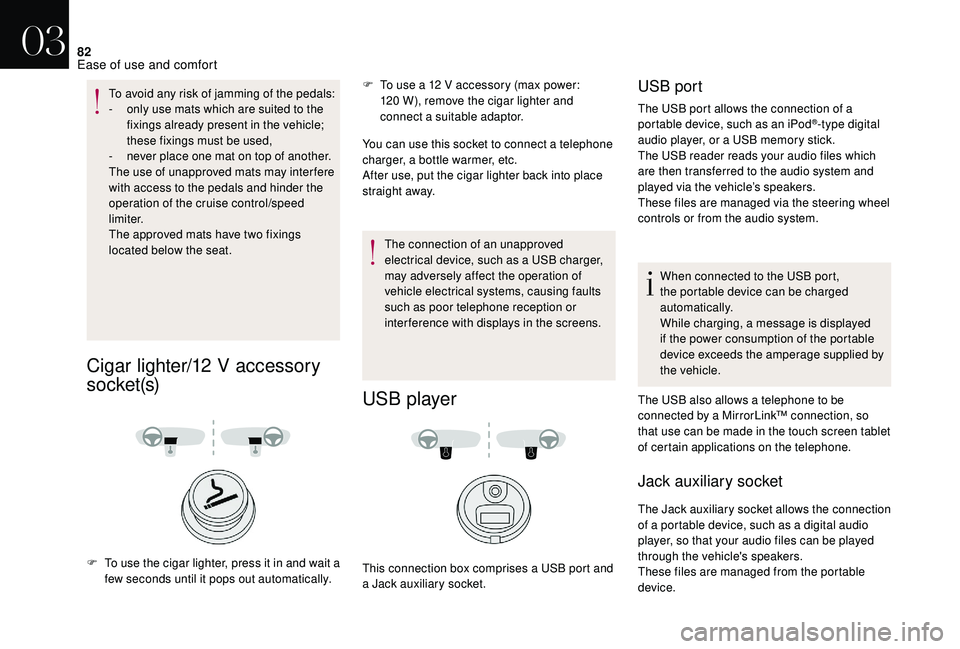
Cigar lighter/12 V accessory
s o c ket (s)
F To use a 12 V accessory (max power: 120 W), remove the cigar lighter and
connect a suitable adaptor.
You can use this socket to connect a telephone
charger, a bottle warmer, etc.
After use, put the cigar lighter
back into place
straight away.
F
T
o use the cigar lighter, press it in and wait a
few seconds until it pops out automatically. The connection of an unapproved
electrical device, such as a USB charger,
may adversely affect the operation of
vehicle electrical systems, causing faults
such as poor telephone reception or
interference with displays in the screens.
USB player
This connection box comprises a USB port and
a Jack auxiliary socket.
USB port
The USB port allows the connection of a
portable device, such as an iPod®-type digital
audio player, or a USB memory stick.
The USB reader reads your audio files which
are then transferred to the audio system and
played via the vehicle’s speakers.
These files are managed via the steering wheel
controls or from the audio system.
When connected to the USB port,
the portable device can be charged
automatically.
While charging, a message is displayed
if the power consumption of the portable
device exceeds the amperage supplied by
the vehicle.
The USB also allows a telephone to be
connected by a MirrorLink™ connection, so
that use can be made in the touch screen tablet
of certain applications on the telephone.
Jack auxiliary socket
The Jack auxiliary socket allows the connection
of a portable device, such as a digital audio
player, so that your audio files can be played
through the vehicle's speakers.
These files are managed from the portable
device.
03
Ease of use and comfort
Page 86 of 296

84
Interior mood lighting
The dimmed passenger compartment lighting
improves visibility in the vehicle when the light
i s p o o r.
Switching on
At night, the audio system and automatic
air conditioning illumination, together with
the illumination of the central dashboard
storage box, come on automatically when the
sidelamps are on.On certain versions, three LEDs, located in the
rail linking the rear view mirror to the roof come
on as well.
Switching off
The mood lighting switches off automatically
when the sidelamps are switched off.
It can be switched off manually by adjusting the
instrument panel lighting dimmer button to one
of the lowest settings.
Centre consoles
Semi-high version
1.
Front armrest
2. Open storage
3. Cup holders
4. Storage compartments
03
Ease of use and comfort
Page 138 of 296

136
For more information on Energy
economy mode, refer to the
corresponding section.
Key left in
If the key has been left in the ignition
switch at position 2 (Ignition on) , the
ignition will be switched off automatically
after one hour.
To switch the ignition back on, turn the key
to position 1 (Stop) , then back to position
2 (Ignition on) .
Starting/Switching off the
engine with Keyless Entry
and Starting
Starting the engine
It is not necessary to place the electronic key in
the reader.
F
P
lace the gear selector lever at P or N for
vehicles with an automatic gearbox, or
neutral for vehicles with a manual gearbox.
F
W
ith the electronic key inside the vehicle,
press the brake pedal for vehicles with an
automatic gearbox, or fully depress the
clutch pedal for vehicles with a manual
gearbox. F
B
riefly press the "
S TA R T/
STOP " button while maintaining
pressure on the pedal until the
engine starts.
The steering column unlocks and
the engine starts.
Diesel vehicles
Energy economy mode
After switching off the engine (position 1 -
Sto p), for a maximum of 30 minutes you
can still use functions such as the audio and
telematic system, the wipers, dipped beam
headlamps, courtesy lamps, etc.
In temperatures below zero, the
engine will not start until the pre-
heater warning lamp has gone off.
If this warning lamp comes on after pressing the " START/STOP " button, press
down on the brake or clutch pedal until the
warning lamp goes off, without pressing
the " START/STOP " button again, until the
engine starts and runs.
06
Driving