stop start CITROEN DS4 2023 Owners Manual
[x] Cancel search | Manufacturer: CITROEN, Model Year: 2023, Model line: DS4, Model: CITROEN DS4 2023Pages: 296, PDF Size: 9.91 MB
Page 6 of 296

4
Instruments and controls1
Door mirrors
Blind Spot Monitoring System
Electric windows
2
Bonnet opening
3
Dashboard fuses
4
Courtesy lamps
Rear view mirror
Mood lighting
5
Monochrome screen C
Touch screen
Adjust date and time
Reversing camera
6
Manual air conditioning
Automatic air conditioning
Front screen demisting/defrosting
Rear screen demisting/defrosting
7
Manual gearbox
Automatic gearbox
Parking brake
Hill start assist
Stop & Start
Over view
Page 8 of 296
6
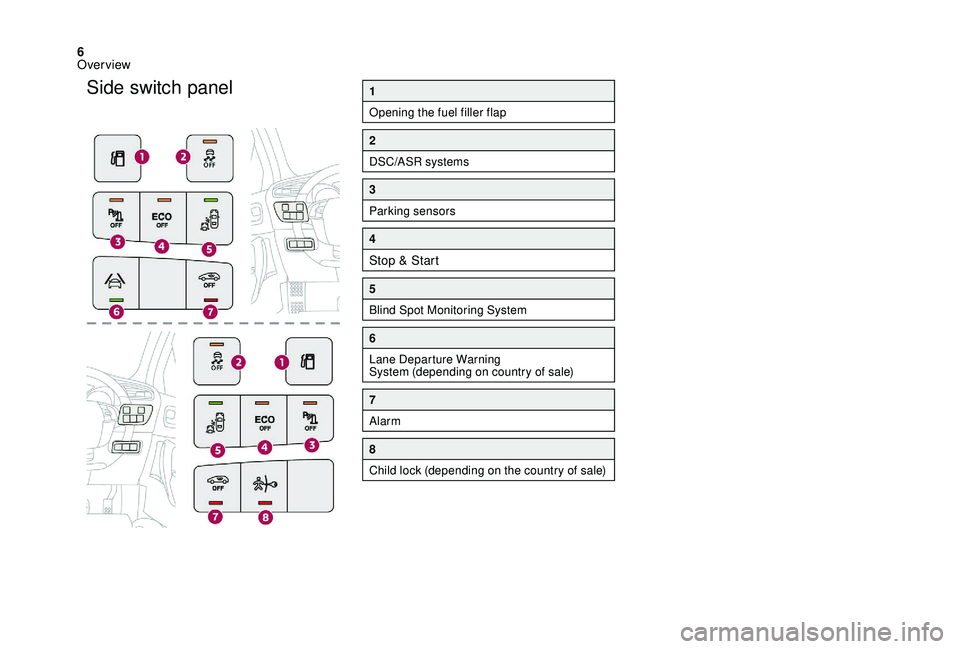
Side switch panel1
Opening the fuel filler flap
2
DSC/ASR systems
3
Parking sensors
4
Stop & Start
5
Blind Spot Monitoring System
6
Lane Departure Warning
System (depending on country of sale)
7
Alarm
8
Child lock (depending on the country of sale)
Over view
Page 17 of 296
15
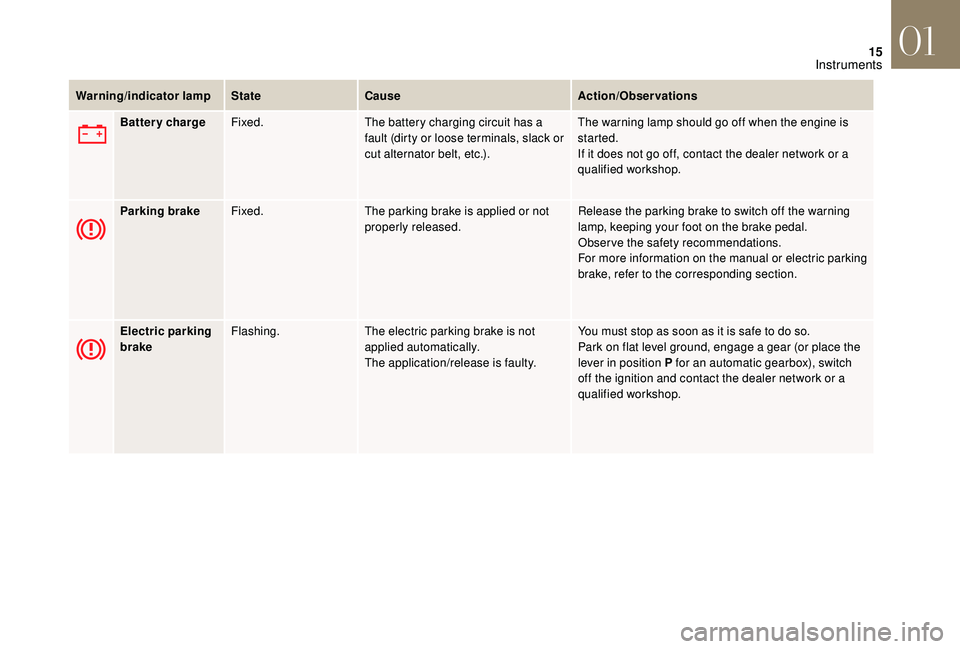
Warning/indicator lampStateCause Action/Observations
Battery charge Fixed. The battery charging circuit has a
fault (dirty or loose terminals, slack or
cut alternator belt, etc.). The warning lamp should go off when the engine is
started.
If it does not go off, contact the dealer network or a
qualified workshop.
Parking brake Fixed. The parking brake is applied or not
properly released. Release the parking brake to switch off the warning
lamp, keeping your foot on the brake pedal.
Observe the safety recommendations.
For more information on the manual or electric parking
brake, refer to the corresponding section.
Electric parking
brake Flashing.
The electric parking brake is not
applied automatically.
The application/release is faulty. You must stop as soon as it is safe to do so.
Park on flat level ground, engage a gear (or place the
lever in position P for an automatic gearbox), switch
off the ignition and contact the dealer network or a
qualified workshop.
01
Instruments
Page 25 of 296

23
Warning/indicator lampStateCause Action/Observations
Rear foglamps Fixed. The rear foglamps have been
switched on using the ring on the
lighting control stalk. Turn the ring on the lighting control stalk rear ward to
switch off the rear foglamps.
Stop & Star t Fixed.
On stopping the vehicle (red lights,
traffic jams,...) the Stop & Start system
has put the engine into STOP mode.The warning lamp goes off and the engine restarts
automatically in START mode, as soon as you want to
move off.
Flashes for a few
seconds, then goes
of f. STOP mode is temporarily
unavailable.
or
START mode is triggered
automatically. For more information on Stop & Star t
, refer to the
corresponding section.
Front foglamps Fixed. The front foglamps are switched on
using the ring on the lighting control
stalk. Turn the ring on the lighting control stalk rear ward
twice to switch off the front foglamps.
Left-hand
direction
indicator Flashing with audible
signal.
The lighting control stalk has been
moved down.
Right-hand
direction
indicator Flashing with audible
signal.
The lighting control stalk has been
moved up.
Hazard warning
lamps Flashing with buzzer. The hazard warning lamps switch,
located on the dashboard, has been
operated. The left-hand and right-hand direction indicators and
their associated warning lamps flash simultaneously.
01
Instruments
Page 28 of 296
26
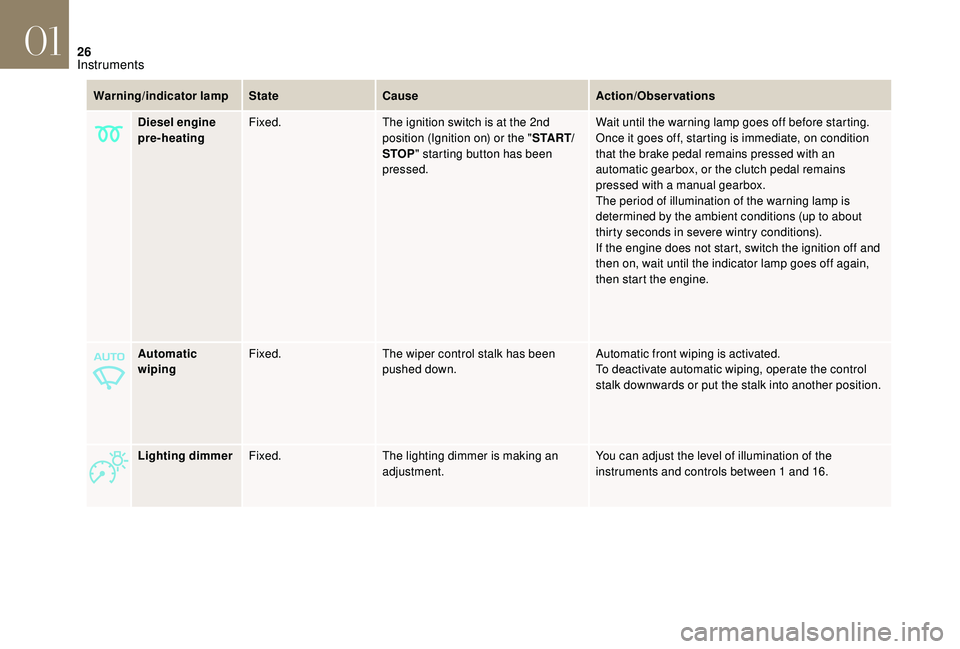
Automatic
wipingFixed.
The wiper control stalk has been
pushed down. Automatic front wiping is activated.
To deactivate automatic wiping, operate the control
stalk downwards or put the stalk into another position.
Lighting dimmer Fixed. The lighting dimmer is making an
adjustment. You can adjust the level of illumination of the
instruments and controls between 1 and 16.
Warning/indicator lamp
StateCause Action/Observations
Diesel engine
pre-heating Fixed.
The ignition switch is at the 2nd
position (Ignition on) or the " S TA R T/
STOP " starting button has been
pressed. Wait until the warning lamp goes off before starting.
Once it goes off, starting is immediate, on condition
that the brake pedal remains pressed with an
automatic gearbox, or the clutch pedal remains
pressed with a manual gearbox.
The period of illumination of the warning lamp is
determined by the ambient conditions (up to about
thirty seconds in severe wintry conditions).
If the engine does not start, switch the ignition off and
then on, wait until the indicator lamp goes off again,
then start the engine.
01
Instruments
Page 30 of 296

28
Warning/indicator lamp StateCause Action/Observations
+
+
+
+ They light up,
accompanied by the
display of the message
"Parking brake fault".
The automatic functions are
deactivated.
Hill start assist is not available.
Upon stopping, to apply the electric parking brake:
F
S
witch off the ignition.
F
P
ull the control for at least 5 seconds or until application is
complete.
F
S
witch on the ignition and check that the electric parking brake
warning lamps come on.
Application is slower than normal.
Upon stopping, to release the electric parking brake:
F
S
witch on the ignition.
F
P
ull the control lever and hold it for at least 3 seconds, then release
it.
If the braking warning lamp is flashing or if the warning lamps do not
come on with the ignition on, these procedures will not work; you must
make your vehicle safe on a level sur face:
F
W
ith a manual gearbox, engage a gear.
F
W
ith an automatic gearbox, put the gear selector in position P,
then
put a chock against one of the wheels.
Contact the dealer network or a qualified workshop.
01
Instruments
Page 45 of 296
43
- The current information display with:• t he range,
•
t
he current fuel consumption,
•
t
he Stop & Start time counter.
-
T
rip display " 1" with:
•
t
he distance travelled,
•
t
he average fuel consumption,
•
a
verage speed for the first trip.
-
T
rip display " 2" with:
•
t
he distance travelled,
•
t
he average fuel consumption,
•
a
verage speed for the second trip.
Reset trip
Tr i p s 1 and 2 are independent but their use is
identical.
For example, trip 1 can be used for daily figures
and trip 2 for monthly figures.
F
W
hen the required trip is displayed, press
the button on the end of the wiper control
stalk for more than two seconds.
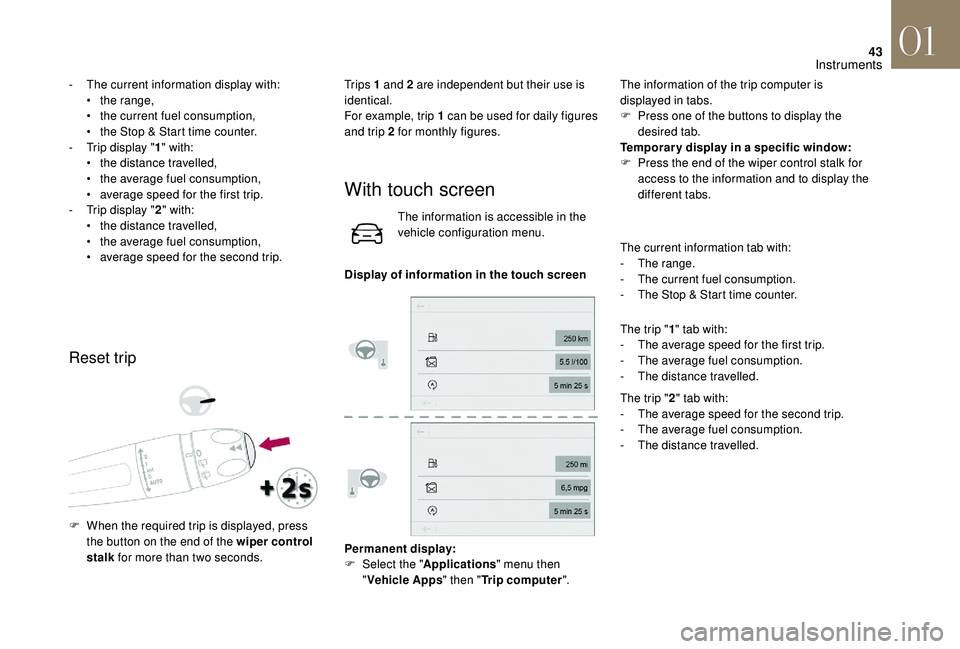
With touch screen
The information is accessible in the
vehicle configuration menu.
Display of information in the touch screen
Permanent display:
F
Sel
ect the " Applications " menu then
" Vehicle Apps " then "Trip computer ".The information of the trip computer is
displayed in tabs.
F
P
ress one of the buttons to display the
desired tab.
Temporar y display in a specific window:
F
P
ress the end of the wiper control stalk for
access to the information and to display the
different tabs.
The current information tab with:
- T he range.
-
T
he current fuel consumption.
-
T
he Stop & Start time counter.
The trip " 1" tab with:
- T he average speed for the first trip.
-
T
he average fuel consumption.
-
T
he distance travelled.
The trip " 2" tab with:
-
T
he average speed for the second trip.
-
T
he average fuel consumption.
-
T
he distance travelled.
01
Instruments
Page 47 of 296

45
Stop & Start time counter
or(minutes/seconds or hours/minutes)
Date and time adjustment
If your vehicle is fitted with Stop & Start, a time
counter adds up the time spent in STOP mode
during a journey.
It resets to zero every time the ignition is
switched on.
Monochrome screen C
F Press the MENU
button for access to the
main menu.
F
P
ress the " 7" or " 8" button to select the
"Personalisation-configuration" menu, then
press OK.
F
P
ress the " 7" or " 8" button to display the
"Display configuration" menu, then press
OK.
F
P
ress the " 5" or " 6" button to select the
"Date and time adjustment" button, then
press OK.
F
P
ress the " 7" or " 8" button to select the
setting to modify. Confirm by pressing OK ,
then modify the setting and confirm again to
save the modification.
F
A
djust the settings one by one, confirming
with the OK button.
F
P
ress the " 5" or " 6" button, then the OK
button to select the OK box and confirm or
the Back button to cancel.
With touch screen
Adjustment of the time and date is only
available if synchronisation with GPS is
deactivated. F
Sel
ect the "
Settings " menu.
F
P
ress the "
OPTIONS " button to go to the
secondary page.
F
Sel
ect "
Setting the time- date".
F
Sel
ect the "
Date" or "Time " tab.
F
A
djust the date and/or time using the
numeric keypad.
F
C
onfirm with "
OK".
Additional adjustments
You can choose:
-
T o change the display format of the date
and time (12h/24h).
-
T
o change the time zone.
-
T
o activate or deactivate synchronisation
with GPS (UTC).
The system does not automatically
manage the change between winter and
summer time (depending on country).
The change between winter and summer
time is done by changing the time zone.
01
Instruments
Page 49 of 296
47
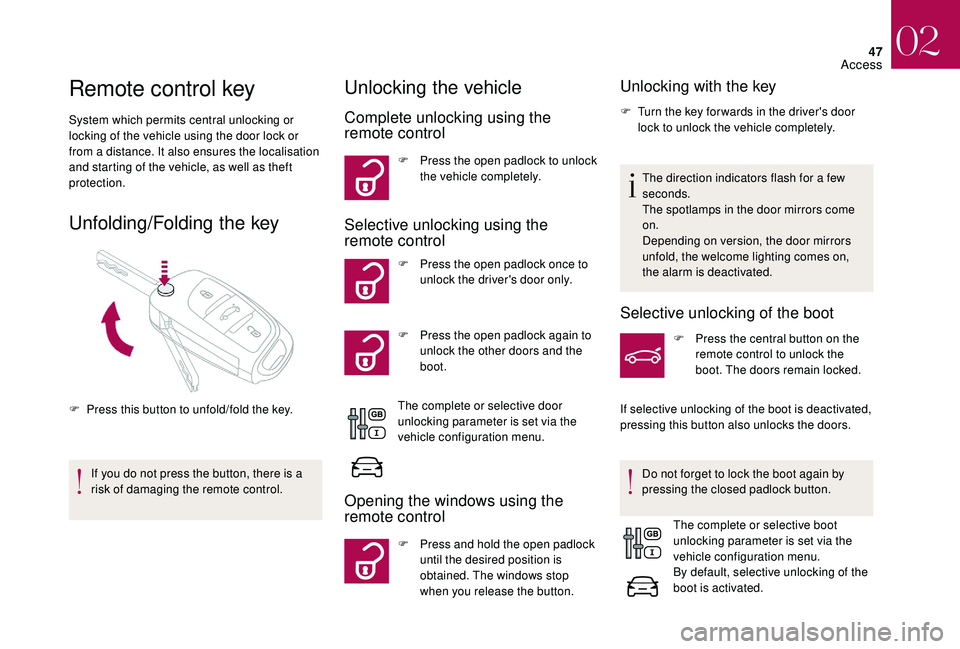
Remote control key
System which permits central unlocking or
locking of the vehicle using the door lock or
from a distance. It also ensures the localisation
and starting of the vehicle, as well as theft
protection.
Unfolding/Folding the key
F Press this button to unfold/fold the key.If you do not press the button, there is a
risk of damaging the remote control.
Unlocking the vehicle
Complete unlocking using the
remote control
F Press the open padlock to unlock the vehicle completely.
Selective unlocking using the
remote control
F Press the open padlock once to unlock the driver's door only.
F
P
ress the open padlock again to
unlock the other doors and the
boot.
The complete or selective door
unlocking parameter is set via the
vehicle configuration menu.
Opening the windows using the
remote control
F Press and hold the open padlock until the desired position is
obtained. The windows stop
when you release the button.
Unlocking with the key
F Turn the key for wards in the driver's door lock to unlock the vehicle completely.
The direction indicators flash for a few
seconds.
The spotlamps in the door mirrors come
on.
Depending on version, the door mirrors
unfold, the welcome lighting comes on,
the alarm is deactivated.
Selective unlocking of the boot
F Press the central button on the remote control to unlock the
boot. The doors remain locked.
If selective unlocking of the boot is deactivated,
pressing this button also unlocks the doors.
Do not forget to lock the boot again by
pressing the closed padlock button. The complete or selective boot
unlocking parameter is set via the
vehicle configuration menu.
By default, selective unlocking of the
boot is activated.
02
Access
Page 55 of 296

53
Accumulations (water, dust, grime, salt...)
on the inner sur face of the door handle
may affect detection.
If cleaning the inner sur face of the door
handle using a cloth does not restore
detection, contact a network dealer or a
qualified workshop.
A sudden splash of water (stream of water,
high pressure jet washer, etc.) may be
identified by the system as the desire to
open the vehicle.
Locating your vehicle
This function allows you to identify your vehicle
from a distance, particularly in poor light. Your
vehicle must be locked.F
P
ress this button.
This will switch on the courtesy lamps and the
direction indicators will flash for around ten
seconds.
Back-up key integrated in the
Keyless Entry and Starting
The integral key is used to lock and unlock the
vehicle when the electronic key cannot operate:
-
c
ell battery flat, vehicle battery discharged
or disconnected, etc.
-
v
ehicle located in an area with strong
electromagnetic signals.
F
P
ull and hold button 1 , to extract the integral
key 2 .
If the alarm is activated, the audible signal
triggered on opening a door with the key
(integral with the remote control) will stop
when the ignition is switched on.
For reasons of safety and theft protection,
do not leave your electronic key in the
vehicle, even when you are close to it.
It is recommended that you keep it on your
person.
Locking the driver's door
F Insert the integral key in the door lock, then
turn it to the rear.
Unlocking the driver's door
F Insert the integral key in the door lock, then turn it to the front.
02
Access