tow CITROEN DS4 2023 Owners Manual
[x] Cancel search | Manufacturer: CITROEN, Model Year: 2023, Model line: DS4, Model: CITROEN DS4 2023Pages: 296, PDF Size: 9.91 MB
Page 5 of 296
3
07
08
0609
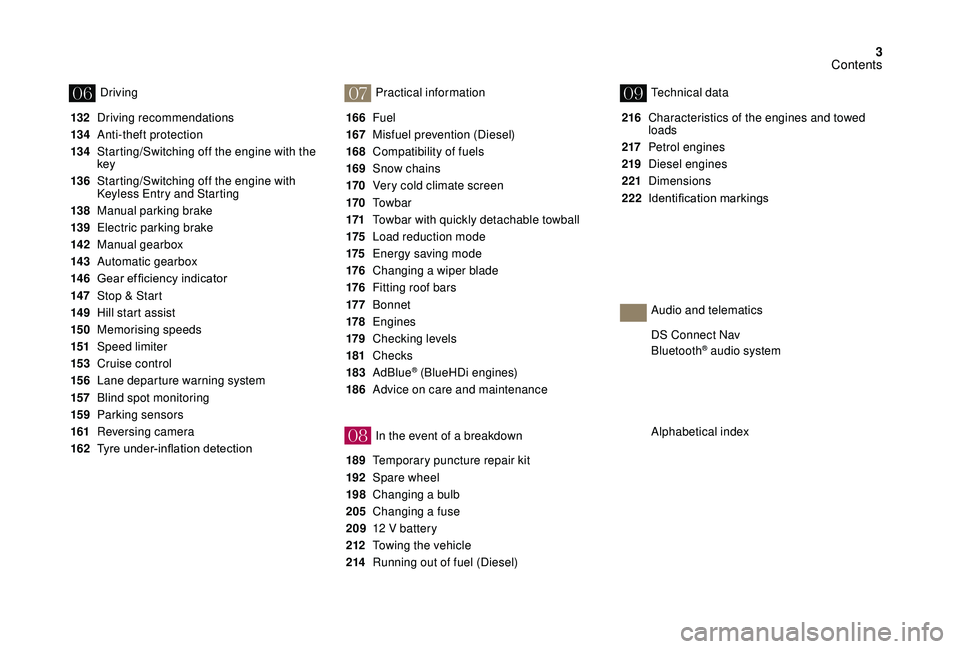
132 Driving recommendations
13 4
A
nti-theft protection
13 4
S
tarting/Switching off the engine with the
key
136
S
tarting/Switching off the engine with
Keyless Entry and Starting
138
M
anual parking brake
139
E
lectric parking brake
142
M
anual gearbox
14 3
Aut
omatic gearbox
14 6 Gear
ef ficiency indicator
14
7
St
op & Start
14 9
H
ill start assist
15 0
M
emorising speeds
151
Spe
ed limiter
15 3
C
ruise control
15 6
L
ane departure warning system
157
B
lind spot monitoring
15 9
P
arking sensors
161
R
eversing camera
162 Tyre
under-inflation detection 166
Fuel
167
M
isfuel prevention (Diesel)
168
C
ompatibility of fuels
169
S
now chains
170
V
ery cold climate screen
170
T
o w b a r
171
T
owbar with quickly detachable towball
175
L
oad reduction mode
175
E
nergy saving mode
176
C
hanging a wiper blade
176
F
itting roof bars
17 7
B
onnet
178
E
ngines
179
Ch
ecking levels
181
Checks
183
AdBlue
® (BlueHDi engines)
186
A
dvice on care and maintenance
189
T
emporary puncture repair kit
192
S
pare wheel
198
C
hanging a bulb
205
C
hanging a fuse
209
1
2 V battery
212
T
owing the vehicle
214
R
unning out of fuel (Diesel) 216
C
haracteristics of the engines and towed
loads
217
Pe
trol engines
219
D
iesel engines
221
Dimensions
222 Identification
ma
rkings
Driving
Practical information
In the event of a breakdownTechnical data
Alphabetical index DS Connect Nav
Bluetooth
® audio system
Audio and telematics
Contents
Page 9 of 296
7
Eco-driving
Eco-driving is a range of everyday practices
that allow the motorist to optimise their fuel
consumption and CO
2 emissions.
Optimise the use of your gearbox
With a manual gearbox, move off gently
and change up without waiting. During
acceleration, change up early.
With an automatic gearbox, give preference
to automatic mode and avoid pressing the
accelerator pedal heavily or suddenly.
The gear efficiency indicator invites you to
engage the most suitable gear: as soon as the
indication is displayed in the instrument panel,
follow it straight away.
For vehicles fitted with an automatic gearbox,
this indicator appears only in manual mode.
Drive smoothly
Maintain a safe distance between vehicles,
use engine braking rather than the
brake pedal, and press the accelerator
progressively. These practices contribute
towards a reduction in fuel consumption and
CO
2 emissions and also help reduce the
background traffic noise.
If your vehicle has cruise control, make use of
the system at speeds above 25 mph (40 km/h)
when the traffic is flowing well.
Control the use of your electrical
equipment
Before moving off, if the passenger
compartment is too warm, ventilate it by
opening the windows and air vents before
using the air conditioning.
Above around 30 mph (50 km/h), close the
windows and leave the air vents open.
Consider using equipment that can help
keep the temperature in the passenger
compartment down (sunroof blind and window
blinds...).
Unless it has automatic regulation, switch off
the air conditioning as soon as the desired
temperature has been reached. Switch off the headlamps and front foglamps
when the ambient light level does not require
their use.
Avoid running the engine before moving off,
particularly in winter; your vehicle will warm up
much faster while driving. Switch off the demisting and defrosting
controls, if these are not automatically
managed.
Switch off the heated seat as soon as possible.
As a passenger, if you avoid connecting your
multimedia devices (film, music, video game
etc.), you will contribute towards limiting the
consumption of electrical energy, and so of
fuel.
Disconnect your portable devices before
leaving the vehicle.
Eco-driving
Page 20 of 296
18
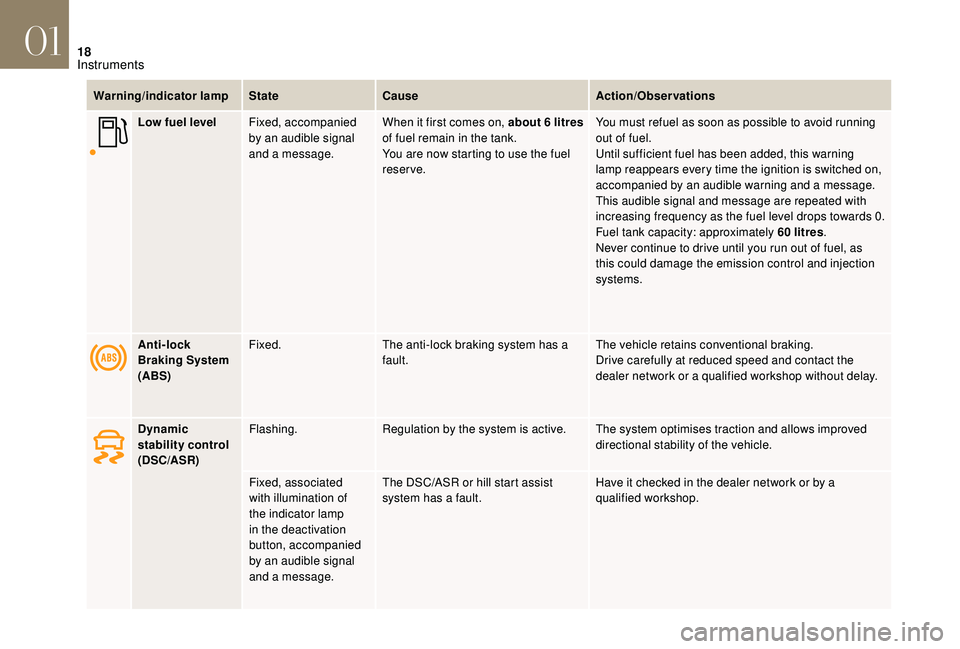
Warning/indicator lampStateCause Action/Observations
Low fuel level Fixed, accompanied
by an audible signal
and a message. When it first comes on, about 6 litres
of fuel remain in the tank.
You are now starting to use the fuel
reserve. You must refuel as soon as possible to avoid running
out of fuel.
Until sufficient fuel has been added, this warning
lamp reappears every time the ignition is switched on,
accompanied by an audible warning and a message.
This audible signal and message are repeated with
increasing frequency as the fuel level drops towards 0.
Fuel tank capacity: approximately 60 litres
.
Never continue to drive until you run out of fuel, as
this could damage the emission control and injection
systems.
Anti-lock
Braking System
(ABS) Fixed.
The anti-lock braking system has a
fault. The vehicle retains conventional braking.
Drive carefully at reduced speed and contact the
dealer network or a qualified workshop without delay.
Dynamic
stability control
(DSC/ASR) Flashing.
Regulation by the system is active. The system optimises traction and allows improved
directional stability of the vehicle.
Fixed, associated
with illumination of
the indicator lamp
in the deactivation
button, accompanied
by an audible signal
and a message. The DSC/ASR or hill start assist
system has a fault.
Have it checked in the dealer network or by a
qualified workshop.
01
Instruments
Page 26 of 296
24
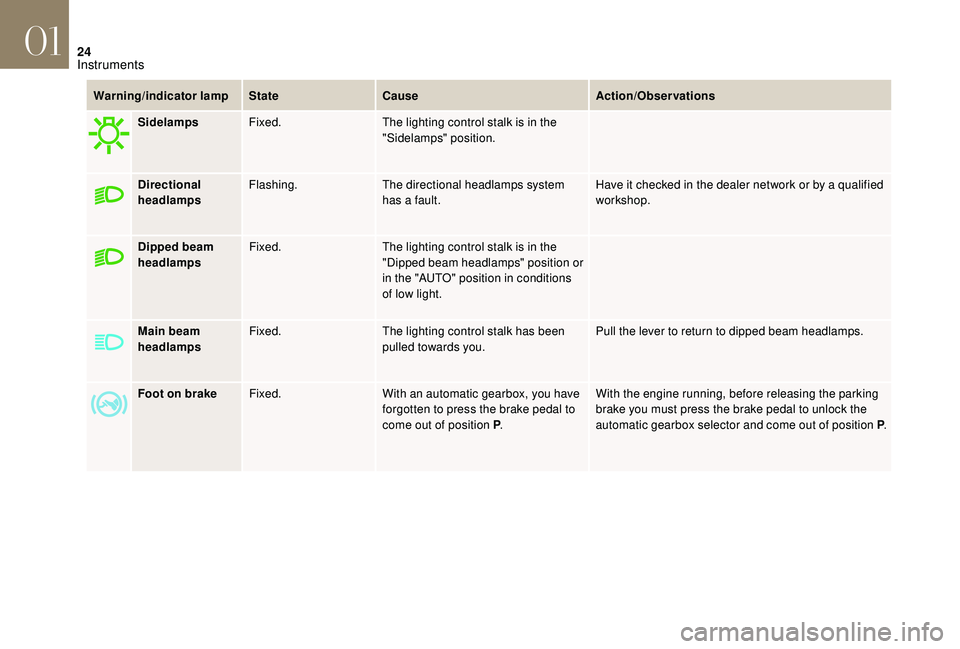
Warning/indicator lampStateCause Action/Observations
Sidelamps Fixed. The lighting control stalk is in the
"Sidelamps" position.
Directional
headlamps Flashing.
The directional headlamps system
has a fault. Have it checked in the dealer network or by a qualified
workshop.
Dipped beam
headlamps Fixed.
The lighting control stalk is in the
"Dipped beam headlamps" position or
in the "AUTO" position in conditions
of low light.
Main beam
headlamps Fixed.
The lighting control stalk has been
pulled towards you. Pull the lever to return to dipped beam headlamps.
Foot on brake Fixed. With an automatic gearbox, you have
forgotten to press the brake pedal to
come out of position P.With the engine running, before releasing the parking
brake you must press the brake pedal to unlock the
automatic gearbox selector and come out of position
P.
01
Instruments
Page 50 of 296

48
Locking the vehicle
Normal locking using the remote
control
F Press the closed padlock button to lock the vehicle.
Normal locking using the key
F Turn the key towards the rear in the driver's door lock to lock the vehicle.
The direction indicators come on for a few
seconds.
Depending on your version, the door mirrors
fold, the alarm is activated. If one of the doors or the boot is still open,
the central locking does not take place.
However, the alarm (if fitted) will be fully
activated after about 45 seconds.
If the vehicle is unlocked inadvertently and
with no action on the doors or boot, the
vehicle will lock itself again automatically
after about 30 seconds.
If the alarm had previously been activated,
it will not be reactivated automatically. The folding and unfolding of the door
mirrors using the remote control can be
deactivated in the dealer network or by
a
qualified workshop.
Deadlocking using the remote
control
Deadlocking using the key
Deadlocking is confirmed by fixed illumination
of the direction indicators for approximately two
seconds.
Depending on version, the door mirrors fold in
at the same time.
In low light, deadlocking also switches on
the guide-me-home lighting (see "Visibility"
section).
Deadlocking renders the exterior and
interior door controls inoperative.
It also deactivates the central locking
button.
Therefore, never leave anyone inside the
vehicle when it is deadlocked.
Closing the windows using the
remote control
F Press and hold the closed padlock until the desired position
is obtained. The windows stop
when you release the button.
F
T
urn the key to the rear in the driver's door
lock to lock the vehicle completely.
F
T
urn the key to the rear again within five
seconds to deadlock the vehicle. F
P
ress the closed padlock to lock
the vehicle completely.
F
P
ress the closed padlock again
within five seconds to deadlock
the vehicle.
02
Access
Page 51 of 296

49
This will switch on the courtesy lamps and the
direction indicators will flash for around ten
seconds.
Back-up control
System allowing mechanical door locking and
unlocking in the event of a malfunction of the
central locking system or battery failure.
Locking the driver's door
F Insert the key in the door lock, then turn it to the rear.
You can also apply this procedure for the
passenger doors.
Unlocking the driver's door
F Insert the key in the door lock, then turn it to the front.
Locking the passenger doors
F Open the doors.
F O n the rear doors, check that the child lock
is not on.
For more information on the Child lock , refer
to the corresponding section.
When closing the windows using the
remote control you must ensure that
nothing prevents them from closing
c o r r e c t l y.
If you want to leave the windows partly
open, you must deactivate the volumetric
alarm monitoring.
Locating your vehicle
This function allows you to identify your vehicle
from a distance, particularly in poor light. Your
vehicle must be locked.
F
P
ress this button. F
R
emove the black cap on the edge of the
door, using the key.
F
W
ithout forcing, insert the key into the
aperture; then, without turning it, move the
latch sideways towards the inside of the
d o o r.
F
R
emove the key and refit the cap.
F
C
lose the doors and check from the outside
that the vehicle is locked.
In the event of a fault with the central
locking system, it is essential to
disconnect the battery to lock the boot and
so ensure complete locking of the vehicle.
02
Access
Page 56 of 296

54
Locking the passenger doors
F Open the doors.
F O n the rear doors, check that the child lock
is not on.
For more information on the Child lock , refer
to the corresponding section.
Unlocking the passenger doors
F Pull the interior door opening handle.
Changing the battery Remote control problem/
reinitialisation
Following disconnection of the vehicle battery,
replacement of the remote control battery or
in the event of a remote control malfunction,
you can no longer unlock, lock or locate your
vehicle.
F
R
emove the black cap, located on the edge
of the door, using the integral key.
F
I
nsert the integral key in the socket without
forcing it, then without turning it, move the
latch sideways towards the inside of the
d o o r.
F
R
emove the integral key and refit the cap.
F
C
lose the doors and check from the outside
that the vehicle is locked. Battery replacement is signalled by the display
of a message.
F
U
nclip the cover using a small screwdriver
at the cut-out.
F
L
ift off the cover.
F
R
emove the discharged battery from its
housing.
F
F
it the new battery into its compartment
observing the original fitting direction.
F
C
lip the cover onto the casing.
Battery type: CR2032/3 volts.
02
Access
Page 60 of 296

58
The monitoring system is active: the indicator
lamp in the button flashes once per second
and the direction indicators come on for about
2 seconds.
Following a vehicle locking request, the
perimeter monitoring is activated after 5
seconds and the interior volumetric and anti-tilt
monitoring after 45 seconds.
If an opening (door, boot...) is not fully closed,
the vehicle will not be locked but the exterior
perimeter monitoring will be activated after
45 seconds, at the same time as the interior
volumetric and anti-tilt monitoring.
Deactivation
F Press the unlocking button on the remote control.
or
F
U
nlock the vehicle with the "Keyless Entry
and Starting" system.
The monitoring system is deactivated: the
indicator lamp in the button goes off and the
direction indicators flash for about 2 seconds. If the vehicle locks itself again
automatically (which occurs 30 seconds
after unlocking, if a door or the boot is
not opened), the monitoring system is not
reactivated automatically. To reactivate it,
the vehicle must be unlocked and locked
again, using the remote control or the
"Keyless Entry and Starting" system.
Locking the vehicle with
exterior perimeter monitoring
only
Deactivate the interior volumetric and anti-tilt
monitoring to avoid unwanted triggering of the
alarm in certain cases such as:
-
l
eaving a pet in the vehicle,
-
l
eaving a window partially open,
-
w
ashing your vehicle,
-
c
hanging a wheel,
-
h
aving your vehicle towed,
-
t
ransportation by sea.
Deactivating the interior volumetric
and anti-tilt monitoring
F Switch off the ignition and within ten seconds, press the button until the indicator
lamp is on continuously.
F
G
et out of the vehicle.
F
I
mmediately lock the vehicle using the
remote control or the Keyless Entry and
Starting system.
The exterior perimeter monitoring alone is
activated: the indicator lamp in the button
flashes once per second.
To be effective, this deactivation must
be carried out each time the ignition is
switched off.
02
Access
Page 71 of 296

69
Rear seats
Bench seat with fixed one-piece cushion and
split backrest (2/3 – 1/3) which can be folded
individually to adapt the load space in the boot.
Rear head restraints
These have one position for use (up) and a
stowed position (down).
They can also be removed.
To remove a head restraint:
F
r
elease the backrest using the control 1 ,
F
t
ilt the backrest 2 slightly forwards,
Folding the backrest
F Move the corresponding front seat for wards if necessary.
F
p
ull the head restraint upwards to the stop,
F
t
hen, press the lug A .
Never drive with the head restraints
removed; they must be fitted and correctly
adjusted. F
P
lace the head restraints in the low position.
F
P
osition the seat belt between the outer and
centre head restraints to avoid trapping the
belt when repositioning the seat backrest.
F
P
ull control 1 for wards to release the seat
backrest 2 .
Returning the backrest to the normal position
F Put the seat backrest in the upright position
and lock it in place.
F
C
heck that the red indicator, located next to
the seat control, is no longer visible.
F
P
ut the seat belt back in place on the side of
the seat backrest.
When repositioning the seat backrest,
take care not to trap the seat belts.
F
F
old the seat backrest 2 on to the cushion.
03
Ease of use and comfort
Page 78 of 296
76
Adjusting the air distribution
F Press one or more buttons to direct the air flow towards:
-
t
he windscreen and side
windows (demisting or
def r o st ing),
-
t
he outer and centre air vents,
-
t
he footwells.
You can combine the three directions to obtain
the desired air distribution.
Adjusting the air flow
F Turn this control to the left to decrease the air flow or to the
right to increase the air flow.
The air flow indicator lamps between the two
fans come on progressively according to the
value requested.
Air intake/Air recirculation
F Press this button to recirculate the interior air. The button's
indicator lamp comes on.
Air recirculation enables the passenger compartment
to be isolated from exterior odours and smoke.
F As soon as possible, press this button again to permit
the intake of outside air and
prevent the formation of
condensation. The button's
indicator lamp goes off.
Avoid prolonged operation in interior air
recirculation mode (risk of misting and
deterioration of air quality).
"REST" function: ventilation with the
engine off
Even with the engine is off, you can operate the
ventilation for a few minutes.
For example, if you leave the vehicle,
ventilation can be provided to the passengers
who stay inside without having to start the
engine.
This function is available after switching on the
ignition, as well as after stopping the engine.
The availability period of the function depends
on the state of charge of the battery.
You can activate the "REST" function as long
as the air conditioning control displays are on. When the ignition is switched on
-
T
he control displays come on: the function
is available.
-
P
ressing the REST
button
activates the ventilation for
a few minutes. Activation of
the function is confirmed by
two dashes appearing in the
control displays and four air
flow level indicator lamps.
On stopping the engine
-
W
hile the control displays are still on: the
function is available.
- P ressing the REST
button
activates the ventilation for
a few minutes. Activation of
the function is confirmed by
two dashes appearing in the
control displays and four air
flow level indicator lamps.
Locking the vehicle has no effect on this
function.
-
T
he displays go off at the end of this period.
Pressing this button again before the end of
the period stops the ventilation completely: the
control displays go off and the function is no
longer available.
03
Ease of use and comfort