ignition Citroen DS4 RHD 2015.5 1.G Repair Manual
[x] Cancel search | Manufacturer: CITROEN, Model Year: 2015.5, Model line: DS4 RHD, Model: Citroen DS4 RHD 2015.5 1.GPages: 436, PDF Size: 10.13 MB
Page 208 of 436

Stop & StartThe Stop & Start system puts the engine temporarily into standby - STOP mode - during stops in the traffic (red lights, traffic jams, or other...).
T he engine restarts automatically - START mode - as soon as you want to move off. The restart takes place instantly, quickly and silently.
Per fect for urban use, the Stop & Start system reduces fuel consumption and exhaust emissions as well as the noise level when stationary.
Operation
going into engine STOP
mode
STOP mode does not affect the
functionality of the vehicle, such as
braking, power steering, for example.
Never refuel with the engine in STOP
mode; you must switch off the ignition
with the key or the "START/STOP"
button.
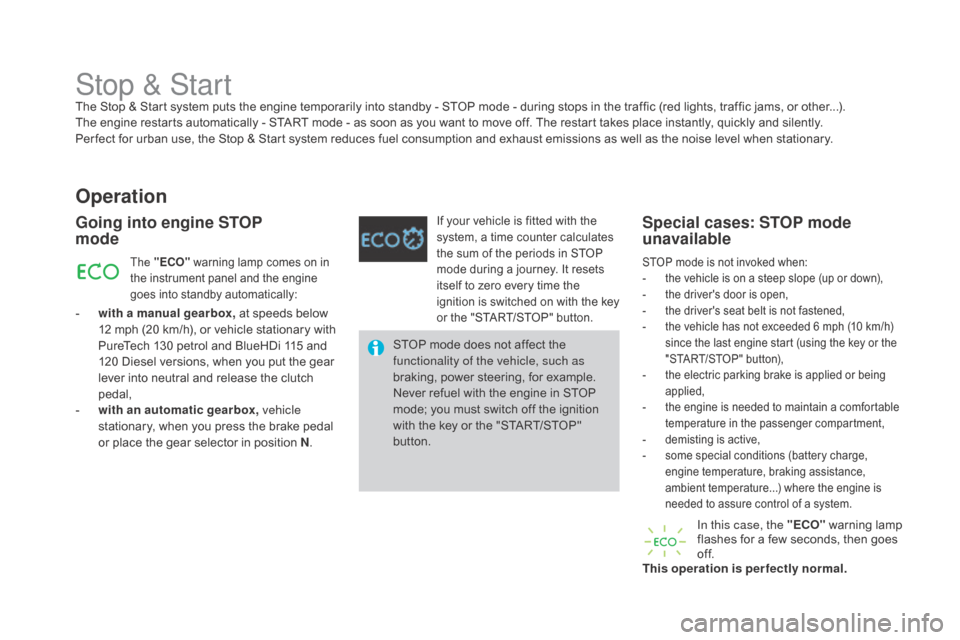
The "ECO" warning lamp comes on in
the instrument panel and the engine
goes into standby automatically:
- with a manual gearbox, at speeds below 12 mph (20 km/h), or vehicle stationary with
PureTech 130 petrol and BlueHDi 115 and
120 Diesel versions, when you put the gear
lever into neutral and release the clutch
pedal,
-
w
ith an automatic gearbox, vehicle
stationary, when you press the brake pedal
or place the gear selector in position
n
.
If your vehicle is fitted with the
system, a time counter calculates
the sum of the periods in STOP
mode during a journey. It resets
itself to zero every time the
ignition is switched on with the key
or the "START/STOP" button.
STOP mode is not invoked when:
- t he vehicle is on a steep slope (up or down),
-
t
he driver's door is open,
-
t
he driver's seat belt is not fastened,
-
t
he vehicle has not exceeded 6 mph (10 km/h)
since the last engine start (using the key or the
"START/STOP" button),
-
t
he electric parking brake is applied or being
applied,
-
t
he engine is needed to maintain a comfortable
temperature in the passenger compartment,
-
d
emisting is active,
-
s
ome special conditions (battery charge,
engine temperature, braking assistance,
ambient temperature...) where the engine is
needed to assure control of a system.
Special cases: STOP mode
unavailable
In this case, the "ECO" warning lamp
flashes for a few seconds, then goes
of f.
This operation is perfectly normal.
Page 211 of 436

209
In the event of a malfunction with the system,
the "ECO OFF" switch warning lamp flashes,
then comes on continuously.
have it checked by a CITROËN dealer or a
qualified workshop.
Operating fault
In the event of a fault in STOP
mode, the vehicle may stall. All of
the instrument panel warning lamps
come on.
Depending on version, an alert
message may also be displayed asking
you to put the gear lever into position
n
and put your foot on the brake pedal.
It is then necessary to switch off the
ignition, then restart the engine using
the key or the "START/STOP" button. Before doing any work under the
bonnet, deactivate the Stop & Start
system to avoid the risk of injury
related to an automatic change to
START
mode.
The Stop & Start system makes use of
an advanced technology. All work on
this type of battery must only be carried
out by a CITROËN dealer or a qualified
workshop.
Maintenance
This system requires the use of a 12 V battery
of specific technology and characteristics
(reference numbers available from a CITROËN
dealer or a qualified workshop).
Fitting a battery not listed by CITROËN would
introduces the risk of faults with the system.
driving
Page 212 of 436

Blind spot sensors
This driving assistance system warns the driver
of the presence of another vehicle in the blind
spot angle of their vehicle (areas masked from
the driver's field of vision), as soon as this
presents a potential danger.
Operation
This system is designed to improve safety when driving and is in no circumstances a
substitute for the use of the interior rear view mirror and door mirrors. It is the driver's
responsibility to constantly check the traffic, to assess the distances and relative speeds of
other vehicles and to predict their movements before deciding whether to change lane.
The blind spot sensor system can never replace the need for vigilance on the part of
the
d
river. F
O
n switching on the ignition, or engine
running, press this button to activate the
function; the warning lamp comes on.
Sensors fitted in the front and rear bumpers
monitor the blind spots.
A warning lamp appears in the door mirror on
the side in question:
-
i
mmediately, when being overtaken,
-
a
fter a delay of about one second, when
overtaking a vehicle slowly.
Page 214 of 436

Operating fault
In the event of a fault, the warning lamp in the
button flashes then goes off.
Have it checked by a CITROËN dealer or a
qualified workshop.The system may suffer temporary
interference in certain weather
conditions (rain, hail...).
In particular, driving on a wet sur face
or moving from a dry area to a wet area
can cause false alerts (for example, the
presence of a fog of water droplets in
the blind spot angle is interpreted as a
vehicle).
In bad or wintry weather, ensure that
the sensors are not covered by mud,
ice or snow.
Take care not to cover the warning
zone in the door mirrors or the
detection zones on the front and rear
bumpers with adhesive labels or other
objects; they may hamper the correct
operation of the system.
F
T
o deactivate the system, press this button
again; the warning lamp goes off.
The state of the system remains in memory on
switching off the ignition.
The system is automatically
deactivated when towing with a towbar
approved by CITROËN.
Page 217 of 436

215
System which prevents the vehicle from exceeding the speed programmed by the driver.
Speed limiter
The speed limiter is a driving aid that
cannot, in any circumstances, replace the
need to observe speed limits or the need
for vigilance on the part of the driver.1.
S
peed limiter mode selection wheel.
2.
P
rogrammed value decrease button.
3.
P
rogrammed value increase button.
4.
S
peed limiter on / pause button.
5.
D
isplay memorised speed settings button.
Steering mounted controls
6. Speed limiter on / pause indication.
7. S
peed limiter mode selection indication.
8.
P
rogrammed speed value.
9.
S
election of a memorised speed setting.
displays in the instrument panel
The speed limiter is switched on manually.
The minimum programmed speed is
20
mph (30 km/h).
The programmed speed remains in the
system memory when the ignition is
switched off.
driving
Page 220 of 436

Cruise control
1. Cruise control mode selection wheel.
2. Button for setting the current speed of the
vehicle as the cruise setting or lowering the
cruise setting.
3.
B
utton for setting the current speed of the
vehicle as the cruise setting or raising the
cruise setting.
4.
C
ruise control pause / resume button.
5.
D
isplay memorised speed settings button.
Steering mounted controls
6. Cruise control pause / resume indication.
7. Cruise control mode selected indication.
8.
C
ruise speed setting.
9.
S
electing a memorised cruise speed.
displays in the instrument panel
System which automatically maintains the cruising speed of the vehicle at a setting programmed by the driver, without any action on the accelerator
pedal.
The cruise control is switched on
manually.
It requires a minimum vehicle speed of
25 mph (40 km/h) as well as:
-
w
ith a manual gearbox, the
engagement of fourth gear or
higher,
-
w
ith an automatic gearbox, the
gear selector at position
d or
second gear or higher in manual
mode.
As a safety measure, you are advised
to keep your feet near the pedals at all
times.
Switching off the ignition cancels any
programmed speed setting.
The cruise control system is a driving aid
that cannot, in any circumstances, replace
the need to observe speed limits, nor the
need for vigilance on the part of the driver.
The operation of the cruise control can be
interrupted (pause):
-
b
y pressing control 4 or by pressing the
brake or clutch pedal,
-
a
utomatically, if operation of the dynamic
stability control system is triggered.
Page 229 of 436

227
1. Sealing
F Uncoil the white pipe g fully.
F U nscrew the cap from the white pipe.
F
C
onnect the white pipe to the valve of the
tyre to be repaired.
Repair procedure
Avoid removing any foreign bodies
which have penetrated into the tyre. F
C
onnect the compressor's electric plug to
the vehicle's 12 V socket.
F
S
tart the vehicle and leave the engine
running.
F
S
witch off the ignition.
Take care, this product is harmful (e.g.
ethylene-glycol, colophony...) if swallowed
and causes irritation to the eyes.
Keep this product out of the reach of
children.
F
T
urn the selector A to the
"sealant" position.
F
C
heck that the switch B is in
position "O" .
The vehicle's electric system allows the
connection of a compressor for long
enough to inflate a tyre after a puncture
repair or for inflating a small inflatable
accessory.
Practical information
Page 237 of 436

235
Removing a wheel
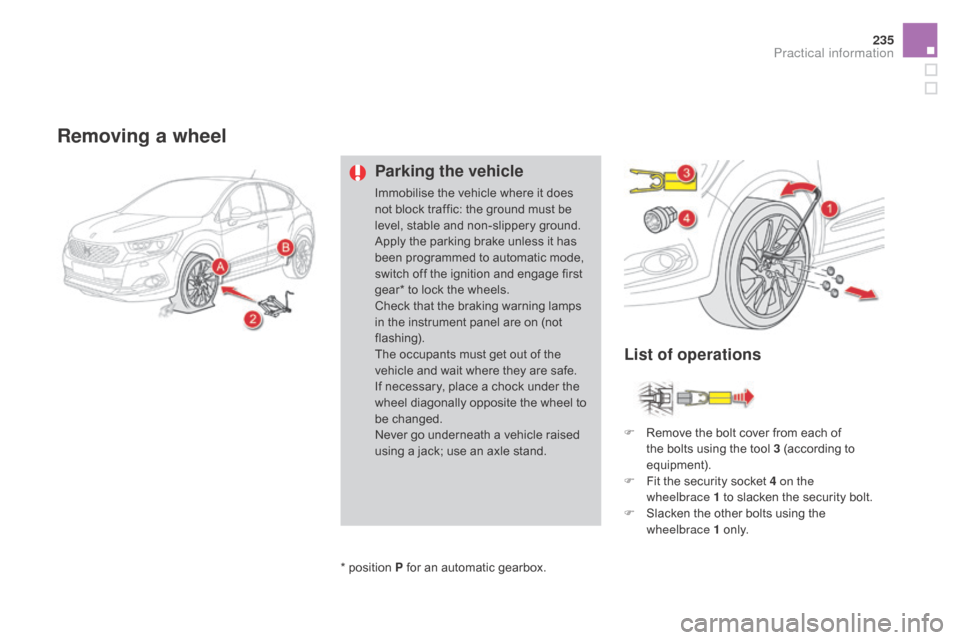
Parking the vehicle
Immobilise the vehicle where it does
not block traffic: the ground must be
level, stable and non-slippery ground.
Apply the parking brake unless it has
been programmed to automatic mode,
switch off the ignition and engage first
gear* to lock the wheels.
Check that the braking warning lamps
in the instrument panel are on (not
flashing).
The occupants must get out of the
vehicle and wait where they are safe.
If necessary, place a chock under the
wheel diagonally opposite the wheel to
be changed.
Never go underneath a vehicle raised
using a jack; use an axle stand.F
R
emove the bolt cover from each of
the bolts using the tool 3 (according to
equipment).
F
F
it the security socket 4 on the
wheelbrace
1 to slacken the security bolt.
F
S
lacken the other bolts using the
wheelbrace 1 o n l y.
*
position P for an automatic gearbox.
List of operations
Practical information
Page 250 of 436

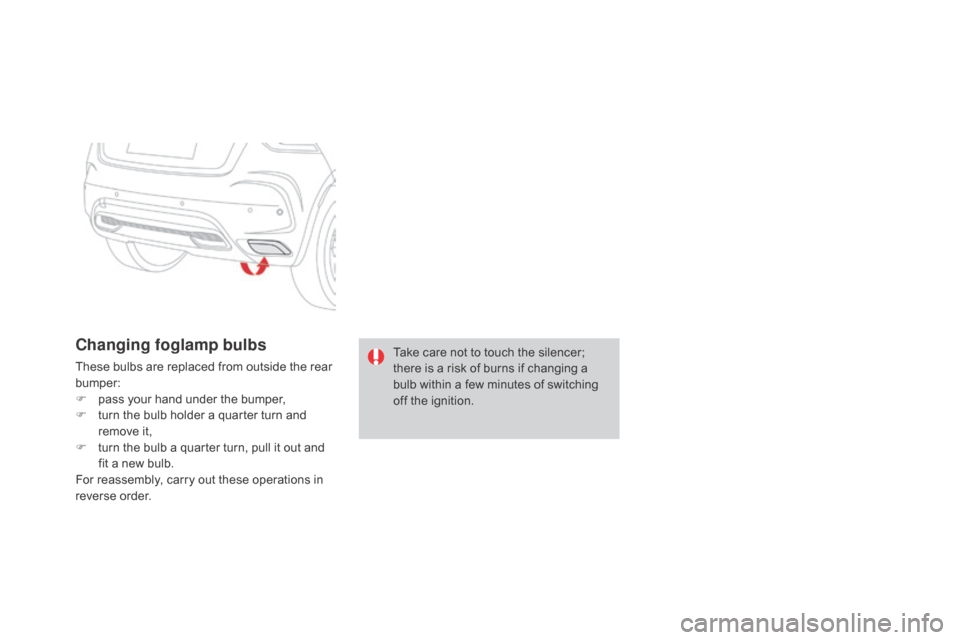
Changing foglamp bulbs
These bulbs are replaced from outside the rear
bumper:
F
p
ass your hand under the bumper,
F
t
urn the bulb holder a quarter turn and
remove it,
F
t
urn the bulb a quarter turn, pull it out and
fit a new bulb.
For reassembly, carry out these operations in
reverse order. Take care not to touch the silencer;
there is a risk of burns if changing a
bulb within a few minutes of switching
off the ignition.
Page 252 of 436

Installing electrical
accessories
Your vehicle's electrical system is
designed to operate with standard or
optional equipment.
Before installing other electrical
equipment or accessories on your
vehicle, contact a CITROËN dealer or a
qualified workshop.
CITROËN will not accept responsibility
for the cost incurred in repairing your
vehicle or for rectifying malfunctions
resulting from the installation of
accessories not supplied and not
recommended by CITROËN and
not installed in accordance with its
instructions, in particular when the
combined consumption of all of the
additional equipment connected
exceeds 10 milliamperes.
Before changing a fuse:
F
t
he cause of the failure must be identified
and rectified,
F
a
ll electrical consumers must be switched
of f,
F
t
he vehicle must be immobilised with the
ignition off,
F
i
dentify the failed fuse using the tables and
layout drawings in the following pages.
Changing a fuse
good Failed
The replacement of a fuse not shown in
the tables below may cause a serious
malfunction of your vehicle. Contact
a CITROËN dealer or a qualified
workshop. Tw e e z e r
To replace a fuse, you must:
F
u
se the special tweezer to extract the fuse
from its housing and check the condition of
its filament
F
a
lways replace the failed fuse with a fuse
of the same rating (same colour); using a
different rating could cause faults (risk of
f i r e).
If the fuse fails again soon after replacement,
have the vehicle's electrical system checked by
a CITROËN dealer or a qualified workshop.