fog light Citroen DS4 RHD 2015.5 1.G Owner's Manual
[x] Cancel search | Manufacturer: CITROEN, Model Year: 2015.5, Model line: DS4 RHD, Model: Citroen DS4 RHD 2015.5 1.GPages: 436, PDF Size: 10.13 MB
Page 10 of 436

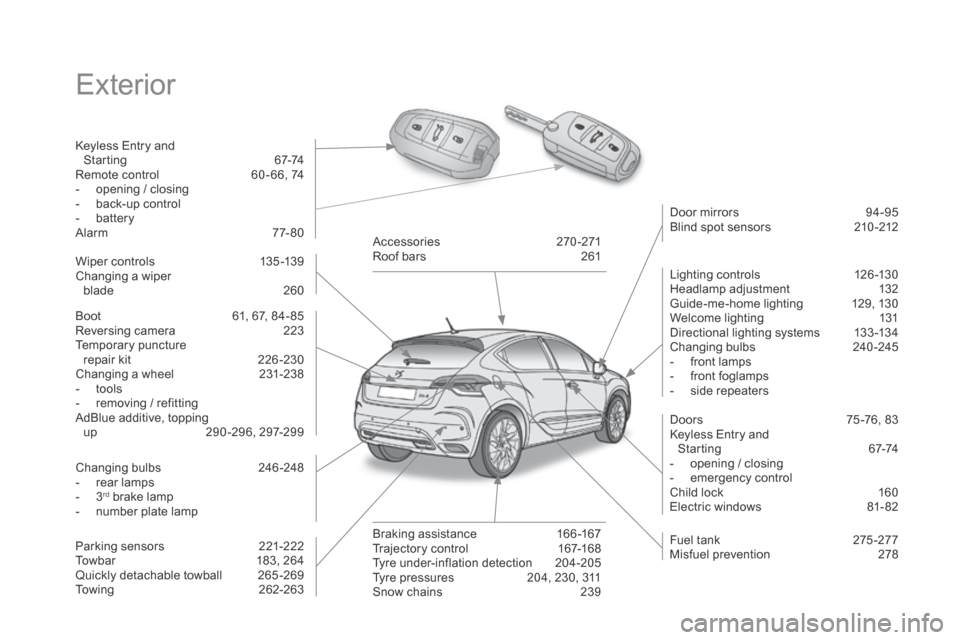
Exterior
Keyless Entry and Starting 6 7-74
Remote control
6
0 - 66, 74
-
o
pening / closing
-
b
ack-up control
-
b
attery
Alarm
7
7-80
Boot
6
1, 67, 84- 85
Reversing camera
2
23
Temporary puncture
repair kit
2
26 -230
Changing a wheel
2
31-238
-
t
ools
-
r
emoving / refitting
AdBlue additive, topping up
29
0-296, 297-299 Door mirrors
9
4-95
Blind spot sensors
2
10 -212
Wiper controls
1
35 -139
Changing a wiper blade
2
60
Changing bulbs
2
46-248
-
r
ear lamps
-
3rd brake lamp
-
n
umber plate lamp
Parking sensors
2
21-222
Towbar
1
83, 264
Quickly detachable towball
2
65 -269
Towing
2
62-263Accessories
2
70-271
Roof bars
2
61
Braking assistance
1
66 -167
Trajectory control
1
67-168
Tyre under-inflation detection
2
04-205
Tyre pressures
2
04, 230, 311
Snow chains
2
39Lighting controls
1
26 -130
Headlamp adjustment
1
32
Guide-me-home lighting
1
29, 130
Welcome lighting
1
31
Directional lighting systems
1
33 -134
Changing bulbs
2
40-245
-
f
ront lamps
-
f
ront foglamps
-
s
ide repeaters
Doors
7
5 -76, 83
Keyless Entry and Starting
6
7-74
-
o
pening / closing
-
em
ergency control
Child lock 1 60
Electric windows 8 1- 82
Fuel tank
2
75 -277
Misfuel prevention
2
78
Page 16 of 436

As a passenger, if you avoid connecting your multimedia devices
(film, music, video game...), you will contribute towards limiting the
consumption of electrical energy, and so of fuel.
Disconnect your portable devices before leaving the vehicle.
Eco-driving
Eco-driving is a range of everyday practices that allow the motorist to optimise their fuel consumption and CO2 emissions.
Optimise the use of your gearbox
With a manual gearbox, move off gently and change up without waiting.
During acceleration change up early.
With an automatic gearbox, give preference to automatic mode and
avoid pressing the accelerator pedal heavily or suddenly.
The gear efficiency indicator invites you engage the most suitable gear:
as soon as the indication is displayed in the instrument panel, follow it
straight away.
For vehicles fitted with an automatic gearbox, this indicator appears
only in manual mode.
drive smoothly
Maintain a safe distance between vehicles, use engine braking rather
than the brake pedal, and press the accelerator progressively. These
practices contribute towards a reduction in fuel consumption and CO
2
emissions and also helps reduce the background traffic noise.
If your vehicle has cruise control, make use of the system at speeds
above 25 mph (40 km/h) when the traffic is flowing well.
Control the use of your electrical
equipment
Before moving off, if the passenger compartment is too warm, ventilate it
by opening the windows and air vents before using the air conditioning.
Above 30 mph (50 km/h), close the windows and leave the air vents
open.
Remember to make use of equipment that can help keep the
temperature in the passenger compartment down (sunroof and window
blinds...).
Switch off the air conditioning, unless it has automatic regulation, as
soon as the desired temperature is attained.
Switch off the demisting and defrosting controls, if not automatic.
Switch off the heated seat as soon as possible.
Switch off the headlamps and front foglamps when the level of light
does not require their use.
Avoid running the engine before moving off, particularly in winter; your
vehicle will warm up much faster while driving.
Page 32 of 436

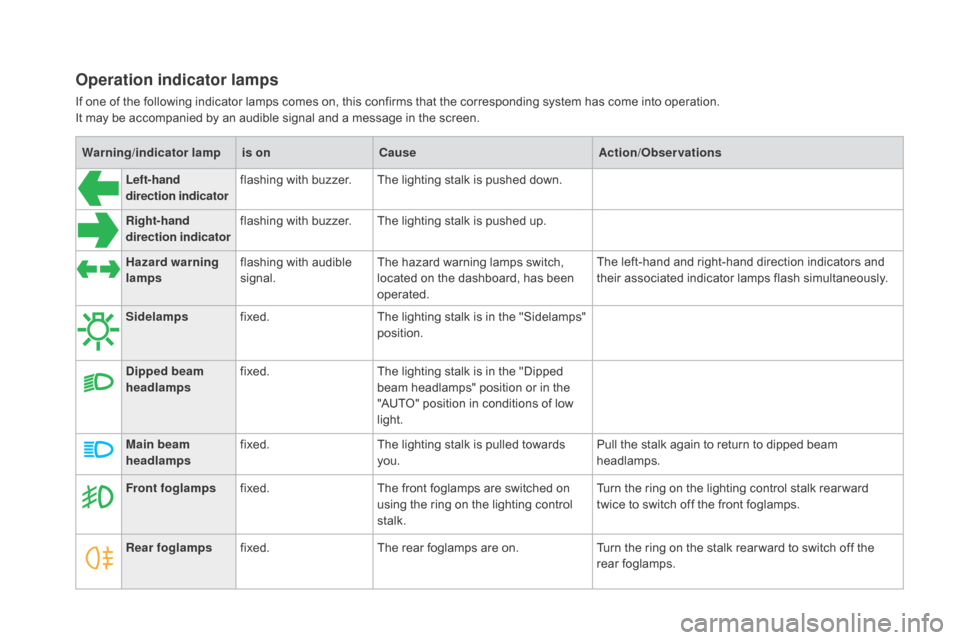
Warning/indicator lampis on Cause Action/Observations
Left-hand
direction indicator flashing with buzzer.
The lighting stalk is pushed down.
Right-hand
direction indicator flashing with buzzer.
The lighting stalk is pushed up.
Sidelamps fixed. The lighting stalk is in the "Sidelamps"
position.
di
pped beam
headlamps fixed.
The lighting stalk is in the "Dipped
beam headlamps" position or in the
"AUTO" position in conditions of low
light.
Main beam
headlamps fixed.
The lighting stalk is pulled towards
you. Pull the stalk again to return to dipped beam
headlamps.
Front foglamps fixed. The front foglamps are switched on
using the ring on the lighting control
stalk. Turn the ring on the lighting control stalk rear ward
twice to switch off the front foglamps.
Rear foglamps fixed. The rear foglamps are on. Turn the ring on the stalk rear ward to switch off the
rear foglamps.
Hazard warning
lamps
flashing with audible
signal. The hazard warning lamps switch,
located on the dashboard, has been
operated. The left-hand and right-hand direction indicators and
their associated indicator lamps flash simultaneously.
Operation indicator lamps
If one of the following indicator lamps comes on, this confirms that the corresponding system has come into operation.
It may be accompanied by an audible signal and a message in the screen.
Page 128 of 436

Lighting controlsSystem for selection and control of the various front and rear lamps providing the vehicle's lighting.
The various front and rear lamps of the vehicle
are designed to adapt the driver's visibility
progressively according to the climatic
conditions:
-
s
idelamps, to be seen,
-
d
ipped beam headlamps to see without
dazzling other drivers,
-
m
ain beam headlamps to see clearly when
the road is clear.
Main lighting
Other lamps are provided to meet the
requirements of particular driving conditions:
-
r
ear foglamps,
-
f
ront foglamps with cornering lighting,
-
d
irectional headlamps for improved
visibility when cornering,
-
d
aytime running lamps to be more visible
during the day,
-
g
uide-me-home and welcome lighting to
facilitate access to the vehicle,
-
p
arking lamps as vehicle position markers.
Additional lighting
The setting of some functions can be adjusted:
- a utomatic illumination of headlamps,
-
g
uide-me-home lighting,
-
w
elcome lighting,
-
d
irectional lighting.
Programming
In some weather conditions (e.g. low
temperature or humidity), the presence
of misting on the internal sur face of the
glass of the headlamps and rear lamps
is normal; it disappears after the lamps
have been on for a few minutes.
Travelling abroad
Halogen and xenon headlamps
If planning to use your vehicle in a
country that drives on the other side of
the road, the headlamp dipped beams
must be adjusted to avoid dazzling on-
coming drivers.
Contact a CITROËN dealer or a
qualified workshop.
Page 130 of 436

C. Foglamp selection ring.
The foglamps operate with the dipped and main
beam headlamps.
Rotate and release the ring C:
F
f
or wards a first time to switch on the front
foglamps,
F
f
or wards a second time to switch on the
rear foglamps,
F
r
ear wards a first time to switch off the rear
foglamps,
F
r
ear wards a second time to switch off the
front foglamps.
Model with front and rear
foglamps
In good or rainy weather, by both day
and night, the front foglamps and the
rear foglamps are prohibited. In these
situations, the power of their beams
may dazzle other drivers. They should
only be used in fog or falling snow.
In these weather conditions, you should
switch on the foglamps and dipped
beam headlamps manually, as the
sunshine sensor may detect sufficient
light.
Do not forget to switch off the front and
rear foglamps when they are no longer
necessary.
front and rear foglamps
When the headlamps switch off with automatic
illumination of headlamps (AUTO model)
or when the dipped beam headlamps are
switched off manually, the foglamps and
sidelamps remain on.
F
T
urn the ring rear wards to switch off the
foglamps, the sidelamps will then switch off.
Page 132 of 436

When a low level of ambient light is detected
by a sunshine sensor, the number plate
lamps,
s
idelamps and dipped beam headlamps
are switched on automatically, without any
action on the part of the driver. They can also
come on if rain is detected, at the same time as
automatic operation of the windscreen wipers.
As soon as the ambient light returns to a
sufficient level or after the windscreen wipers
are switched off, the lamps are switched off
automatically.
Activation
F Turn the ring to the "AUTO" position. The
activation of the function is accompanied
by the display of a message in the screen.
deactivation
F Turn the ring to another position. Deactivation of the function is accompanied
by the display of a message in the screen.
Automatic guide-me-home
lighting
Operating fault
In the event of a malfunction of the
sunshine sensor, the lighting comes
on, this warning lamp is displayed
in the instrument panel and/or a
message appears in the screen,
accompanied by an audible signal. In fog or snow, the sunshine sensor
may detect sufficient light. In this
case, the lighting will not come on
automatically.
Do not cover the sunshine sensor,
coupled with the rain sensor and
located in the centre of the windscreen
behind the rear view mirror; the
associated functions would no longer
be controlled.
When the automatic illumination of headlamps
function is activated (lighting control stalk in the
"
AUTO " position), under low ambient light the
dipped beam headlamps remain on when the
ignition is switched off.
Programming
Activation or deactivation, as well
as the duration of the guide-me-
home lighting, is set in the vehicle
configuration menu.
Contact a CITROËN dealer or a qualified
workshop.
Automatic illumination of headlamps
Page 136 of 436

Cornering lighting
With dipped or main beams, this function
makes use of the beam from a front foglamp
to illuminate the inside of a bend, when the
vehicle speed is below 25 mph (approximately
40 km/h) (urban driving, winding road,
intersections, parking manoeuvres...).
Switching on
with cornering lighting
without cornering lighting
Switching off
The system does not operate:
- b elow a certain angle of rotation of the
steering wheel,
-
a
bove 25 mph (40 km/h),
-
w
hen reverse gear is engaged.
The system is activated by default.
Programming
The system is activated or
deactivated in the vehicle
configuration menu.
The system operates:
-
w
hen the corresponding direction indicator
is switched on,
or
-
f
rom a certain angle of rotation of the
steering wheel.
Page 243 of 436

241
Bulbs with lugs, type H1, H7... take care
to position them correctly to ensure the
best lighting.
Model with directional xenon and
full-LEd h eadlamps
1. daytime running lamps / sidelamps
(LEds ).
2.
di
rectional main beam / dipped beam
headlamps (
d1S
).
3.
di
rection indicators (LE
ds
).
4.
di
rectional foglamps (LE
ds
).
Model with halogen headlamps
(t y p e 1)
1. direction indicators (H21 clear).
2. di
pped beam headlamps (H7).
3.
M
ain beam headlamps (H1).
4.
da
ytime running lamps / sidelamps
(P21/5W XL).
5.
di
rectional front foglamps (H11).
Front lamps
Model with halogen headlamp
and LEd light signature (type 2)*
1. direction indicators (LEds ).
2. da
ytime running lamps / sidelamps
(LE
ds
).
3.
di
pped beam headlamps (H7).
4.
M
ain beam headlamps (H7).
5.
di
rectional front foglamps (H11).
Bulbs with lugs, type H1, H7... take care
to position them correctly to ensure the
best lighting.
*
LED: light emitting diodes.
Practical information
Page 247 of 436

245
Changing the side spotlamps
(LEd s)
For the replacement of this type of light emitting
diode lamp, contact a CITROËN dealer or a
qualified workshop.
Changing foglamp bulbs
(on models with halogen
headlamps)
F Introduce a flat screwdriver in the hole in
the finisher.
F
P
ull and lever to unclip the bumper finisher.
F
R
emove the two module fixing screws and
remove it from its housing.
F
D
isconnect the bulb holder connector.
F
T
urn the bulb holder a quarter of a turn and
extract it.
F
P
ull the bulb and change it. To refit, carry out these operations in reverse
o r d e r.
To replace these bulbs you may also contact a
CITROËN dealer or a qualified workshop.
Practical information
Page 248 of 436

1. Brake lamps (P21/5W).
2. Sidelamps (LE d s)*.
3.
di
rection indicators (PY21W amber).
4.
R
eversing lamp (P21W).
5.
R
ear foglamps (P21W).
Rear lamps
Amber bulbs, such as those for the
direction indicators, must be replaced
by bulbs of the same rating and colour.
The lamps on the tailgate, other than
the guide lamps, are dummy units.
They are there for aesthetic purposes
o n l y.
Changing stop lamp, reversing lamp and direction indicator bulbs
These three bulbs are changed from inside the boot:
F
o
pen the boot,
F
r
emove the access grille from the
corresponding side trim panel,
F
s
lacken the two nuts using a 10 mm tube
spanner then remove the nuts by hand,
F
u
nclip the lamp unit connector,
F
e
xtract the lamp unit carefully pulling in its
middle towards the outside, F
r
emove the foam seal,
F
u
nclip the two small secondary connectors,
F
s
pread the two tabs and remove the bulb
h o l d e r,
F
t
urn the bulb a quarter of a turn and change it.
To reassemble, carry out these operations in
reverse order.
Take care to engage the lamp unit in its guides,
while keeping it in line with the vehicle.
Tighten sufficiently to ensure sealing, but
without forcing, so as to avoid damaging
the
lamp.
* LED: light-emitting diodes.