11
1
2
3a
3b
1
2
3
4
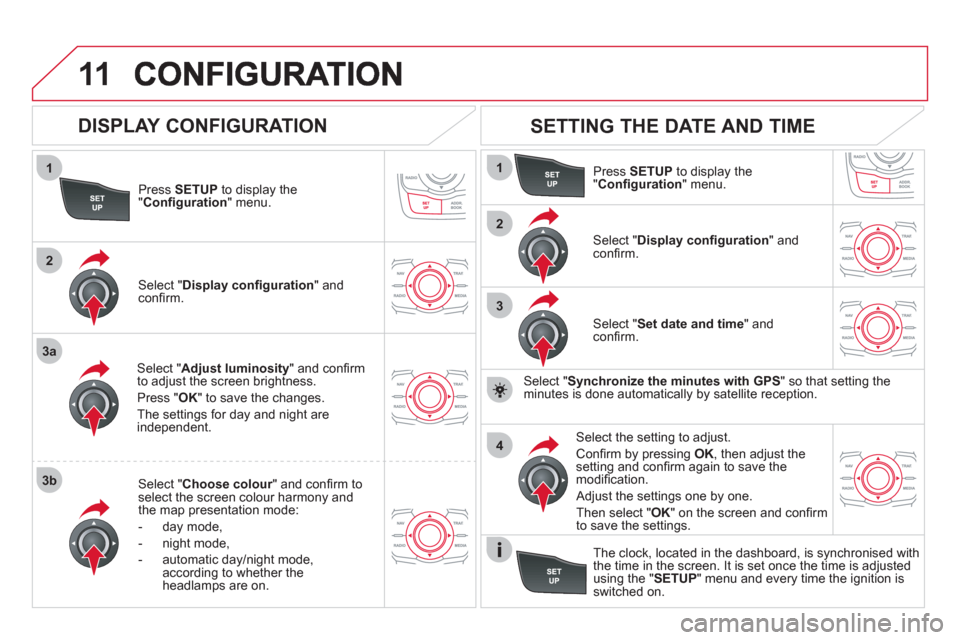
Press SETUP
to display the"Confi guration " menu.
Select " Adjust luminosity" and confi rm
to adjust the screen brightness.
Pr
ess "OK" to save the changes.
The settin
gs for day and night areindependent.
Select " Choose colour" and confi rm torselect the screen colour harmony and
the map presentation mode:
-
day mode,
- n
ight mode,
- automatic day
/night mode,
according to whether the headlamps are on.
SETTING THE DATE AND TIME
Select "Set date and time " and confi rm.
Select the setting to adjust.
Confi rm by pressing OK
, then adjust the setting and confi rm again to save themodifi cation.
Select " Display confi guration" andconfi rm.
Pr
ess SETUPto display the
"Confi guration" menu.
Select "Display confi guration " andconfi rm.
Adjust the settings one by one.
Then select "OK" on the screen and confi rm
to save the settings.
DISPLAY CONFIGURATION
Select " Synchronize the minutes with GPS" so that setting theminutes is done automatically by satellite reception.
The clock, located in the dashboard, is synchronised withthe time in the screen. It is set once the time is adjusted using the "SETUP" menu and every time the ignition isswitched on.
1
2
1
04
303
AUDIO
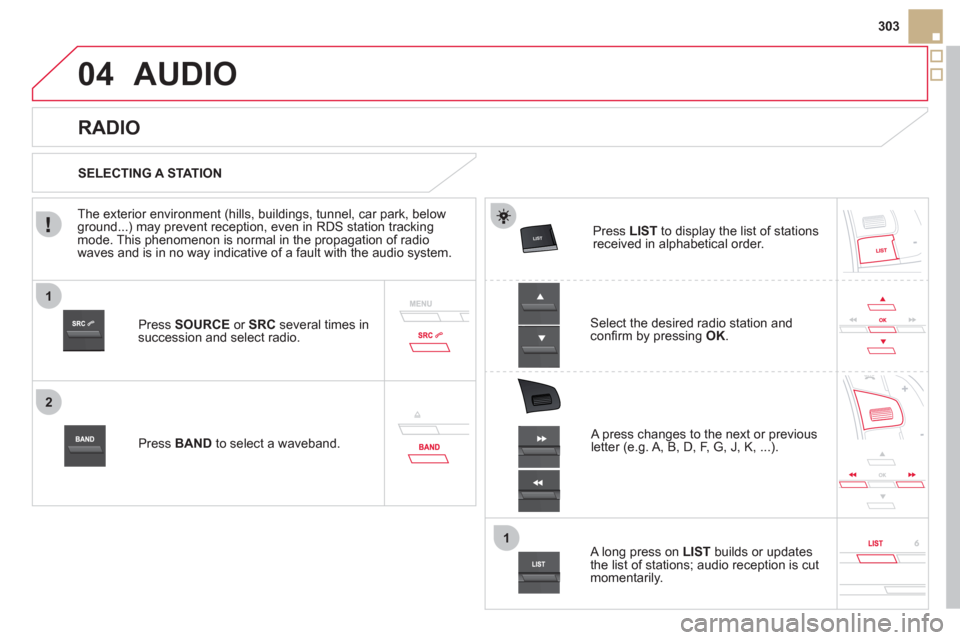
Press SOURCEor SRCseveral times in succession and select radio.
Pr
ess BAND to select a waveband. Pr
ess LISTto display the list of stationsreceived in alphabetical order.
A press changes to the next or previous letter (e.g. A, B, D, F, G, J, K, ...).
RADIO
Select the desired radio station andconfi rm by pressing OK.
SELECTING A STATION
A lon
g press on LIST
builds or updates
the list of stations; audio reception is cut
momentarily.
The exterior environment
(hills, buildings, tunnel, car park, belowground...) may prevent reception, even in RDS station tracking mode. This phenomenon is normal in the propagation of radio
waves and is in no way indicative of a fault with the audio system.
5
63
4
07
2
1
6
323
CONFIGURATION
SETTING THE DATE AND TIME
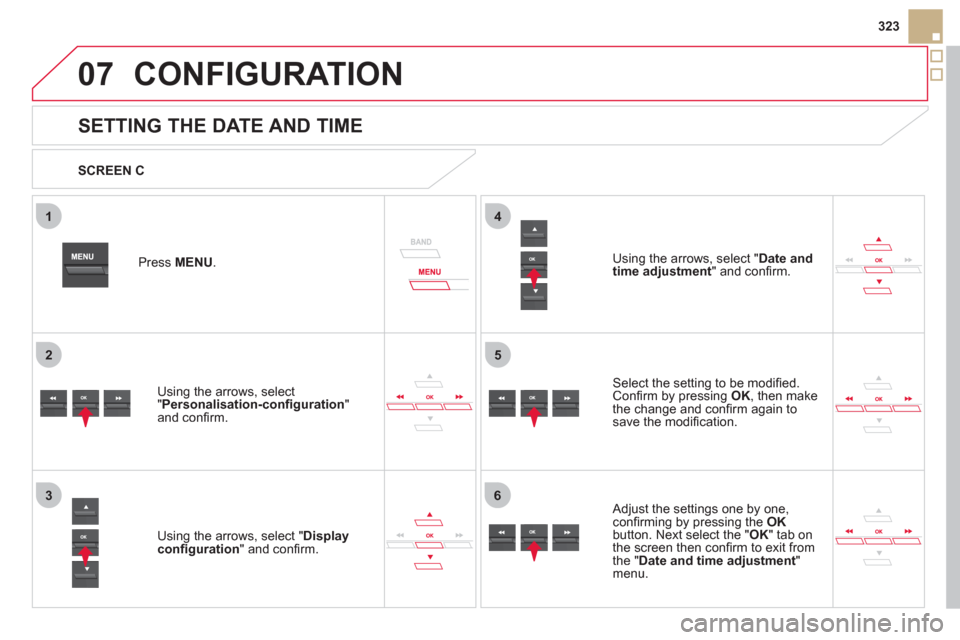
Select the setting to be modifi ed.Confi rm by pressing OK
, then make
the change and confi rm again to save the modifi cation.
Using the arrows, select "Displayconfi guration
" and confi rm.
Press MENU.
Using the arrows, select "Personalisation-confi guration"and confi rm.
SCREEN C
Using the arrows, select "
Date and
time adjustment" and confi rm.
Adjust the settings one by one,confi rming by pressing the OKbutton. Next select the " OK
" tab on
the screen then confi rm to exit from
the " Date and time adjustment"
menu.


