seat adjustment Citroen DS5 RHD 2012.5 1.G Owner's Manual
[x] Cancel search | Manufacturer: CITROEN, Model Year: 2012.5, Model line: DS5 RHD, Model: Citroen DS5 RHD 2012.5 1.GPages: 356, PDF Size: 10.28 MB
Page 5 of 356
001001002002003003004004 COMFORT ACCESS MONITORINGDRIVING
Instrument panel
31 Indicator and warning lamps
40Gauges and indicators
44Adjustment buttons
46 Setting the date and time
46 Clock
48 Tr i p c o m p u ter
52 Electronic key - remote control
61 Boot
62 Alarm
64 Electric windows
66 Cockpit glass roof
68Fuel tank
69 Misfuel prevention (Diesel)
74 Front seats
79Rear seats
82Mirrors
83Steering wheel adjustment
84Interior fi ttings
88Boot fi ttings
89 Tr i a ngle (stowing)
90 Heating and Ventilation
92 Dual-zone digital air conditioning
96 Rear screen demist - defrost
100Starting-switching off the engine
103 Electric parking brake
111Hill start assist
112 Manual gearbox
113Gear effi ciency indicator
114 Automatic gearbox
1186-speed electronic gearboxsystem
122Stop & Start
125Lane departure warning system
126 Head-up display
129Speed limiter
131 Cruise control
133 Parking sensors
135 Reversing camera
Page 6 of 356
005005006006007007008008SAFETY
PR ACTICAL
INFORMATION CHILD SAFETY VISIBILITY
138 Lighting controls
141Daytime running lamps
142Automatic illumination of headlamps
143 Automatic headlamp dipping
146Headlamp adjustment
147 Directional lighting
149 Wiper controls
151 Automatic rain sensitive
wipers
153Courtesy lamps
154Interior mood lighting
158 Child seats
164ISOFIX child seats
167 Child lock
170 Direction indicators
171Emergency or assistance call
171 Horn
172 Tyre under-infl ation detection
173 ESP system
176Seat belts
179Airbags
186Te m p o r a ry puncture repair kit
192Changing a wheel
199Changing a bulb
207 Changing a fuse
210 12 V battery
213 Energy economy mode
214Changing a wiper blade
215 Towing the vehicle
216Towing a trailer
218 Fitting roof bars
219 Accessories
Page 15 of 356
13Familiarisation
Sitting comfortably
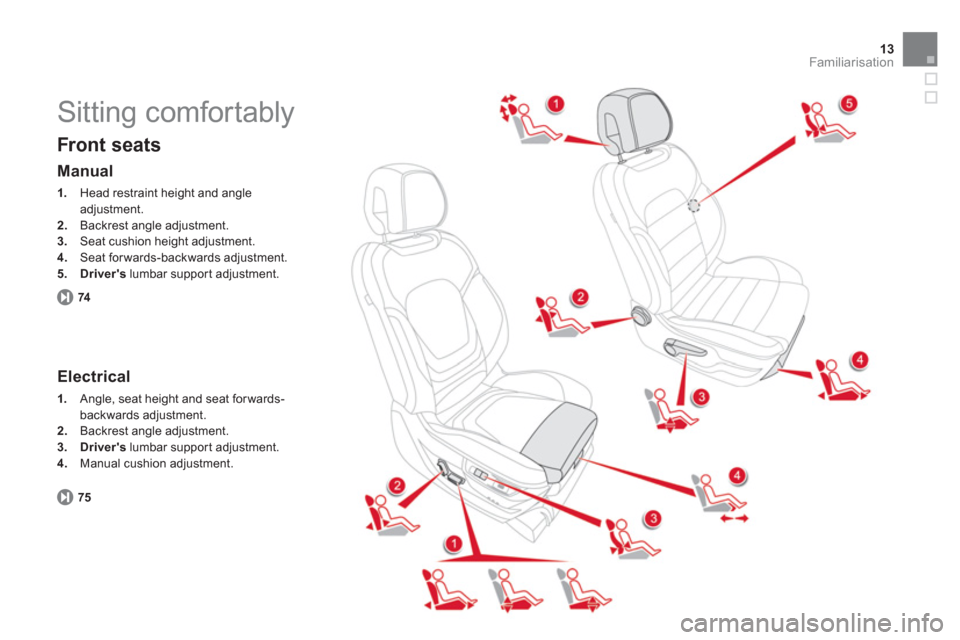
Front seats
74
Manual
1.
Head restraint height and angleadjustment. 2.Backrest angle adjustment.3.Seat cushion height adjustment. 4.
Seat forwards-backwards adjustment.
5.Driver'slumbar suppor t adjustment.
Electrical
1.
Angle, seat height and seat for wards-
backwards adjustment. 2.Backrest angle adjustment.3.Driver'slumbar suppor t adjustment.4.
Manual cushion adjustment.
7
5
Page 16 of 356
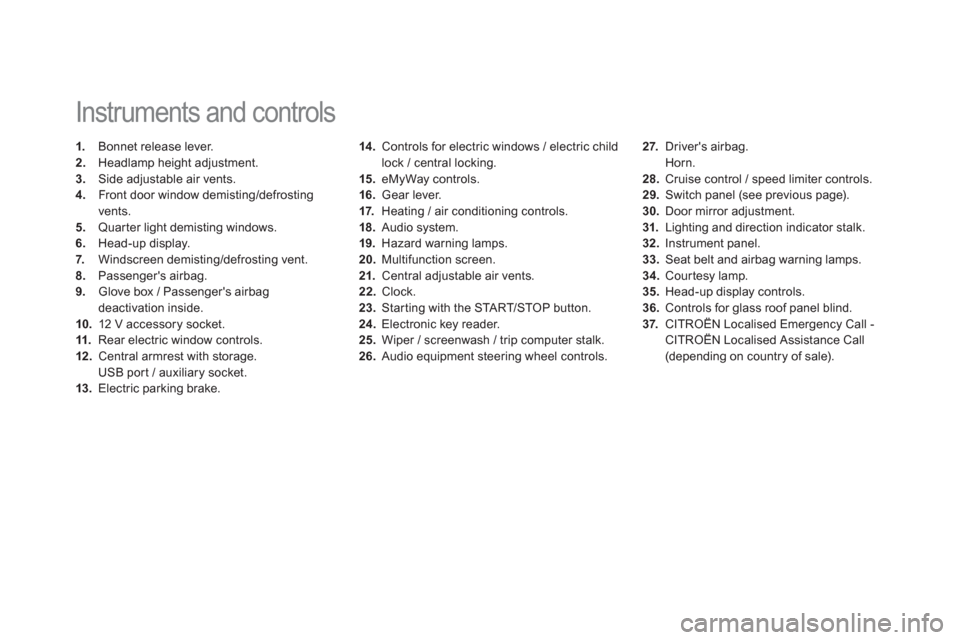
14 . Controls for electric windows / electric child lock / central locking.
15. eMyWay controls.
16.Gear lever.
17. Heating / air conditioning controls.
18
. Audio system.
19.Hazard warning lamps.
20.Multifunction screen.21. Central adjustable air vents. 22.Clock.
23.Star ting with the STA R T/STOP button.
24.Electronic key reader.
25. Wiper / screenwash / trip computer stalk.
26. Audio equipment steering wheel controls.
Instruments and controls
1.
Bonnet release lever.2.
Headlamp height adjustment. 3.
Side adjustable air vents.4.
Front door window demisting/defrosting
vents.
5. Quarter light demisting windows.
6.Head-up display.7. Windscreen demisting/defrosting vent.8.Passenger's airbag. 9.
Glove box / Passenger's airbag deactivation inside. 10.12 V accessory socket. 11.
Rear electric window controls.12.Central armrest with storage.
USB por t / auxiliary socket. 13.Electric parking brake.
27. Driver's airbag.
Horn. 28. Cruise control / speed limiter controls.29.
Switch panel (see previous page).30.
Door mirror adjustment.
31.Lighting and direction indicator stalk .32.
Instrument panel. 33.
Seat belt and airbag warning lamps. 34.Courtesy lamp. 35.Head-up display controls. 36.Controls for glass roof panel blind.37.CITROËNLocalised Emergency Call -
CITROËNLocalised Assistance Call(depending on country of sale).
Page 18 of 356
Sitting comfortably
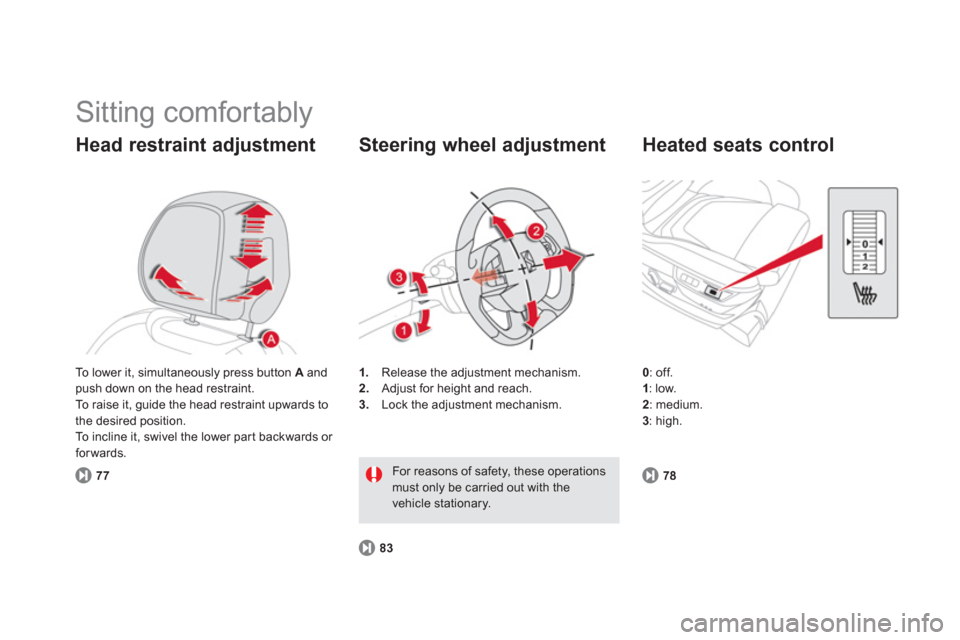
Head restraint adjustment
771
.Release the adjustment mechanism.
2. Adjust for height and reach. 3.
Lock the adjustment mechanism.
Steering wheel adjustment
83
For reasons of safety, these operations must only be carried out with thevehicle stationary.
Heated seats control
0
: off.1: low.2
: medium. 3
: high. To lower it, simultaneously press button
A andpush down on the head restraint.
To raise it, guide the head restraint upwards to
the desired position.
To incline it, swivel the lower part backwards o
r
forwards.
7
8
Page 19 of 356
17Familiarisation
Sitting comfortably
Door mirrors
Adjustment
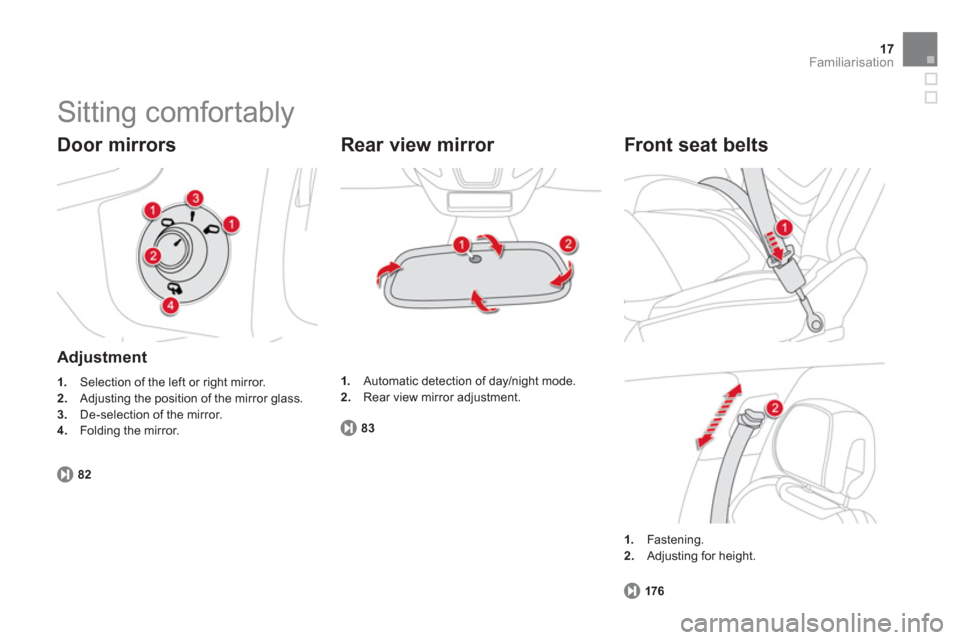
1.
Selection of the left or right mirror.2.Adjusting the position of the mirror glass. 3.De-selection of the mirror.
4.
Folding the mirror.
82
Rear view mirror
83
1.Automatic detection of day/night mode.2.
Rear view mirror adjustment.
Front seat belts
176
1.
Fastening.2.Adjusting for height.
Page 76 of 356
Front seats
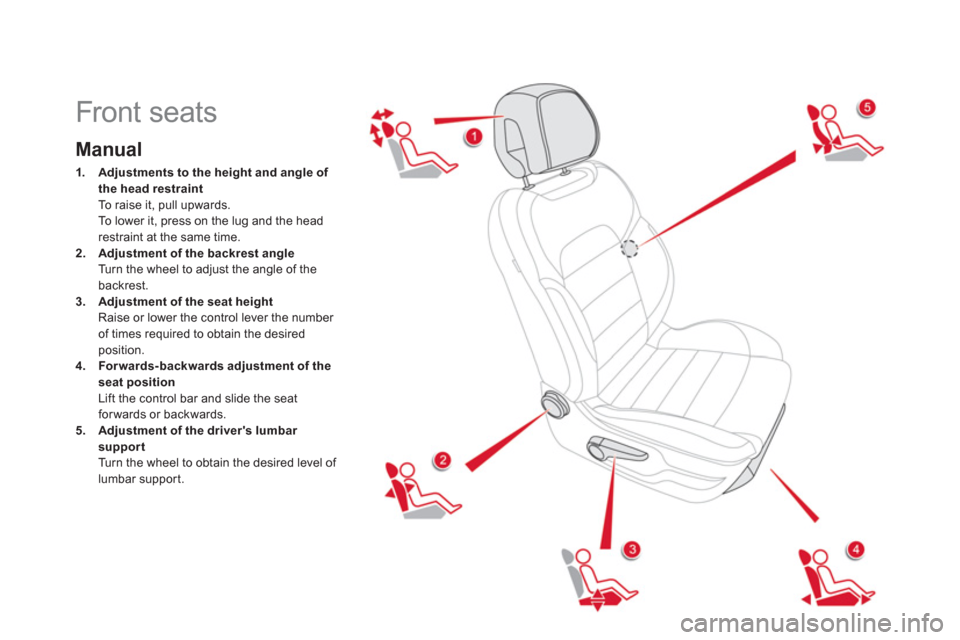
Manual
1.Adjustments to the height and angleof
the head restraintTo raise it, pull upwards.
To lower it, press on the lug and the headrestraint at the same time.2.Adjustment of the backrest angleTurn the wheel to adjust the angle of thebackrest. 3.Adjustment of the seat heightRaise or lower the control lever the number
of times required to obtain the desiredposition.4.Forwards-backwards adjustment of the
seat position Lift the control bar and slide the seatforwards or backwards.5.Adjustment of the driver's lumbar
supportTurn the wheel to obtain the desired level of lumbar support.
Page 77 of 356
Comfort
Switch on the ignition or star t the engine if the vehicle has gone into economy mode.
The electric functions of the driver's seat are active for about 45 seconds after opening the front door. They are deactivated about 45 seconds after switching off the ignition and in economy mode.
To reactivate them, switch on the ignition.
Electric
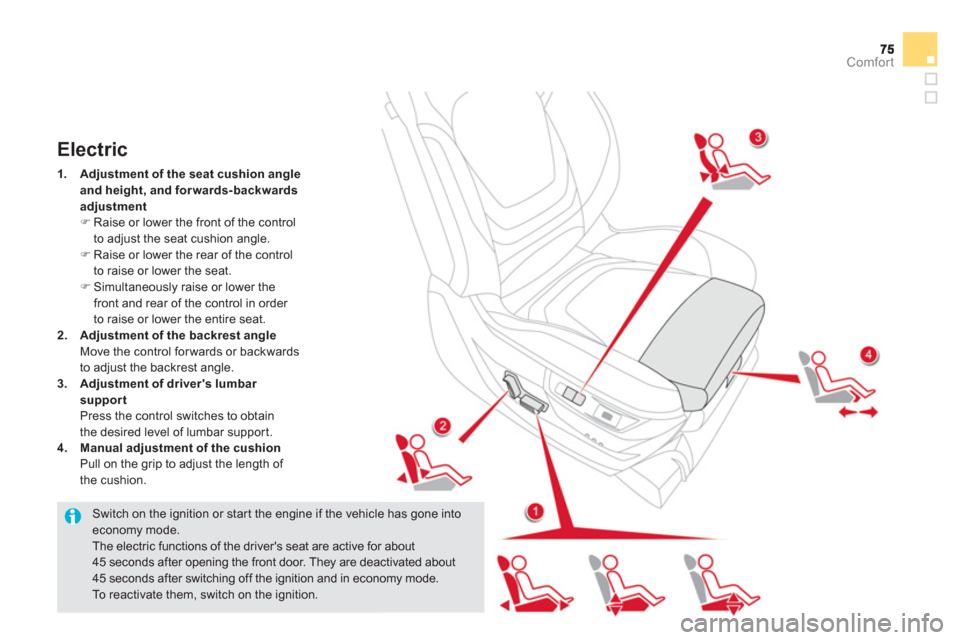
1.Adjustment of the seat cushion angleand height, and for wards-backwards adjustment)Raise or lower the front of the control
to adjust the seat cushion angle. )Raise or lower the rear of the control
to raise or lower the seat.)Simultaneously raise or lower the
front and rear of the control in order
to raise or lower the entire seat. 2.Adjustment of the backrest angle Move the control forwards or backwards
to adjust the backrest angle.
3.Adjustment of driver's lumbar
support Press the control switches to obtain
the desired level of lumbar suppor t.
4. Manual adjustment of the cushion
Pull on the grip to adjust the length of
the cushion.
Page 78 of 356

Storing driving positions
System which stores the electrical settings
of the driver's seat and the head-up display settings. It enables you to store up to
two positions using the buttons on the side of
the driver's seat.
Storing a position usingbuttons M / 1 / 2
)
Switch on the ignition. )
Adjust your seat and the head-up display.)
Press button M
, then press button 1or 2within four seconds.
An audible signal indicates that the positionhas been stored.
Storing a new position cancels the previous
position.
Recalling a stored position
)Briefly press button 1
or 2to recall the corresponding position.
An audible signal indicates the end of the
adjustment.
You can interrupt the current movementby pressing button M, 1
or 2
or by using one of the seat controls. A stored position cannot be recalled while driving. Recalling stored positions is deactivated 45 seconds after switching off the ignition.
Page 79 of 356
Comfort
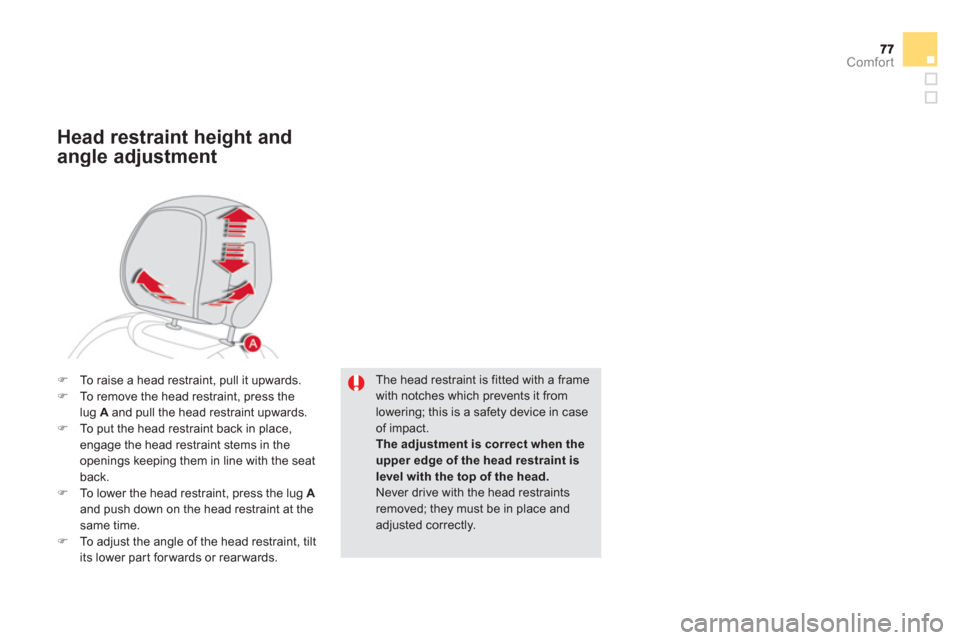
The head restraint is fitted with a framewith notches which prevents it from lowering; this is a safety device in caseof impact.
The adjustment is correct when theupper edge of the head restraint is level with the top of the head.Never drive with the head restraints removed; they must be in place andadjusted correctly.
Head restraint height and
angle adjustment
)To raise a head restraint, pull it upwards. )To remove the head restraint, press thelug A
and pull the head restraint upwards. )To put the head restraint back in place,
engage the head restraint stems in the
openings keeping them in line with the seat back. )To lower the head restraint, press the lug Aand push down on the head restraint at thesame time. )To a djust the angle of the head restraint, tilt
its lower part forwards or rearwards.