setting CITROEN DS7 CROSSBACK 2019 Service Manual
[x] Cancel search | Manufacturer: CITROEN, Model Year: 2019, Model line: DS7 CROSSBACK, Model: CITROEN DS7 CROSSBACK 2019Pages: 244, PDF Size: 6.87 MB
Page 118 of 244
116
Driving06
Operating limits
The system does not take account of reduced
speed limits, especially those imposed in the
following cases:
–
Poor w
eather (rain, snow).
–
A
tmospheric pollution.
–
Towing.
–
D
riving with a space-saver type spare wheel or
snow chains fitted.
–
Tyre repaired using the t
emporary puncture
repair kit.
–
Y
oung drivers.
The system may not display the speed limit if it
does not detect a speed limit sign within a preset
period and in the following situations:
–
R
oad signs that are obstructed, non-standard,
damaged or bent.
–
Ob
solete or incorrect maps.
Recommendation
In addition to Road signs recognition, the driver
can select the speed displayed as a speed setting
for the speed limiter or cruise control using the
speed limiter or cruise control 'store' button.
For more information on the Speed limiter,
Cruise control or Adaptive cruise control,
refer to the corresponding sections.
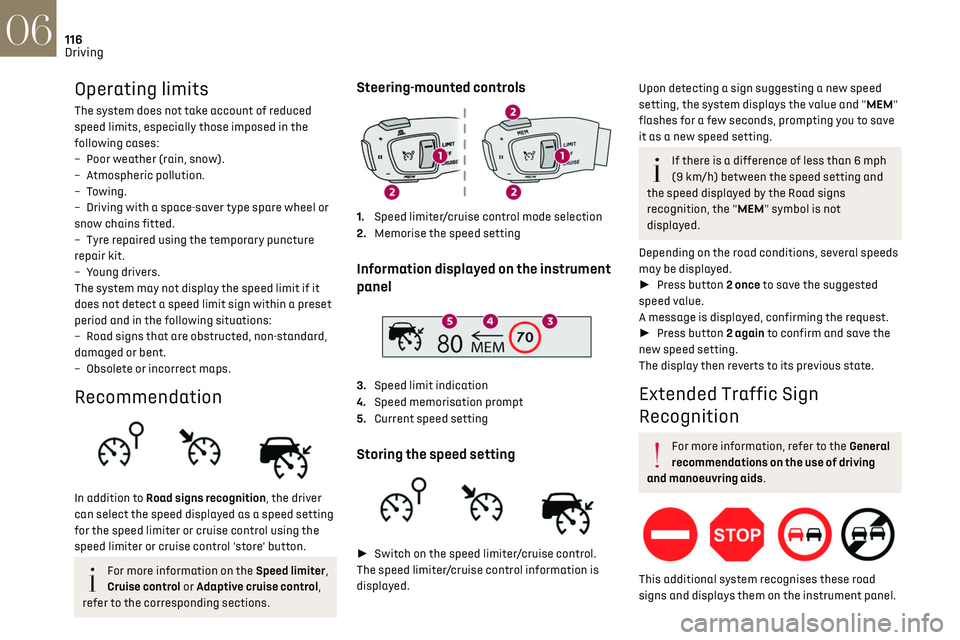
Steering-mounted controls
1. Speed limiter/cruise control mode selection
2. Memorise the speed setting
Information displayed on the instrument
panel
3.Speed limit indication
4. Speed memorisation prompt
5. Current speed setting
Storing the speed setting
► Switch on the speed limiter/cruise control.
The speed limiter/cruise control information is
displayed.
Upon detecting a sign suggesting a new speed
setting, the system displays the value and "MEM"
flashes for a few seconds, prompting you to save
it as a new speed setting.
If there is a difference of less than 6 mph
(9 km/h) between the speed setting and
the speed displayed by the Road signs
recognition, the "MEM" symbol is not
displayed.
Depending on the road conditions, several speeds
may be displayed.
► Press button 2 once to save the suggested
speed value.
A message is displayed, confirming the request.
► Press button 2 again to confirm and save the
new speed setting.
The display then reverts to its previous state.
Extended Traffic Sign
Recognition
For more information, refer to the General
recommendations on the use of driving
and manoeuvring aids.
This additional system recognises these road
signs and displays them on the instrument panel.
Page 119 of 244
117
Driving06
As you approach it, the symbol of the
corresponding sign is displayed on the instrument
panel.
The selected display mode must be "Driving".
The actual road signs always take priority
over those displayed by the system.
The signs must comply with the Vienna
Convention on road signs.
Activation/Deactivation
It is configured in the ADAS touch screen
application.
Speed limiter
For more information, refer to the General
recommendations on the use of driving
and manoeuvring aids.
This system prevents the vehicle from
exceeding the speed programmed by the
driver (speed setting).
The speed limiter is switched on manually.
The minimum speed setting is 19 mph (30 km/h).
The speed setting remains in the system memory
when the ignition is switched off.
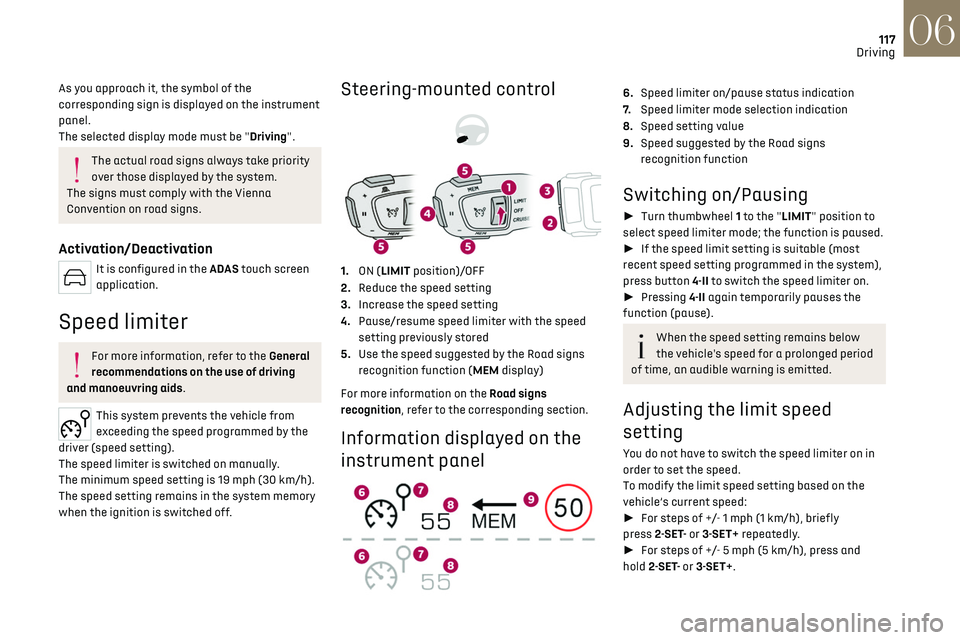
Steering-mounted control
1. ON (LIMIT position)/OFF
2. Reduce the speed setting
3. Increase the speed setting
4. Pause/resume speed limiter with the speed
setting previously stored
5. Use the speed suggested by the Road signs
recognition function (MEM display)
For more information on the Road signs
recognition, refer to the corresponding section.
Information displayed on the
instrument panel
6. Speed limiter on/pause status indication
7. Speed limiter mode selection indication
8. Speed setting value
9. Speed suggested by the Road signs
recognition function
Switching on/Pausing
► Turn thumbwheel 1 to the "LIMIT" position to
select speed limiter mode; the function is paused.
► If the speed limit setting is suitable (most
recent speed setting programmed in the system),
press button 4-II to switch the speed limiter on.
► Pressing 4-II again temporarily pauses the
function (pause).
When the speed setting remains below
the vehicle's speed for a prolonged period
of time, an audible warning is emitted.
Adjusting the limit speed
setting
You do not have to switch the speed limiter on in
order to set the speed.
To modify the limit speed setting based on the
vehicle’s current speed:
► For steps of +/- 1 mph (1 km/h), briefly
press 2-SET- or 3-SET+ repeatedly.
► For steps of +/- 5 mph (5 km/h), press and
hold 2-SET- or 3-SET+.
Page 120 of 244
118
Driving06
To modify the speed limit setting based on the
speed suggested by the Road signs recognition
function displayed on the instrument panel:
► Press 5-MEM once; a message is displayed,
confirming the memorisation request.
► Press 5-MEM again to save the suggested
speed.
The new speed setting value is displayed on the
instrument panel.
Temporarily exceeding the
speed setting
► Fully depress the accelerator pedal.
The speed limiter is temporarily deactivated and
the displayed speed setting flashes.
► Release the accelerator pedal to return to
below the speed setting.
When exceeding the speed is not due to the
driver's action (e.g. in case of a steep slope), an
audible signal is triggered immediately.
On a steep descent or in the event of
sharp acceleration, the speed limiter will
not be able to prevent the vehicle from
exceeding the speed setting.
If necessary, apply the brakes to control your
vehicle’s speed.
When the vehicle speed returns to the speed
setting level, the speed limiter operates again: the
speed setting display becomes fixed again.
Switching off
► Turn the thumbwheel 1 to the "OFF" position:
speed limiter information is no longer displayed.
Malfunction
In the event of a malfunction, dashes are
displayed flashing and then fixed instead of the
speed setting.
Have it checked by a dealer or a qualified
workshop.
Cruise control - Specific
recommendations
The cruise control function does not
guarantee compliance with the maximum
authorised speed and the safety distance
between vehicles, the driver remains
responsible for their driving.
In the interest of public safety, only use cruise
control if the traffic conditions enable vehicles
to drive at a steady speed and maintain an
adequate safety distance.
Remain vigilant while cruise control is
activated. If you press and hold one of the
speed setting modification buttons, your
vehicle may change speed very abruptly.
When descending a steep hill, the cruise
control system cannot prevent the vehicle from
exceeding the set speed. Brake if necessary to
control the vehicle speed.
On steep climbs or when towing, the set speed
may not be reached or maintained.
Exceeding the programmed speed setting
You can temporarily exceed the speed
setting by pressing the accelerator pedal (the
programmed speed flashes).
To return to the speed setting, release the
accelerator pedal (when the set speed is
reached again, the displayed speed stops
flashing).
Operating limits
Never use the system in the following
situations:
–
In an urban area with the risk o
f pedestrians
crossing the road.
–
In hea
vy traffic (except versions with the
Stop & Go function).
–
O
n winding or steep roads.
–
O
n slippery or flooded roads.
–
In poor w
eather conditions.
–
In the e
vent of restricted visibility for the
driver.
–
D
riving on a speed circuit.
–
D
riving on a rolling road.
–
When using a ‘
space-saver’ type spare
wheel.
–
When using sno
w chains, non-slip covers or
studded tyres.
Page 121 of 244
119
Driving06
Programmable cruise
control
For more information, refer to the General
recommendations on the use of driving
and manoeuvring aids and the Specific
recommendations on cruise control.
This system automatically maintains the
vehicle’s speed at the value programmed
by the driver (speed setting), without the use of
the accelerator pedal.
Cruise control is switched on manually.
It requires a minimum vehicle speed of 25 mph
(40 km/h).
With an automatic gearbox, mode D or second
gear or higher in mode M must be engaged.
Cruise control remains active after
changing gear on engines fitted with the
Stop & Start function.
Switching off the ignition cancels any
speed setting.
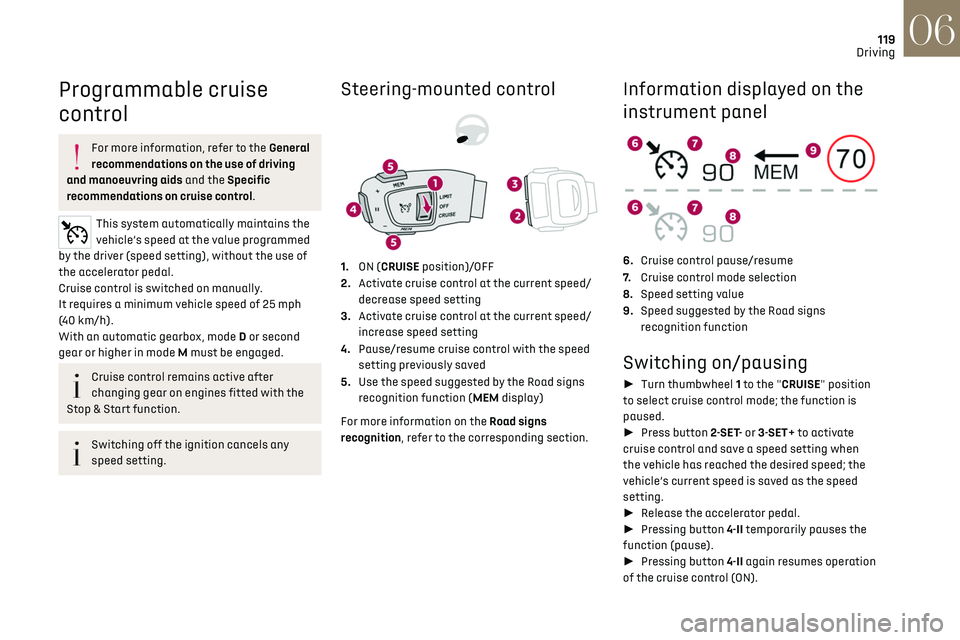
Steering-mounted control
1. ON (CRUISE position)/OFF
2. Activate cruise control at the current speed/
decrease speed setting
3. Activate cruise control at the current speed/
increase speed setting
4. Pause/resume cruise control with the speed
setting previously saved
5. Use the speed suggested by the Road signs
recognition function (MEM display)
For more information on the Road signs
recognition, refer to the corresponding section.
Information displayed on the
instrument panel
6. Cruise control pause/resume
7. Cruise control mode selection
8. Speed setting value
9. Speed suggested by the Road signs
recognition function
Switching on/pausing
► Turn thumbwheel 1 to the "CRUISE" position
to select cruise control mode; the function is
paused.
► Press button 2-SET- or 3-SET+ to activate
cruise control and save a speed setting when
the vehicle has reached the desired speed; the
vehicle’s current speed is saved as the speed
setting.
► Release the accelerator pedal.
► Pressing button 4-II temporarily pauses the
function (pause).
► Pressing button 4-II again resumes operation
of the cruise control (ON).
Page 122 of 244
120
Driving06
Cruise control can also be paused
temporarily:
–
b
y pressing the brake pedal.
–
aut
omatically, if the electronic stability
control (ESC) system is triggered.
Changing the cruise speed
setting
The cruise control must be active.
To change the cruise speed setting, based on the
vehicle’s current speed:
► For steps of +/- 1 mph (1 km/h), briefly
press 2-SET- or 3-SET+ repeatedly.
► For steps of +/- 5 mph (5 km/h), press and
hold 2-SET- or 3-SET+.
Pressing and holding 2-SET- or 3-SET+
results in a rapid change in the speed of
the vehicle.
As a precaution, we recommend setting a
cruise speed fairly close to the current
speed of your vehicle, to avoid any sudden
acceleration or deceleration of the vehicle.
To change the cruise speed setting using the
speed suggested by the Road signs recognition
function displayed on the instrument panel:
► Press 5-MEM once; a message is displayed,
confirming the memorisation request.
► Press 5-MEM again to save the suggested
speed.
The new speed setting value is displayed on the
instrument panel.
Switching off
► Turn the thumbwheel 1 to the "OFF" position:
the cruise control information disappears from
the screen.
Malfunction
In the event of a malfunction, dashes are
displayed flashing and then fixed instead of the
speed setting.
Have it checked by a dealer or a qualified
workshop.
DS DRIVE ASSIST
This system automatically adjusts the speed
and corrects the trajectory of the vehicle, using
Adaptive cruise control with Stop&Go function in
conjunction with Lane Positioning Assist.
These two functions must be activated and in
operation.
For more information on Adaptive cruise
control and Lane Positioning Assist, refer to the
corresponding sections.
The system assists the driver by acting on
the steering, acceleration and braking
within the physical limits and capacities of the
vehicle. Certain road infrastructure elements
or vehicles in the surroundings may not be
properly seen or may be poorly interpreted by
the camera and radar, resulting in an
unexpected change in direction, a lack of
steering correction and/or inappropriate
management of acceleration or braking.
Primarily designed for driving on main
roads and motorways, this system only
works with moving vehicles driving in the same
direction as your vehicle.
Adaptive cruise control
For more information, refer to the General
recommendations on the use of driving
and manoeuvring aids and the Specific
recommendations of cruise control.
This system automatically maintains the vehicle
speed at a value set by the driver (speed setting),
while respecting a safety distance from the
vehicle in front (target vehicle) previously set by
the driver. The system automatically manages the
acceleration and deceleration of the vehicle.
With the Stop function, the system manages
braking until the vehicle comes to a complete
stop.
With the Stop & Go function, the system manages
braking until the vehicle comes to a complete stop
and restarts the vehicle.
Page 123 of 244
121
Driving06
The brake lamps come on if the vehicle is
slowed down by the system.
It can be dangerous to drive if the brake lamps
are not in perfect working order.
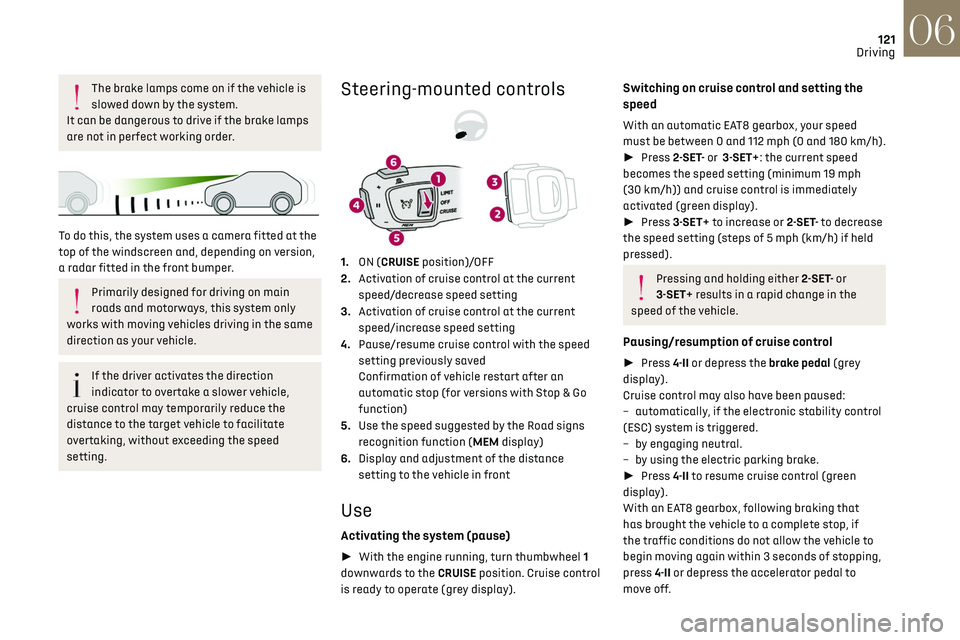
To do this, the system uses a camera fitted at the
top of the windscreen and, depending on version,
a radar fitted in the front bumper.
Primarily designed for driving on main
roads and motorways, this system only
works with moving vehicles driving in the same
direction as your vehicle.
If the driver activates the direction
indicator to overtake a slower vehicle,
cruise control may temporarily reduce the
distance to the target vehicle to facilitate
overtaking, without exceeding the speed
setting.
Steering-mounted controls
1. ON (CRUISE position)/OFF
2. Activation of cruise control at the current
speed/decrease speed setting
3. Activation of cruise control at the current
speed/increase speed setting
4. Pause/resume cruise control with the speed
setting previously saved
Confirmation of vehicle restart after an
automatic stop (for versions with Stop & Go
function)
5. Use the speed suggested by the Road signs
recognition function (MEM display)
6. Display and adjustment of the distance
setting to the vehicle in front
Use
Activating the system (pause)
► With the engine running, turn thumbwheel 1
downwards to the CRUISE position. Cruise control
is ready to operate (grey display).
Switching on cruise control and setting the
speed
With an automatic EAT8 gearbox, your speed
must be between 0 and 112 mph (0 and 180 km/h).
► Press 2-SET- or 3-SET+: the current speed
becomes the speed setting (minimum 19 mph
(30 km/h)) and cruise control is immediately
activated (green display).
► Press 3-SET+ to increase or 2-SET- to decrease
the speed setting (steps of 5 mph (km/h) if held
pressed).
Pressing and holding either 2-SET- or
3-SET+ results in a rapid change in the
speed of the vehicle.
Pausing/resumption of cruise control
► Press 4-II or depress the brake pedal (grey
display).
Cruise control may also have been paused:
–
aut
omatically, if the electronic stability control
(ESC) system is triggered.
–
b
y engaging neutral.
–
b
y using the electric parking brake.
► Press 4-II to resume cruise control (green
display).
With an EAT8 gearbox, following braking that
has brought the vehicle to a complete stop, if
the traffic conditions do not allow the vehicle to
begin moving again within 3 seconds of stopping,
press 4-II or depress the accelerator pedal to
move off.
Page 124 of 244
122
Driving06
If the driver takes no action after the vehicle
has been stopped, the electric parking brake is
applied automatically after about 5 minutes.
Cruise control remains active after
changing gear, regardless of the gearbox
type.
When the driver attempts to reactivate
cruise control after the function has been
paused, the message "Activation not possible,
unsuitable conditions" is displayed briefly if
reactivation is not possible (safety conditions
not met).
Changing the programmed speed setting with
the Road signs recognition function
► Press 5-MEM to accept the speed suggested
by the system on the instrument panel, then press
again to confirm.
To prevent sudden acceleration or
deceleration of the vehicle, select a speed
setting relatively close to the vehicle's current
speed.
Changing the inter-vehicle distance
► Press 6 to display the distance setting
thresholds ("Distant", "Normal", "Close"), then
press again to select a threshold.
After a few seconds, the option is accepted and
will be memorised when the ignition is switched
off.
Temporarily exceeding the speed setting
► Press the accelerator pedal fully. Distance
monitoring and cruise control are deactivated
while acceleration is maintained. "Cruise control
on hold" is displayed.
Deactivating the system
► Turn thumbwheel 1 upwards to the OFF
position.
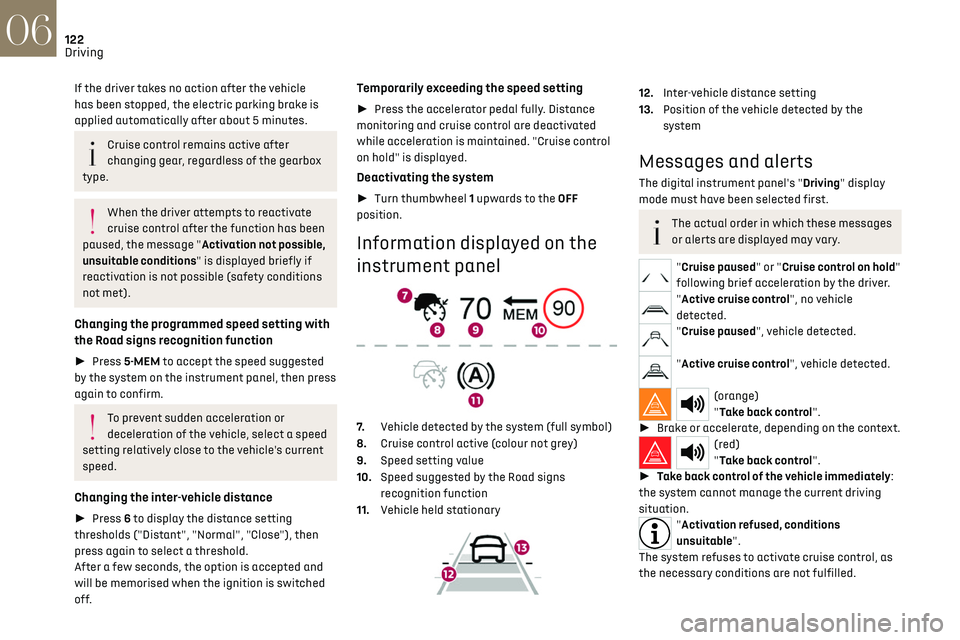
Information displayed on the
instrument panel
7. Vehicle detected by the system (full symbol)
8. Cruise control active (colour not grey)
9. Speed setting value
10. Speed suggested by the Road signs
recognition function
11. Vehicle held stationary
12.Inter-vehicle distance setting
13. Position of the vehicle detected by the
system
Messages and alerts
The digital instrument panel's "Driving" display
mode must have been selected first.
The actual order in which these messages
or alerts are displayed may vary.
"Cruise paused" or "Cruise control on hold"
following brief acceleration by the driver.
"Active cruise control", no vehicle
detected.
"Cruise paused", vehicle detected.
"Active cruise control", vehicle detected.
(orange)
"Take back control".
► Brake or accelerate, depending on the context.
(red)
"Take back control".
► Take back control of the vehicle immediately:
the system cannot manage the current driving
situation.
"Activation refused, conditions
unsuitable".
The system refuses to activate cruise control, as
the necessary conditions are not fulfilled.
Page 126 of 244
124
Driving06
If any of the following malfunctions
occurs, do not use the system:
–
Follo
wing an impact on the windscreen close
to the camera or on the front bumper (versions
with radar).
–
B
rake lamps not working.
If the vehicle has undergone any of the
following modifications, do not use the
system:
–
Carrying long objects on roo
f bars.
–
Towing.
–
F
ront end of the vehicle modified (for
example by adding long-range headlamps or
painting the front bumper).
–
Ob
structed radar.
Malfunction
In the event of a malfunction,
dashes are displayed instead of
the speed setting.
This warning lamp comes on, accompanied
by a message and an audible signal, to
confirm the malfunction.
Have it checked by a dealer or a qualified
workshop.
Lane positioning assist
For more information, refer to the General
recommendations on the use of driving
and manoeuvring aids.
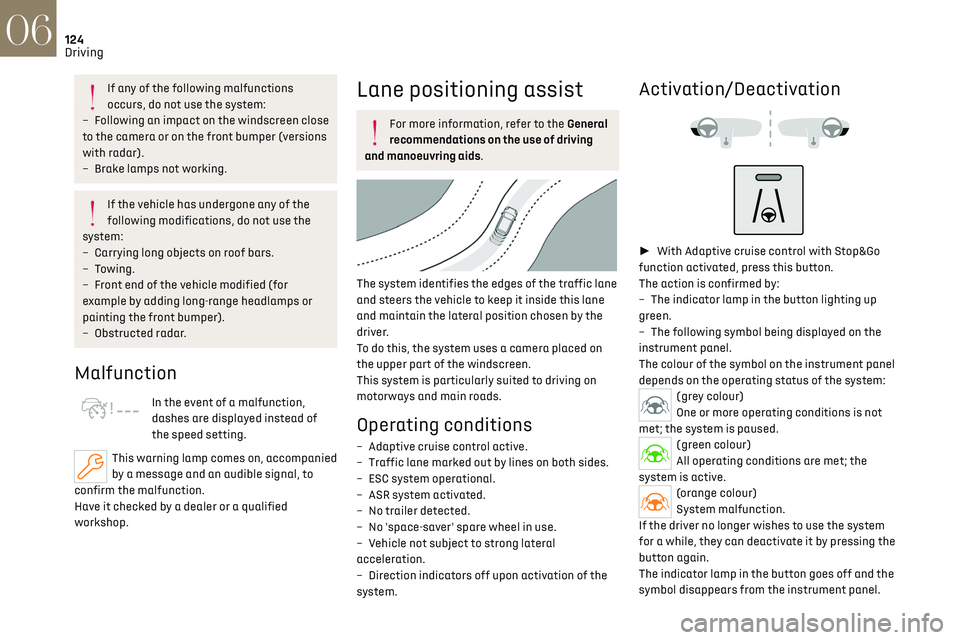
The system identifies the edges of the traffic lane
and steers the vehicle to keep it inside this lane
and maintain the lateral position chosen by the
driver.
To do this, the system uses a camera placed on
the upper part of the windscreen.
This system is particularly suited to driving on
motorways and main roads.
Operating conditions
– Adaptive cruise control active.
– Tra ffic lane marked out by lines on both sides.
–
ESC s
ystem operational.
–
ASR s
ystem activated.
–
No trailer det
ected.
–
No '
space-saver' spare wheel in use.
–
V
ehicle not subject to strong lateral
acceleration.
–
Direction indic
ators off upon activation of the
system.
Activation/Deactivation
► With Adaptive cruise control with Stop&Go
function activated, press this button.
The action is confirmed by:
–
The indic
ator lamp in the button lighting up
green.
–
The follo
wing symbol being displayed on the
instrument panel.
The colour of the symbol on the instrument panel
depends on the operating status of the system:
(grey colour)
One or more operating conditions is not
met; the system is paused.
(green colour)
All operating conditions are met; the
system is active.
(orange colour)
System malfunction.
If the driver no longer wishes to use the system
for a while, they can deactivate it by pressing the
button again.
The indicator lamp in the button goes off and the
symbol disappears from the instrument panel.
Page 132 of 244
130
Driving06
It is possible that collision warnings are
not given, are given too late or seem
unjustified.
The driver must always stay in control of the
vehicle and be prepared to react at any time to
avoid an accident.
If you select "Far" in the touch screen,
then the system warns sooner. This
increases the safety but increases also the
amount of alerts, if the legal safety distance is
not kept.
To reduce the alert occurrence, you can change
the setting to either of the other two.
Intelligent emergency braking
assistance (iEBA)
This function increases vehicle deceleration if the
driver does not brake enough to avoid a collision.
This assistance is only provided if the driver
presses the brake pedal.
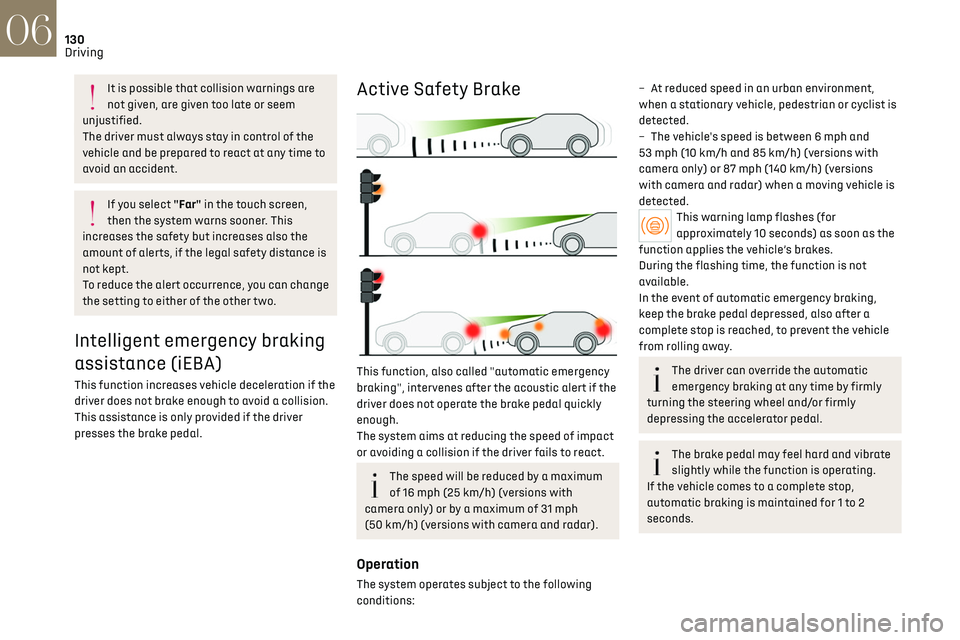
Active Safety Brake
This function, also called "automatic emergency
braking", intervenes after the acoustic alert if the
driver does not operate the brake pedal quickly
enough.
The system aims at reducing the speed of impact
or avoiding a collision if the driver fails to react.
The speed will be reduced by a maximum
of 16 mph (25 km/h) (versions with
camera only) or by a maximum of 31 mph
(50 km/h) (versions with camera and radar).
Operation
The system operates subject to the following
conditions:
– At reduced speed in an urban environment,
when a stationary vehicle, pedestrian or cyclist is
detected.
–
The v
ehicle's speed is between 6 mph and
53 mph (10 km/h and 85 km/h) (versions with
camera only) or 87 mph (140 km/h) (versions
with camera and radar) when a moving vehicle is
detected.
This warning lamp flashes (for
approximately 10 seconds) as soon as the
function applies the vehicle’s brakes.
During the flashing time, the function is not
available.
In the event of automatic emergency braking,
keep the brake pedal depressed, also after a
complete stop is reached, to prevent the vehicle
from rolling away.
The driver can override the automatic
emergency braking at any time by firmly
turning the steering wheel and/or firmly
depressing the accelerator pedal.
The brake pedal may feel hard and vibrate
slightly while the function is operating.
If the vehicle comes to a complete stop,
automatic braking is maintained for 1 to 2
seconds.
Page 133 of 244
131
Driving06
Malfunction
This warning lamp lights up on the
instrument panel with the message
"Sensor blind" in certain cases.
Version with camera only: the system is
deactivated.
Version with camera and radar: the system may
continue to operate in a degraded mode.
This may be caused by a reduced visibility
(e.g. rain, fog, snow, blinding by low sun) or by a
real sensor blockage. In this case, stop the vehicle
and verify if the front camera or the front radar is
covered by dirt, snow, ice or anything preventing
the sensing.
In the event of a malfunction, this warning
lamp lights up on the instrument panel,
accompanied by the display of a message and an
audible signal.
Have it checked by a dealer or a qualified
workshop.
If these warning lamps come on
after the engine has been switched
off and then restarted, contact a dealer or a
qualified workshop to have the system checked.
These warning lamps light up on
the instrument panel and/or in the
warning lamp display for seat belts and front
passenger airbag to indicate that the driver's and/
or front passenger's seat belt is not fastened
(depending on version). The automatic braking
system is deactivated until the seat belts are
fastened.
Distraction detection
For more information, refer to the General
recommendations on the use of driving
and manoeuvring aids.
The function comprises the "Driver Attention
Warning" and "Driver Attention Warning by
Camera" systems, combined, depending on
version, with the "DS DRIVER ATTENTION
MONITORING" system.
These systems are in no way designed to
keep the driver awake or to prevent the
driver from falling asleep at the wheel.
It is the driver’s responsibility to stop if feeling
tired.
Take a break if you are feeling tired or at least
every 2 hours.
Activation/Deactivation
By default, the function is automatically activated
at every engine start.
The settings are changed via the ADAS
touch screen application.
Driver Attention Warning
The system triggers an alert when it
detects that the driver has not taken a
break after two hours of driving at a speed above
43 mph (70 km/h).
This alert is issued via the display of a message
encouraging the driver to take a break,
accompanied by an audible signal.
If the driver does not follow this advice, the alert
is repeated hourly until the vehicle is stopped.
The system resets itself if one of the following
conditions is met:
–
With the engine running, the v
ehicle has been
stationary for more than 15 minutes.
–
The ignition has been s
witched off for a few
minutes.
–
The driv
er's seat belt is unfastened and their
door is opened.
As soon as the speed of the vehicle drops
below 43 mph (70 km/h), the system goes
into standby.
Driving time starts being counted again once
the speed reaches above 43 mph (70 km/h).