boot not locking CITROEN DS7 CROSSBACK 2019 Owners Manual
[x] Cancel search | Manufacturer: CITROEN, Model Year: 2019, Model line: DS7 CROSSBACK, Model: CITROEN DS7 CROSSBACK 2019Pages: 244, PDF Size: 6.87 MB
Page 29 of 244
27Access02
If selective unlocking of the tailgate is
deactivated, pressing the button unlocks the
whole vehicle.
If motorised operation of the tailgate is
deactivated, pressing the button partially
opens the tailgate.
To lock the vehicle, it is necessary to close the
tailgate again.
Locking the vehicle
Normal locking
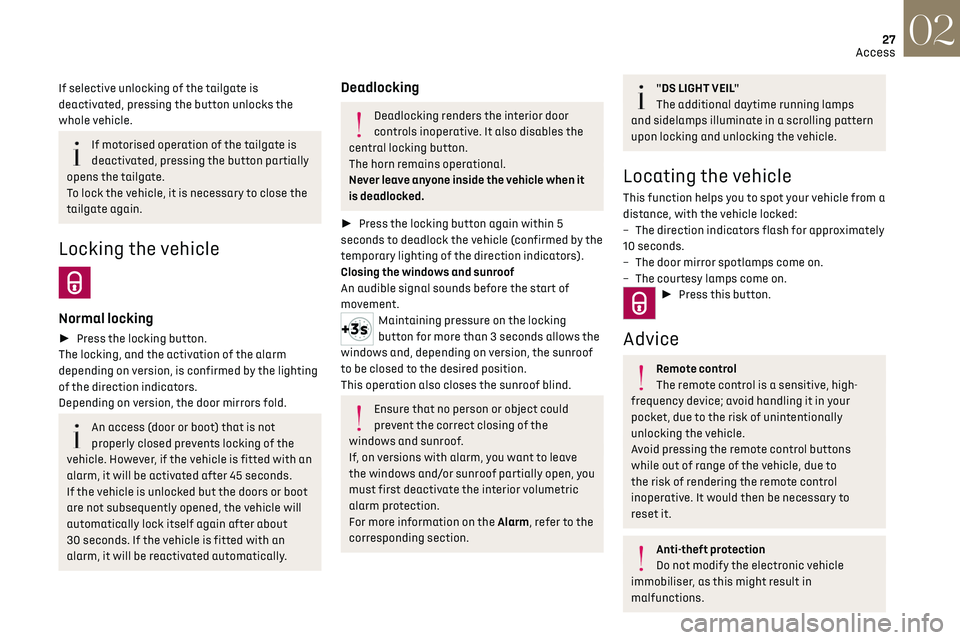
► Press the locking button.
The locking, and the activation of the alarm
depending on version, is confirmed by the lighting
of the direction indicators.
Depending on version, the door mirrors fold.
An access (door or boot) that is not
properly closed prevents locking of the
vehicle. However, if the vehicle is fitted with an
alarm, it will be activated after 45 seconds.
If the vehicle is unlocked but the doors or boot
are not subsequently opened, the vehicle will
automatically lock itself again after about
30 seconds. If the vehicle is fitted with an
alarm, it will be reactivated automatically.
Deadlocking
Deadlocking renders the interior door
controls inoperative. It also disables the
central locking button.
The horn remains operational.
Never leave anyone inside the vehicle when it
is deadlocked.
► Press the locking button again within 5
seconds to deadlock the vehicle (confirmed by the
temporary lighting of the direction indicators).
Closing the windows and sunroof
An audible signal sounds before the start of
movement.
Maintaining pressure on the locking
button for more than 3 seconds allows the
windows and, depending on version, the sunroof
to be closed to the desired position.
This operation also closes the sunroof blind.
Ensure that no person or object could
prevent the correct closing of the
windows and sunroof.
If, on versions with alarm, you want to leave
the windows and/or sunroof partially open, you
must first deactivate the interior volumetric
alarm protection.
For more information on the Alarm, refer to the
corresponding section.
"DS LIGHT VEIL"
The additional daytime running lamps
and sidelamps illuminate in a scrolling pattern
upon locking and unlocking the vehicle.
Locating the vehicle
This function helps you to spot your vehicle from a
distance, with the vehicle locked:
–
The direction indic
ators flash for approximately
10 seconds.
–
The door mirror spo
tlamps come on.
–
The c
ourtesy lamps come on.
► Press this button.
Advice
Remote control
The remote control is a sensitive, high-
frequency device; avoid handling it in your
pocket, due to the risk of unintentionally
unlocking the vehicle.
Avoid pressing the remote control buttons
while out of range of the vehicle, due to
the risk of rendering the remote control
inoperative. It would then be necessary to
reset it.
Anti-theft protection
Do not modify the electronic vehicle
immobiliser, as this might result in
malfunctions.
Page 31 of 244
29Access02
Locking the vehicle
Normal locking
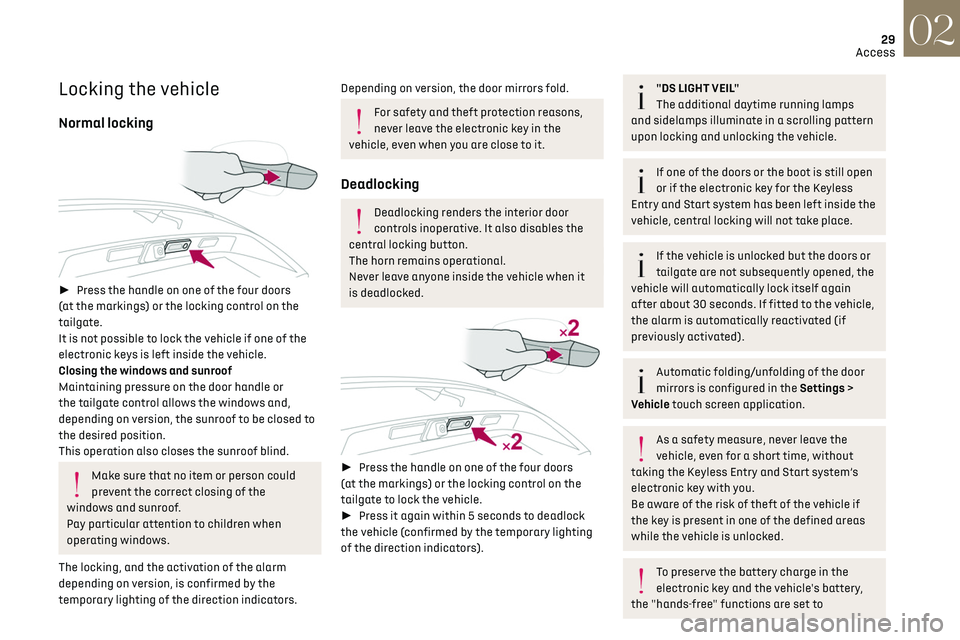
► Press the handle on one of the four doors
(at the markings) or the locking control on the
tailgate.
It is not possible to lock the vehicle if one of the
electronic keys is left inside the vehicle.
Closing the windows and sunroof
Maintaining pressure on the door handle or
the tailgate control allows the windows and,
depending on version, the sunroof to be closed to
the desired position.
This operation also closes the sunroof blind.
Make sure that no item or person could
prevent the correct closing of the
windows and sunroof.
Pay particular attention to children when
operating windows.
The locking, and the activation of the alarm
depending on version, is confirmed by the
temporary lighting of the direction indicators.
Depending on version, the door mirrors fold.
For safety and theft protection reasons,
never leave the electronic key in the
vehicle, even when you are close to it.
Deadlocking
Deadlocking renders the interior door
controls inoperative. It also disables the
central locking button.
The horn remains operational.
Never leave anyone inside the vehicle when it
is deadlocked.
► Press the handle on one of the four doors
(at the markings) or the locking control on the
tailgate to lock the vehicle.
► Press it again within 5 seconds to deadlock
the vehicle (confirmed by the temporary lighting
of the direction indicators).
"DS LIGHT VEIL"
The additional daytime running lamps
and sidelamps illuminate in a scrolling pattern
upon locking and unlocking the vehicle.
If one of the doors or the boot is still open
or if the electronic key for the Keyless
Entry and Start
s
ystem has been left inside the
vehicle, central locking will not take place.
If the vehicle is unlocked but the doors or
tailgate are not subsequently opened, the
vehicle will automatically lock itself again
after about 30 seconds. If fitted to the vehicle,
the alarm is automatically reactivated (if
previously activated).
Automatic folding/unfolding of the door
mirrors is configured in the Settings >
Vehicle touch screen application.
As a safety measure, never leave the
vehicle, even for a short time, without
taking the Keyless Entry and Start system’s
electronic key with you.
Be aware of the risk of theft of the vehicle if
the key is present in one of the defined areas
while the vehicle is unlocked.
To preserve the battery charge in the
electronic key and the vehicle's battery,
the "hands-free" functions are set to
Page 32 of 244
30Access02
hibernation mode after 21 days without use. To
restore these functions, press one of the
remote control buttons or start the engine with
the electronic key in the reader.
For more information on starting with the
Keyless Entry and Start system, refer to the
corresponding section.
Electrical interference
The electronic key may not work if it
is close to an electronic device (e.g. mobile
telephone (switched on or on standby), laptop
computer, strong magnetic fields). If this
occurs, move the electronic key away from the
electronic device.
Central locking
Manual
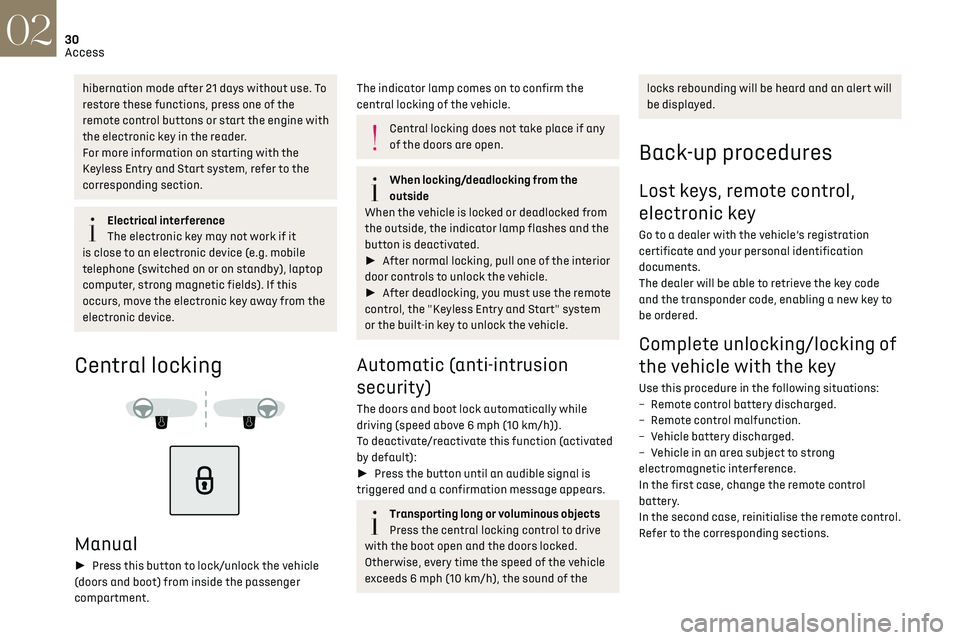
► Press this button to lock/unlock the vehicle
(doors and boot) from inside the passenger
compartment.
The indicator lamp comes on to confirm the
central locking of the vehicle.
Central locking does not take place if any
of the doors are open.
When locking/deadlocking from the
outside
When the vehicle is locked or deadlocked from
the outside, the indicator lamp flashes and the
button is deactivated.
► After normal locking, pull one of the interior
door controls to unlock the vehicle.
► After deadlocking, you must use the remote
control, the "Keyless Entry and Start" system
or the built-in key to unlock the vehicle.
Automatic (anti-intrusion
security)
The doors and boot lock automatically while
driving (speed above 6 mph (10 km/h)).
To deactivate/reactivate this function (activated
by default):
► Press the button until an audible signal is
triggered and a confirmation message appears.
Transporting long or voluminous objects
Press the central locking control to drive
with the boot open and the doors locked.
Otherwise, every time the speed of the vehicle
exceeds 6 mph (10 km/h), the sound of the
locks rebounding will be heard and an alert will
be displayed.
Back-up procedures
Lost keys, remote control,
electronic key
Go to a dealer with the vehicle’s registration
certificate and your personal identification
documents.
The dealer will be able to retrieve the key code
and the transponder code, enabling a new key to
be ordered.
Complete unlocking/locking of
the vehicle with the key
Use this procedure in the following situations:
– R emote control battery discharged.
–
R
emote control malfunction.
–
V
ehicle battery discharged.
–
V
ehicle in an area subject to strong
electromagnetic interference.
In the first case, change the remote control
battery.
In the second case, reinitialise the remote control.
Refer to the corresponding sections.
Page 34 of 244
32
Access02
Swallowing the battery can cause serious
internal burning in only 2 hours and can be
fatal.
If batteries have been swallowed or inserted
into a part of the body, seek immediate
medical advice.
Keep new and used batteries out of the reach
of children.
If the battery compartment does not close
properly, stop using the product and keep it out
of the reach of children.
Risk of explosion if the battery is replaced
with an incorrect type!
Replace the battery with the same type.
Risk of explosion or leaking of
inflammable liquid or gas!
Do not use in/store in/place in an environment
where the temperature is extremely high or
where the pressure is extremely low due to
very high altitude.
Do not try to burn, crush or cut a used battery.
Reinitialising the remote
control
Following replacement of the battery or in the
event of a fault, it may be necessary to reinitialise
the remote control.
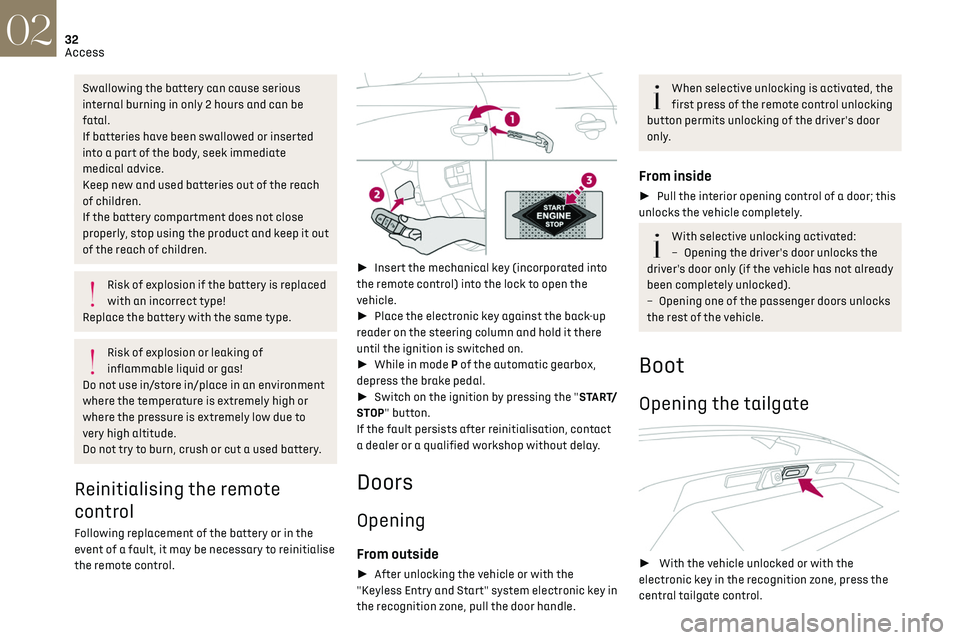
► Insert the mechanical key (incorporated into
the remote control) into the lock to open the
vehicle.
► Place the electronic key against the back-up
reader on the steering column and hold it there
until the ignition is switched on.
► While in mode P of the automatic gearbox,
depress the brake pedal.
► Switch on the ignition by pressing the "START/
STOP" button.
If the fault persists after reinitialisation, contact
a dealer or a qualified workshop without delay.
Doors
Opening
From outside
► After unlocking the vehicle or with the
"Keyless Entry and Start" system electronic key in
the recognition zone, pull the door handle.
When selective unlocking is activated, the
first press of the remote control unlocking
button permits unlocking of the driver's door
only.
From inside
► Pull the interior opening control of a door; this
unlocks the vehicle completely.
With selective unlocking activated:
– O pening the driver's door unlocks the
driver's door only (if the vehicle has not already
been completely unlocked).
–
O
pening one of the passenger doors unlocks
the rest of the vehicle.
Boot
Opening the tailgate
► With the vehicle unlocked or with the
electronic key in the recognition zone, press the
central tailgate control.
Page 35 of 244

33
Access02
► Raise the tailgate.
When selective unlocking is activated, the
electronic key must be close to the rear of
the vehicle.
The tailgate is not designed to hold a
bicycle carrier.
Closing the tailgate
► Lower the tailgate using the interior grips.
► Release the grips and press down on the
outside of the tailgate to close it.
In the event of a malfunction or if you
experience difficulty opening or closing
the tailgate, have it checked by a dealer or a
qualified workshop without delay, to avoid the
issue deteriorating and prevent any risk of the
tailgate dropping, potentially causing serious
injury.
Back-up release
To manually unlock the boot in the event of a
battery or central locking failure.
Unlocking
► Fold the rear seats to gain access to the lock
from inside the boot.
► Insert a small screwdriver into hole A of the
lock to unlock the boot.
► Move the latch to the left.
Locking after closing
If the fault persists after closing again, the boot
will remain locked.
In the event of a fault with the central
locking system, it is essential to
disconnect the battery to lock the boot and so
ensure complete locking of the vehicle.
Motorised tailgate
(Depending on version)
The motorised tailgate must only be operated
with the vehicle stationary.
Check that there is enough space to allow
for the movement of the motorised
tailgate.
Never insert a finger in the locking system
of the motorised tailgate - risk of serious
injury!
Anti-pinch
The motorised tailgate has an obstacle detection
system that automatically interrupts and reverses
its movement by a few degrees, to allow the
obstacle to be cleared.
Please note that this anti-pinch system is not
active at the end of the closing travel (around
1 cm from completely closed).
To avoid the risk of injury through
pinching or trapping, before and during
operation of the motorised tailgate:
–
ensure tha
t there is no-one close to the rear
of the vehicle.
Page 36 of 244
34
Access02
– monitor the activity of the rear passengers,
particularly any children.
Bicycle carrier/Towing device
The motorised tailgate is not designed to support
a bicycle carrier.
When installing a bicycle carrier on the towing
device with connection of the cable to the trailer
socket, the motorised operation of the tailgate
will be automatically deactivated.
If using a towing device or bicycle carrier
not recommended by the Manufacturer, it
is essential to deactivate the motorised
operation of the tailgate.
Motorised operation
The motorised operation of the tailgate is
configured in the Settings > Vehicle touch
screen application.
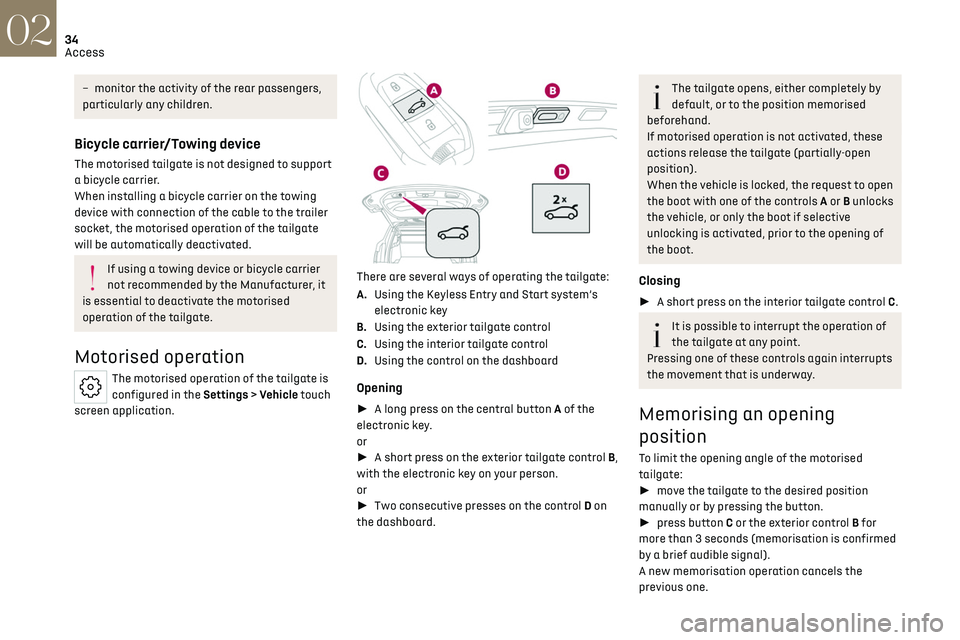
There are several ways of operating the tailgate:
A. Using the Keyless Entry and Start system’s
electronic key
B. Using the exterior tailgate control
C. Using the interior tailgate control
D. Using the control on the dashboard
Opening
► A long press on the central button A of the
electronic key.
or
► A short press on the exterior tailgate control B,
with the electronic key on your person.
or
► Two consecutive presses on the control D on
the dashboard.
The tailgate opens, either completely by
default, or to the position memorised
beforehand.
If motorised operation is not activated, these
actions release the tailgate (partially-open
position).
When the vehicle is locked, the request to open
the boot with one of the controls A or B unlocks
the vehicle, or only the boot if selective
unlocking is activated, prior to the opening of
the boot.
Closing
► A short press on the interior tailgate control C.
It is possible to interrupt the operation of
the tailgate at any point.
Pressing one of these controls again interrupts
the movement that is underway.
Memorising an opening
position
To limit the opening angle of the motorised
tailgate:
► move the tailgate to the desired position
manually or by pressing the button.
► press button C or the exterior control B for
more than 3 seconds (memorisation is confirmed
by a brief audible signal).
A new memorisation operation cancels the
previous one.
Page 39 of 244
37
Access02
► remove the electronic key from the
recognition zone, with the tailgate closed.
For more information on the Towing device
with quickly detachable towball, refer to the
corresponding section.
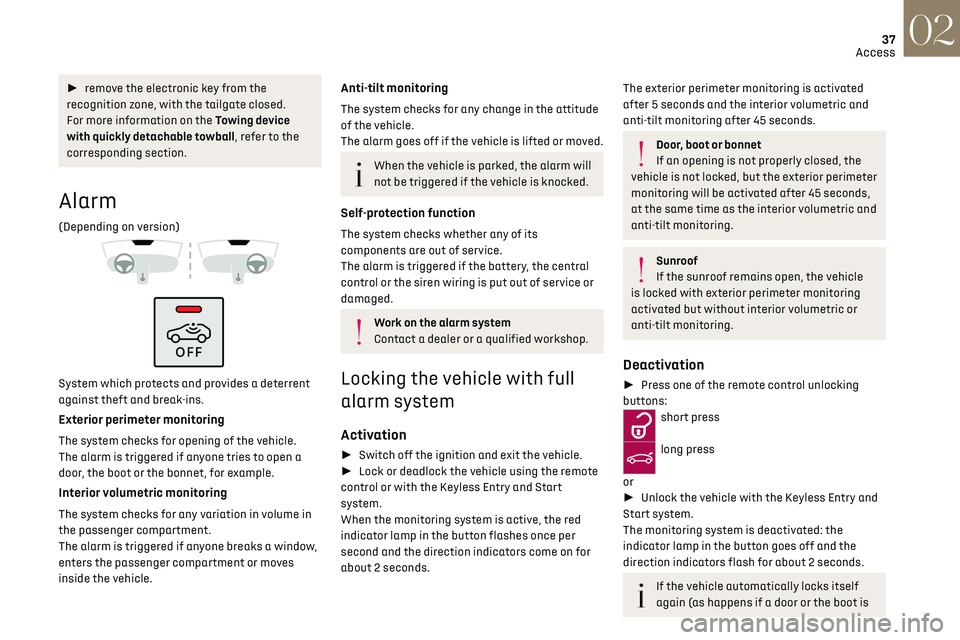
Alarm
(Depending on version)
System which protects and provides a deterrent
against theft and break-ins.
Exterior perimeter monitoring
The system checks for opening of the vehicle.
The alarm is triggered if anyone tries to open a
door, the boot or the bonnet, for example.
Interior volumetric monitoring
The system checks for any variation in volume in
the passenger compartment.
The alarm is triggered if anyone breaks a window,
enters the passenger compartment or moves
inside the vehicle.
Anti-tilt monitoring
The system checks for any change in the attitude
of the vehicle.
The alarm goes off if the vehicle is lifted or moved.
When the vehicle is parked, the alarm will
not be triggered if the vehicle is knocked.
Self-protection function
The system checks whether any of its
components are out of service.
The alarm is triggered if the battery, the central
control or the siren wiring is put out of service or
damaged.
Work on the alarm system
Contact a dealer or a qualified workshop.
Locking the vehicle with full
alarm system
Activation
► Switch off the ignition and exit the vehicle.
► Lock or deadlock the vehicle using the remote
control or with the Keyless Entry and Start
system.
When the monitoring system is active, the red
indicator lamp in the button flashes once per
second and the direction indicators come on for
about 2 seconds.
The exterior perimeter monitoring is activated
after 5 seconds and the interior volumetric and
anti-tilt monitoring after 45 seconds.
Door, boot or bonnet
If an opening is not properly closed, the
vehicle is not locked, but the exterior perimeter
monitoring will be activated after 45 seconds,
at the same time as the interior volumetric and
anti-tilt monitoring.
Sunroof
If the sunroof remains open, the vehicle
is locked with exterior perimeter monitoring
activated but without interior volumetric or
anti-tilt monitoring.
Deactivation
► Press one of the remote control unlocking
buttons:
short press
long press
or
► Unlock the vehicle with the Keyless Entry and
Start system.
The monitoring system is deactivated: the
indicator lamp in the button goes off and the
direction indicators flash for about 2 seconds.
If the vehicle automatically locks itself
again (as happens if a door or the boot is
Page 40 of 244
38
Access02
not opened within 30 seconds of unlocking),
the monitoring system is automatically
reactivated.
Locking the vehicle with
exterior perimeter monitoring
only
Deactivate the interior volumetric monitoring to
avoid the unwanted triggering of the alarm, in
certain cases such as:
–
Sligh
tly open window.
–
W
ashing the vehicle.
–
C
hanging a wheel.
–
T
owing the vehicle.
–
Transport on a ship or ferry
.
Deactivating the interior volumetric and
anti-tilt monitoring
► Switch off the ignition and within 10 seconds
press the alarm button until its red indicator lamp
is on fixed.
► Get out of the vehicle.
► Immediately lock the vehicle using the remote
control or the Keyless Entry and Start system.
Only the exterior perimeter monitoring is
activated; the button's red indicator lamp flashes
once every second.
To take effect, this deactivation must be
carried out after each time the ignition is
switched off.
Reactivating the interior volumetric and
anti-tilt monitoring
► Deactivate the exterior perimeter monitoring
by unlocking the vehicle using the remote control
or the Keyless Entry and Start system.
The indicator lamp in the button goes off.
► Reactivate all monitoring by locking the
vehicle using the remote control or the Keyless
Entry and Start system.
The red indicator lamp in the button once again
flashes every second.
Triggering of the alarm
This is indicated by sounding of the siren and
flashing of the direction indicators for 30
seconds.
Depending on the country of sale, certain
monitoring functions remain active until
the alarm has been triggered eleven times
consecutively.
When the vehicle is unlocked using the remote
control or the Keyless Entry and Start system,
rapid flashing of the red indicator lamp in the
button informs you that the alarm was triggered
during your absence. When the ignition is
switched on, this flashing stops.
Failure of the remote control
To deactivate the monitoring functions:
► Unlock the vehicle using the key in the front
left-hand door lock.
► Open the door; the alarm is triggered. ►
Switch on the ignition; this stops the alarm.
The indicator lamp in the button goes off.
Locking the vehicle without
activating the alarm
► Lock the vehicle using the key (built-in the
remote control) in the front left-hand door lock.
Automatic activation
(Depending on version)
The system is activated automatically 2 minutes
after the last door or the boot is closed.
► To avoid triggering the alarm on entering the
vehicle, first press the unlocking button on the
remote control or unlock the vehicle using the
"Keyless Entry and Start" system.
Malfunction
When the ignition is switched on, the fixed
lighting of the red indicator lamp in the button
indicates a system malfunction.
Have it checked by a dealer or a qualified
workshop.
Page 156 of 244
154
Practical information07
the connector on the vehicle. A warning is
displayed on the instrument panel.
While charging is in progress, unlocking the
vehicle will cause the charging to stop.
If no action is taken on one of the openings
(door or boot) or on the charging nozzle, the
vehicle will lock again after 30 seconds and
charging will resume automatically.
Never work under the bonnet:
–
Some areas remain v
ery hot, even an hour
after charging ends - risk of burns!
–
The fan ma
y start at any time - risk of cuts or
strangulation!
After charging
Check that the charging flap is closed.
Do not leave the cable connected to the
domestic power socket - risk of short-circuit
or electrocution in the event of contact with or
immersion in water!
Charging procedure
Connection
► Before charging, check that the gear selector
is in mode P and the ignition is off, otherwise
charging is impossible.
► Press on the rear of the charging flap to open
it and check that there are no foreign bodies on
the vehicle's charging connector.
The light guides in the flap come on white.
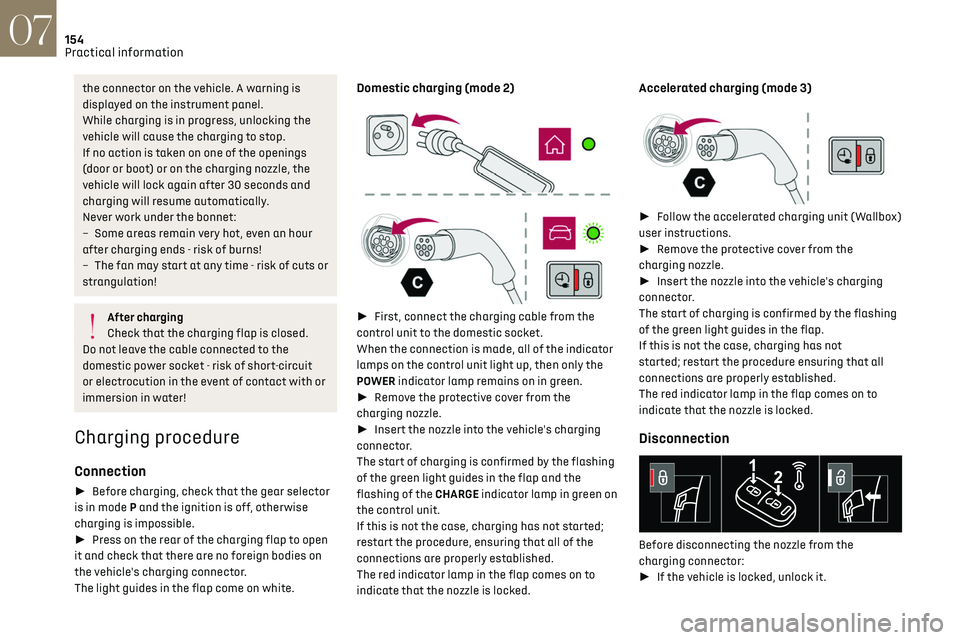
Domestic charging (mode 2)
► First, connect the charging cable from the
control unit to the domestic socket.
When the connection is made, all of the indicator
lamps on the control unit light up, then only the
POWER indicator lamp remains on in green.
► Remove the protective cover from the
charging nozzle.
► Insert the nozzle into the vehicle's charging
connector.
The start of charging is confirmed by the flashing
of the green light guides in the flap and the
flashing of the CHARGE indicator lamp in green on
the control unit.
If this is not the case, charging has not started;
restart the procedure, ensuring that all of the
connections are properly established.
The red indicator lamp in the flap comes on to
indicate that the nozzle is locked.
Accelerated charging (mode 3)
► Follow the accelerated charging unit (Wallbox)
user instructions.
► Remove the protective cover from the
charging nozzle.
► Insert the nozzle into the vehicle's charging
connector.
The start of charging is confirmed by the flashing
of the green light guides in the flap.
If this is not the case, charging has not
started; restart the procedure ensuring that all
connections are properly established.
The red indicator lamp in the flap comes on to
indicate that the nozzle is locked.
Disconnection
Before disconnecting the nozzle from the
charging connector:
► If the vehicle is locked, unlock it.
Page 185 of 244
183
In the event of a breakdown08
► Lift the plastic cover on the (+) terminal, if the
vehicle has one.
► Connect the cables of charger B as follows:
•
the po
sitive (+) red cable to the (+) terminal
of battery A,
•
the nega
tive (-) black cable to earth point C on
the vehicle.
► At the end of the charging operation, switch
off charger B before disconnecting the cables
from battery A.
If this label is present, use only a 12 V
charger to avoid causing irreversible
damage to the electrical components.
24V
12V
Disconnecting/reconnecting the battery
In order to maintain an adequate state of
charge for starting the engine, we recommend
disconnecting the battery if the vehicle is to be
unused for an extended period.
Before disconnecting the battery:
► Close all openings (doors, boot, windows,
roof).
► Switch off all electricity-consuming devices
(audio system, wipers, lamps, etc.).
► Switch off the ignition and wait for 4 minutes. After accessing the battery, it is only necessary to
disconnect the (+) terminal.
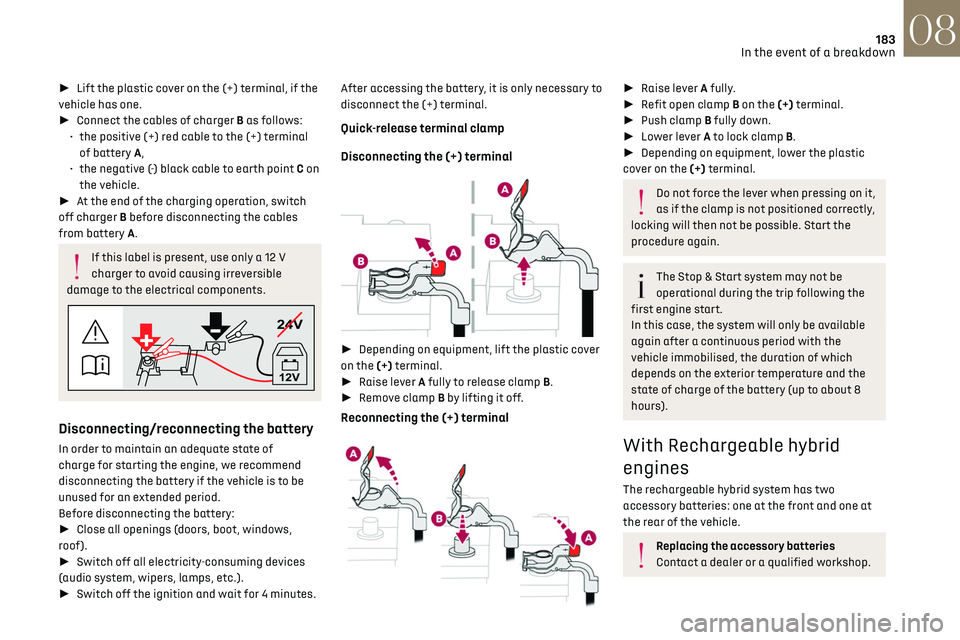
Quick-release terminal clamp
Disconnecting the (+) terminal
►
Depending on equipment, lift the plastic cover
on the (+) terminal.
► Raise lever A fully to release clamp B.
► Remove clamp B by lifting it off.
Reconnecting the (+) terminal
► Raise lever A fully.
► Refit open clamp B on the (+) terminal.
► Push clamp B fully down.
► Lower lever A to lock clamp B.
► Depending on equipment, lower the plastic
cover on the (+) terminal.
Do not force the lever when pressing on it,
as if the clamp is not positioned correctly,
locking will then not be possible. Start the
procedure again.
The Stop & Start system may not be
operational during the trip following the
first engine start.
In this case, the system will only be available
again after a continuous period with the
vehicle immobilised, the duration of which
depends on the exterior temperature and the
state of charge of the battery (up to about 8
hours).
With Rechargeable hybrid
engines
The rechargeable hybrid system has two
accessory batteries: one at the front and one at
the rear of the vehicle.
Replacing the accessory batteries
Contact a dealer or a qualified workshop.