key CITROEN DS7 CROSSBACK 2022 Owner's Manual
[x] Cancel search | Manufacturer: CITROEN, Model Year: 2022, Model line: DS7 CROSSBACK, Model: CITROEN DS7 CROSSBACK 2022Pages: 244, PDF Size: 6.87 MB
Page 100 of 244
98Driving06
Move the electronic key so that the engine can
be started or switched off.
If there is still a problem, refer to the "Key not
detected - Back-up starting or Back-up switch-
off" section.
Illuminated animations of the "START/
STOP" button indicate the presence or
absence of the electronic key in the passenger
compartment.
Starting
► Select mode P or N on the automatic gearbox,
then depress the brake pedal.
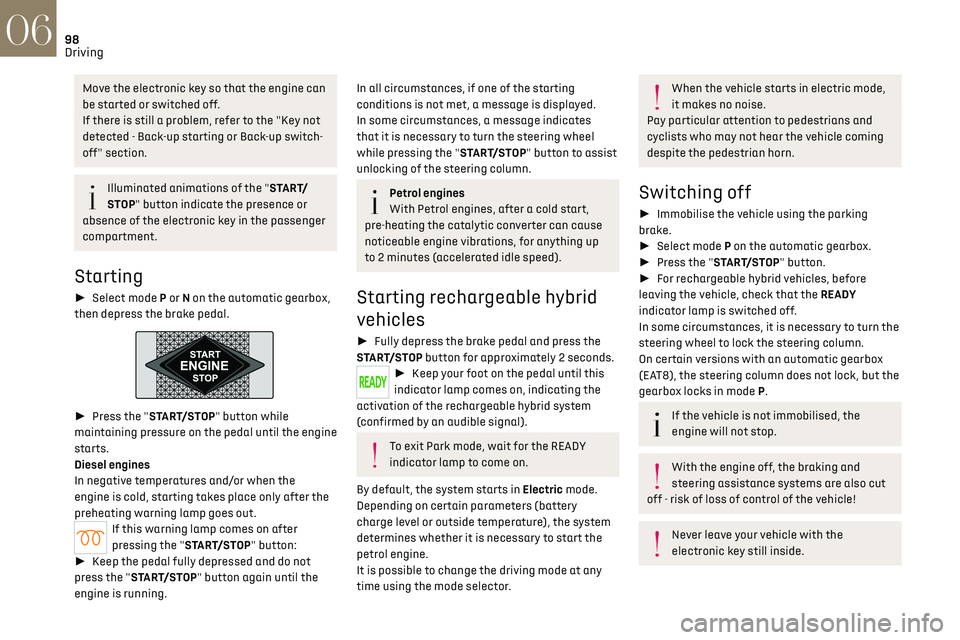
► Press the "START/STOP" button while
maintaining pressure on the pedal until the engine
starts.
Diesel engines
In negative temperatures and/or when the
engine is cold, starting takes place only after the
preheating warning lamp goes out.
If this warning lamp comes on after
pressing the "START/STOP" button:
► Keep the pedal fully depressed and do not
press the "START/STOP" button again until the
engine is running.
In all circumstances, if one of the starting
conditions is not met, a message is displayed.
In some circumstances, a message indicates
that it is necessary to turn the steering wheel
while pressing the "START/STOP" button to assist
unlocking of the steering column.
Petrol engines
With Petrol engines, after a cold start,
pre-heating the catalytic converter can cause
noticeable engine vibrations, for anything up
to 2 minutes (accelerated idle speed).
Starting rechargeable hybrid
vehicles
► Fully depress the brake pedal and press the
START/STOP button for approximately 2 seconds.
► Keep your foot on the pedal until this
indicator lamp comes on, indicating the
activation of the rechargeable hybrid system
(confirmed by an audible signal).
To exit Park mode, wait for the READY
indicator lamp to come on.
By default, the system starts in Electric mode.
Depending on certain parameters (battery
charge level or outside temperature), the system
determines whether it is necessary to start the
petrol engine.
It is possible to change the driving mode at any
time using the mode selector.
When the vehicle starts in electric mode,
it makes no noise.
Pay particular attention to pedestrians and
cyclists who may not hear the vehicle coming
despite the pedestrian horn.
Switching off
► Immobilise the vehicle using the parking
brake.
► Select mode P on the automatic gearbox.
► Press the "START/STOP" button.
► For rechargeable hybrid vehicles, before
leaving the vehicle, check that the READY
indicator lamp is switched off.
In some circumstances, it is necessary to turn the
steering wheel to lock the steering column.
On certain versions with an automatic gearbox
(EAT8), the steering column does not lock, but the
gearbox locks in mode P.
If the vehicle is not immobilised, the
engine will not stop.
With the engine off, the braking and
steering assistance systems are also cut
off - risk of loss of control of the vehicle!
Never leave your vehicle with the
electronic key still inside.
Page 101 of 244
99Driving06
Switching on the ignition
without starting the engine
With the electronic key in the passenger
compartment, pressing the "START/STOP" button,
without depressing any of the pedals, allows the
ignition to be switched on without starting the
engine.
► Press this button again to switch off the
ignition and allow the vehicle to be locked.
Key not detected
Back-up starting
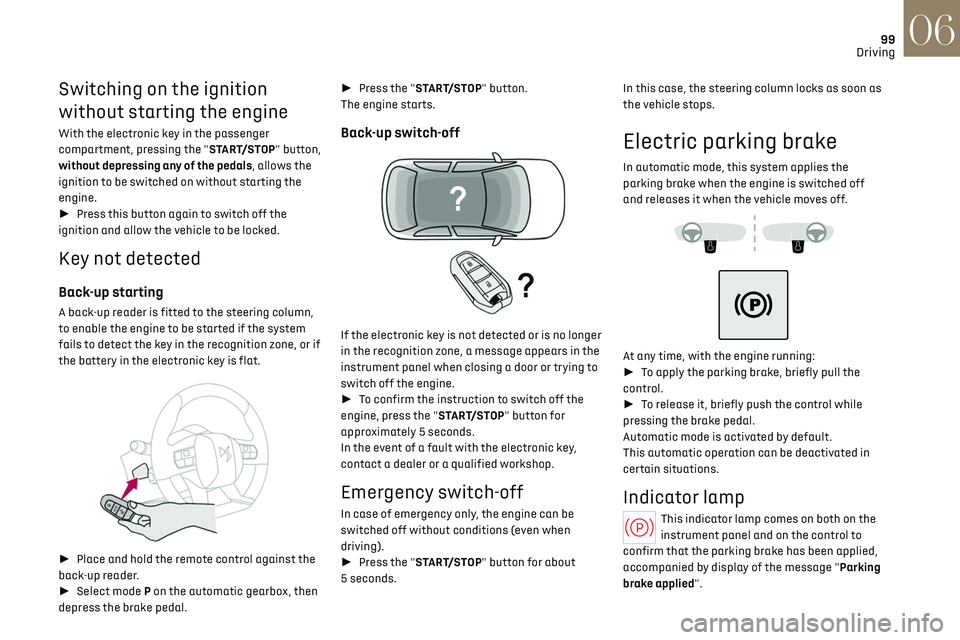
A back-up reader is fitted to the steering column,
to enable the engine to be started if the system
fails to detect the key in the recognition zone, or if
the battery in the electronic key is flat.
► Place and hold the remote control against the
back-up reader.
► Select mode P on the automatic gearbox, then
depress the brake pedal. ►
Press the "START/STOP" button.
The engine starts.
Back-up switch-off
If the electronic key is not detected or is no longer
in the recognition zone, a message appears in the
instrument panel when closing a door or trying to
switch off the engine.
► To confirm the instruction to switch off the
engine, press the "START/STOP" button for
approximately 5 seconds.
In the event of a fault with the electronic key,
contact a dealer or a qualified workshop.
Emergency switch-off
In case of emergency only, the engine can be
switched off without conditions (even when
driving).
► Press the "START/STOP" button for about
5 seconds. In this case, the steering column locks as soon as
the vehicle stops.
Electric parking brake
In automatic mode, this system applies the
parking brake when the engine is switched off
and releases it when the vehicle moves off.
At any time, with the engine running:
► To apply the parking brake, briefly pull the
control.
► To release it, briefly push the control while
pressing the brake pedal.
Automatic mode is activated by default.
This automatic operation can be deactivated in
certain situations.
Indicator lamp
This indicator lamp comes on both on the
instrument panel and on the control to
confirm that the parking brake has been applied,
accompanied by display of the message "Parking
brake applied".
Page 152 of 244

150
Practical information07
Type 2POWER
Green: electrical connection established;
charging can begin.
CHARGE
Flashing green: charging in progress or
temperature pre-conditioning activated.
Fixed green: charging complete.
FA U LT
Red: fault; charging not permitted or must
be stopped immediately. Check that everything
is connected correctly and that the electrical
system is not faulty.
If the indicator lamp does not go off, contact a
dealer or a qualified workshop.
Upon plugging the charging cable into a domestic
socket, all of the indicator lamps come on briefly.
If no indicator lamps come on, check the domestic
socket's circuit-breaker. –
If the circ
uit-breaker has tripped, contact a
professional to check that your electricity supply
is compatible and carry out any necessary repairs.
–
If the circ
uit-breaker has not tripped, stop
using the charging cable and contact a dealer or a
qualified workshop.
Type 1 control unit label - Recommendations
1. Refer to the handbook before use.
2. Incorrect use of this charging cable may
result in fire, property damage and serious
injury or death by electrocution!
3. Always use a correctly earthed power socket,
protected by a 30 mA residual current device.
4. Always use an electrical socket protected
by a circuit-breaker appropriate for the
electrical circuit’s current rating.
5. The weight of the control unit must not be
borne by the electrical socket, plug and
cables.
6. Never use this charging cable if it is defective
or in any way damaged. 7.
Never attempt to repair or open this charging
cable. It contains no repairable parts -
replace the charging cable if it is damaged.
8. Never immerse this charging cable in water.
9. Never use this charging cable with an
extension cable, a multi-plug socket,
a conversion adaptor or on a damaged
electrical socket.
10. Do not unplug the plug from the wall as a
means of stopping charging.
11. Do not force the connector if it is locked into
the vehicle.
12. Immediately stop charging, by locking and
then unlocking the vehicle using the remote
control key, if the charging cable or wall
socket feel burning hot to the touch.
13. This charging cable includes components
liable to cause electrical arcing or sparks. Do
not expose to flammable vapours.
14. Only use this charging cable with DS
AUTOMOBILES vehicles.
15. Never plug the cable into the wall socket (or
unplug it) with wet hands.
Type 2 control unit label - State of indicator
lamps
State of the indicator
lamp
Off
Page 154 of 244

152
Practical information07
POWERCHARGE FA U LT SymbolDescription
(red)
Control unit malfunction. No charging allowed.
If an error indicator reappears after a manual reset,
the control unit must be checked by a dealer before
the next charge.
(green)
(green)
(red)
The control unit is in diagnostic mode.
Manual reset procedure
The control unit can be reset by simultaneously disconnecting the charging connector and the wall socket.
Then, reconnect the wall socket first. For more information, refer to the handbook.
Type 2 control unit label - Recommendations
Refer to the handbook before use.
1. Incorrect use of this charging cable may
result in fire, property damage and serious
injury or death by electrocution!
2. Always use a correctly earthed power socket,
protected by a 30 mA residual current device.
3. Always use an electrical socket protected
by a circuit-breaker appropriate for the
electrical circuit’s current rating. 4.
The weight of the control unit must not be
borne by the electrical socket, plug and
cables.
5. Never use this charging cable if it is defective
or in any way damaged.
6. Never attempt to repair or open this charging
cable. It contains no repairable parts -
replace the charging cable if it is damaged.
7. Never immerse this charging cable in water.
8. Never use this charging cable with an
extension cable, a multi-plug socket,
a conversion adaptor or on a damaged
electrical socket.
9. Do not unplug the plug from the wall as a
means of stopping charging. 10.
Immediately stop charging, by locking and
then unlocking the vehicle using the remote
control key, if the charging cable or wall
socket feel burning hot to the touch.
11. This charging cable includes components
liable to cause electrical arcing or sparks. Do
not expose to flammable vapours.
12. Only use this charging cable with DS
AUTOMOBILES vehicles.
13. Never plug the cable into the wall socket (or
unplug it) with wet hands.
14. Do not force the connector if it is locked into
the vehicle.
Page 158 of 244

156
Practical information07
If using accessories attached to the
towing device (e.g. bicycle carriers, tow
boxes):
–
Comply with the maximum authorised no
se
weight.
–
Do no
t transport more than 4 conventional
bicycles or 2 electric bicycles.
When loading bicycles onto a bicycle carrier
on a towball, be sure to place the heaviest
bicycles as close as possible to the vehicle.
Observe the legislation in force in the
country where you are driving.
Vehicle equipped with motorised tailgate
with hands-free function (Hands-Free
Tailgate Access)
To avoid unintentionally opening the motorised
tailgate when operating the towing device:
–
Deactiv
ate this function in advance in the
vehicle's configuration application.
–
O
r remove the electronic key from the
recognition zone, with the tailgate closed.
Rechargeable hybrid vehicles
A rechargeable hybrid vehicle with 20"
wheels (R20) cannot be fitted with a towing
device.
It is therefore not possible to tow a trailer or
caravan.
Towing device with
retractable ball joint
When this towing device is not in use, it is folded
away underneath the rear bumper.
No tools are required to install or stow it.
Before any operation, the vehicle must be
stationary with the parking brake applied.
The area close to the exhaust pipe may reach a
high temperature: risk of burns!
Vehicle equipped with motorised tailgate
with hands-free function (Hands-Free
Tailgate Access)
To avoid unintentional opening of the tailgate,
follow the recommendations on the Towing
device by referring to the corresponding
section.
Unlocking handle
The towball is locked in either the storage
position or the usage position.
The unlocking handle is behind the rear bumper,
protected by a storage case.
To reach the handle:
► Pass your hand flat under the rear bumper
with the palm facing upwards.
► Insert your hand into the storage case and
grasp the handle.
To unlock the towball:
► Pull the handle firmly downwards to release it.
The towball hangs, hooked onto its shaft.
Page 168 of 244
166
Practical information07
Never store AdBlue® containers in your
vehicle.
Precautions for use
AdBlue® is a urea-based solution. This fluid is non-
flammable, colourless and odourless (when kept
in a cool place).
In the event of contact with the skin, wash the
affected area with soap and running water. In the
event of contact with the eyes, immediately rinse
the eyes with large amounts of water or with an
eye wash solution for at least 15 minutes. Seek
medical attention if you feel a persistent burning
sensation or irritation.
If swallowed, immediately wash out the mouth
with clean water and then drink plenty of water.
In certain conditions (high temperature, for
example), the risk of release of ammonia cannot
be excluded: do not inhale the fluid. Ammonia
vapours have an irritant effect on mucous
membranes (eyes, nose and throat).
Store AdBlue® out of the reach of children,
in its original container.
Procedure
Before starting the top-up procedure, ensure that
the vehicle is parked on a flat and level surface.
In wintry conditions, ensure that the temperature
of the vehicle is above -11°C. Otherwise the
AdBlue
® may be frozen and so cannot be poured
into the tank. Park the vehicle in a warmer area
for a few hours to allow the top-up to be carried
out.
Never pour the AdBlue® into the Diesel fuel
tank.
If any AdBlue® is splashed, or if there are
any spillages on the bodywork, rinse
immediately with cold water or wipe with a
damp cloth.
If the fluid has crystallised, clean it off using a
sponge and hot water.
Important: in the event of a top-up after an
AdBlue breakdown, you must wait about
5 minutes before switching on the ignition,
without opening the driver's door, unlocking
the vehicle or bringing the electronic key into
the passenger compartment.
Switch on the ignition, then wait for 10
seconds before starting the engine.
► Press the "START/STOP" button to switch off
the engine.
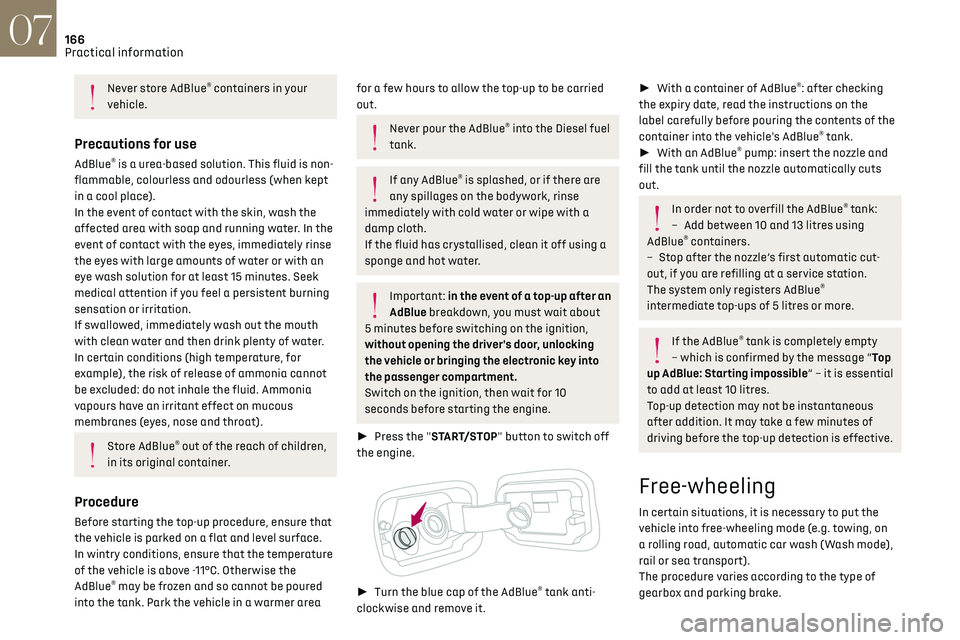
► Turn the blue cap of the AdBlue® tank anti-
clockwise and remove it.
► With a container of AdBlue®: after checking
the expiry date, read the instructions on the
label carefully before pouring the contents of the
container into the vehicle's AdBlue
® tank.
► With an AdBlue® pump: insert the nozzle and
fill the tank until the nozzle automatically cuts
out.
In order not to overfill the AdBlue® tank:
–
Add betw
een 10 and 13 litres using
AdBlue
® containers.
–
St
op after the nozzle’s first automatic cut-
out, if you are refilling at a service station.
The system only registers AdBlue
®
intermediate top-ups of 5 litres or more.
If the AdBlue® tank is completely empty
– which is confirmed by the message “Top
up AdBlue: Starting impossible” – it is essential
to add at least 10 litres.
Top-up detection may not be instantaneous
after addition. It may take a few minutes of
driving before the top-up detection is effective.
Free-wheeling
In certain situations, it is necessary to put the
vehicle into free-wheeling mode (e.g. towing, on
a rolling road, automatic car wash (Wash mode),
rail or sea transport).
The procedure varies according to the type of
gearbox and parking brake.
Page 169 of 244

167
Practical information07
Never leave the vehicle unattended with
the vehicle into free-wheeling mode.
/
Release procedure
► With the vehicle stationary and the engine
running, select mode N and switch off the engine.
Within 5 seconds:
► Switch on the ignition.
► While depressing the brake pedal, move the
push selector forwards or backwards to confirm
mode N.
► While depressing the brake pedal, press the
control to release the parking brake.
► Release the brake pedal, switch off the
ignition.
If the 5-second time limit is exceeded, the
gearbox engages mode P; it is then
necessary to restart the procedure.
Reverting to normal operation
► While depressing the brake pedal, restart the
engine and select mode P.
Keyless Entry and Start
You must not depress the brake pedal
while switching the ignition on again, then
switching it off. If you do, the engine will start,
requiring you to restart the procedure.
Advice on care and
maintenance
General recommendations
Observe the following recommendations to avoid
damaging the vehicle.
Exterior
Never use a high-pressure jet wash in the
engine compartment - risk of damaging
the electrical components!
Do not wash the vehicle in bright sunshine or
extremely cold conditions.
When washing the vehicle in an automatic
roller-brush car wash, be sure to lock the
doors and, depending on version, move the
electronic key away and deactivate the
"hands-free" function (Hands-Free Tailgate
Access).
When using a pressure washer, keep the jet
nozzle at a minimum distance of 30 cm from
the vehicle (particularly when cleaning areas
containing chipped paint, sensors or seals).
Promptly clean up any stains containing
chemicals liable to damage the vehicle's
paintwork (including tree resin, bird droppings,
insect secretions, pollen and tar).
Depending on the environment, clean the
vehicle frequently to remove salty deposits
(in coastal areas), soot (in industrial areas)
and mud/salts (in wet or cold areas). These
substances can be highly corrosive.
Contact a dealer or a qualified workshop for
advice on removing stubborn stains requiring
special products (such as tar or insect
removers).
Preferably, have paint touch-ups performed by
a dealer or a qualified workshop.
Interior
When washing the vehicle, never use a
water hose or high-pressure jet to clean
the interior.
Liquids carried in cups or other open
containers can spill, presenting a risk of
damage to the instruments and controls and
the controls located on the centre console. Be
vigilant!
To clean instrument panels, touch screens
or other displays, wipe gently with a soft,
dry cloth. Do not use products (e.g. alcohol,
disinfectant) or soapy water directly on these
surfaces - risk of damage!
Page 197 of 244
195DS IRIS SYSTEM - 12" touch screen Infotainment system10
– Time.
– Q uick access to the Mirror Screen® functions
(associated with a connected smartphone).
Swipe down from the upper edge of the touch
screen to access the notifications centre and
display a list of quick settings :Guest, Privacy
Settings, Brightness, My Devices, night mode, etc.
Principles
► Use this button (HOME) to display the
most recent home page used; a second
press displays the first home page, then press the
virtual buttons displayed on the touch screen.
Scroll through the home pages by sliding
your finger along the screen to the right or
to the left.
Principle of movement in the system
Depending on the pages displayed on the screen,
scroll through the text or the menu (on the left
side of the screen) by sliding your finger, as with
a smartphone.
Touch buttons
Display/hide the context menu.
Return to the previous page.
► To change the status of a function, press the
description for the corresponding line (change
confirmed by the slider moving to the right/left:
function activated/deactivated).
Access to additional information about the
function.
Access to a function’s settings.
Add/delete shortcuts.
Configuring profiles
Press the "Settings" application.
In the list, select the "Profile" tab.
The screen displays a "Guest" profile built
into the system and allows you to create and
personalise several new profiles with or without
an associated mobile device.
The "Guest" profile has a default display
with the possibility of adding to it and/or
returning it to its initial configuration. This profile
is built into the system and cannot be deleted.
Each profile created can be associated
with a mobile device of your choice
connected via Bluetooth
®; the Bluetooth® function
of the mobile device must first be activated. This
association allows the system to detect your
presence in the vehicle when it starts and to
propose the activation of your personalised
profile.
The connected mobile device serves as an access
key to the profile and restores the last value of the
associated Private Mode.
If a profile is not connected to the mobile device,
the last profile used will be highlighted.
Select "Create Profile", then follow the
procedure.
Creating a new profile allows you to personalise: –
Language
, units, Privacy Settings.
–
Screen c
onfiguration, appearance, SMART
TOUCH (depending on equipment).
–
Audio settings, fa
vourite radio stations.
–
Ligh
ting, interior ambience (refer to the "Ease
of use and comfort" section).
–
Na
vigation history, favourite points of interest
(POIs), navigation settings.
–
Some driving aids and the list o
f favourites.
To delete a profile, select it from the list of
profiles then press the bin.
Privacy Settings
"Privacy Settings" management is associated
with each profile. This function is used with:
a "Guest" profile configured by default in "Sharing
Data and Location" mode,
or
a profile to be created in the system, with or
without connection to a mobile device.
If there is no connection to a mobile device, the
mode value will be set to "Sharing Data and
Location" mode.
The connected mobile device serves as an access
key to personal information. First activate the
Bluetooth
® function on the mobile device. The last
saved mode value will be restored.
"Sharing Data and Location"
This mode allows the vehicle to externally
transmit all the personal data needed for each
valid available connected service.
Page 198 of 244
196DS IRIS SYSTEM - 12" touch screen Infotainment system10
The personal data required to use the
connected services is sent to the
providers of these services.
"Sharing Data"
This mode allows the vehicle to externally
transmit all the data needed for each valid
available connected service, with the exception of
vehicle location data (e.g. GPS coordinates).
Some connected services may not
function without the vehicle location
data.
This mode will not be applied to the
emergency call function or to specific
services to which the user has consented
under the terms of commercial contracts
(Connected alarm).
"Private Mode"
This mode does not allow the vehicle to
transmit personal data outside the vehicle.
Connected services will only perform local
processing inside the vehicle with limited
functions.
This mode will not be applied to the
emergency call function or to specific
services to which the user has consented
under the terms of commercial contracts
(Connected alarm).
If the vehicle is used for professional purposes
or under the terms of specific contracts
(e.g. corporate fleet, government assignment),
some privacy modes will not be available for
the user on the screen, depending on the data
sharing needs of the services.
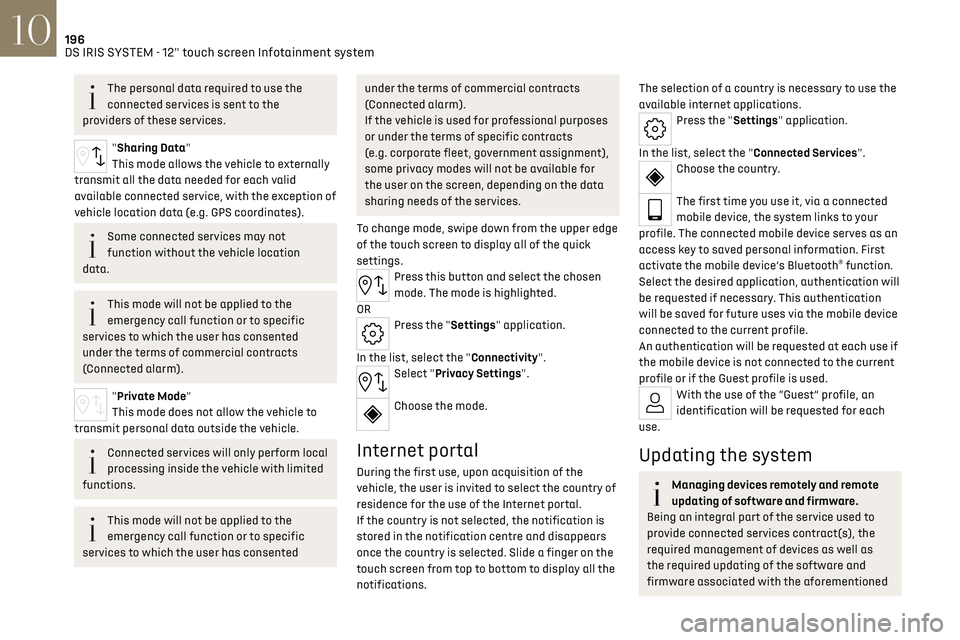
To change mode, swipe down from the upper edge
of the touch screen to display all of the quick
settings.
Press this button and select the chosen
mode. The mode is highlighted.
OR
Press the "Settings" application.
In the list, select the "Connectivity".
Select "Privacy Settings".
Choose the mode.
Internet portal
During the first use, upon acquisition of the
vehicle, the user is invited to select the country of
residence for the use of the Internet portal.
If the country is not selected, the notification is
stored in the notification centre and disappears
once the country is selected. Slide a finger on the
touch screen from top to bottom to display all the
notifications.
The selection of a country is necessary to use the
available internet applications.
Press the "Settings" application.
In the list, select the "Connected Services".
Choose the country.
The first time you use it, via a connected
mobile device, the system links to your
profile. The connected mobile device serves as an
access key to saved personal information. First
activate the mobile device’s Bluetooth
® function.
Select the desired application, authentication will
be requested if necessary. This authentication
will be saved for future uses via the mobile device
connected to the current profile.
An authentication will be requested at each use if
the mobile device is not connected to the current
profile or if the Guest profile is used.
With the use of the “Guest” profile, an
identification will be requested for each
use.
Updating the system
Managing devices remotely and remote
updating of software and firmware.
Being an integral part of the service used to
provide connected services contract(s), the
required management of devices as well as
the required updating of the software and
firmware associated with the aforementioned
Page 206 of 244

204
DS IRIS SYSTEM - 12" touch screen Infotainment system10
To ensure an optimum wireless connection, we
recommend avoiding placing your smartphone
too close to other Wi-Fi networks to which it
can connect automatically.
The cable connection requires that you deactivate
the Android Auto wireless function, in the
Settings menu of the "Android Auto" application
of your smartphone.
Connect the smartphone to the system
using the USB socket compatible with
Mirror Screen
®.
Android Auto is automatically launched a few
seconds after the USB connection has been
established. A validation procedure on the
smartphone has to be followed for the first
connection, with the vehicle stationary.
The smartphone charges when connected by the
USB cable.
The cable connection allows you to avoid
disconnections, especially when passing through
toll booths.
Only one USB socket enables the Mirror
Screen® connection (Android Auto); refer
to the "Ease of use and comfort - Fittings"
section.
It is recommended that you use the device's
original USB cables, preferably with a short
cable to ensure optimum performance.
The wireless connection of an Android Auto
smartphone can be initiated from the "My
Devices" menu. First activate the smartphone’s Android Auto
®
wireless function, in the Settings menu of the
"Android Auto" application of your smartphone.
Press the "Settings" application.
In the list, select the "Connectivity" tab.
Select "My Devices" to display the device
to be connected to Android Auto.
If the device has never been connected to the
system before, it will have to be paired (refer to
the "Bluetooth
® connection" section).
The system detects if the smartphone is
compatible with Android Auto and offers to
connect to it following the pairing process.
If the device has already been connected to the
system via Bluetooth
®, select the device settings
from the list of known devices and choose Android
Auto as the wireless connection mode.
The subsequent automatic connection of the
smartphone requires activation of Bluetooth
® on
your device.
As soon as the connection is established,
press this button to display the "Android
Auto" interface.
To initiate the smartphone voice
commands, press and hold the steering-
mounted control button.
Media
Changing source
Press the "Media" application.
Press this button to change source (radio,
audio streaming via a USB socket,
Bluetooth
® or Mirror Screen®).
Selecting a radio station
Press the "Media" application.
In the list, select the "Player" tab.
Press one of the buttons to perform
an automatic search for radio
stations.
Or
Move the slider to manually search for
frequencies up or down.
Or
Press this button.
Enter the frequency values using the
virtual keypad.
Press this button to confirm.
A list of stations is available by pressing the
“Stations” tab.
Press “Mute” to activate/deactivate the
sound.