engine CITROEN DS7 CROSSBACK 2022 Service Manual
[x] Cancel search | Manufacturer: CITROEN, Model Year: 2022, Model line: DS7 CROSSBACK, Model: CITROEN DS7 CROSSBACK 2022Pages: 244, PDF Size: 6.87 MB
Page 104 of 244
102
Driving06
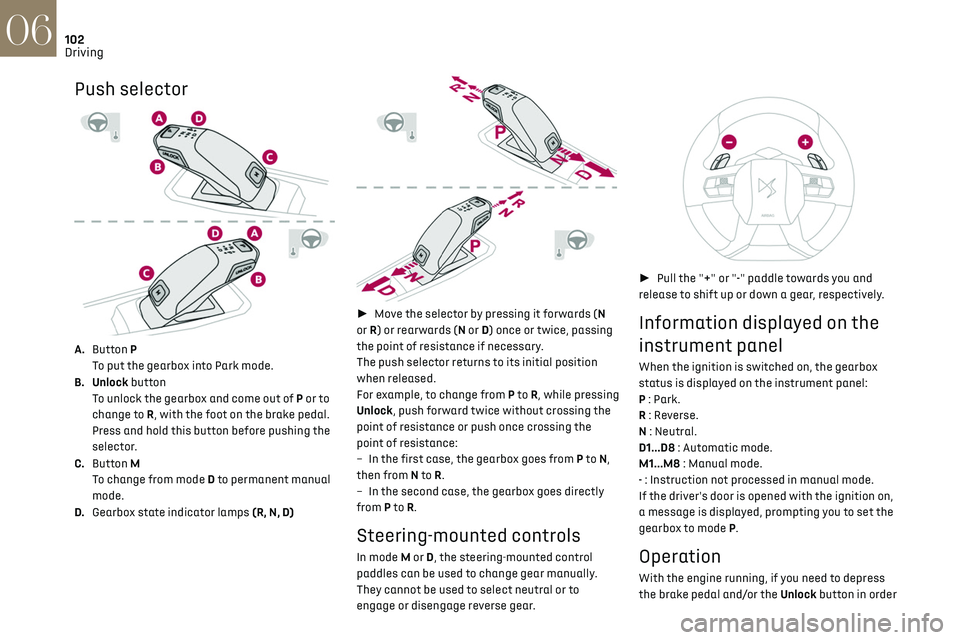
Push selector
A.Button P
To put the gearbox into Park mode.
B. Unlock button To unlock the gearbox and come out of P or to
change to R, with the foot on the brake pedal.
Press and hold this button before pushing the
selector.
C. Button M
To change from mode D to permanent manual
mode.
D. Gearbox state indicator lamps (R, N, D)
► Move the selector by pressing it forwards (N
or R) or rearwards (N or D) once or twice, passing
the point of resistance if necessary.
The push selector returns to its initial position
when released.
For example, to change from P to R, while pressing
Unlock, push forward twice without crossing the
point of resistance or push once crossing the
point of resistance:
–
In the first c
ase, the gearbox goes from P to N,
then from N to R.
–
In the sec
ond case, the gearbox goes directly
from P to R.
Steering-mounted controls
In mode M or D, the steering-mounted control
paddles can be used to change gear manually.
They cannot be used to select neutral or to
engage or disengage reverse gear.
► Pull the "+" or "-" paddle towards you and
release to shift up or down a gear, respectively.
Information displayed on the
instrument panel
When the ignition is switched on, the gearbox
status is displayed on the instrument panel:
P : Park.
R : Reverse.
N : Neutral.
D1...D8 : Automatic mode.
M1...M8 : Manual mode.
- : Instruction not processed in manual mode.
If the driver's door is opened with the ignition on,
a message is displayed, prompting you to set the
gearbox to mode P.
Operation
With the engine running, if you need to depress
the brake pedal and/or the Unlock button in order
Page 105 of 244
103
Driving06
to change modes, an alert message is displayed
on the instrument panel.
Only appropriate mode change instructions are
validated.
With the engine running and the brakes
released, if R, D or M is selected, the
vehicle moves off, even without pressing the
accelerator pedal.
Never press the accelerator and brake
pedals at the same time. Risk of
damaging the gearbox!
If the battery is flat, you must place the chocks
supplied with the vehicle tools against one of
the wheels to immobilise the vehicle.
Unlocking the gearbox
– From mode P: ► Fully depress the brake pedal.
► Press the Unlock button.
► While continuing to press the brake pedal
and the Unlock button, select another mode.
–
F
rom neutral N, at a speed below 3 mph
(5 km/h): ► Fully depress the brake pedal.
► While continuing to depress the brake pedal,
select another mode.
Engaging reverse gear
► Slow down until you come to a stop.
► Depress the brake pedal, then press the
Unlock button.
► While continuing to press, select mode R.
Permanent manual mode
Entering the mode:
► With mode D initially selected.
► Press button M; the green indicator lamp in
the button comes on.
Exiting the mode:
► Push forwards once to return to D.
or
► Press button M; the indicator lamp in the
button goes off.
Switching off the ignition
To switch off the ignition, the vehicle must be
stationary.
Free-wheeling
For more information on Free-wheeling, refer to
the corresponding section.
If you open the driver's door while mode N
is engaged, an audible signal will sound. It
will stop when you close the driver's door
again.
Special aspects of automatic mode
The gearbox selects the gear that provides
optimal performance based on ambient
temperature, road profile, vehicle loading and
driving style.
For maximum acceleration, press the accelerator
fully down (kick-down). The gearbox changes down automatically or holds the selected gear
until the maximum engine speed is reached.
Steering mounted controls allow the driver to
temporarily select a gear, if the vehicle speed and
engine speed conditions permit.
Special aspects of manual mode
The gearbox only changes from one gear to
another if the vehicle speed and engine speed
conditions permit.
Starting the vehicle
From mode P:
►
Fully depress the brake pedal.
► Start the engine.
► Maintaining pressure on the brake pedal,
press the Unlock button.
► Push once or twice rearwards to select
the automatic mode D, or forwards to engage
reverse R.
From neutral N:
► Fully depress the brake pedal.
► Start the engine.
► Maintaining pressure on the brake pedal,
push rearwards to select the automatic mode D,
or forwards, while pressing the Unlock button to
engage reverse R.
Then, from D or R:
► Release the brake pedal.
► Accelerate gradually to automatically release
the electric parking brake.
The vehicle moves off immediately.
Page 106 of 244

104
Driving06
Never try to start the engine by pushing
the vehicle.
Switching the vehicle off
Regardless of the current gearbox mode, mode P
is immediately engaged automatically when the
ignition is switched off.
However, in mode N, mode P will be engaged after
a delay of 5 seconds (time to enable free-wheeling
mode).
Check that mode P has been engaged and
that the electric parking brake was applied
automatically; if not, apply it manually.
The corresponding indicator lamps on the
gear selector and the electric parking
brake control must be on, as well as the
indicator lamps on the instrument panel.
Gearbox malfunction
This warning lamp comes on, accompanied
by an audible signal and the display of a
message.
Visit a dealer or a qualified workshop.
Do not drive faster than 62 mph (100 km/h),
keeping to the speed limit.
Switching of the gearbox to back-up mode
Mode D locks in third gear.
The paddles on the steering wheel do not work
and mode M is no longer accessible.
You may feel a significant jolt on engaging reverse
gear. This will not damage the gearbox.
Selector malfunction
Minor malfunction
This warning lamp comes on, accompanied
by the display of a message and an audible
signal.
Drive carefully.
Visit a dealer or a qualified workshop.
In some cases, the selector indicator lamps may
no longer come on, but the gearbox state is still
displayed on the instrument panel.
Major malfunction
This warning lamp comes on, accompanied
by the display of a message.
You must stop the vehicle.
Stop as soon as it is safe to do so and
switch off the ignition.
Contact a dealer or a qualified workshop.
e-EAT8 electric automatic
gearbox (Rechargeable
hybrid)
Automatic 8-speed gearbox with a push selector
and regenerative braking function.
With the exception of manual mode and
regenerative braking, the operation is identical to
that of other EAT8 gearboxes. For more information on the Operation or the
Malfunctions of the EAT8 gearbox, refer to the
corresponding sections.
Gearbox selector positions
P.
Car park
For parking the vehicle: the front wheels are
blocked.
R. Reverse gear
N. Neutral
For moving the vehicle with the ignition
off: in certain car washing machines, when
towing the vehicle, etc.
D/B. Automatic forward gear (D) or automatic
forward gear with regenerative braking (B)
The gearbox manages gear changes
according to the style of driving, the road
profile and the vehicle load. With the
regenerative braking function activated,
the gearbox also controls braking when the
accelerator pedal is released.
Page 107 of 244

105
Driving06
Push selector
A. Button P
To put the gearbox into Park mode.
B. Unlock button To unlock the gearbox and come out of P or to
change to R, with the foot on the brake pedal.
Press and hold this button before pushing the
selector.
C. Gearbox selector indicator lamps (R, N, D/B)
To exit Park mode, wait for the READY
indicator lamp to come on.
Displays in the instrument
panel
When the ignition is switched on, the status of
the gearbox is displayed in the instrument panel:
P: park.
R: reverse.
N: neutral.
D1 to D8: automatic forward gear.
B1 to B8: automatic forward gear with
regenerative braking function activated.
In all-electric driving, the gear engaged is not
indicated.
The state of the gearbox remains displayed in
the instrument panel for a few seconds after
switching off the ignition.
Regenerative braking (Brake
function)
The regenerative braking function emulates
engine braking, slowing the vehicle with no need
to depress the brake pedal. When the driver
releases the accelerator pedal, the vehicle slows
down more quickly.
The energy recovered when the accelerator
pedal is released is used to partially recharge the
traction battery.
This partial recharging has no effect on
the charge level indicator.
The resulting deceleration of the vehicle
does not cause the brake lamps to come
on.
► From mode D/B , move the push selector
backwards to activate/deactivate the function.
D on the instrument panel is replaced with B.
The state of the function is not saved when the
ignition is switched off.
In some situations (e.g. battery full,
extreme temperatures), the amount of
regenerative braking may be temporarily
limited, resulting in less deceleration.
The driver must remain alert to traffic
conditions and must always be ready to use
the brake pedal.
Regenerative braking using the brake
pedal
Energy recovery can also be produced by
depressing the brake pedal in order to partially
recharge the traction battery, without
affecting the charge level indicator.
DS ACTIVE SCAN
SUSPENSION
This system adapts the vehicle suspension
according to the road condition and profile, the
vehicle load, the driving style and the selected
driving mode.
Page 108 of 244
106
Driving06
The system uses a computer and sensors, which
determine the optimal level of shock absorption
to be applied to each shock absorber.
The system is also associated with a camera,
located at the top of the windscreen, constantly
monitoring the road condition. Based on the
information transmitted by the camera, the
system anticipates possible road defects.
The operation of the system depends on the
driving mode selected (depending on equipment).
For more information on the Driving modes,
please refer to the corresponding section.
Malfunction
In the event of a malfunction, this warning
lamp lights up on the instrument panel.
Have it checked by a dealer or a qualified
workshop.
Driving modes
The driving modes available depend on the engine
and equipment of the vehicle.
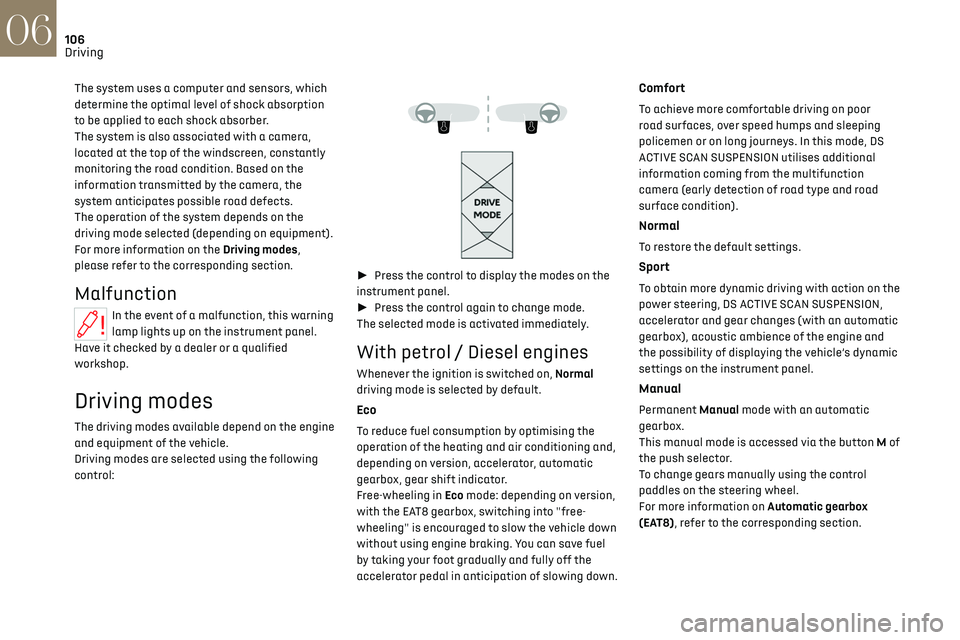
Driving modes are selected using the following
control:
► Press the control to display the modes on the
instrument panel.
► Press the control again to change mode.
The selected mode is activated immediately.
With petrol / Diesel engines
Whenever the ignition is switched on, Normal
driving mode is selected by default.
Eco
To reduce fuel consumption by optimising the
operation of the heating and air conditioning and,
depending on version, accelerator, automatic
gearbox, gear shift indicator.
Free-wheeling in Eco mode: depending on version,
with the EAT8 gearbox, switching into "free-
wheeling" is encouraged to slow the vehicle down
without using engine braking. You can save fuel
by taking your foot gradually and fully off the
accelerator pedal in anticipation of slowing down.
Comfort
To achieve more comfortable driving on poor
road surfaces, over speed humps and sleeping
policemen or on long journeys. In this mode, DS
ACTIVE SCAN SUSPENSION utilises additional
information coming from the multifunction
camera (early detection of road type and road
surface condition).
Normal
To restore the default settings.
Sport
To obtain more dynamic driving with action on the
power steering, DS ACTIVE SCAN SUSPENSION,
accelerator and gear changes (with an automatic
gearbox), acoustic ambience of the engine and
the possibility of displaying the vehicle’s dynamic
settings on the instrument panel.
Manual
Permanent Manual mode with an automatic
gearbox.
This manual mode is accessed via the button M of
the push selector.
To change gears manually using the control
paddles on the steering wheel.
For more information on Automatic gearbox
(EAT8), refer to the corresponding section.
Page 109 of 244
107
Driving06
With Rechargeable hybrid
engines
Whenever the ignition is switched on, Electric
driving mode is selected by default.
Electric
Allows driving using 100% electrical energy.
The maximum speed is approximately 84 mph
(135 km/h).
When starting the vehicle, if the conditions do
not allow the activation or retention of Electric
mode, the message "Electric mode currently
unavailable" is displayed on the instrument panel.
The vehicle automatically changes to Hybrid
mode.
If an LED comes on under the interior rear view
mirror, visible from outside the vehicle, this
confirms that you are driving in Electric mode
(depending on country of sale).
The LED can be deactivated by inserting
the tip of a paper clip or other similar
object into the hole located underneath the
interior rear view mirror.
Conditions of activation
–
Adequa
te battery charge level. Charging
the vehicle after each drive is therefore
recommended. Electric mode is available as long
as there is power left in the battery.
–
O
utside temperature between approximately
-5°C and 45°C.
Manually exiting the mode
► Fully depress the accelerator pedal, or
► Select another mode.
In case of non-use of the vehicle for a long
period (several months), a restart of the
petrol engine may occur even if the battery is
charged.
Depending on equipment, Electric mode is
combined with Normal mode of the DS
ACTIVE SCAN SUSPENSION function.
For more information on DS ACTIVE SCAN
SUSPENSION, refer to the corresponding
section.
In the event of multiple starts of the
internal combustion engine without a
sufficient rise in
temperature, Electric mode may be temporarily
unavailable (natural phenomenon of dilution of
fuel in oil). The message "Electric mode
unavailable: automatic operation in progress"
then appears on the instrument panel.
To regain normal electrical operation, drive
approximately 50 miles (80 km) in "motorway"
conditions or approximately 125 miles (200
km) in urban conditions.
This phenomenon does not cause any
mechanical or electrical damage. It can occur
several times in the life of the vehicle.
Hybrid
To optimise the vehicle's fuel consumption
by managing the alternating or simultaneous
operation of the two types of engine, depending
on driving conditions and driving style.
In Hybrid mode, it is possible to drive in 100%
electric mode if the battery charge level is
sufficient and acceleration requirements are
moderate.
Depending on equipment, Hybrid mode is
combined with Normal mode of the DS
ACTIVE SCAN SUSPENSION function.
For more information on DS ACTIVE SCAN
SUSPENSION, refer to the corresponding
section.
Sport
To obtain more dynamic driving in order to benefit
from the maximum performance of the vehicle.
Electric power is used to supplement the petrol
engine as long as there is energy left in the
battery.
Depending on equipment, Sport mode is
combined with Sport mode of the DS
ACTIVE SCAN SUSPENSION function.
For more information on DS ACTIVE SCAN
SUSPENSION, refer to the corresponding
section.
Page 110 of 244

108
Driving06
E-TENSE 4X4 360
The electrical energy is used to
supplement the petrol engine or recharge the
traction battery, depending on the type of
driving.
This mode is optimised with specific settings
which make the most of the dynamic
performance of this vehicle (power steering,
accelerator pedal sensitivity, ESC).
Comfort
(Depending on equipment)
Combines Hybrid mode and Comfort mode of the
DS ACTIVE SCAN SUSPENSION function.
To favour flexible shock absorption improving
driving comfort on poor surfaces.
For more information on DS ACTIVE SCAN
SUSPENSION, refer to the corresponding
section.
4WD (4-wheel drive)
(Depending on version)
Improves the vehicle's grip at low and moderate
speeds by driving all 4 wheels continuously.
4WD mode (4-wheel drive) is especially suited
to driving on snow-covered roads and difficult
terrain (e.g. mud, sand) as well as ford crossings,
at moderate speed.
Depending on the driving conditions and the
battery charge level, 4WD mode may be 100%
electric.
If the system does not detect a situation of wheel
slipping or poor grip after 300 metres of driving, it
switches to Hybrid mode.
This mode will be even more effective if
the vehicle is fitted with suitable tyres,
such as winter tyres.
The grip can be improved up to 84 mph (135 km/h)
using the electric motors; above this speed, the
vehicle is driven by the front wheels only.
Hill start assist
This system keeps the vehicle briefly stationary
(for approximately 2 seconds) when making a hill
start, while you transfer your foot from the brake
pedal to the accelerator pedal.
The system is only active when:
–
The v
ehicle is completely stationary, with your
foot on the brake pedal.
–
Cert
ain slope conditions are met.
–
The driv
er’s door is closed.
Do not leave the vehicle while it is being
held temporarily by hill start assist.
If someone needs to get out of the vehicle with
the engine running, apply the parking brake
manually. Then check that the parking brake
indicator lamp and the P indicator lamp in the
electric parking brake control are on fixed.
The hill start assist function cannot be
deactivated. However, using the parking
brake to immobilise the vehicle interrupts its
operation.
Operation
Facing uphill, with the vehicle stationary, the
vehicle is held for a short time when the driver
releases the brake pedal:
–
If mode
D or M is selected on an automatic
gearbox.
Facing downhill, with the vehicle stationary and
reverse gear engaged, the vehicle is held for a
short time when the driver releases the brake
pedal.
Malfunction
If the event of a malfunction, these
warning lamps light up on the
Page 111 of 244

109
Driving06
instrument panel, accompanied by the display of
a message.
Have it checked by a dealer or a qualified
workshop.
Gear shift indicator
(Depending on engine)
This system is designed to reduce fuel
consumption by recommending the most suitable
gear.
Operation
Depending on the driving situation and the
vehicle's equipment, the system may recommend
skipping one or more gears.
Gear engagement recommendations are not to be
considered mandatory. Indeed, the configuration
of the road, the traffic density and safety remain
determining factors when choosing the best
gear. Therefore, the driver remains responsible
for deciding whether or not to follow the system’s
advice.
The system cannot be deactivated.
The system is only active in mode M of the
automatic gearbox.
The information appears on the instrument
panel, in the form of an arrow and the
recommended gear.
The system adapts the gear change
instructions according to the driving
conditions (e.g. slope, load) and driving style
(e.g. power demand, acceleration, braking).
The system never suggests:
–
engaging first gear
.
–
engaging re
verse gear.
Stop & Start
The Stop & Start function puts the engine
temporarily into standby - STOP mode - during
phases when the vehicle is stationary (e.g. red
lights, traffic jams). The engine automatically
restarts - START mode - as soon as the driver
indicates the intention of moving off again.
Primarily designed for urban use, the function
is intended to reduce fuel consumption and
exhaust emissions as well as the noise level when
stationary.
The function does not affect the functionalities of
the vehicle, in particular the braking.
Deactivation/Reactivation
By default, the function is activated when the
ignition is switched on.
It is configured in the ADAS touch screen
application.
or
Direct access to the Shortcuts for driving aids.
The display of a message on the instrument panel
confirms the change of state.
If the function is deactivated while the engine is
in STOP mode, it will restart immediately.
Associated indicator lamps
Function activated: engine on standby
(STOP mode)
Function deactivated or malfunction
Opening the bonnet
Before doing anything under the bonnet,
deactivate the Stop & Start system to avoid
any risk of injury caused by the engine
restarting automatically.
Driving on flooded roads
Before entering into a flooded area, it is
strongly recommended that you deactivate the
Stop & Start system.
For more information on Driving
recommendations, particularly on flooded
roads, refer to the corresponding section.
Operation
Main conditions for operation
– The driver’s door must be closed.
– The driv er's seat belt must be fastened.
–
The le
vel of charge in the battery must be
sufficient.
–
The t
emperature of the engine must be within
its nominal operating range.
Page 112 of 244
110
Driving06
– The outside temperature must be between 0°C
and 35°C.
Putting the engine into standby (STOP
mode)
The engine automatically enters standby mode
as soon as the driver indicates their intention to
stop:
–
With an automatic gearbo
x, at speeds below
12 mph (20 km/h) on BlueHDi versions, or below
2 mph (3 km/h) on PureTech 130, 180 and 225
versions, when you depress the brake pedal or
place the gear selector in mode N.
Time counter
A time counter adds up the time spent in standby
during the journey. It is reset to zero every time
the ignition is switched on.
Special cases:
The engine will not go into standby if the
conditions for operation are not met and in the
following cases:
–
St
eep slope (ascending or descending).
–
Needed t
o maintain a comfortable temperature
in the passenger compartment.
–
Demisting activ
e.
In these cases, this indicator lamp flashes
for a few seconds, then goes off.
After the engine has restarted, STOP
mode is not available until the vehicle has
reached a speed of 5 mph (8 km/h).
During parking manoeuvres, STOP mode is
not available for a few seconds after
coming out of reverse gear or turning the
steering wheel.
Restarting the engine (START mode)
The engine automatically restarts as soon as the
driver indicates the intention of moving off again:
–
With the select
or in mode D or M: with the
brake pedal released.
–
With the select
or in mode N and the brake
pedal released: with the selector at D or M.
–
With the select
or in mode P and the brake pedal
depressed: with the selector at R, N, D or M.
–
With re
verse gear engaged.
Special cases
The engine will restart automatically if the
conditions for operation are met again and in the
following cases:
–
V
ehicle speed exceeds 2.5 mph (4 km/h) with
PureTech 130, 180 and 225 versions, or 16 mph
(25 km/h) with BlueHDi versions.
In these cases, this indicator lamp flashes
for a few seconds, then goes off.
Malfunctions
In the event of a fault with the system, this
warning lamp flashes for a few moments
on the instrument panel, then remains on,
accompanied by the display of a message.
Have it checked by a dealer or a qualified
workshop.
The vehicle stalls in STOP mode
All of the instrument panel warning lamps come
on if there is a fault.
► Switch off the ignition then start the engine
again with the "START/STOP" button.
12 V battery
The Stop & Start system requires a
12 V battery of specific technology and
specification.
All work must be carried out only by a dealer or
a qualified workshop.
Tyre under-inflation
detection
This system alerts the driver if one or more tyres
suffer a drop in pressure.
The alert is raised when the vehicle is moving, not
when stationary.
It compares the information given by the wheel
speed sensors with reference values, which must
be reinitialised every time the tyre pressures are
adjusted or a wheel changed.
It takes into account the last values stored
during the reinitialisation request. It is therefore
essential that the tyre pressure is correct during
the operation. This operation is the driver’s
responsibility.
Page 117 of 244
115
Driving06
Supplementary
traffic sign detected Display of the speed
associated with
the supplementary traffic sign
Speed limit for
vehicles with a gross vehicle weight or
gross train weight
less than 3.5 tonnes
56 mph (90 km/h) (for example)
Speed limit in case of snow
Example:
If the outside
temperature is below 3°C:
19 mph (30 km/h) (for example)
with a "snowflake" symbol
Speed limit at certain times of the day Example:
19 mph (30 km/h) (for example)
with a "clock" symbol
Navigation mapping should be regularly
updated in order to receive accurate
speed limit information from the system.
The units for the speed limit (mph or
km/h) depend on the country you are
driving in.
This should be taken into account to ensure
you observe the speed limit.
For the system to work properly when
changing countries, the speed unit of the
instrument panel must match that of the
country you are driving in.
Automatic sign reading is a driving aid
system and does not always display the
correct speed limits.
The speed limit signs present on the road
always take priority over those displayed by
the system.
The system is designed to detect signs that
conform to the Vienna Convention on road
signs.
Specific speed limits, such as those for
heavy goods vehicles, are not displayed.
The display of the speed limit on the
instrument panel is updated when passing
a speed limit sign intended for cars (light
vehicles).
Activation/Deactivation
By default, the system is automatically activated
at every engine start.
It is configured in the ADAS touch screen
application.
Information displayed on the
instrument panel
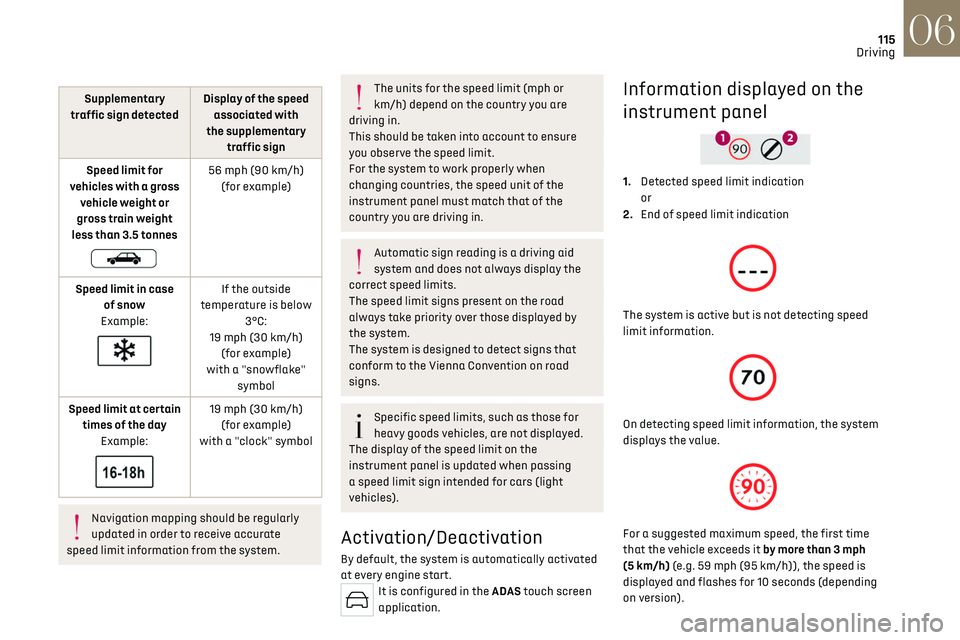
1. Detected speed limit indication
or
2. End of speed limit indication
The system is active but is not detecting speed
limit information.
On detecting speed limit information, the system
displays the value.
For a suggested maximum speed, the first time
that the vehicle exceeds it by more than 3 mph
(5 km/h) (e.g. 59 mph (95 km/h)), the speed is
displayed and flashes for 10 seconds (depending
on version).