dashboard CITROEN DS7 CROSSBACK 2023 Owner's Manual
[x] Cancel search | Manufacturer: CITROEN, Model Year: 2023, Model line: DS7 CROSSBACK, Model: CITROEN DS7 CROSSBACK 2023Pages: 244, PDF Size: 6.87 MB
Page 86 of 244

84
Safety05
Impact detection zones
A.Front impact zone
B. Side impact zone
When one or more airbags are deployed,
the detonation of the pyrotechnic charge
incorporated in the system makes a noise and
releases a small quantity of smoke.
This smoke is not harmful, but sensitive
individuals may experience irritation.
The detonation noise associated with the
deployment of one or more airbags may result
in a slight loss of hearing for a short time.
* For more in formation on Deactivating the front passenger airbag, refer to the corresponding section.
Front airbags
This system protects the driver and front
passenger in the event of a serious front impact,
limiting the risk of head and chest injury.
The driver's airbag is fitted in the centre of the
steering wheel; the front passenger airbag is
fitted in the dashboard above the glove box.
The front airbags are adaptive. In
particular, they inflate less firmly in the
presence of a smaller occupant, with the seat
set in a forward longitudinal position.
Deployment
They deploy, except the front passenger airbag if
it is deactivated*, in the event of a serious front
impact to all or part of the front impact zone A.
The front airbag inflates between the thorax and
head of the front occupant of the vehicle and the steering wheel, driver's side, and the dashboard,
passenger's side, to cushion their forward
movement.
Lateral airbags
This system protects the driver and front
passenger in the event of a serious side impact,
limiting the risk of injury to the chest, between
the hip and the shoulder.
Each lateral airbag is fitted in the seat backrest
frame, on the door side.
Deployment
The lateral airbags are deployed on one side in
the event of a serious side impact applied to all or
part of the side impact zone B.
The lateral airbag inflates between the chest of
the vehicle's occupant and the corresponding
door panel.
Page 87 of 244
85
Safety05
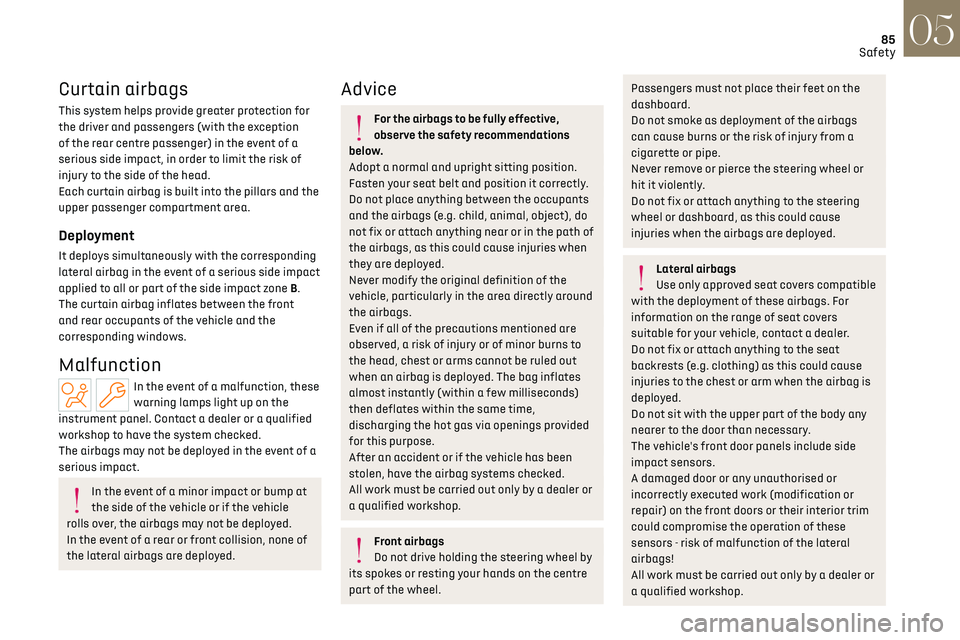
Curtain airbags
This system helps provide greater protection for
the driver and passengers (with the exception
of the rear centre passenger) in the event of a
serious side impact, in order to limit the risk of
injury to the side of the head.
Each curtain airbag is built into the pillars and the
upper passenger compartment area.
Deployment
It deploys simultaneously with the corresponding
lateral airbag in the event of a serious side impact
applied to all or part of the side impact zone B.
The curtain airbag inflates between the front
and rear occupants of the vehicle and the
corresponding windows.
Malfunction
In the event of a malfunction, these
warning lamps light up on the
instrument panel. Contact a dealer or a qualified
workshop to have the system checked.
The airbags may not be deployed in the event of a
serious impact.
In the event of a minor impact or bump at
the side of the vehicle or if the vehicle
rolls over, the airbags may not be deployed.
In the event of a rear or front collision, none of
the lateral airbags are deployed.
Advice
For the airbags to be fully effective,
observe the safety recommendations
below.
Adopt a normal and upright sitting position.
Fasten your seat belt and position it correctly.
Do not place anything between the occupants
and the airbags (e.g. child, animal, object), do
not fix or attach anything near or in the path of
the airbags, as this could cause injuries when
they are deployed.
Never modify the original definition of the
vehicle, particularly in the area directly around
the airbags.
Even if all of the precautions mentioned are
observed, a risk of injury or of minor burns to
the head, chest or arms cannot be ruled out
when an airbag is deployed. The bag inflates
almost instantly (within a few milliseconds)
then deflates within the same time,
discharging the hot gas via openings provided
for this purpose.
After an accident or if the vehicle has been
stolen, have the airbag systems checked.
All work must be carried out only by a dealer or
a qualified workshop.
Front airbags
Do not drive holding the steering wheel by
its spokes or resting your hands on the centre
part of the wheel.
Passengers must not place their feet on the
dashboard.
Do not smoke as deployment of the airbags
can cause burns or the risk of injury from a
cigarette or pipe.
Never remove or pierce the steering wheel or
hit it violently.
Do not fix or attach anything to the steering
wheel or dashboard, as this could cause
injuries when the airbags are deployed.
Lateral airbags
Use only approved seat covers compatible
with the deployment of these airbags. For
information on the range of seat covers
suitable for your vehicle, contact a dealer.
Do not fix or attach anything to the seat
backrests (e.g. clothing) as this could cause
injuries to the chest or arm when the airbag is
deployed.
Do not sit with the upper part of the body any
nearer to the door than necessary.
The vehicle's front door panels include side
impact sensors.
A damaged door or any unauthorised or
incorrectly executed work (modification or
repair) on the front doors or their interior trim
could compromise the operation of these
sensors - risk of malfunction of the lateral
airbags!
All work must be carried out only by a dealer or
a qualified workshop.
Page 116 of 244
114
Driving06
– First of all, the selection of all the functions
that you want to deactivate.
–
Sec
ondly, the simultaneous deactivation of all
these functions.
Selection of functions
► Press this button on the dashboard to
display the ADAS tabs.
► Select the Functions tab.
► Press this button to display the list of
available functions.
► Select the functions to deactivate (e.g. Stop
& Start, Lane Keeping Assist, Automatic Braking
System (Active Safety Brake)).
► Press this button to return to the
previous page.
The functions to deactivate are saved in the
system.
Deactivation of these functions
► Press and hold this button on
the dashboard.
All previously selected functions are deactivated
until the vehicle is next restarted (confirmed by an
audible signal).
Road signs recognition
For more information, refer to the General
recommendations on the use of driving
and manoeuvring aids.
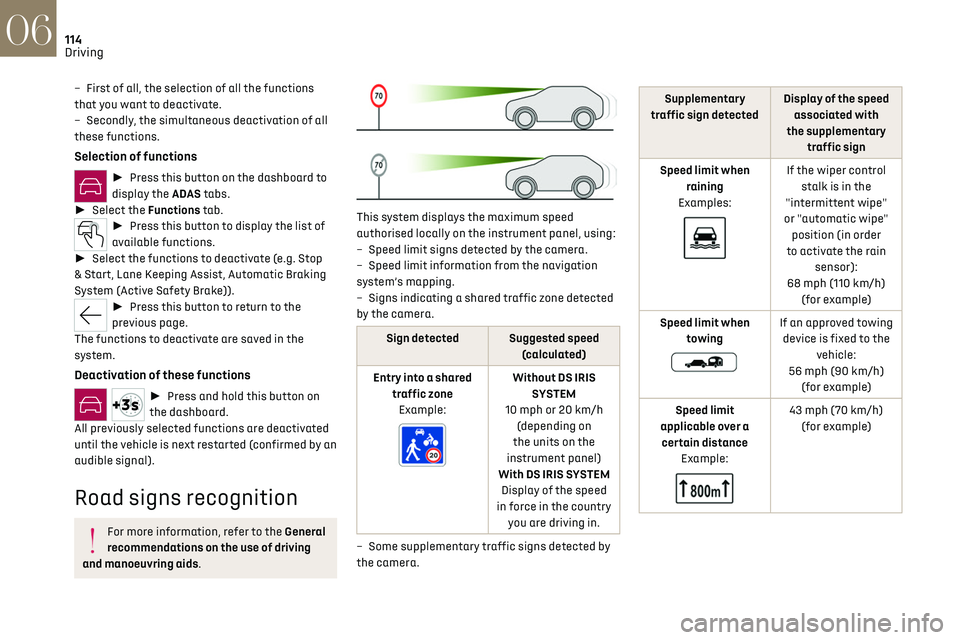
This system displays the maximum speed
authorised locally on the instrument panel, using:
–
Speed limit signs det
ected by the camera.
–
Speed limit in
formation from the navigation
system’s mapping.
–
Signs indic
ating a shared traffic zone detected
by the camera.
Sign detected Suggested speed (calculated)
Entry into a shared traffic zoneExample:
Without DS IRIS SYSTEM
10 mph or 20 km/h (depending on
the units on the
instrument panel)
With DS IRIS SYSTEM Display of the speed
in force in the country you are driving in.
–
Some supplemen
tary traffic signs detected by
the camera.
Supplementary
traffic sign detected Display of the speed
associated with
the supplementary traffic sign
Speed limit when raining
Examples:
If the wiper control stalk is in the
"intermittent wipe"
or "automatic wipe" position (in order
to activate the rain sensor):
68 mph (110 km/h) (for example)
Speed limit when towing
If an approved towing device is fixed to the vehicle:
56 mph (90 km/h) (for example)
Speed limit
applicable over a certain distance Example:
43 mph (70 km/h) (for example)
Page 146 of 244
144
Practical information07
► To open the filler flap, press the flap opening
button for more than 2 seconds or, with the
vehicle unlocked, press the rear of the filler flap
(depending on version).
Rechargeable hybrid vehicles
After pressing the button on the
dashboard, the filler flap may not open for
several minutes. A sound is emitted when the
filler flap opens.
If the flap becomes stuck, press and hold
the button on the dashboard for more than
3 seconds.
The filler cap is built into the flap.
► Select a pump that delivers the correct fuel
type for the vehicle's engine (see a reminder label
on the inside of the filler flap).
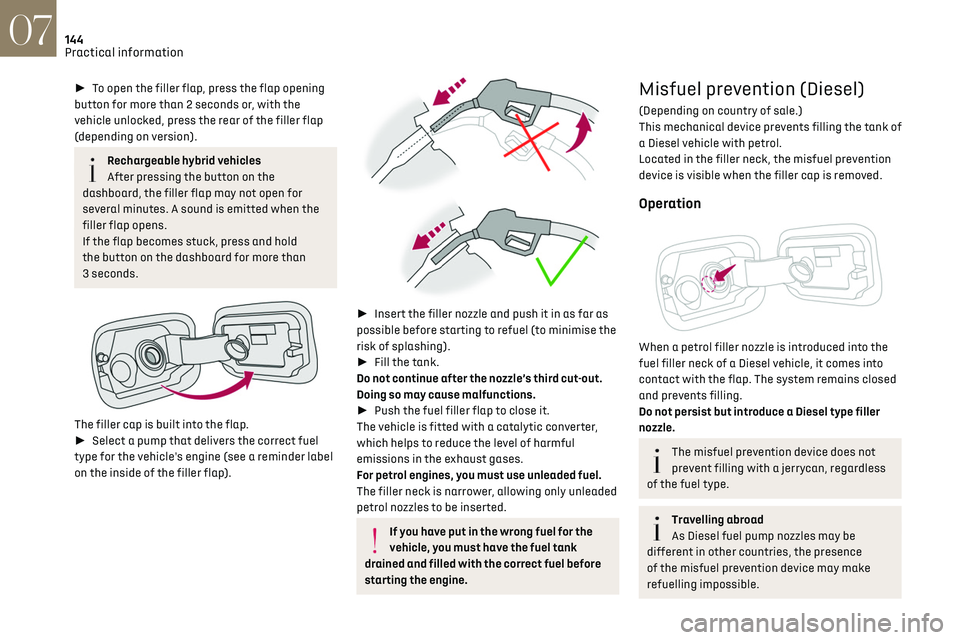
► Insert the filler nozzle and push it in as far as
possible before starting to refuel (to minimise the
risk of splashing).
► Fill the tank.
Do not continue after the nozzle’s third cut-out.
Doing so may cause malfunctions.
► Push the fuel filler flap to close it.
The vehicle is fitted with a catalytic converter,
which helps to reduce the level of harmful
emissions in the exhaust gases.
For petrol engines, you must use unleaded fuel.
The filler neck is narrower, allowing only unleaded
petrol nozzles to be inserted.
If you have put in the wrong fuel for the
vehicle, you must have the fuel tank
drained and filled with the correct fuel before
starting the engine.
Misfuel prevention (Diesel)
(Depending on country of sale.)
This mechanical device prevents filling the tank of
a Diesel vehicle with petrol.
Located in the filler neck, the misfuel prevention
device is visible when the filler cap is removed.
Operation
When a petrol filler nozzle is introduced into the
fuel filler neck of a Diesel vehicle, it comes into
contact with the flap. The system remains closed
and prevents filling.
Do not persist but introduce a Diesel type filler
nozzle.
The misfuel prevention device does not
prevent filling with a jerrycan, regardless
of the fuel type.
Travelling abroad
As Diesel fuel pump nozzles may be
different in other countries, the presence
of the misfuel prevention device may make
refuelling impossible.
Page 162 of 244

160
Practical information07
or in certain moving components - risk of
strangulation and serious injury!
Rechargeable hybrid vehicles
Before any work is carried out under the
bonnet, it is essential to switch off the ignition
and disconnect the charging connector nozzle
if it is connected, check that the READY
indicator lamp is off on the instrument panel
and wait 4 minutes - risk of serious injury!
The location of the interior bonnet release
lever prevents the bonnet being opened
when the left-hand front door is closed.
When the engine is hot, handle the
exterior safety catch with care (risk of
burns), using the protected area.
When the bonnet is open, take care not to
damage the safety catch.
Do not open the bonnet under very windy
conditions.
Cooling of the engine when stopped
The engine cooling fan may start after the
engine has been switched off.
Take care with objects or clothing that could
be caught in the blades of the fan!
Opening
► From the inside: pull the control lever, located
on the left below the dashboard, towards you.
► From the outside: lift the safety catch and
raise the bonnet.
A bonnet strut opens the bonnet and holds it
open.
Closing
► Lower the bonnet and release it near the end
of its travel.
► Check the locking.
Because of the presence of electrical
equipment under the bonnet, it is strongly
recommended that exposure to water (rain,
washing, etc.) be limited.
Engine compartment
The engine shown here is an example for
illustrative purposes only.
The locations of the following components may
vary:
–
Air filt
er.
–
Engine oil dip
stick.
–
Engine oil filler c
ap.
–
Priming pump
.
–
Degas
sing screw.
Page 170 of 244
168
Practical information07
Bodywork
High-gloss paint
Do not use abrasive products, solvents,
petrol or oil to clean the bodywork.
Never use an abrasive sponge to clean
stubborn stains - risk of scratching the
paintwork!
Do not apply polish in strong sunshine, or to
plastic or rubber parts.
Use a soft cloth and soapy water or a pH
neutral product.
Gently wipe the bodywork with a clean
microfibre cloth.
Apply polish with the vehicle clean and dry.
Comply with the instructions for use stated on
the product.
Decals
(Depending on version)
Do not use a high-pressure washer to
clean the vehicle - risk of damaging or
detaching the decals!
Use a high-flow hose (temperature
between 25°C and 40°C).
Place the jet of water perpendicular to the
surface to be cleaned.
Rinse the vehicle with demineralised water.
Textile
The dashboard, door panels and seats may
contain parts made of textile material.
Maintenance
Do not use aggressive cleaning products
(e.g. alcohol, solvent or ammonia).
Do not use steam-cleaning systems - risk of
affecting the adhesion of the fabrics!
Remove dust from the textile parts
regularly with a dry cloth, soft brush or
vacuum cleaner.
Rub down the textile parts once per year with
a clean, damp cloth. After leaving overnight to
dry, brush with a soft-bristled brush.
Stain removal
Do not rub the stain or it may spread or
you may cause the substance to
penetrate the surface.
Act quickly by reducing the stain from its
edges inwards.
Remove as much substance or solids as
possible using a spoon or spatula, and
remove as much liquid as possible using
absorbent paper.
Product/Procedure to use depending on
the type of stain:
–
G
rease, oil and ink: clean with a pH-neutral
detergent.
–
V
omit: clean with sparkling mineral water.
–
Blood: spread flour o
ver the stain and allow
to dry; remove with a slightly damp cloth.
–
Mud: allo
w to dry and then remove with a
slightly damp cloth.
–
Cak
e, chocolate, ice cream: clean with
lukewarm water.
–
Sugary and/
or alcoholic drinks: clean with
lukewarm water, or lemon juice if the stain is
persistent.
–
Hair gel, c
offee, tomato sauce, vinegar:
clean with lukewarm water and lemon juice.
For solid substances, then use a soft brush or
vacuum cleaner.
For liquid substances, then use a damp
microfibre cloth and then dry with another
cloth.
Alcantara®
Alcantara® is an elegant and practical material
which is very resistant and easy to maintain.
Do not use printed cloths or
printed absorbent paper.
Do not use steam-cleaning systems.
Page 195 of 244
193Technical data09
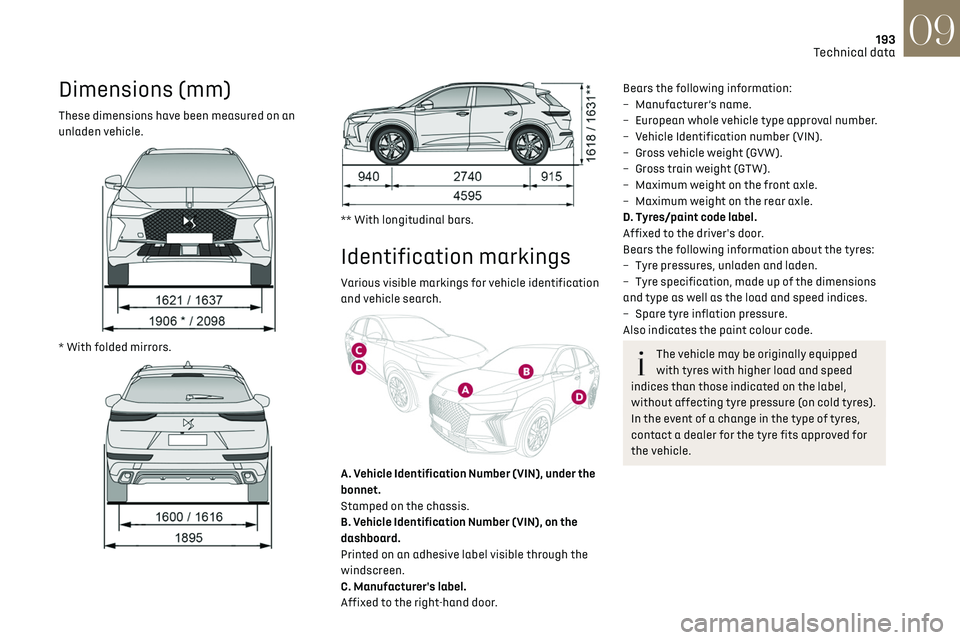
Dimensions (mm)
These dimensions have been measured on an
unladen vehicle.
* With folded mirrors.
** With longitudinal bars.
Identification markings
Various visible markings for vehicle identification
and vehicle search.
A. Vehicle Identification Number (VIN), under the
bonnet.
Stamped on the chassis.
B. Vehicle Identification Number (VIN), on the
dashboard.
Printed on an adhesive label visible through the
windscreen.
C. Manufacturer's label.
Affixed to the right-hand door.
Bears the following information:
– Manufact urer’s name.
–
European whole v
ehicle type approval number.
–
V
ehicle Identification number (VIN).
–
G
ross vehicle weight (GVW).
–
G
ross train weight (GTW).
–
Maximum w
eight on the front axle.
–
Maximum w
eight on the rear axle.
D. Tyres/paint code label.
Affixed to the driver's door.
Bears the following information about the tyres:
–
Tyre pre
ssures, unladen and laden.
–
Tyre specific
ation, made up of the dimensions
and type as well as the load and speed indices.
–
Spare tyre in
flation pressure.
Also indicates the paint colour code.
The vehicle may be originally equipped
with tyres with higher load and speed
indices than those indicated on the label,
without affecting tyre pressure (on cold tyres).
In the event of a change in the type of tyres,
contact a dealer for the tyre fits approved for
the vehicle.